Table of Contents
Advertisement
Quick Links
Advertisement
Table of Contents

Related Manuals for AG Neovo TX-2202A

Summary of Contents for AG Neovo TX-2202A
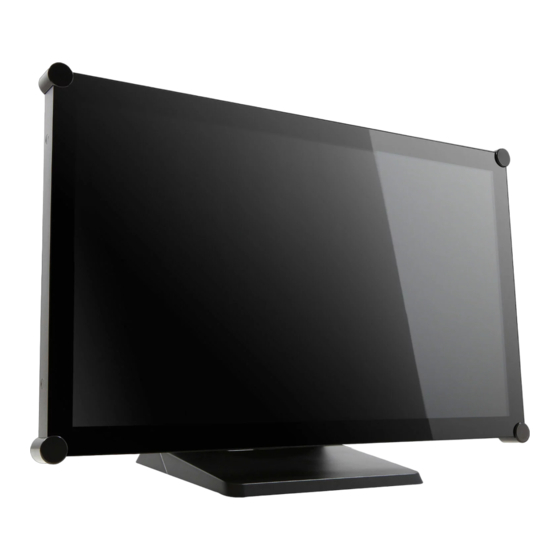
- Page 1 TX-2202A & TX-2202A White Touch Screen Monitor User Manual www.agneovo.com...
-
Page 2: Table Of Contents
TABLE OF CONTENTS SAFETY INFORMATION WEEE ................................4 PRECAUTIONS Notice ................................5 Cautions When Setting Up ........................... 5 Cautions When Using ........................... 6 Cleaning and Maintenance ........................... 7 Notice for the LCD Monitor ........................... 7 CHAPTER 1: PRODUCT DESCRIPTION 1.1 Package Contents ..........................8 1.2 Removing/Attaching Cable Cover ...................... - Page 3 TABLE OF CONTENTS CHAPTER 6: SPECIFICATIONS 6.1 Monitor Specifications .......................... 34 6.2 Monitor Dimensions ..........................35...
-
Page 4: Safety Information
SAFETY INFORMATION WEEE Disposal of Waste Equipment by Users in Private Household in the European Union. This symbol on the product or on its packaging indicates that this product must not be disposed of with your other household waste. Instead, it is your responsibility to dispose of your waste equipment by handing it over to a designated collection point for the recycling of waste electrical and electronic equipment. -
Page 5: Precautions
Precautions PRECAUTIONS PRECAUTIONS CAUTION RISK OF ELECTRIC SHOCK DO NOT OPEN Symbols used in this manual This icon indicates the existence of a potential hazard that could result in personal injury or damage to the product. This icon indicates important operating and servicing information. Notice •... -
Page 6: Cautions When Using
Users who have already mounted the monitor on the ceiling or any other horizontal surface overhead are strongly advised to contact AG Neovo for consultations and solutions to help ensure a most pleasurable and fulfilling monitor experience. -
Page 7: Cleaning And Maintenance
PRECAUTIONS Cleaning and Maintenance Do not attempt to service the LCD monitor yourself, refer to qualified service personnel. Opening or removing the covers may expose you to dangerous voltage or other risks. Notice for the LCD Monitor In order to maintain the stable luminous performance, it is recommended to use low brightness setting. Due to the lifespan of the lamp, it is normal that the brightness quality of the LCD monitor may decrease with time. -
Page 8: Chapter 1: Product Description
Chapter 1: Product Description CHAPTER 1: PRODUCT DESCRIPTION 1.1 Package Contents When unpacking, check if the following items are included in the package. If any of them is missing or damaged, contact your dealer. LCD Monitor Warranty Card Cable Cover and Screw Quick Start Guide Quick Start Guide (M3 x 6) -
Page 9: Removing/Attaching Cable Cover
PRODUCT DESCRIPTION 1.2 Removing/Attaching Cable Cover 1. Lay the LCD monitor face down on a flat even surface. 2. Press on the cable cover latches and then remove the cable cover as shown in the illustration below. Cable Cover 3. After connect the cables to the appropriate connectors and position all cables under the cover lip, attach the cable cover. -
Page 10: Adjusting The Tilt
PRODUCT DESCRIPTION 1.3 Adjusting the Tilt For comfort viewing, tilt the LCD monitor up to an angle of -5° to 90°. Hold the stand with one hand and use the other to adjust the LCD monitor to the desired angle. -
Page 11: Wall Mounting
Note: Take measures to prevent the LCD monitor from falling down and lessen possible injury and damage to the monitor in case of earthquakes or other disasters. • Use only the 100 x 100 mm wall mount kit recommended by AG Neovo. All AG Neovo wall mount kits comply with VESA standard. -
Page 12: Lcd Monitor Overview
PRODUCT DESCRIPTION 1.5 LCD Monitor Overview 1.5.1 Front View 1.5.2 Rear View MENU SELECT DC IN DisplayPort HDMI Audio RJ11 DC IN: Connect with the supplied power adaptor. DisplayPort: Connect DisplayPort signals input. HDMI: Connect HDMI signals input. VGA: Connect VGA signals input. -
Page 13: Control Buttons
PRODUCT DESCRIPTION AUDIO IN: Connect to audio input source (3.5 mm Stereo Audio Jack). RJ11: Connect with wired OSD control. (Don’t connect telephone or internet cable to RJ-Type port.) USB: Connect USB for touch screen control. 1.5.3 Control Buttons MENU MENU SELECT SELECT... - Page 14 PRODUCT DESCRIPTION DOWN (q): Hot Key: Mute • When OSD menu is ON, navigate through adjustment icons or adjust a function. • When the DOWN key is pressed, switch the audio mute ON/OFF. Mute Pr es s <▲ , ▼ > t o Ad jus t and < Menu> to Ex it SELECT: •...
- Page 15 PRODUCT DESCRIPTION Note: To lock/unlock the MENU key and/or the key, press the MENU and q keys simultaneously. Then select the desired lock/unlock function. Lock Lock OSD Key Inactive Power Key Inactive Press<▲,▼> to Adj ust and <Me nu> to E xit Pr e s s <▲...
-
Page 16: Chapter 2: Making Connections
CHAPTER 2: MAKING CONNECTIONS CAUTION: Make sure that the LCD monitor is not connected to the power outlet before making any connections. Connecting cables while the power is ON may cause possible electric shock or personal injury. 2.1 Connecting the AC Power 1. -
Page 17: Connecting Audio Device
MAKING CONNECTIONS 2.3 Connecting Audio Devices Connect one end of an audio cable to the AUDIO IN connector of the LCD monitor and the other end to the AUDIO OUT connector of the computer. AUDIO IN AUDIO 2.4 Connecting the Wired OSD Controller Connect the wired OSD controller (optional, not supplied) to the RJ11 connector of the LCD monitor. -
Page 18: Connecting Usb For Touch Screen Control
MAKING CONNECTIONS 2.5 Connecting USB for Touch Screen Control Connect one end of a USB cable to the USB connector of the LCD monitor and the other end to the USB connector of the computer. MENU SELECT Touch Disable Function To disable the touch function, do the following: 1. -
Page 19: Ventilation Requirements For Enclosure Locating
MAKING CONNECTIONS 2.6 Ventilation Requirements for Enclosure Locating To allow heat to disperse, avoid installing the LCD monitor directly on the cabinet wall and make sure the operating/storage temperature/humidity requirements are met as described below: • Operating conditions: 0°C-40°C (32°F-104°F) •... -
Page 20: Chapter 3: On Screen Display Menu
CHAPTER 3: ON SCREEN DISPLAY MENU 3.1 Using the OSD Menu Menu Navigation Operation MENU Display the main menu screen. Press Picture Advanced Option Contrast Brightness H-Position V-Position Phase Clock Auto Adjust < S e l e ct > = En te r, < ▲ , ▼ > =M o v e , <M e n u > =E x it Enter the submenu. - Page 21 ON SCREEN DISPLAY MENU Menu Navigation Operation Adjust the settings or select the value. 1 Press p q to adjust the value or select the setting. For example: 2 Press SELECT to confirm the setting (if necessary). Picture Advanced Option Auto Adjust P re ss < ▲ , ▼ > to A d j u st a n d <M e n u > t o E x i t Return to the previous menu and/or close the Press MENU once to return to the previous menu.
-
Page 22: Osd Menu Tree
ON SCREEN DISPLAY MENU 3.2 OSD Menu Tree Main Menu Submenu Reference Picture Contrast Refer to page 23. Brightness H-Position V-Position Phase Clock Auto Adjust Advanced Color Temp Refer to page 25. USER Picture Mode Sharpness OSD Timeout Refer to page 26. OSD Position OSD H-Position OSD V-Position Touch Switch Option Reset Refer to page 27. -
Page 23: Chapter 4: Adjusting The Lcd Monitor
CHAPTER 4: ADJUSTING THE LCD MONITOR 4.1 Picture Menu 1. Press MENU on the control panel to call out the OSD window. 2. Press p / q to select Picture and then press SELECT to enter the menu. 3. Press p / q to select the submenu item and then press SELECT to enter its settings. Picture Advanced Option... - Page 24 ADJUSTING THE LCD MONITOR Item Function Operation Range V-Position Moves the screen image up or down. 0 to 100 Press p q to adjust the (Vertical Position) value. Note: This menu item is only available if the source is VGA. Phase Adjusts the phase timing to synchronise 0 to 100...
-
Page 25: Colour Menu
ADJUSTING THE LCD MONITOR 4.2 Advanced Menu 1. Press MENU on the control panel to call out the OSD window. 2. Press p / q to select Colour and then press SELECT to enter the menu. 3. Press p / q to select the submenu item and then press SELECT to enter its settings. Picture Advanced Option... -
Page 26: Osd Menu
ADJUSTING THE LCD MONITOR 4.3 OSD Menu 1. Press MENU on the control panel to call out the OSD window. 2. Press p / q to select OSD and then press SELECT to enter the menu. 3. Press p / q to select the submenu item and then press SELECT to enter its settings. Picture Advanced Option... -
Page 27: Option Menu
ADJUSTING THE LCD MONITOR 4.4 Option Menu 1. Press MENU on the control panel to call out the OSD window. 2. Press p / q to select System and then press SELECT to enter the menu. 3. Press p / q to select the submenu item and then press SELECT to enter its settings. Picture Advanced Option... -
Page 28: Chapter 5: Appendix
APPENDIX 5.1 Warning Messages When any of these warning messages appear, check the following items. Warning Message Cause Solution The LCD monitor cannot detect the √ Check if the input source is input source signal. turned ON. No Signal √ Check if the signal cable is properly connected. -
Page 29: Timing
APPENDIX 5.2 Timing Resolution H-Frequency(khz) Mode V-Frequency(hz) IBM VGA 720 x 400 31.47 IBM VGA 640 x 480 31.47 Apple MacII 640 x 480 35.00 VESA VGA 640 x 480 37.86 VESA VGA 640 x 480 37.50 VESA SVGA 800 x 600 35.16 VESA SVGA 800 x 600... -
Page 30: Touch Screen Driver Installation
APPENDIX 5.3 Touch Screen Driver Installation The LCD monitor is available with USB connections. The touch driver can be downloaded from 211.72.159.212/AP/Service/TPDriver.nsf/ website. Documents and drivers password: Ili888 The supported operating systems are Windows 7/8/10/11, Windows VISTA/XP/2000/CE/XP Embedded, Mac ® OS 10.10-10.14, Linux 2.6.36 later/3.x.x/4.x.x/5.x.x, Android 3.08 upwards (Windows 7/8/10/11 Multi touch without driver). -
Page 31: Driver Installation Instructions
APPENDIX 2. In Tablet PC Settings, tap “Calibrate the screen for pen or touch input”. 3. On the Display tab, in Display options, tap “Calibrate” and then “Yes” to allow the program to make changes. 4. Follow the on-screen instructions to calibrate the touch screen. 5.3.2 Driver Installation Instructions If you are using a PC running Windows VISTA, XP, 2000, follow the instructions below:... -
Page 32: Cleaning
APPENDIX If you are using a PC running Windows CE, follow the instructions below: ® 1. Power on the computer. 2. Make sure the USB cable is connected to the computer. 3. Using Platform Builder, build an image file by following the step-by-step instructions found in the driver folder file. -
Page 33: Troubleshooting
APPENDIX 5.5 Troubleshooting Problems Possible Cause and Solution No picture. • Check if the LCD monitor is turned ON. • Check if the power adapter is properly connected to the LCD monitor. • Check if the power cord is plugged into the power outlet and to the power adapter. - Page 34 Single Touch Support by Driver Windows VISTA/XP/2000/CE/XP Embedded Multi-touch Support by Driver 10-point touch for Linux Android 3.08 or later Power Power Supply External Power Requirements 12V, 4.16A/12V, 5.0A for TX-2202A white On Mode 15W (On) Stand-by Mode <0.7W Off Mode <0.3W Glass Thickness 2.05 mm (0.08”)
- Page 35 208.9 208.9 (M4xL10) x4 258.9 258.9 57.4 57.4 57.4 57.4 (M4xL10) x4 AG Neovo Company Address: 5F-1, No. 3-1, Park Street, Nangang District, Taipei, 11503, Taiwan. Copyright © 2022 AG Neovo. All rights reserved. TX2A00_UM_V010 TX-2202A Eprel registration number: 1372216...
Need help?
Do you have a question about the TX-2202A and is the answer not in the manual?
Questions and answers