Table of Contents
Advertisement
Quick Links
Advertisement
Table of Contents

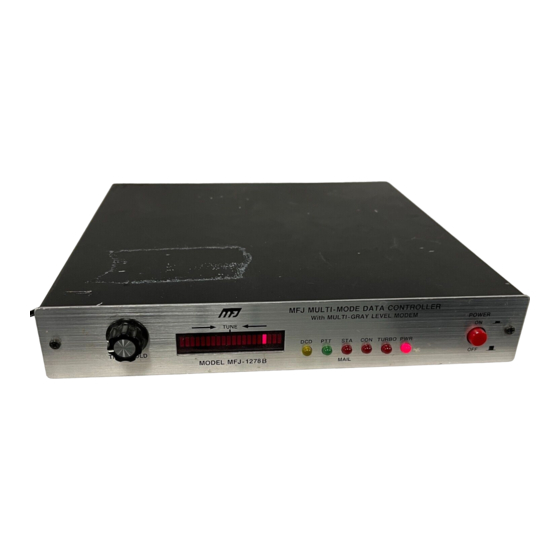
Summary of Contents for MFJ Enterprises MFJ-1278
- Page 1 Easy-to follow guide to connecting your new MFJ-1278/1278T Multi-Mode Data Controller between your radio and computer CAUTION: Read all Instructions Before Operating Equipment MFJ ENTERPRISES, INC. P.O.BOX 494, MISSISSIPPI STATE, MS 39762, USA COPYRIGHT © 1990 MFJ ENTERPRISES, INC.
- Page 2 The Computer Installation section assumes that you have purchased one of the MFJ Starter Packs. If you are not using the MFJ Starter Pack, you should refer to the main MFJ-1278 Owner's Manual for Computer interface connections. However, you may still use the Radio Installation and the other parts of the Fast-Start manual.
-
Page 3: Installation
Commodore C64/128 and Macintosh computers. If you are not using one of these com- puters, or if you are not using an MFJ Starter Pack, then you must refer to the main MFJ-1278 in- struction manual for computer installation. -
Page 4: Radio Interface
The above procedure verifies that the MFJ-1278 is communicating with your Computer. Radio Interface The first step in connecting the MFJ-1278 is to wire a cable to connect the MFJ-1278 Radio Port to the microphone or accessory connector of the radio. The radio cable supplied with your MFJ-1278 has one end already wired with a 5-pin DIN connector. - Page 5 MFJ-1278 to make the FSK cable. See Diagram below. Note: The polarity of the FSK signal is defaulted to normal on the MFJ-1278. If your radio requires you to provide a reverse FSK signal you will need to relocate the shorting jumper to position 2 &...
-
Page 6: Basic Operation Commands
Most of the commands of the MFJ-1278 are defaulted to enable you to operate in any mode. How- ever, before you start to use the MFJ-1278, you must first enter your callsign into the MFJ-1278 memory. - Page 7 To select CW mode at 13 wpm, you will type: MODE CW,13<CR> If no radio baud rate or modem are selected, MFJ-1278 will used the defaulted radio baud- rate/speed and modem. b. To select 300 baud HF packet, you will type: MODE HP<CR>...
- Page 8 2. With the MFJ-1278 in the VHF packet (VP) mode and under the cmd: command prompt, type: CALIBRA<CR> 3. Type K, then press the space bar for the higher of the two tones transmitted by the MFJ-1278. Note the MFJ-1278 will unkey itself after a few seconds. Re-key, if needed by pressing the K again to transmit.
-
Page 9: Receiver Audio Setting
MFJ-1278 & MFJ-1278T Fast-Start Manual 5. The transmit audio level controls are located on the left side of the MFJ-1278. With a small screw driver turn the transmit control fully counter-clockwise (minimum). 6. Slowly turn it clockwise (increase) until at a point where output power is slightly below the rated Output of your radio. -
Page 10: Transmit Audio Setting
MFJ-1278 will be set to 2400 packet operation. TURBO LED will light. 2400 packet can be operated with Radio Port 1 or Radio Port 2 on the MFJ-1278. Note that if your MFJ-1278 is not equipped with the 2400 modem, TURBO LED will not function and you will not be able to operate 2400 pac- ket. - Page 11 "K" at the cmd: prompt and MFJ-1278 begin to copy the signal. If the ASA result is a 100 baud signal, the MFJ-1278 will prompt the user that the signal could be AMTOR. If this occurs then the user can enter the following from the cmd: command prompt:...
- Page 12 AMTOR operating procedure to go to any of the AMTOR modes. If the user does not issue the "OK AMTOR" command the MFJ-1278 will switch to 100 baud RTTY. Note that if RTTY or ASCII signals are analyzed, and the MFJ-1278 not copying the signal correctly.
- Page 13 TXDIDDLE ONlOFF Mode: Packet Default: ON TXDIDDLE is whether or not the MFJ-1278 uses a highly efficient square wave Signal in place of flags during the transmitter delay (TXDELAY) period. When TXDIDDLE is ON, you may select even smaller TXDELAY intervals because the square wave presents four times as many transitions as TX-...
- Page 14 MFJ-1278 & MFJ-1278T Fast-Start Manual TXDIDDLE is defaulted to the ON setting to reflect the increased efficiency. However there are a number of TNCs on the market which purport to be AX.25 compatible but do not recognize valid AX.25 packets preceded by the TXDIDDLE keyup technique. You may recognize the need to set TXDIDDLE OFF if it appears that the Station you're working is unable to successfully receive your packets despite your adequate signal.
- Page 15 Inc. is not responsible for any inaccuracy of the information provided by the diagrams and charts in this instruction manual. Some optional pre-assembled cables to connect the MFJ-1278 to some radios are available. Con- tact MFJ dealer or MFJ Enterprises, Inc. for detail concerning these cables.
- Page 16 MFJ-1278 & MFJ-1278T Fast-Start Manual 4-pin Microphone Connector...
- Page 17 MFJ-1278 & MFJ-1278T Fast-Start Manual Handheld Radio Connectors:...
- Page 18 MFJ-1278 & MFJ-1278T Fast-Start Manual Using the Accessory Jack...
- Page 19 If your HT is one that is noted in the above chart, you must follow the instruction given in Chapter 3 of the MFJ-1278 instruction manual. NOTE: The radio connection information listed in this section is believed to be accurate. However, you should check the accuracy of this information with the instruction manual of your radio.
Need help?
Do you have a question about the MFJ-1278 and is the answer not in the manual?
Questions and answers