Table of Contents
Advertisement
Quick Links
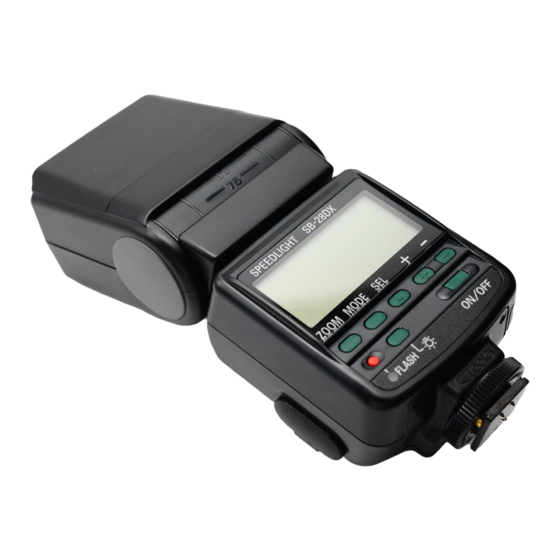
SB-28DX
スピードライ ト
Autofocus Speedlight
日本語
■はじめに
J
SB-28DXを次のように設定します
E
このたびはニコンスピードライ トSB-28DXをお買い上げいただき、あ
4
りがとうございます。SB-28DXは、ニコンスピードライ トSB-28に、
FC
デジタル一眼レフカメラ用の自動調光機能を付加したものです。ニコン
S
F5、F100カメラなどと組み合わせて最新のTTL調光機能を発揮するの
に加えて、ニコンデジタル一眼レフカメラとの組み合わせでデジタル一
眼レフカメラ用D-TTLモード撮影、AA (絞り連動自動調光) モードでの
撮影が行えます。また、KODAK DCS 600シリーズカメラとの組み
合わせで専用のAA (絞り連動自動調光) モードでの撮影が行えます。
本書は、デジタル一眼レフカメラ用D-TTLモード撮影と、デジタル一眼
レフカメラおよびKODAK DCS 600シリーズカメラ専用のAA (絞り
連動自動調光)モードでの撮影について説明しています。
■ご使用の前に
同梱の 『SB-28使用説明書』 に記載されている 「安全上のご注意」
(警告・注意) を
●
よくお読みください。
5
本書、 組み合わせるカメラ及びSB-28の使用説明書をよくお読みください。
●
本書の (+P.00) は、 「 SB-28使用説明書」 の参照ページを示しています。
●
■組み合わせるカメラと使用説明書について
ニコンデジタル一眼レフカメラと可能なスピードライ ト撮影
※
・デジタル一眼レフカメラ用D-TTLモード撮影
(本書)
・AA (絞り連動自動調光) モードでの撮影 (本書)
・A (外部自動調光) モードでの撮影 (SB-28使用説明書)
・M (マニュアル) モード (FPも含む) での撮影 (SB-28使用説明書)
・マルチフラッシュモードでの撮影 (SB-28使用説明書)
※使用レンズのタイプにより、異なるTTL動作を行いますが、本書ではすべての
TTL (4種類) の総称として 「デジタル一眼レフカメラ用D-TTLモード撮影」 また
6
は「D-TTLモード撮影」とします。
注意
・SB-28の使用説明書では、 デジタル一眼レフカメラがAグループに属するもの
としてお読みください。
・SB-28の使用説明書の 「TTLモードでの撮影」 はできません。
・スレーブフラッシュコントローラーSU-4を使用したコードレス増灯撮影を行
う場合は、AAモードまたはAモードを使用してください。
・TTLコードSC-17/18/19を使用したTTL増灯撮影はできません。
KODAK DCS 600シリーズカメラと可能なスピードライト撮影
・AA (絞り連動自動調光) モードでの撮影 (本書)
・A (外部自動調光) モードでの撮影 (SB-28使用説明書)
・M (マニュアル) モード (FPも含む) での撮影 (SB-28使用説明書)
・マルチフラッシュモードでの撮影 (SB-28使用説明書)
注意
・SB-28の使用説明書では、DCS 600シリーズが Aグループに属するものと
してお読みください。
・SB-28の使用説明書の 「TTLモードでの撮影」 はできません。
・デジタル一眼レフカメラ用D-TTLモード撮影はできません。
・スレーブフラッシュコントローラーSU-4を使用したコードレス自動調光増灯
撮影は可能です。
・TTLコードSC-17/18/19を使用したTTL増灯撮影はできません。
■表示パネル
SB-28DXの表示パネルの一部が、SB-28と異なります (+P.4∼5) 。
D-TTLモード表示
表1. D-TTLモード撮影で可能な感度 ・絞り値および調光範囲
1600 800
8
11
16
22
32
D-TTLモード撮影
45
64
デジタル一眼レフカメラ
–
–
スピードライトが撮影のための本発光をする直前にモニター発光を行
い、被写体からの反射光をTTL分割測光した後、最適な露出となるよ
光量補正による露出補正
うに本発光を制御します。カメラの感度、絞り値、焦点距離または露
D-TTLモード撮影では、スピードライトの光量レベルを変えて撮影す
出補正値などのデータはSB-28DXに自動的に伝達されます (CPU内
ることができます。必要に応じてSB-28DXの{または}ボタンを使
蔵ニッコールレンズ使用時) 。
って、表示パネルの補正量を確認しながら、−3段から+1段まで
使用するレンズなどにより、以下の4種類の調光制御が行われます。
1/3段きざみでスピードライトの光量を補正できます。
装着レンズ
可能な撮影*
表示パネル
調光制御の内容
...カメラ側で露出補正を行うこともできます。設定方法は、カメラの使用説明
D/Gタイプ
D-3D-マルチ
D
t Ø
モニター発光の情報にレンズからの
書をご覧ください。
AFレンズ
BL調光
距離情報を加えて、より正確な自動
...SB-28DX、カメラの両方で露出補正した場合、SB-28DXの表示パネルの
調光撮影を行います。
調光範囲バーグラフは両者の補正量を加算して変化し、加算した補正量で撮
D/Gタイプ
D-マルチBL調光
D
t Ø
マルチパターン測光とモニター発光
影されます。ただし、光量補正値はSB-28DXで設定した補正量しか表示さ
以外のAFレンズ
に基づいて、被写体と背景の露出を
れません。
バランスよく制御します。
CPU内蔵
簡 易 D - T T L - B L
D
t ø
中央部重点測光によって背景露出を
ニッコール
調光
求め、モニター発光に基づいて、被
AA (絞り連動自動調光) モードでの撮影
以外のレンズ
写体と背景の露出をバランスよく制
御します。
カメラの感度 (ISO) 、 絞り値、 焦点距離または露出補正値などのデータ
上記すべてのレンズでスタンダードD-TTL調光 (Dt ) に設定できます。この
場合、モニター発光を中央部重点測光してTTL調光を行います。被写体と背景
がSB-28DXに自動的に伝達され、 SB-28DXの外部自動調光センサ
の区別はせず、全体を一つのシーンとして扱います。
ーで適正な露出になるように調光します。
*また、カメラの測光モードがスポット測光の場合、スタンダードD-TTL調光
AAモードは、 CPU内蔵ニッコールレンズ (IXニッコールおよびF3AF用を除く)
●
となります。
使用時のみ使用可能です (+P.11) 。CPU内蔵ニッコール以外のレンズ使用
時には、AAモードは自動的に˙ (SB-28の外部自動調光) モード (+P.46)
カメラを次のように設定します
に切り替わります。
1
感度
カメラを次のように設定します
...デジタル一眼レフカメラの感度をセットします。セット方法は、
1
カメラの使用説明書をお読みください。
2
露出モード
CPU内蔵ニッコールレンズの場合:
2
すべての露出モードが使用可能です。
CPU内蔵ニッコールレンズ以外の場合:
絞り優先オート (A) またはマニュアル (M) 露出モードに設定します。
3
絞り値
3
CPU内蔵ニッコールレンズの場合:レンズの絞り値を最小絞り
にセットし(Gタイプレンズを除く) 、カメラ側で絞り値をセ
ットします。設定できる絞り値は、表1 「D-TTLモード撮影で
可能な感度・絞り値および調光範囲」 を参照してください。
CPU内蔵ニッコールレンズ以外の場合:レンズの絞りリングを
回してセットします。この場合、SB-28DXの表示パネルの絞
り表示はレンズに設定した絞り値と連動しません。前もって調
光距離を確認する場合は、SB-28DXの { または } ボタンで
レンズに設定した絞り値と同じ値を設定し、調光範囲バーグラ
フで確認してください。
NIKON CORPORATION
使用説明書
使用説明書
Instruction Manual
FUJI BLDG., 2-3, MARUNOUCHI 3-CHOME, CHIYODA-KU,
使用説明書
TOKYO 100-8331, JAPAN
SB-28DXを次のように設定します
撮影モード
4
撮影モード
:D-3D-マルチBL
またはD-マルチBL
調光
:簡易D-TTL-
BL調光
:スタンダード
D-TTL調光
... µボタンを押して˙を表示させます。調光補正マークと光
量補正値も表示されます。AAモード時も、 外部自動調光モード
... µ ボタンを押すと D t ØやD t øが表示されます。
時も、表示パネルには˙が表示されます。
もう一度 µ ボタンを押すとD t が表示されます。
... KODAK DCS 620カメラにSB-28DXを取り付け、 最初に電源
をONにしたときは、 自動的にAAモードになります。
調光範囲バーグラフで調光距離を確認します。
5
レデ ィライ トの点灯を確認して撮影します。
調光範囲バーグラフの
調光距離は0.8∼6mです
...撮影距離が調光範囲内にない場合は、 カメラ側で絞り値を変更して
ください。
...スピードライ ト発光直後にレディライトが約3秒間点滅した場合は、
撮影の結果に露出不足の可能性があります。 表2を参照して、 撮影距
レデ ィライ トの点灯を確認して撮影します。
離、 絞り値、 調光範囲を再度確認し、 撮影し直してください。
撮影前に調光範囲を確認するには
カメラを実際の撮影と同じに設定し、 同じ構図で構え、 シャッターボタ
ンを半押ししてから、 SB-28DXの ~ ボタンを押します。 発光直
後にレディライ トが約3秒間点滅した場合は、 実際の撮影でも露出不足
の可能性があります。 表2を参照して、 撮影距離、 絞り値、 調光範囲を再
度確認し、 撮影し直してください。
...SB-28DXがフル発光して撮影の結果に露出不足の可能性がある場合
表2. AA (絞り連動自動調光) および ˙モードで可能なISO感度・絞り値
は、 発光直後にレデ ィライ トとTTL調光アンダーマークが約3秒間点滅
および調光範囲
して警告します。同時に、 目安となるアンダー量 (−3段まで) が表示さ
ISO感度
れますので、 それを参考にして、 撮影距離、 絞り値、 調光範囲を再度確
1600 800 400 200
100/80
認し、 撮影し直してください。 ( −1.0が表示された場合は、絞りを1段
A
8
5.6
4
2.8
以上開けて撮影し直すことをおすすめします)
B
11
8
5.6
4
2.8
C
16
11
8
5.6
TTL調光アンダーマーク
22
16
11
8
5.6
32
22
16
11
アンダー量
45
32
22
16
11
64
45
32
22
16
64
45
32
22
D
64
45
32
光量補正による露出補正
AAモード撮影では、 スピードライトの光量レベルを変えて露出を補正
することができます。 必要に応じて、 SB-28DXの { または }ボタン
...消灯したアンダー量は、. ボタンを押すと再表示できます。
を使って、 表示パネルの補正量を確認しながら、 −3段から+1段まで
1/3段きざみでスピードライ トの光量を補正してください。
... 表2のA∼Dゾーンでは、 以下の制限がありますのでご注意ください。
ISO感度
調光範囲(m)
Aゾーン:マイナス側の光量補正はできません。
400
200
18mm
20mm
24mm
28mm
35mm
50mm
70mm
85mm
5.6
4
2.8
0.8-9
0.9-10
1.4-15
1.5-16
1.6-18
1.9-20
2.2-20
2.2-20
Bゾーン:−1段を超える光量補正はできません。
8
5.6
4
0.6-6.3
0.7-7.0
1.0-10
1.0-11
1.2-12
1.4-14
1.5-16
1.6-17
Cゾーン:−2段を超える光量補正はできません。
11
8
5.6
0.6-4.5
0.6-5.0
0.7-7.5
0.7-8.0
0.8-9.0
1.0-10
1.1-12
1.1-12
Dゾーン:プラス側の光量補正はできません。
16
11
8
0.6-3.1
0.6-3.5
0.6-5.3
0.6-5.6
0.7-6.3
0.7-7.4
0.8-8.4
0.8-8.8
... 制御できない補正量を設定すると、 表示パネルの調光範囲バーグラフが消灯
22
16
11
0.6-2.2
0.6-2.5
0.6-3.7
0.6-4.0
0.6-4.5
0.6-5.2
0.6-6.0
0.6-6.2
し、 絞り値と調光補正マーク、 光量補正値が点滅して警告します。
32
22
16
0.6-1.5
0.6-1.7
0.6-2.6
0.6-2.8
0.6-3.1
0.6-3.7
0.6-4.2
0.6-4.4
45
32
22
0.6-1.1
0.6-1.2
0.6-1.8
0.6-2.0
0.6-2.2
0.6-2.6
0.6-3.0
0.6-3.1
... カメラ側で露出補正を行うこともできます。 設定方法は、 カメラの使用説明書
64
45
32
0.6-0.7
0.6-0.8
0.6-1.3
0.6-1.4
0.6-1.5
0.6-1.8
0.6-2.1
0.6-2.2
をご覧ください。
–
64
45
0.6
0.6-0.9
0.6-1.0
0.6-1.1
0.6-1.3
0.6-1.5
0.6-1.5
... SB-28DX、 カメラの両方で露出補正した場合、 SB-28DXの表示パネルの調
光範囲バーグラフは両者の補正量を加算して変化し、加算した補正量で撮影
されます。ただし、光量補正値はSB-28DXで設定した補正量しか表示され
ません。
【参 考】
■ƒおよび"モード時のガイ ドナンバー計算
(+P.75∼77)
"
ƒ、
モード時のガイ ドナンバー (ISO200・m、20℃)
光量
18mm 20mm 24mm 28mm 35mm 50mm 70mm
1/1(Full)
25
1/2
18
1/4
12.7
1/8
9
1/16
6.4
1/32
4.5
デジタル一眼レフカメラ・DCS 600シリーズ
1/64
3.2
ISO200以外のフィルム使用時のガイ ドナンバー算出係数
上表のガイドナンバーに下記の係数を乗じて求めます。
ISO
80
係数
0.630
感度 (ISO)
...カメラの感度 (ISO) をセットします。セット方法は、カメラの使
用説明書をお読みください。
露出モード
...絞り優先オート (A) またはプログラムオート (P) にします。マニ
ュアル (M) またはシャッター優先オート (S) を使用する場合は、
絞りが調光範囲外にならないよう注意してください。
絞り値
絞り優先オート (A) 時:ご使用のレンズの絞り値を最小絞りに
セットし、 カメラ側で絞り値をセットします。 設定できる絞り値
は、 表2 「AA (絞り連動自動調光) および ˙モードで可能な ISO
感度・絞り値および調光範囲」 を参照してください。
プログラムオート (P) 時: ご使用のレンズの絞り値を最小絞りに
セットします。
...いずれの露出モードでも、 調光範囲外の絞りではSB-28DXの表
示パネルの調光範囲バーグラフが消灯し、 絞り値と調光補正マー
ク、 光量補正値が点滅して警告します。表2を参照して絞り値ま
たは撮影距離を確認してください。
Printed in Japan T1C1000301 (S842) 43
English
Introduction
Thank you for purchasing the Nikon Autofocus Speedlight SB-28DX. The SB-28DX is
a special version of the Nikon Speedlight SB-28 that features a D-TTL Auto Flash mode
for Nikon Digital SLR cameras, and an Auto Aperture (AA) mode for Nikon Digital SLR
cameras and Kodak DCS600 Series digital cameras.
This instruction manual describes how to use the SB-28DX in the D-TTL Auto Flash mode
with Digital SLR cameras and the AA mode with Digital SLR cameras and Kodak DCS600
Series cameras.
Of course, the SB-28DX works well with film-based Nikon cameras such as the F5
and F100.
Notes on using the SB-28DX
• Before using the SB-28DX, please read carefully the notes on safety operations—
especially the cautions—appearing in the SB-28 instruction manual provided in the
same package.
• Read the instruction manuals of the SB-28, SB-28DX, and the camera you are using in
combination with this unit.
• When you see the note "
+
page xx," this indicates the page to refer to in the SB-28
instruction manual.
Usable cameras and their respective instruction manuals
Available flash modes with Nikon Digital SLR cameras
• D-TTL Auto Flash mode for Digital SLR cameras* (refer to this manual).
• Auto Aperture (AA) mode (refer to this manual).
• Non-TTL Auto Flash A mode (refer to the SB-28's manual).
• Manual M mode (including FP High-Speed Flash sync FP) (refer to the SB-28's manual).
• Repeating Flash mode (refer to the SB-28's manual).
*
Four TTL auto flash modes are available depending on the type of Nikkor lenses you are using. In
this manual, all available TTL modes are generally referred to as "D-TTL Auto Flash mode for Digital
SLR cameras" or "D-TTL Auto Flash mode."
Notes:
• Because Digital SLR cameras are not listed in the camera groups in the SB-28
instruction manual, refer to the information for "Cameras in Group I."
• TTL Auto Flash Mode as described in the SB-28 instruction manual is not possible.
• Multiple flash operation using the Wireless Slave Flash Controller SU-4 is not possible.
Use the AA or A mode.
• TTL multiple flash operation using a sync or remote cord such as TTL Remote Cord
SC-17 or TTL Multi-Flash Sync Cords SC-18 or SC-19 is not possible.
Available flash modes with Kodak DCS600 Series digital cameras
• Auto Aperture (AA) mode (refer to this manual).
• Non-TTL Auto Flash A mode (refer to the SB-28's manual).
• Manual M mode (including FP High-Speed Flash sync FP) (refer to the SB-28's manual).
• Repeating Flash mode (refer to the SB-28's manual).
Notes:
• Because DCS600 Series cameras are not listed in the camera groups in the SB-28
instruction manual, refer to the information for "Cameras in Group I."
• TTL Auto Flash Mode as described in the SB-28 instruction manual is not possible.
調光範囲(m)
• D-TTL Auto Flash mode for Digital SLR cameras is not possible.
18mm
20mm
24mm
28mm
35mm
50mm
70mm
85mm
• Multiple flash operation using the Wireless Slave Flash Controller SU-4 is possible.
2
0.8-9
0.9-10
1.4-15
1.5-16
1.6-18
1.9-20
2.2-20
2.2-20
• TTL multiple flash operation using a sync or remote cord such as TTL Remote Cord
0.6-6.3 0.7-7.0
1.0-10
1.0-11
1.2-12
1.4-14
1.5-16
1.6-17
SC-17 or TTL Multi-Flash Sync Cords SC-18 or SC-19 is not possible.
4
0.6-4.5 0.6-5.0 0.7-7.5 0.7-8.0 0.8-9.0
1.0-10
1.1-12
1.1-12
LCD panel
0.6-3.1 0.6-3.5 0.6-5.3 0.6-5.6 0.7-6.3 0.7-7.4 0.8-8.4 0.8-8.8
The LCD panel on the SB-28DX differs slightly from that of the SB-28 (
8
0.6-2.2 0.6-2.5 0.6-3.7 0.6-4.0 0.6-4.5 0.6-5.2 0.6-6.0 0.6-6.2
0.6-1.5 0.6-1.7 0.6-2.6 0.6-2.8 0.6-3.1 0.6-3.7 0.6-4.2 0.6-4.4
Flash mode indicator
0.6-1.1 0.6-1.2 0.6-1.8 0.6-2.0 0.6-2.2 0.6-2.6 0.6-3.0 0.6-3.1
for Digital SLR
0.6-0.7 0.6-0.8 0.6-1.3 0.6-1.4 0.6-1.5 0.6-1.8 0.6-2.1 0.6-2.2
cameras
0.6
0.6-0.9 0.6-1.0 0.6-1.1 0.6-1.3 0.6-1.5 0.6-1.5
Taking flash photographs in the D-TTL Auto Flash mode
In this mode, the SB-28DX fires a series of nearly invisible preflashes, called the Monitor
Preflash. These preflashes are detected by the camera's TTL multi-sensor to control the
flash output, ensuring correct exposure. Data such as the camera's ISO setting, aperture,
focal length, and exposure compensation value are automatically transmitted to the
SB-28DX (with Nikkor lenses with a built-in CPU mounted.)
The following four flash modes are possible depending on the type of lens mounted.
Lens
Available flash
LCD panel
mounted
mode*
D/G-type AF
3D Multi-Sensor
D
t Ø
Nikkor
Balanced Fill-Flash
lenses
for Digital SLRs
Non-D/G-
Multi-Sensor
D
t Ø
type AF
Balanced Fill-Flash
Nikkor
for Digital SLRs
lenses
(+P.60∼64)
t ø
Nikkor
Center-Weighted
D
lenses
Fill-Flash for
without a
Digital SLRs
built-in CPU
照射角
85mm
28
42
45
51
59
68
71
Standard TTL (D
t
) Flash operation is performed by measuring monitor preflashes
using the TTL multi-sensor's entire segment area with emphasis placed on the central
20
30
32
36
42
48
50
segment.
14
21
22.5
25.5
30
34
36
* When the camera's metering system is set to Spot Metering, the Standard TTL Flash
10
15
16
18
21
24
25
mode for Digital SLRs is set.
7
10.5
11.3
12.7
15
17
18
Camera settings
5
7.5
8
9
10.5
12
12.7
3.5
5.3
5.7
6.4
7.5
8.5
9
Set the ISO sensitivity level.
1
– Refer to Digital SLR's instruction manual for details on setting.
2
Set the exposure mode.
– With Nikkor lenses with a built-in CPU: Use your desired exposure
100
200
400
800
1600
mode.
0.707
1
1.414
2
2.827
– With Nikkor lenses without a built-in CPU: Use Aperture-priority auto (A)
or Manual (M) mode.
Set the aperture.
3
– With Nikkor lenses with a built-in CPU: Set the lens aperture to its
minimum (largest f-number) except G-type lenses. Then set the aperture
on the camera. Refer to "Table 1: Usable aperture/flash shooting distance
ranges in D-TTL Auto Flash mode."
– With Nikkor lenses without a built-in CPU: Set the aperture on the lens.
In this case, the aperture set on the SB-28DX's LCD panel does not
directly link the aperture set on the lens. To check the flash shooting
distance range before shooting, select the aperture on the lens and set
the same aperture on the SB-28DX's LCD panel by pressing the
SB-28DX's
{
or
}
button, then confirm the flash shooting distance
range using the flash shooting range indicator bars on the LCD panel.
使用説明書の内容が破損などによって判読できなくなったときは、当社サービス機関にて新しい使用説明書をお求めください。 (有料)
No reproduction in any form of this manual, in whole or in part (except for brief quotation in critical articles or reviews), may
be made without written authorization from NIKON CORPORATION.
SB-28DX settings
4
Select the flash mode.
– Press the
µ
button once to display D
t Ø
the LCD panel. Press the
µ
button again to display D
LCD panel.
5
Check the shooting distance using the flash shooting range
indicator bars.
A flash shooting distance range
of 0.8 to 6m (3 to 20 ft.) is
shown.
– If the subject is out of range, change the aperture on the camera to bring
the subject within the flash shooting distance range.
6
Wait for the ready-light to come on before taking
the picture.
– If the ready-light and the underexposure indicator blink for approx.
3 seconds after the picture is taken, this indicates the flash fired at
maximum output, meaning that light may have been insufficient for correct
exposure. In that case, use a wider aperture or move closer to the subject
before taking the next picture by referring to the amount of underexposure
(up to –3 EV) appearing on the LCD panel. (If "–1.0" is displayed, reshoot
+
pages 4–5).
using an aperture that is at least one stop wider.)
Underexposure indicator
Amount of underexposure
– You can recall the amount of underexposure last shown on the LCD panel
by pressing the
.
button.
Table 1: Usable aperture/flash shooting distance ranges in D-TTL Auto
Flash mode
Use this table to determine the distance range in which the correct auto flash exposure
will be obtained at various ISO sensitivity levels, aperture, and zoom settings.
Distance range according to zoom settings
ISO number (f/number)
(Upper figures are in meters, lower figures are in feet.)
Flash operation
1600
800
400
200
18mm
20mm
24mm
28mm
35mm
0.8-9
0.9-10
1.4-15
1.5-16
1.6-18
8
5.6
4
2.8
2.6-29
2.9-32
4.4-49
4.7-52
5.2-59
Monitor preflash data is integrated with the
0.6-6.3
0.7-7.0
1.0-10
1.0-11
1.2-12
distance information from D-type Nikkor
11
8
5.6
4
2.2-20
2.1-23
3.1-34
3.3-37
3.7-41
lenses to obtain correct TTL auto flash
0.6-4.5
0.6-5.0
0.7-7.5
0.7-8.0
0.8-9.0
16
11
8
5.6
2.0-14
2.0-16
2.2-24
2.4-26
2.6-29
operation.
0.6-3.1
0.6-3.5
0.6-5.3
0.6-5.6
0.7-6.3
22
16
11
8
2.0-10
2.0-11
2.0-17
2.0-18
2.0-20
Based on camera's Matrix Metering system
0.6-2.2
0.6-2.5
0.6-3.7
0.6-4.0
0.6-4.5
32
22
16
11
and monitor preflash data, flash output is
2.0-7.3
2.0-8.2
2.2-12
2.0-13
2.0-14
0.6-1.5
0.6-1.7
0.6-2.6
0.6-2.8
0.6-3.1
45
32
22
16
automatically controlled to keep both
2.0-5.2
2.0-5.7
2.0-8.6
2.0-9.2
2.0-10
subject and background correctly exposed.
0.6-1.1
0.6-1.2
0.6-1.8
0.6-2.0
0.6-2.2
64
45
32
22
2.0-3.6
2.0-4.1
2.0-6.1
2.0-6.5
2.0-7.3
Measuring background ambient light
0.6-0.7
0.6-0.8
0.6-1.3
0.6-1.4
0.6-1.5
64
45
32
2.0-2.6
2.0-2.8
2.0-4.3
2.0-4.6
2.0-5.2
using Center-Weighted metering system,
0.6
0.6-0.9
0.6-1.0
0.6-1.1
64
45
flash output is controlled using monitor
2.0
2.0-3.0
2.0-3.2
2.0-3.6
preflash data to keep both subject and
Flash exposure compensation
background correctly exposed.
Flash output compensation is possible in 1/3 steps from –3.0 to +1.0EV by pressing the
{ or } button to increase or decrease the compensation while confirming the amount
on the LCD panel (
pages 71-73.)
+
– Exposure compensation on the camera is possible. Refer to your camera's instruction
manual on how to set it.
– Exposure compensation can be made on both the SB-28DX and the camera. The
exposure is controlled by the sum total of both exposure compensation values and the
shooting range indicator bars change to match the exposure compensation. However,
the SB-28DX's LCD panel displays the amount of compensation set on the SB-28DX
only.
Taking flash photographs in the Auto Aperture (AA) mode
for Digital SLR and Kodak DCS600 Series cameras
In this mode, the correct exposure for both subject and background is automatically
obtained. The SB-28DX's built-in sensor controls the flash output in combination with
data transmitted from the camera and lens to the SB-28DX, including the ISO sensitivity
level, aperture, focal length, and exposure compensation value.
– AA (Auto Aperture) mode only works when using the Digital SLR or DCS600 Series
cameras when Nikkor lenses with a built-in CPU (except IX Nikkor lenses and AF Nikkor
lenses for the F3AF) are mounted (
page 7). The AA mode is automatically switched
+
to Non-TTL Auto Flash A mode (
+
page 42) when Nikkor lenses without a built-in
CPU are mounted.
Camera settings
1
Set the ISO sensitivity level.
– Refer to the camera's instruction manual for details.
2
Set the exposure mode to A (Aperture-priority) or
P (Programmed auto).
– When using the M (Manual) or S (Shutter-priority auto) exposure mode,
make sure the aperture is within the range.
3
Set the aperture.
– In A (Aperture-priority auto) exposure mode: Set the lens aperture to its
minimum. Then set the aperture on the camera.
Refer to "Table 2: Usable aperture/flash shooting distance ranges in AA
(Auto Aperture) and A (non-TTL Auto Flash) modes."
– In P (Programmed auto) exposure mode: Set the lens aperture to its
minimum.
• In either exposure mode, if the aperture is out of the range, the aperture
value, exposure compensation indicator and exposure compensation
value on the LCD panel blink and the flash shooting distance range
indictor bars disappear to warn you. In this case, adjust the aperture and
shooting distance by referring to Table 2.
SB-28DX settings
4
Select the flash mode.
3D Multi-Sensor
Balanced Fill-Flash
or Multi-Sensor
Balanced Fill-Flash
for Digital SLR
cameras
Center-Weighted
Fill-Flash for Digital
SLR cameras
Standard TTL Flash
– Press the
button until
appears on the LCD panel in either AA
µ
˙
for Digital SLR
cameras
(Auto Aperture) or A (non-TTL auto) mode. In AA mode, the exposure
compensation indicator and exposure compensation value appear on the
LCD panel simultaneously.
or D
t ø
on
– When the flash unit is mounted on the Kodak DCS620 camera and turned
t
on the
on for the first time, the AA mode is always activated.
5
Wait for the ready-light to come on before taking
the picture.
– If the ready-light blinks for approx. 3 seconds after the picture is taken,
this indicates the flash fired at maximum output, meaning that light may
have been insufficient for correct exposure. In that case, use a wider
aperture or move closer to the subject before taking the next picture by
referring to Table 2.
To check the correct flash shooting distance range before taking
the picture
Point the camera at the subject. After pressing the shutter release button
lightly, press the
~
button on the SB-28DX. If the ready-light blinks
for approx. 3 seconds, this indicates the flash fired at maximum output,
meaning that light may have been insufficient for correct exposure. In this
case, use a wider aperture or move closer to the subject by referring to
Table 2 before taking the actual picture.
Table 2: Usable aperture/flash shooting distance ranges in AA (Auto Aperture)
and A (non-TTL Auto Flash) modes
Use this table to determine the distance range in which the correct auto flash exposure will
be obtained at various ISO sensitivity levels, aperture, and zoom settings.
Distance range according to zoom settings
ISO number (f/number)
(Upper figures are in meters, lower figures are in feet.)
1600 800
400
200
18mm
20mm
24mm
28mm
35mm
50mm
70mm
85mm
100/80
0.8-9
0.9-10
1.4-15
1.5-16
1.6-18
1.9-20
2.2-20
2.2-20
A
8
5.6
4
2.8
2
2.6-29
2.9-32
4.4-49
4.7-52
5.2-59
6.1-66
7.0-66
7.2-66
0.6-6.3
0.7-7.0
1.0-10
1.0-11
1.2-12
1.4-14
1.5-16
1.6-17
B
11
8
5.6
4
2.8
2.2-20
2.1-23
3.1-34
3.3-37
3.7-41
4.3-48
4.9-55
5.1-57
0.6-4.5
0.6-5.0
0.7-7.5
0.7-8.0
0.8-9.0
1.0-10
1.1-12
1.1-12
C
16
11
8
5.6
4
2.0-14
2.0-16
2.2-24
2.4-26
2.6-29
3.0-34
3.5-39
3.6-41
0.6-3.1
0.6-3.5
0.6-5.3
0.6-5.6
0.7-6.3
0.7-7.4
0.8-8.4
0.8-8.8
22
16
11
8
5.6
2.0-10
2.0-11
2.0-17
2.0-18
2.0-20
2.2-24
2.5-27
2.6-28
0.6-2.2
0.6-2.5
0.6-3.7
0.6-4.0
0.6-4.5
0.6-5.2
0.6-6.0
0.6-6.2
32
22
16
11
8
2.0-7.3
2.0-8.2
2.2-12
2.0-13
2.0-14
2.0-17
2.0-19
2.0-20
0.6-1.5
0.6-1.7
0.6-2.6
0.6-2.8
0.6-3.1
0.6-3.7
0.6-4.2
0.6-4.4
45
32
22
16
11
2.0-5.2
2.0-5.7
2.0-8.6
2.0-9.2
2.0-10
2.0-12
2.0-13
2.0-14
0.6-1.1
0.6-1.2
0.6-1.8
0.6-2.0
0.6-2.2
0.6-2.6
0.6-3.0
0.6-3.1
64
45
32
22
16
2.0-3.6
2.0-4.1
2.0-6.1
2.0-6.5
2.0-7.3
2.0-8.6
2.0-9.8
2.0-10
0.6-0.7
0.6-0.8
0.6-1.3
0.6-1.4
0.6-1.5
0.6-1.8
0.6-2.1
0.6-2.2
64
45
32
22
2.0-2.6
2.0-2.8
2.0-4.3
2.0-4.6
2.0-5.2
2.0-6.0
2.0-6.9
2.0-7.2
0.6
0.6-0.9
0.6-1.0
0.6-1.1
0.6-1.3
0.6-1.5
0.6-1.5
D
64
45
32
2.0
2.0-3.0
2.0-3.2
2.0-3.6
2.0-4.3
2.0-4.9
2.0-5.1
Flash exposure compensation
In AA mode, flash output compensation is possible in 1/3 steps from –3.0 to +1.0EV by
pressing the { or } button to increase or decrease the compensation while confirming
the amount on the LCD panel.
Note that flash output compensation is restricted in Zones A to D.
Zone A: Minus flash output compensation is not possible.
Zone B: Flash output compensation exceeding –1EV is not possible.
Zone C: Flash output compensation exceeding –2EV is not possible.
Zone D: Flash output compensation from 0 to +1EV is not possible.
50mm
70mm
85mm
– If flash output compensation is made exceeding the amount of the above values, the
1.9-20
2.2-20
2.2-20
6.1-66
7.0-66
7.2-66
flash shooting range indicator bars disappear and the aperture, exposure compensation
1.4-14
1.5-16
1.6-17
4.3-48
4.9-55
5.1-57
indicator, and exposure compensation value blink to warn you.
1.0-10
1.1-12
1.1-12
– Exposure compensation on the camera is possible. Refer to your camera's instruction
3.0-34
3.5-39
3.6-41
0.7-7.4
0.8-8.4
0.8-8.8
manual for information.
2.2-24
2.5-27
2.6-28
– Exposure compensation can be made on both the SB-28DX and the camera. The
0.6-5.2
0.6-6.0
0.6-6.2
2.0-17
2.0-19
2.0-20
exposure is controlled by the sum total of both exposure compensation values and the
0.6-3.7
0.6-4.2
0.6-4.4
shooting range indicator bars changes to match the exposure compensation. However,
2.0-12
2.0-13
2.0-14
0.6-2.6
0.6-3.0
0.6-3.1
the SB-28DX's LCD panel displays the amount of compensation set on the
2.0-8.6
2.0-9.8
2.0-10
0.6-1.8
0.6-2.1
0.6-2.2
SB-28DX only.
2.0-6.0
2.0-6.9
2.0-7.2
0.6-1.3
0.6-1.5
0.6-1.5
2.0-4.3
2.0-4.9
2.0-5.1
For your information
ISO 200 guide numbers(m/ft)in the Manual ƒ and Repeating Flash " Modes
(at 20°C/68°F) (
+
pages 56-60)
Zoomp-head position
Flash output
level
18mm
20mm
24mm
28mm
35mm
50mm
70mm
85mm
1/1(Full)
25/84
28/93
42/139
45/148
51/167
59/195
68/223
71/232
1/2
18/59
20/66
30/98
32/105
36/118
42/138
48/157
50/164
1/4
12.7/42
14/46
21/69
22.5/74
25.5/84
30/98
34/112
36/118
1/8
9/30
10/33
15/49
16/53
18/59
21/69
24/79
25/82
1/16
6.4/21
7/23
10.5/35
11.3/37
12.7/42
15/49
17/56
18/59
1/32
4.5/15
5/16
7.5/25
8/26
9/30
10.5/35
12/39
12.7/42
1/64
3.2/10
3.5/11
5.3/17
5.7/19
6.4/21
7.5/25
8.5/28
9/30
Adjustment factors for other ISO sensitivity levels
ISO
80
100
200
400
800
1600
Factor
0.630
0.707
1
1.414
2
2.827
For sensitivity levels other than ISO 200, multiply the guide numbers by the factors shown
in the above table.
Advertisement
Table of Contents

Related Manuals for Nikon SB-28DX


Summary of Contents for Nikon SB-28DX
- Page 1 SB-28 instruction manual provided in the … µボタンを押して˙を表示させます。調光補正マークと光 same package. 量補正値も表示されます。AAモード時も、 外部自動調光モード • Read the instruction manuals of the SB-28, SB-28DX, and the camera you are using in combination with this unit. 時も、表示パネルには˙が表示されます。 • When you see the note “...
- Page 2 µ ˙ • Lea el manual de instrucciones del SB-28, del SB-28DX y de la cámara que utilice junto contrôle CL que ce soit en mode AA (ouverture auto) ou A (auto non- con este flash. TTL). En mode AA, l’indicateur de correction d’exposition et la valeur de •...
Need help?
Do you have a question about the SB-28DX and is the answer not in the manual?
Questions and answers