Table of Contents
Advertisement
Quick Links
Advertisement
Table of Contents

Related Manuals for DGS Retail APTE3


Summary of Contents for DGS Retail APTE3
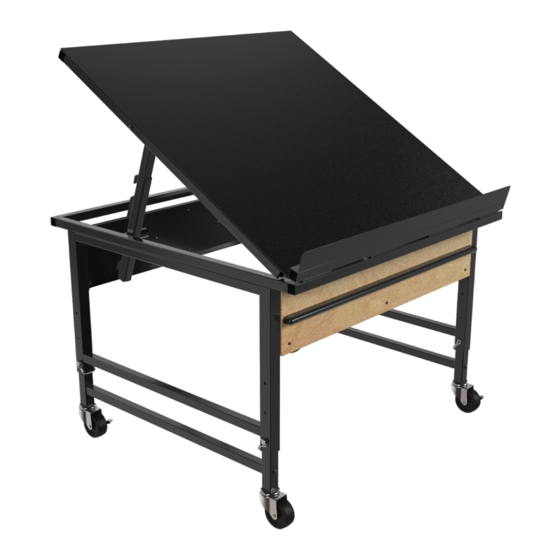
- Page 1 F0440 APTE3 PRODUCE TABLE Copyright © 2022 DGS Retail (800) 211-9646 Press 2...
- Page 2 Part List: Copyright © 2022 DGS Retail...
- Page 3 - Slide one of the metal bumper panels under the bottom legs, and align holes in bumper short flanges with holes in L-brackets. - Attach bumper panel to bottom/ back legs with (4x) 1/4-20 x .625 machine screws. (x4) Copyright © 2022 DGS Retail...
- Page 4 ASSEMBLE FRONT BUMPER PANEL WITH WOOD TRIM AND BUMPER: - Attach wood trim panel to the front of metal bumper - Attach bumper to wood trim with panel with (6x) #8-32 x 0.375 machine screws. (4x) #8 x .375 wood screws. (X6) (X4) ASSEMBLE FRONT BUMPER PANEL WITH TABLE:...
- Page 5 ASSEMBLE LOWER LEG - Flip the table and place it on its top with leg tubes pointing up. - Slide the lower leg into tube and align the hole in leg with one of the holes in tube - Lock required position of leg in frame with a clevis pin and secure the pin from sliding out by closing the retaining wire.
- Page 6 ASSEMBLE CASTERS - Screw in casters into weld nuts on legs, install casters with brakes across front of the table. FRONT OF TABLE ASSEMBLE FRONT LIP Z-CHANNEL - Flip table upside-down and set it on casters. - Slide the z-channel on top front tube, make sure that holes on channel are aligned with rivet-nuts on the back of tube.
- Page 7 SET THE TABLE TOP AT REQUIRED ANGLE: - Remove/ cut-off the zip ties that hold two support arms attached to side tubes. - Lift the back of the top frame of table and swing down both left and right support arms. - Depending on the required angle of the top, engage/ rest the appropriate cut-out on support arms on short side tubes.
- Page 8 ASSEMBLY COMPLETE (REFERENCE STEP 5) 33˝ 30˝ 27˝ (REFERENCE STEP 9) 53.36˝ 48˝ 42.25˝...
Need help?
Do you have a question about the APTE3 and is the answer not in the manual?
Questions and answers