Table of Contents
Advertisement
Advertisement
Table of Contents

Related Manuals for TUATARA 1000EFI 4x4 2020


Summary of Contents for TUATARA 1000EFI 4x4 2020
- Page 1 (2020 M WNERS ANUAL ODEL Tuatara Machinery Limited Version 271219...
- Page 2 P a g e...
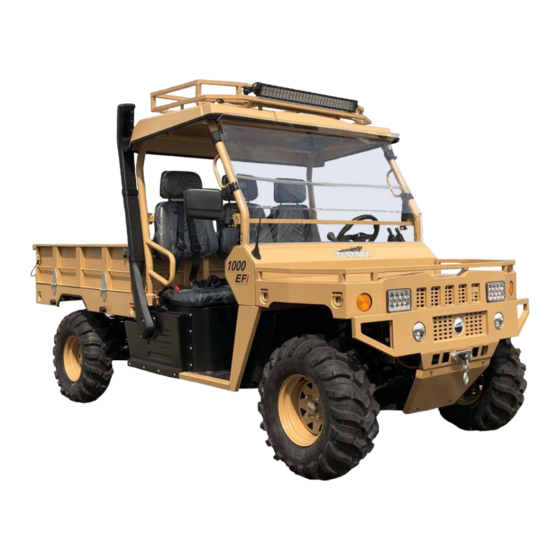
- Page 3 Owner’s Manual READ THIS MANUAL CAREFULLY. IT CONTAINS IMPORTANT SAFETY INFORMATION. MINIMUM RECOMMENDED: OPERATOR AGE: 16 TUATARA Off-Road Agricultural Transport Machine 1000EFI TUATARA P a g e...
-
Page 4: Table Of Contents
TABLE OF CONTENTS Owner’s Manual 1. Foreword 2. Warning Signs and Important Safety Information 2.1 Warning Signs 2.2 Important safety information 3. Specifications 4. Operating Instructions 5. Maintenance and Service 5.1 Principal Components - Maintenance 5.2 Preventive Maintenance and Service Log 6. -
Page 5: Owner's Manual
We are sure that you will enjoy your new vehicle. With the purchase of your TUATARA ATM you can now appreciate the craftsmanship and reliability that has served to make the TUATARA a standout performer in its field. If you have any questions regarding the operation or maintenance of your vehicle, please contact the nearest TUATARA dealer. -
Page 6: Warning Signs
→ Never drive the ATM if you are under 16 years of age. Before driving, be sure: → That you are of good physical and mental health. → That you are not affected by any alcohol or drugs. 2.1 Warning Signs Foreword about safety In order to keep everyone safe, it is important to understand the warning signs on the ATM. - Page 7 WARNING Always bring the vehicle to a complete stop before changing between 2WD and 4WD. Failure to do so could result in damage to the differential and / or components within the drive train. WARNING WARNING Improper tyre pressure or overloading can cause a loss of control. Loss of control could result in a serious accident which may lead to Always bring the vehicle to a complete stop before changing between serious injury or death.
-
Page 8: Important Safety Information
WARNING Serious INJURY or DEATH could result if you ignore the following: → The maximum capacity of the rear cargo tray is 550kg. → All cargo must be adequately secured. Unsecured cargo could move suddenly and affect handling and stability. →... - Page 9 WARNING → Operating this Off Road ATM on paved surfaces may seriously affect handling and control and could result in the loss of control. → Extreme care must be exercised when driving on any paved surfaces such as roads, footpaths, and concreted areas. Age Recommendation It is strongly recommended that no one under the age of 16 be permitted to operate this ATM and never without proper adult supervision.
- Page 10 with its size, weight and handling characteristics. Check with your dealer for more information on training courses. WARNING Operating this ATM without proper instruction could increase the risk of an accident, which could lead to serious injury or death. WARNING In the event of a rollover, ensure that you keep your hands and other parts of your body inside the vehicle.
- Page 11 WARNING → Operating this ATM after consuming alcohol or drugs can seriously affect your judgment, causing the operator to react more slowly, affect your balance and perception, and could result in serious injury or death. → Never consume alcohol or drugs before or while operating this ATM. Is Your Vehicle Ready to Drive? Before driving, it is important to inspect your ATM and ensure that any problems discovered are corrected.
- Page 12 Pre-Drive Inspection Check the following items before you get in the ATM: Engine Oil Check the level and add oil if needed. Check for leaks. Coolant Check the coolant and add coolant if need. Check for the leaks. Fuel Check the level and add fuel if needed. Also make sure the fuel filler cap is secure. Check for leaks.
- Page 13 Lights Make sure the headlights, brake lights and tail lights are working properly. 10) Throttle Check the free play and adjust if needed. Press the throttle to make sure it moves smoothly without sticking, and “snaps” back automatically when it is released.
- Page 14 Keep Hands and Feet on Controls Always keep both hands on the steering wheel and both feet on the foot controls. When driving your ATM, it is important to maintain your balance and control of the ATM. Removing hands or feet from the controls will reduce your ability to react and control the vehicle.
- Page 15 WARNING → Operating this ATM at excessive speeds increases your changes of losing control of the ATM, which could result in an accident. → Always drive at a speed that is appropriate for the terrain, visibility, your experience and other operating conditions. Use Care on Unfamiliar or Undulating Terrain Before driving in an unfamiliar area, always check the terrain thoroughly.
- Page 16 WARNING → Failure to use extra care when operating on excessively rough, slippery or loose terrain could cause loss of traction or vehicle control, which could result in an accident, including a rollover. → Do not operate on excessively rough, slippery or loose terrain until you have learned and practiced the skills necessary to control the ATM on such terrain.
-
Page 17: Specifications
3. Specifications 3.1 DIMENSIONS Overall Length--------------------------------------------------------------------------------------------3580mm Overall Width --------------------------------------------------------------------------------------------1550mm Overall Height -------------------------------------------------------------------------------------------2065mm Wheelbase------------------------------------------------------------------------------------------------ 8 24 0mm Turning circle---------------------------------------------------------------------------------------------8600mm Ground Clearance ----------------------------------------------------------------------------------------310mm Rear cargo deck (Internal dimensions)(L x W x H)------------------1,600mm x 1390mm x 300mm 3.2 ENGINE Type -----------------------------------------------------------------------------Liquid-cooled – 3Cyl 4-Stroke Bore x Stroke-------------------------------------------------------------------------------------71mm ×... - Page 18 Final Drive -------------------------------------------------------------------------------------------- Shaft driven Fuel type ------------------------------------------------------------------------------91 or greater (unleaded) ----------------------------------------------------------------- Engine oil ------ API SF SAE 10W/30 – 50 Engine oil filter ------------------------------------------------------------------------JX0604 (Thread ¾”- 16) 3.3 CAPACITIES Maximum load (Rear cargo tray)-------------------------------------------------------------------------550kg Fuel tank --------------------------------------------------------------------------------------------------------50.0L Engine oil-----------------------------------------------------------------------------------------(With filter)-3.5L Transmission oil------------------------------------------------------------------------------------------------ 2.0L Front differential----------------------------------------------------------------------------------------------0.45L Rear differential-----------------------------------------------------------------------------------------------0.85L...
-
Page 19: Operating Instructions
The cooling fan override switch allows the operator to override the thermostatic control of both cooling fans in the event that the TUATARA ATM is being operated under conditions in which it is desirable for the early operation of the cooling fans. - Page 20 4. A combination of items 1 – 3 above; Headlight Switch Move the switch to the green position to activate the headlights. Turn Indicators Move the switch to the up or down position to activate the turn indicators in the direction indicated by the arrows.
- Page 21 Rear Cargo Tray Hoist The rear carry tray fitted to the Tuatara 1000 can be elevated with an electric hoist, which is operated via the dashboard switch as indicated in Figure 2 above. Drive Switch The Tuatara 1000 ATM can be operated in either 2WD or 4WD, which is selected via the dashboard switch as indicated in Figure 2 above.
- Page 22 Whenever, the Tuatara is to be parked with no operator in attendance, the hand brake must first be applied, the engine stopped and first gear engaged. The Brake Pedal Lock may also be applied if the steepness of the terrain makes this prudent.
- Page 23 The function of the Ignition Switch is to allow an operator to start and stop the engine of the Tuatara ATM. The switch is operated with the use of the ignition key, which must be moved through four positions while undertaking the start and stop procedure –...
- Page 24 Figure 5 WARNING → Do not operate the electric starter continuously for more than 5 seconds, or starter damage could occur. Wait at least 5 seconds between each operation of the electric starter to let it cool. → Do not turn the key to the "START" position with the engine running, or damage to the electric starter can result.
- Page 25 Gauges Please refer to Figure 6 below for a description and location of the gauges within the Instrument Panel. Figure 6 1 – Tachometer Indicates the engine RPM of your vehicle. The ATM should not be operated above 6000 rpm. 2 - Oil Pressure Light Indicates Low Oil Pressure 3 - Voltmeter Light...
- Page 26 Differential Lock The TUATARA ATM is equipped with both front and rear differential locking, which can be applied together or individually. In the event of a loss of traction, the differential lock(s) can be applied to lock the axles to allow the ATM to regain full wheel traction.
- Page 27 disengaging the clutch and moving forward; → Disengagement of the differential lock is the reverse of the engagement process; Differential Lock Levers Instrument Panel Figure 7 Figure 8 Front differential lever in the locked position. Rear differential lever in the unlocked position. = Image indicating front and rear differential locks are engaged.
- Page 28 Accelerator, Brake, Clutch Pedal Figure 9 Clutch pedal The left foot pedal controls the hydraulic clutch operation. Depressing the clutch disengages the drive train and permits the selection of the gears. Brake pedal The center pedal controls the operation of the brakes. Applying pressure to the pedal applies pressure to the brake calipers to slow or stop the vehicle.
- Page 29 Figure 10 Figure 11 Transmission The TUATARA ATM is fitted with a manual, five speed transmission, as well as reverse gear. Gear selection is achieved through the use of the gear selection lever – see Figure 29 | P a g e...
- Page 30 Figure 12 Figure 13 The first month of operation of your Tuatara 1000 ATM is most important to the overall life of your vehicle. Proper operation during this break-in period will help assure maximum life and performance from your new vehicle.
- Page 31 Figure 14 Fuel Tank The fuel tank is located directly below the driver’s seat of the Tuatara ATM – see Figure 15 below. To refill the tank, insert the key into the lock in the fuel cap and turn the key and the fuel cap in a clockwise direction for approximately one quarter of a turn and remove the cap and the key.
- Page 32 Always keep the fuel tank cap clean. Seat Belts The Tuatara ATM is equipped with a four-point seat belt harness system for the driver and passengers – see Figure 16 below. It is anticipated that the ATM will be operated on uneven ground and in circumstances where passengers may be at increased risk of injury or even death if the vehicle is involved in a collision with a solid object or experiences a rollover.
- Page 33 3. To release the buckle, simply push the Red Button in the centre of the lap belt. Passengers The TUATARA ATM allows for the carriage of three passengers including the driver. WARNING → Before starting the engine, ensure that the driver is seated correctly and that his / her seatbelt is fitted and firmly fastened.
- Page 34 Engine Starting Procedure 1. Ensure that the handbrake is engaged. 2. Ensure that the gear shifter is in the neutral position. 3. Depress the clutch pedal. 4. Turn the ignition key clockwise to the “start” position and hold it for no more than 5 seconds.
-
Page 35: Maintenance And Service
Engine Stopping Procedure 1. It is strongly recommended that the vehicle be brought to a complete stop before shutting off the engine. 2. Ensure that the gearshift lever is in the neutral position. 3. Engage the handbrake. 4. Turn the key anti-clockwise to the “off” position to stop the engine. 5. - Page 36 Checking The Engine Oil Level On each occasion, before operating your Tuatara ATM, remove the dipstick and check the engine oil level. If the level falls below the “F” mark – see Figure 19 below, top up with fresh oil. Note also any changes to the colour of the oil, in particular if oil appears “milky”...
- Page 37 After every 40 hours or 750 kilometres of operation, check the transmission oil on your Tuatara ATM. Remove the oil filler plug – see Figure 20 below, and confirm that the oil level is level with the bottom of the oil filler plug. If not, top it up. Also check the condition of the oil.
- Page 38 “milky” or brown in colour, the oil should be changed. Also observe the oil change intervals as indicated in the Preventative Maintenance & Service Log shown later in this manual. Figure 20 Transmission Oil Replacement Procedure You must change the oil in the transmission after the first 25 hours of operating of your new engine and after 200 hours or 5000 kilometres of use thereafter, whichever first occurs.
- Page 39 Checking the Differential Oil Level The Tuatara ATM is fitted with a front and a rear differential. To check the oil level, remove the bung plug – see Figure 21 below, and confirm that the oil level is slightly lower than the level of the filler hole.
- Page 40 Complying with this requirement will ensure proper lubrication of internal parts and prevent costly repairs due to excessive wear. The replacement procedure is as follows: 1. Park the vehicle on the level ground. 2. Stop the engine. Remove the drain plug (see Figure 21 below) and allow all oil to drain from the differential.
- Page 41 prevent air from lodging in the engine in the event of an over-heating event should the cooling system be compromised in some way. The procedure for checking the cooling system is as follows: 1. Park the vehicle on a level surface. 2.
- Page 42 Figure 23 WARNING → Removing the radiator cap while the engine is hot risks serious scalding. → Avoid direct skin contact with coolant as this could be hazardous to your health. Wear waterproof gloves at all times while handling coolant, and wash any skin with soap and water that does come in contact with coolant.
- Page 43 Idle Speed The engine installed in the Tuatara ATM is equipped with electronic fuel injection (EFI) and the idle speed is preset and controlled by Electronic Control Unit (ECU). Never change the idle speed. Checking & Replacement of Spark Plugs The spark plugs should be replaced every 30,000 km, or 18 months, whichever comes first.
- Page 44 Inspection and / or Replacement of the Drive Belt Correct installation and setting the proper tension of the drive belt will ensure that the alternator and the water pump operate correctly. If the belt is worn, cracked or can’t be tightened, it must be replaced immediately. To check the belt tension, apply firm pressure with your thumb (ie.
- Page 45 Figure 25 = Handbrake primary adjustment nut; = Handbrake equalizer; = Right handbrake cable secondary adjustment nut; = Left handbrake cable secondary adjustment nut; Drive the vehicle on to level ground and move the gearshift lever into the neutral position. Then jack the rear wheels off the ground and disengage the handbrake. Remove any free play in the handbrake cables by first loosening the lock nut at above (ie.
- Page 46 Fuses and Relays The fuse box is located in the glove compartment in the dashboard of the ATM. To access the relays, first remove the plastic protective cover – see Figure 26 below. Fuse Box Figure 26 A = ECU (10A) B = Ignition (10A) C = Cooling fan (20A) D = Fuel pump (10A)
-
Page 47: Preventive Maintenance And Service Log
Battery Maintenance The Tuatara ATM is equipped with a factory sealed low maintenance 12 volt battery. Therefore, the only maintenance required is to periodically check that both terminals are tight and remain free of corrosion, and to recharge the battery in the event that it inadvertently becomes discharged. - Page 48 48 | P a g e...
- Page 49 49 | P a g e...
- Page 50 50 | P a g e...
- Page 51 51 | P a g e...
-
Page 52: Warranty
30 days. As the ATM owner, you should be aware that TUATARA may deny warranty coverage if the ATM or a part has failed due to abuse, neglect, improper maintenance or unapproved modifications. - Page 53 Tuatara ATM to a place of repair or for the cost of travel by a serviceman to affect repairs. The warranty also does not cover any freight costs associated with the delivery of replacement parts under this warranty.
- Page 54 ATM and / or before any new use. Warranty Repairs & Servicing: In order to validate the warranty offered by TUATARA all ATMs must be serviced in strict accordance with the Preventative Maintenance & Service Log as outlined in this manual.
-
Page 55: Appendix A - Nominated Serviceman Declaration
I also wish to nominate the following person / company to undertake repairs and / or servicing on my TUATARA ATM, being servicing and / or repairs that I don’t have the competence and / or wish to do myself. - Page 56 I also undertake to complete in full, a Warranty Claim Form (ie. see APPENDIX B) and forward it to Tuatara Machinery Limited for approval prior to carrying out any warranty repairs on the said Tuatara ATM.
- Page 57 57 | P a g e...
-
Page 58: Appendix B - Warranty Claim Form
PPENDIX TUATARA SERVICE RECORD 25hrs. or 500kms Service date: Service Interval: Model: Engine No: Chassis No: Hours: Kms: Owner: Address: Tel. Email: Customer / Serviceman Component Code(s)* initials Engine oil Air filter Transmission oil Differential oil Coolant levels Coolant hoses & clamps Fuel hoses &... -
Page 59: Appendix C - Service Record Form
Telephone: Signed: WARRANTY VALIDATION Note that in order to validate the Tuatara Warranty, all of the actions referred to in the Preventative Maintenance & Service Log recorded in the Tuatara User Manual must be undertaken at the required intervals. In addition, the applicable Tuatara Service Record... - Page 60 TUATARA SERVICE RECORD 50hrs. or 1,000kms Service date: Service Interval: Model: Engine No: Chassis No: Hours: Kms: Owner: Address: Tel. Email: Customer / Serviceman Component Code(s)* initials Engine oil Air filter Transmission oil Differential oil Coolant levels Coolant hoses & clamps Fuel hoses &...
- Page 61 Telephone: Signed: WARRANTY VALIDATION Note that in order to validate the Tuatara Warranty, all of the actions referred to in the Preventative Maintenance & Service Log recorded in the Tuatara User Manual must be undertaken at the required intervals. In addition, the applicable Tuatara Service Record...
- Page 62 TUATARA SERVICE RECORD 100hrs. or 1,500kms Service date: Service Interval: Model: Engine No: Chassis No: Hours: Kms: Owner: Address: Tel. Email: Customer / Serviceman Component Code(s)* initials Engine oil Air filter Transmission oil Differential oil Coolant levels Coolant hoses & clamps Fuel hoses &...
- Page 63 Telephone: Signed: WARRANTY VALIDATION Note that in order to validate the Tuatara Warranty, all of the actions referred to in the Preventative Maintenance & Service Log recorded in the Tuatara User Manual must be undertaken at the required intervals. In addition, the applicable Tuatara Service Record...
- Page 64 TUATARA SERVICE RECORD 200hrs. or 5,000kms Service date: Service Interval: Model: Engine No: Chassis No: Hours: Kms: Owner: Address: Tel. Email: Customer / Serviceman Component Code(s)* initials Engine oil Air filter Transmission oil Differential oil Coolant levels Coolant hoses & clamps Fuel hoses &...
- Page 65 Telephone: Signed: WARRANTY VALIDATION Note that in order to validate the Tuatara Warranty, all of the actions referred to in the Preventative Maintenance & Service Log recorded in the Tuatara User Manual must be undertaken at the required intervals. In addition, the applicable Tuatara Service Record...
Need help?
Do you have a question about the 1000EFI 4x4 2020 and is the answer not in the manual?
Questions and answers