
Subscribe to Our Youtube Channel
Related Manuals for joule JPSH01

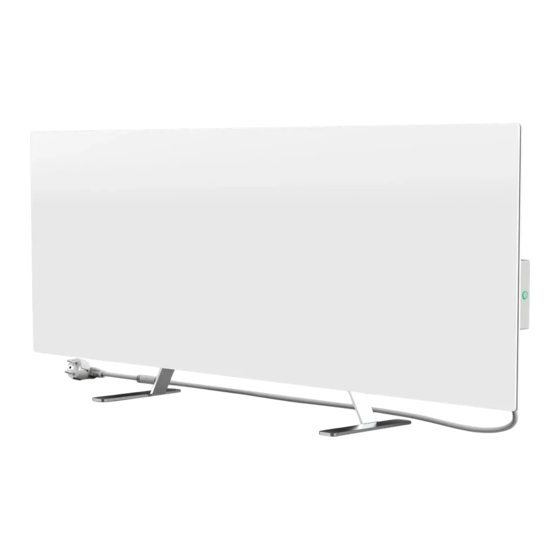
Summary of Contents for joule JPSH01
- Page 1 Installation and Operation Manual for Joule Eco Smart Heater (Model: JPSH01-JPSH05, JPSH01V-JPSH02V) November, 2022...
-
Page 3: Introduction
Joule Production shall make no guarantee with respect to any data contained herein including but not limited to the device merchantability and fitness for a particular purpose. -
Page 4: Conformity To Standards
Conformity to standards The device is CE certified and meets the requirements of the following European Union directives: • Electromagnetic Compatibility Directive 2014/30/EU; • Low Voltage Directive 2014/35/EU. The device complies with the UKCA labeling requirements necessary to sell the device in the United Kingdom. - Page 5 Warning symbols and icons Hot surface. Danger of burns from The degree of protection of the device IP44 contact with heated surface. Do not casing ensuring protection against touch the heating panels until they ingress of solid objects larger than are cooled down completely 1 mm, as well as drops and splashes of liquid falling at any angle...
- Page 6 16. If the power cable is damaged, it may only be replaced by an authorized service center or other authorized party. 17. Do not drop, throw, disassemble or attempt to repair the device on your own. Stop using the device, it is has fallen.
-
Page 7: Table Of Contents
Contents Introduction ................................3 Copyright ................................. 3 Responsibility and Technical Support ........................3 Conformity to standards ............................4 Limitations and Warnings ............................4 Contents .................................. 7 1 General Description and Characteristics ......................9 1.1 Purpose of the Device ..........................9 1.2 Technical Data ............................ - Page 8 Figure 5 – Examples of heater installation ......................13 Figure 6 – General drawing for the floor installation of JPSH01-JPSH05 .............. 15 Figure 7 – General drawing for the floor installation of JPSH01V-JPSH02V ............16 Figure 8 – General assembly diagram for JPSH01-JPSH05 (wall mounting) ............18 Figure 9 –...
-
Page 9: General Description And Characteristics
1 General Description and Characteristics 1.1 Purpose of the Device Joule Eco Smart Heater is an electric heating device with heat emission mainly by infrared radiation designed for primary, secondary and local heating of domestic, industrial and other premises (apartments, offices, trade enterprises, gyms, educational institutions, catering companies, etc.). -
Page 10: Figure 3 - Buttons, Connectors And Indicators
Venting hole The venting hole in the heater body is required to ensure proper air circulation and is not a defect in the device. Its location may differ for some models of heaters. WARNING! It is forbidden to block the venting hole of the device. Heat emitting Mounting Mounting... -
Page 11: Technical Data
1.2 Technical Data Table 3 – Basic technical specification Parameter Value Model JPSH01 (white), JPSH02 (black), JPSH03 (silver), JPSH04 (gold), JPSH05 (green), JPSH01V (white), JPSH02V (black) Communication Standard Wi-Fi (IEEE 802.11b/g/n), 18.2 dBm max (~66 mW) Operating frequency 2400-2483.5 GHz... -
Page 12: Package Contents
1.4 Packaging and labeling Joule Eco Smart Heater is supplied in an individual cardboard package containing the full name and labeling, a list of the included accessories and the main technical specifications, as well as the date of manufacture and information about the manufacturer. -
Page 13: Installation And Operation
Weight of the carton: • Gross weight for JPSH01V-JPSH02V: 9.3 kg; • Gross weight for JPSH01-JPSH05: 10.2 kg. 2 Installation and operation Before installation, the User shall select one of the following possible locations and for the device: • on a flat and stable horizontal surface for mounting on legs;... -
Page 14: First Installation And Setup
2.1 First installation and setup To ensure proper installation and proper operation of the heater, follow the steps below: 1. Unpack the unit, mount it in the chosen location connect it to the power supply with the power cord. 2. If necessary, activate the device in the mobile app. WARNING! After the first activation in the mobile app, the process of updating the heater firmware can be started (the user will receive a corresponding notification). -
Page 15: Installation On The Floor
2.1.3 Installation on the floor For JPSH01-JPSH05: Figure 6 – General drawing for the floor installation of JPSH01-JPSH05 1. Install the legs on the back of the heater by threading connections on the body through special holes in legs. 2. Make sure that leg orientation is correct in relation to the heating panel. -
Page 16: Figure 7 - General Drawing For The Floor Installation Of Jpsh01V-Jpsh02V
3. Install a washer on each of the threaded joints over the previously installed legs. 4. Install the nuts on the threaded connections and use the wrench provided to tighten them. For JPSH01V-JPSH02V : Figure 7 – General drawing for the floor installation of JPSH01V-JPSH02V Version: 1.1.1 Page 16 of 36... - Page 17 1. Screw the two metal legs to the wall brackets of the heater using headed fasteners. 2. Make sure that the legs are correctly oriented in relation to the heating panel (the power cord must be supplied to the control unit from the bottom). Version: 1.1.1 Page 17 of 36...
-
Page 18: Wall Mounting
2.1.4 Wall Mounting Note. For PSH01V-JPSH02V models, please skip steps 1 to 4. Figure 8 – General assembly diagram for JPSH01-JPSH05 (wall mounting) 1. Install the brackets on the back of the heater by threading connections on the body through the special holes in the legs. -
Page 19: Figure 9 - Horizontal Mounting With 2 Or 4 Screws
3. Install a washer on each of the threaded joints over the previously installed brackets. 4. Install the nuts on the threaded connections and use the wrench provided to tighten them. 5. Choose the orientation of the heater on the wall (horizontally or vertically). 6. -
Page 20: Hardwiring Option
Figure 10 – Vertical mounting with 4 screws 8. Check that the device is securely fixed with all points of connection. 2.1.5 Hardwiring Option If you decide to mount the heater into the wall in such a way as to hide its power cable or to embed the device in the wall, then you should understand and agree to the following: •... -
Page 21: Initial Switching On
2.2 Initial Switching On To switch on the Eco Smart Heater, plug it into an mains socket using the power cord and press the power button (See table 1). Note that by default, the Eco Smart Heater will be in the mode ready for activation in the mobile app for 3 minutes after it is first switched on. -
Page 22: Activation Process
• Logging in to an existing account: o Enter your e-mail address and password in the login screen; Click on the LOG IN button. Note that if the password is lost, the User can restore it by clicking on a corresponding link on the screen. -
Page 23: Additional Settings
After successful connection of the device, the User may specify the following: a. Image; b. Device name; c. Room. When the settings are complete, press the DONE button. Note. All the specified data can be entered or changed later in the Smart Heater settings. -
Page 24: Control Panel
2.4.4 Control Panel The Eco Smart Heater control panel is displayed when you click on its image in the list of connected devices in the “Devices” tab. In this control panel, the User may perform the following actions: • Turn on and off the device remotely; •... -
Page 25: Viewing Energy Statistics
2. From the “Devices” tab: a. Click on the three-dot icon next to the Eco Smart Heater name; b. In the popup window, move the climate control slider to the right or to the left to activate or deactivate the mode, respectively; c. -
Page 26: Setting Scheduled Timers
Then select the period of time after which the device will be turned on or off. Press “Done”. The timer will be created but not started. To start the timer, click on the icon 2.4.8 Setting Scheduled Timers Scheduled timers are used to automatically turn on and/or off the Eco Smart Heater at a specified time on specified days of the week. - Page 27 Activate and select the time to turn off the Eco Smart Heater, if necessary. Note. The switch-off time activation is optional. Select days of the week when the Eco Smart Heater shall be turned on. If required, activate the climate control mode, and select a maintained temperature. Click on the “Save”...
- Page 28 Select the time to turn off the Eco Smart Heater. Activate and select the time to turn on the Eco Smart Heater, if necessary. Note. The switch-on time activation is optional. Select the days of the week on which the Eco Smart Heater shall operate on a timer. If required, activate the climate control mode, and select a maintained temperature.
-
Page 29: Event History
Activate the timer in the “Scheduled timer” tab by moving the slider to the right/left. The User may make changes to the created timer by clicking on it in the “Scheduled timer” tab. Note. If the User shall try to change settings of an activated timer, it will be automatically disabled. A maximum of fifteen (15) weekly timers can be activated at a time. -
Page 30: Subscriptions
2.4.10 Subscriptions Subscriptions allow the User to increase the storage period of the following information and data in the cloud: • Videos and images; • History of events; • Statistics. By default, all users of the Perenio Smart Home & Office Mobile App are subscribed to a free plan with a limited storage period. -
Page 31: Changing The Room Or Location For The Eco Smart Heater
Table 4 – Available subscriptions Storage Perenio Basic Perenio Pro Perenio Extra Video 24 hours 14 days 30 days History Last 7 days Last 180 days Last 365 days Statistics Last 7 days Last 180 days Last 365 days 2.4.11 Changing the Room or Location for the Eco Smart Heater When using the Eco Smart Heater, it may be necessary to change its installation area. -
Page 32: Remote Control Via Voice Assistants
4 Warranty obligations The warranty period for the Joule Eco Smart Heater shall be two (2) years from the date of sale to the End User, while the service life shall be two (2) years. The Warranty Card shall be deemed valid provided that it is correctly and completely filled in by the Seller. Upon the purchase, the Customer shall check that both the Serial Number and the Model name of the device correspond to those indicated in the Warranty Card. - Page 33 Seller, as well as the date when this device was sold. LIMITATION OF LIABILITY Joule devices SHALL NOT BE SUBJECT TO a free warranty service in the case of identification of at least one of the following damages or defects: •...
-
Page 34: Storage, Transportation And Disposal
THE PRESENT LIMITED WARRANTY IS AN EXCLUSIVE AND THE ONLY PROVIDED GUARANTEE THAT SHALL REPLACE ANY OTHER EXPRESS AND IMPLIED GUARANTEES. THE MANUFACTURER SHALL PROVIDE NO GUARANTEES, WHETHER EXPRESS OR IMPLIED, BEYOND THE DESCRIPTION CONTAINED IN THE PRESENT DOCUMENT, INCLUDING THE IMPLIED WARRANTY OF MERCHANTABILITY AND FITNESS FOR A PARTICULAR PURPOSE. -
Page 35: Other Information
Declaration of Conformity of the EAEU as of 22.09.2020 Declaration of Conformity STB as of 03.11.2020 Addresses of service centers can be found at joule.kz, joule.by or joule-eco.ru under "Support" for more information. * Waste Electrical and Electronic Equipment, or WEEE, means used electrical or electronic equipment, including all components, assemblies, consumables that are part of the equipment at the time it is taken out of service (including supplied batteries (if any), components containing mercury, etc.). -
Page 36: Troubleshooting
7 Troubleshooting The table below shows typical errors and problems encountered when wiring and setting up the heater. Table 5 – Typical errors and solutions Problem Possible causes Solution The heater does not turn on The electric outlet is de- Check the mains voltage or energized or defective;...
Need help?
Do you have a question about the JPSH01 and is the answer not in the manual?
Questions and answers