Table of Contents
Advertisement
Advertisement
Table of Contents

Related Manuals for Nikon CoolPix 995


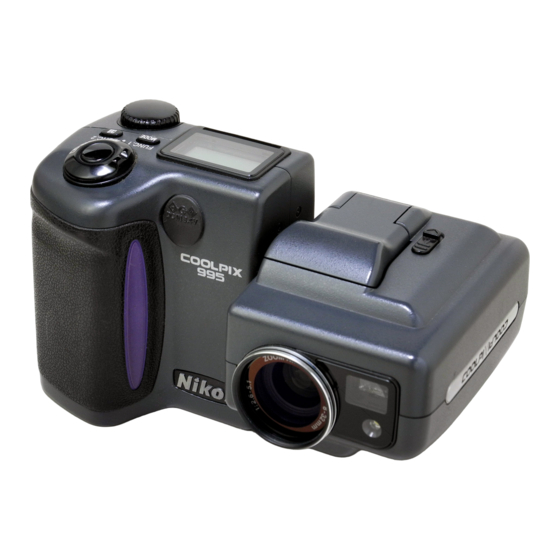
Summary of Contents for Nikon CoolPix 995
- Page 1 The Nikon Guide to Digital Photography with the DIGITAL CAMERA...
-
Page 2: Before Using The Camera
AC adapter (available separately), unplug the AC adapter and remove the battery immediately, taking care to avoid burns. Continued operation could result in injury. After removing the battery, take the equipment to a Nikon- authorized service center for inspection. - Page 3 • Make sure the product is off before replacing the battery. If you are using the AC adapter, Make sure it is unplugged. • Use only the supplied rechargeable Nikon EN-EL1 lithium-ion battery or a 6V 2CR5 (DL245) lithium battery (available separately).
-
Page 4: Notice For Customers In Canada
CAUTIONS Modifications The FCC requires the user to be notified that any changes or modifications made to this device that are not expressly approved by Nikon Corporation may void the user’s authority to operate the equipment. Interface Cables Use the interface cables sold or provided by Nikon for your equipment. - Page 5 The address of Nikon’s representative in your area is provided separately. Disclaimer of Liability • Nikon does not accept liability for damages resulting from the use of this product. A Note on Memory Cards Your digital camera uses CompactFlash flash-memory cards to store photographs.
-
Page 6: Quick Guide
Take trial shots before shooting at important occasions like weddings or graduations. Have Nikon check your camera regularly Nikon recommends that you have your camera serviced by an authorized dealer or service center at least once every two years. Using your camera correctly The Nikon COOLPIX995’s performance has been optimized for use with Nikon... -
Page 7: Table Of Contents
Contents Before Using the Camera ...2-27 For Your Safety ...3-9 Introduction...10 About This Manual ...11 Nomenclature ...14-17 Quick Guide...18-21 Menu Guide: Shooting Mode ...22-23 Menu Guide: Shooting Mode...24-25 Menu Guide: ˘ Playback Mode ...26-27 Preparation...29-40 Installing Battery ...30-31 Selecting a Language ...32-33 Setting Date/Time...34-35 Inserting CF Memory Card...36-37 Formatting CF Memory Cards...38-39... -
Page 8: Nomenclature
Nomenclature 22 23 1 Viewfinder p. 16 2 Red-eye reduction/Self-timer lamp p. 70/53 3 Lens 4 MONITOR button p. 46 5 QUICK review button p. 51 6 MENU button p. 92 7 Control panel p. 16 8 Mode dial p. 44 9 Shutter release button p. - Page 9 8 Auto transfer p. 146 9 Print-order selection p. 144 10 Protect on p. 142 11 Frame number of displayed image p. 74 *3 Not displayed when folder name is set to NIKON. *4 Not displayed when battery power is sufficient. p. 31...
-
Page 10: Quick Guide
Quick Guide This section will rapidly guide you through the first steps, from setting up the camera to taking your first picture. For fully detailed descriptions of each operation, please see the page referred as “(p. 00)”. Set the Mode dial to and insert the battery (p. - Page 11 Quick Guide —continued Press the Shutter release button lightly to focus on the subject by using autofocus. (p. 48). In-focus Green LED lights. • The Green LED lights when the subject is in focus and flashes rapidly when the camera cannot autofocus. Use the built-in Speedlight if there is insufficient light to illuminate the subject (p.
-
Page 12: Menu Guide: Shooting Mode
Menu Guide: Shooting Mode Shooting Menu 1 Press MENU button to select. WHITE BALANCE A Auto Select white balance in accor- White Bal Preset dance with lighting conditions (p. 95) Fine Incandescent METERING Matrix Select metering mode (p. 97) Spot Center-Weighted Spot AF Area CONTINUOUS... -
Page 13: Shooting Mode
Press MENU button and Multi selector to select. FOLDERS Options Create new folders, rename or delete existing folders, choose folder for recording (p. 122) NIKON (Folder name) MONITOR OPTIONS Display Mode Adjust monitor brightness and hue (p. 125) Brightness CONTROLS Memorize Set camera to “remember”... -
Page 14: Playback Mode
(p. 138) FOLDERS Options Create new folders, rename or All Folders delete existing folders; choose folder for recording (p. 140) NIKON (Folder name) SLIDE SHOW Start slide show of images Start contained in single folder; set frame interval from 2s/3s/5s/ Frame Intvl 10s (p. -
Page 15: Preparation
6. CompactFlash™ (CF) Memory Card 7. USB Cable for connection to computer. 8. Lens cap 9. Nikon View 4 CD-ROM (contains Nikon View 4 and bundled software) 10. Instruction manual for COOLPIX995 11. CD-ROM instruction manual for Nikon View 4 12. -
Page 16: Installing Battery
Installing Battery The camera requires either the supplied Li-ion Rechargeable Battery or a 2CR5 (DL245) 6V lithium battery (available separately). Make sure to check the battery power when a new battery is installed or before shooting. Turn the Mode dial (p. 44) to and open the battery chamber cover. -
Page 17: Selecting A Language
Selecting a Language The language in which menus and messages are displayed can be selected using the Language sub-menu. Turn the Mode dial to ˘. • The Language can also be set using the SET-UP menu in the mode. Press the MENU button so the Playback menu is displayed. •... -
Page 18: Setting Date/Time
Setting Date/Time The date and time for your country or location should be set before use. Set the Mode dial to and press the MENU button to display the SET-UP menu. Select “Date” in the SET-UP menu. • Press ≤/≥ on the Multi selector (p. 44) to highlight Date and press > to display date/time setting. -
Page 19: Inserting Cf Memory Card
The COOLPIX995 uses a CompactFlash™ (CF) memory card to store images and movies. Use a Nikon CF memory cards or other recommended memory card. See p. 163 and the instruction manual of the CF memory card for notes on using the card. -
Page 20: Formatting Cf Memory Cards
Formatting CF Memory Cards CF memory cards must be formatted before being used with the COOLPIX995. Note that the CF memory card supplied with your camera has already been formatted. Note: Formatting CF memory cards Note that when a CF memory card is formatted, the entire contents of the card are permanently deleted. -
Page 21: Strap And Lens Cap
Strap and Lens Cap Attaching strap M-FO CUS SIZE Useful Advice on COOLPIX Camera • Attach the strap as illustrated. Lens cap Techniques M-F OC IS O SI ZE • Press the latch on the lens cap to attach/detach it. •... -
Page 22: Holding The Camera
Holding the Camera To reduce blurring caused by camera shake, hold the camera steadily in both hands and press the Shutter release button slowly and gently. Photographs can be framed in the Monitor or the Viewfinder. Check point The lens section of this camera rotates so the subject can be seen easily on the Monitor and/or Viewfinder. -
Page 23: Mode Dial And Multi Selector
Mode Dial and Multi Selector Mode Dial Use the Mode dial to select the Shooting mode mode ˘. : Shooting mode There are two modes for taking pictures: • In “ ” (Auto mode), the camera controls the exposure and other settings for simple, easy operation. -
Page 24: Basic Operation (Auto Mode)
Basic Operation (Auto Mode) Set the camera to Auto Mode (Set the Mode dial to • The camera beeps once when the power is turned on and standby operation starts. After a short pause, the camera is ready and the Viewfinder image is displayed on the Monitor. - Page 25 Basic Operation (Auto Mode) Lightly press the Shutter release button and confirm the focus. In-focus Green LED lights. Bright subject Confirm LED No LED indication Note: Continuous AF When the Monitor is on, the camera continues to attempt to focus (Continuous AF, p.
- Page 26 Basic Operation (Auto Mode) Built-in Speedlight Use the built-in Speedlight if there is insufficient light to illuminate the subject. This condition is indicated by the Red LED flashing rapidly when the Shutter release button is half-pressed. To use the Speedlight Å...
-
Page 27: Self-Timer Operation
Basic Operation (Auto Mode) Press the Delete button in Full-screen review mode and select “Yes” with the Multi selector to delete a single image. • Using the Multi selector choose the image to be deleted. Pressing the Delete button displays a confirmation dialog. Select Yes with the Multi selector. Pressing >... -
Page 28: Simple Playback Operations
Simple Playback Operations Set the Mode dial to ˘ to set the camera to Playback mode. In Playback mode, recorded images are visible on the Monitor. Multiple reduced size images can be viewed at once (Thumbnail Playback) or reviewed for deletion. Full-Frame Playback (See p. -
Page 29: Other Functions
You can connect your camera directly to your computer via the supplied UC-E1 Universal Serial Bus (USB) cable. Nikon View 4 allows you to transfer, enlarge, save or print out images that have been downloaded to your computer. -
Page 30: Setting Image Quality And Size
Setting Image Quality and Size In both mode, one of the most important options for your pictures is the combination of Image quality setting (image compression ratio) and Image size setting that you select. There are four available Image quality settings and six Image size settings. Image Quality To reduce memory requirements, images are compressed using JPEG compression. -
Page 31: How Much Space Is Left On My Cf Memory Card-Confirming The Number Of Exposures Remaining
How Much Space is Left on my CF Memory Card— Confirming the Number of Exposures Remaining The total number of images that can be saved on a CF memory card depends on the amount of space left in the CF memory card being used, and on the selected Image quality and size. -
Page 32: Selecting Focus Mode
Selecting Focus Mode —continued Check points • The Autofocus mode is selected when the power is turned on. • Selecting the Self-timer enables Macro Close-up mode and displayed. Autofocus Options There are several advanced options that may be employed when setting up the Autofocus. -
Page 33: Setting The Exposure Mode
Setting the Exposure mode To create a variety of photographic treatments, various Exposure modes can be selected to achieve a desired effect. Four Exposure modes can be selected in Shooting mode. Rotate the Command dial while pressing the MODE button so the desired Exposure mode is displayed. - Page 34 Setting the Exposure mode —continued : Shutter-Priority Auto Enables you to manually set the desired shutter speed (8-1/2000 sec.) in 1 EV steps; the camera automatically selects the proper aperture to provide correct exposure. • Turning the Command dial after setting Shutter-Priority Auto Exposure mode changes the shutter speed as follows: Note: Control range of the camera When the subject is too dark or too bright (beyond the control range of the...
-
Page 35: Setting The Flash Mode
Setting the Exposure mode —continued Check point If the shutter speed is displayed in red when 1/2000 sec. shutter speed is selected, stop-down aperture while confirming exposure on the Exposure meter in the Monitor. Exposure status Control panel Correct exposure 1 EV under 2 EV over Long time (BULB) exposure (up to 60 sec.) -
Page 36: Setting The Exposure Compensation Value
Setting the Flash Mode —continued Setting Indication Characteristics Speedlight automatically fires when the subject is dark and the built-in Speedlight is released. Speedlight does ⁄ AUTO flash not fire if the subject is adequately illuminated even when the built-in Speedlight is released. ¤⁄... -
Page 37: Adjusting Sensitivity
Adjusting Sensitivity Sensitivity increases the use that the camera makes of available light, allowing faster shutter speeds to be employed. However as sensitivity is increased, the picture may become noisy. Standard sensitivity is equivalent to film ISO 100. The camera will automatically increase sensitivity in low levels of ambient lighting if set to AUTO. -
Page 38: Playback
Playback Playback Playback mode is used for reviewing pictures that are saved on the CF memory card, starting with the most recent first. Set the Mode dial to ˘. • After a short pause, the most recent photograph is displayed in full-frame with information such as the folder name, file name (number and type), date and time of recording, Image size, Image quality mode and frame number. -
Page 39: Deleting Photographs
Playback —continued Thumbnail Playback Up to nine Thumbnail images can be displayed on the Monitor. The Thumbnail images can be viewed a page at a time and it is possible at any time to select one Thumbnail for Full-frame playback or deleting. Set the Mode dial to ˘. -
Page 40: Advanced Operations
Deleting photographs —continued Deleting Individual Photographs in Thumbnail Playback Highlight the image to be deleted using the Multi selector. The selected image is marked with a yellow highlight. To delete the currently selected Thumbnail, press the D button. Press ≤/≥ on the Multi selector to highlight “Yes”, then press >. •... -
Page 41: Autofocus Lock/Auto Exposure Lock
Autofocus Lock/Auto Exposure Lock If the subject is outside of the Autofocus area, a feature called Autofocus lock can be used to maintain focus on the subject. Autofocus is locked by half pressing the shutter with the subject in the focus target area. -
Page 42: Situations Where Autofocus May Not Work As Expected
Situations Where Autofocus May not Work as Expected Autofocus does not perform well under the conditions listed below. You can Autofocus as detailed below. 1. No subject detail for Autofocus system. • Very dark subjects. • Scenes with a pronounced difference in brightness (such as a subject in the shade with the sun in the background). -
Page 43: Recording Movie/Movie Playback
Recording Movie/Movie Playback Operation in Movie Playback mode When the first frame is displayed as a still image After completing the playback, the final frame is Start movie displayed for one second, and then returns to the still image of the first frame. While movie is in progress The movie stops and a still image of the frame Pause movie... -
Page 44: Quick Review Mode/Full-Screen Review Mode
Quick Review Mode/Full-Screen Review Mode Quick review mode/Full-screen review mode is set by pressing the QUICK review button in Shooting mode These two review modes enable you to quickly review and confirm the image without having to turn the Mode dial from •... -
Page 45: Viewing Additional Picture Information
5. Focus confirmation display • The contents of the image information displayed are as follows. 1. Basic display screen Display 100 Nikon Folder name 0025.JPG File number (the last 4 numbers and file type) Battery indication (displayed only when battery... -
Page 46: Sync Terminal
Remove the Sync terminal cover and connect the camera plug of the multiple flash adapter. • The following Nikon optional Speedlights can be used: SB-28DX, SB-28, SB- 26, SB-25, SB-24, SB-22s and SB-22. Please contact an authorized Nikon dealer or service center about using other Nikon Speedlights. -
Page 47: Setting Shooting Menus
Setting Shooting Menus Shooting mode, the Shooting menu provides access to a range of camera setting adjustments, such as the White balance, Saturation control and Noise reduction. The Shooting menu contains two pages of advanced shooting options: SHOOTING MENU 1 A WHITE BALANCE METERING CONTINUOUS... - Page 48 Setting Shooting Menus —continued Check points: Moving from page to page • In the Shooting mode, two menu pages follow each other so that when you reach the end of page 1,page 2 then appears. The number tab for the active page is highlighted in white.
-
Page 49: Preset White Balance
Setting Shooting Menus —continued — Preset White Balance — In certain lighting, you may find that you can obtain a more accurate color balance by measuring the color temperature of the light manually. The Preset White Balance function allows you to photograph a neutral object (usually a piece of gray card) from which the camera calculates the color temperature. - Page 50 Setting Shooting Menus —continued Metering system Characteristic Spot AF Area Metering can be selected when the autofocus mode in FOCUS OPTIONS > AF Area Mode (p. 111) in Shooting Mode is set to Auto or Manual. Auto: Automatically shifts the Spot Metering area to one of five focus areas.
- Page 51 Setting Shooting Menus —continued * The shooting speed varies with the memory available in the camera. • Once shooting has commenced, the Autofocus mode, exposure value and white balance settings in the Continuous, Multi-shot 16, VGA Sequence and Ultra HS modes are fixed at their initial values Note: CF memory card After shooting a sequence, do not remove the CF memory card from the camera until all the pictures have been saved.
- Page 52 Setting Shooting Menus —continued BEST SHOT SELECTOR The Best Shot Selector function is most effective in situations where inadvertent camera movement may affect the outcome of the photograph, such as the following: • The camera is zoomed in or you are using an optional teleconverter lens attachment.
- Page 53 Setting Shooting Menus —continued IMAGE ADJUSTMENT When you take a photograph, the camera automatically compensates for optical brightness and contrast before recording the photograph on the CF memory card. The Image Adjustment menu gives you control over this image compensation. Auto Image is adjusted automatically.
- Page 54 Enabled after setting quality varies significantly depending on the type or manufacturer of the film being used. To obtain high-quality images, use of a film scanner such as the Enabled after setting Nikon COOLSCAN is recommended. Enabled after setting Disabled Disabled Notes: Lens setting •...
- Page 55 Setting Shooting Menus —continued USER SETTING The camera can “memorize” up to three combinations of settings, including White Balance, Metering, Continuous, Best Shot Selector, Image Adjustment, Saturation Control, Lens and Image Sharpening. These settings can be recalled as desired, allowing you to create separate combinations of settings for different shooting conditions and then recall them later at a touch.
- Page 56 Setting Shooting Menus —continued — Exposure Compensation — Exposure metering can be offset to allow manual compensation for more creative control of your pictures. Twelve settings are available for Exposure Compensation, from –2EV to +2EV in 1/3-EV steps. • The Exposure Compensation indication ≠ is displayed on the Control panel and both ≠...
-
Page 57: Autofocus Mode
Setting Shooting Menus —continued — Auto-Focus Mode — The camera Auto-Focus can operate in two modes: Continuous AF and Single AF. As long as the monitor is turned on, Autofocus is enabled continuously regardless of whether the shutter is being pressed or not. The Focus is Continuous AF locked when the Shutter release button is pressed lightly. - Page 58 Setting Shooting Menus —continued IMAGE SHARPENING The camera can emphasize the details and borders of objects, making the picture appear sharper and bolder. Auto The camera automatically sets the sharpness. High Sets the Sharpness to high. Normal Sets the Standard sharpness. Sets the Sharpness to low.
- Page 59 Setting Shooting Menus —continued Check point To perform Auto Bracketing or White Balance Bracketing in Continuous or VGA Sequence mode (p. 99), hold down the Shutter release button fully. A selected number of consecutive shots are taken (up to three shots with FULL, 3 : 2 and Fine mode), after which the sequence stops automatically.
- Page 60 Exposure Compensation 0 Exposure Mode Not cleared *1 Fine-tuned values are also reset. *2 Only the settings in the selected User Setting number is reset. Shooting SET-UP items Folders NIKON info. txt Monitor Options: Auto Off Display Mode Seq. Numbers Brightness...
-
Page 61: Setting Shooting Set-Up Menus
Setting Shooting SET-UP Menus The SET-UP menu allows you to select various settings for basic camera setup before shooting, such as Monitor, Zoom and Speedlight options, etc. Displaying the SET-UP Menu mode Set the Mode dial to and press the MENU button to display the SET-UP menu on the Monitor. - Page 62 Shooting Mode Press the MENU button to complete the setting. [Rename] Use this option to rename folder (other than the NIKON folder). Select the “Rename” option and press > on the Multi selector to display the folder list. Press ≤/≥ to select the folder to be renamed and press > to display the name.
- Page 63 Setting Shooting SET-UP Menus —continued [Delete] This option enables you to delete folders (other than the NIKON folder). Select “Delete” in Options and press > on the Multi selector to display the folder list. Press ≤/≥ to select the folder to be deleted and press > to display the confirmation dialog box.
- Page 64 Setting Shooting SET-UP Menus —continued — Hue — The hue (overall color) of the Monitor can be finely adjusted to any of eleven levels. Press≤ or ≥ to alter the hue by moving the arrow at the right side of the display up (reddish) or down (bluish). Once you have adjusted hue to your satisfaction, press >...
- Page 65 Image file numbers and folder numbers Four-digit numbers are assigned to image files recorded with the Nikon COOLPIX995, and file names from DSCN0001.JPG to DSCN9999.JPG are assigned to the files. Three-digit numbers are assigned to the folders in which these image files are to be saved.
- Page 66 Setting Shooting SET-UP Menus —continued Shooting SET-UP Items (only in mode) Controls You can use the Controls setting to specify whether individual functions are retained in the camera or cleared from the camera’s memory when you turn the camera off. Various alternative functions can be selected and assigned to the FUNC.
- Page 67 Setting Shooting SET-UP Menus —continued Zoom Options You can use the Zoom Options to determine various functions that relate to the initial set up of the lens and the aperture variations relative to the Zoom position. Digital Tele Sets the Digital zoom setting. Startup Position Sets the initial Zoom position.
- Page 68 Setting Shooting SET-UP Menus —continued Note: Activating an optional Speedlight When you are using an optional Speedlight, be sure to raise the built-in Speedlight to ensure that the flash sync sensor is available. — Shot Confirm Lamp — With the Shot Confirm Lamp setting On, the Red-eye reduction/Self- timer lamp next to lens lights each time a single picture is taken as a shot confirmation lamp.
-
Page 69: Playback Menus
(Folders), show the pictures in a sequence as a slide show (Slide Show) and prepare photographs for printing (Print Set). The Nikon View 4 software (which allows you to copy images from your camera or CompactFlash™ card to a computer) can be set to transfer an image based on Protect or Auto Transfer being either set or not. -
Page 70: Playback Menu
Playback Menus —continued Playback Menu Delete Saved photographs, the settings of Auto Transfer and Print-order files can be deleted. With the Delete option in the Playback menu, it is possible to delete either selected photographs from the thumbnail pages or alternatively all the photographs on the CF memory card (except Hidden and Protected). - Page 71 NIKON folder. • For Folders Options, see page 122. • Select a folder to be played back from All Folders, NIKON or from a newly created folder. • The All Folders option enables you to view images in all folders without having to select individual folders.
- Page 72 Playback Menus —continued Protect The Protect option can be used to prevent recorded images in the CF memory card from being deleted. — Protecting selected images — Press </> on the Multi selector to highlight a desired Thumbnail. Press ≤/≥ to select an image to be protected. •...
-
Page 73: Playback Set-Up Menus
Playback SET-UP Menus —continued Print Set The Digital Print Order Format (DPOF) allows images to be marked for printing at a Lab, Print Shop or on a desktop Printer that can read the DPOF information. As well as the instruction to print the image, the DPOF system also allows the number of prints to be specified and whether or not the image date and/or other information should appear. - Page 74 Playback Menus —continued Auto Transfer The Auto Transfer setting controls whether or not the Nikon View 4 software will automatically copy selected images to a computer when the camera is connected by the USB cable. Selected Photos All Photos — Setting Auto Transfer —...
- Page 75 Playback SET-UP Menus In the Playback SET-UP menu, you can make changes to basic camera settings and perform tasks such as formatting memory cards. Displaying the Playback SET-UP Menu In Playback ˘ mode, press the MENU button to display the Playback menu and press <...
- Page 76 Playback SET-UP Menus —continued Playback SET-UP Menu items Monitor Options The hue (overall color) and brightness of the Monitor can be adjusted to improve visibility. Brightness Adjusts Monitor brightness Adjusts overall Monitor color • For setting Monitor Options, see Monitor Options in Shooting SET-UP on p. 125. Shutter Sound The camera has a small speaker to provide a “confidence”...
-
Page 77: Connections
Playback SET-UP Menus —continued Language The camera menus and messages can be viewed in one of a number of languages. German English French Japanese Spanish • For information on Selecting a Language, see p. 32. Playback Mode ˘ This chapter provides information on connecting your camera to an AC adapter (available separately), to a computer, and to a television or videocassette recorder (VCR). -
Page 78: Connecting To An Ac Adapter (Optional)
• When connecting or removing the AC adapter plug, make sure that the Mode dial is set to • Use only the Nikon Accessory EH-21 AC adapter/battery charger. • The camera and the AC adapter may become warm when plugged in for a long time. -
Page 79: Connecting To A Computer
PC card slot or CompactFlash™ card reader, where it will function as an additional disk. • By using the Nikon View 4 software provided, images stored in the memory card or camera can be conveniently checked and selected for copying to your computer. - Page 80 A simple, optional inexpensive adapter (EC-AD1) is available from Nikon, and this takes a Type I CF card and allows it to fit into a PC card slot. If you are using Type II CF cards, make sure that your adapter is compatible.
-
Page 81: Miscellaneous
USB. However, Nikon View 4 can copy this information into a special part of the image file called the IPTC text. This information can be read in certain applications such as Fotostation and Photoshop (Full versions). -
Page 82: Optional Accessories
Multi-Flash Bracket Unit SK-E900/TTL Multi-Flash Adapter AS-E900 This bracket unit is used to attach an optional Nikon Speedlight to the COOLPIX995 for multiple-flash photography. The amount of light from the built-in and external Speedlights is controlled by the sensor in the COOLPIX995, making multiple-flash photography simple and reliable. -
Page 83: Operating Conditions
Optional Accessories /Operating Conditions —continued Notes: Using CF memory cards—continued • Do not attempt to touch the terminals or contacts with your hand or a metal object. • Do not stress or bend the CF memory card. • Most CF memory cards, being slight and durable, are immune to physical shock. -
Page 84: Troubleshooting
Troubleshooting If the COOLPIX995 is not operating properly, check the following items. If the problem persists, contact the retailer where you bought this camera or an authorized Nikon dealer or service center. Problem Check points Power does not turn on. -
Page 85: Error Messages
• Check that the card is compatible with the COOLPIX995. • CF memory card may be physically damaged. Check that there is no dirt or foreign matter in the connector. Contact authorized Nikon dealer or service center. • Folder may contain photos taken with camera other than COOLPIX995, or image file edited with software. - Page 86 • Reformat the card for COOLPIX995. • Cancel image's hidden setting with Hide Image menu on Playback menu. • Photo has been taken with camera other than COOLPIX 995, 990, 950, 880, 800, 700, 900s and 900, or contains image file edited with software.
-
Page 87: Specifications
Sync method: automatic sync control Flash mode: 4 modes; Auto Flash, Anytime Flash, Slow Sync, Red-Eye Reduction Sync terminal connects to external Nikon Speedlight SB-28/28DX/26/25/24/22/22s through the Multi-Flash Bracket Unit SK-E900 (up to 5 flash units when using AS-10 and SC-18/19) Automatically turns off after 30 seconds (or a duration selected from 0.5/1/5/30 min.) after last camera operation... - Page 88 Supplied accessories Li-ion Rechargeable Battery EN-EL1, Battery Charger, USB Cable, Video cable, CompactFlash™ (CF) Memory Card, Strap, Lens cap, Instruction manual, Nikon View 4 CD-ROM (contains Nikon View 4 and bundled software), CD-ROM instruction manual for Nikon View 4, “Open Me First!”...
-
Page 89: Index
Index 3 : 2 size ...P. 59, 60 Shooting mode ...P. 44, 45 Shooting mode ...P. 44 ˘ Playback mode ...P. 44 AF/AE Lock ...P. 80 Anytime Flash ...P. 70 Aperture-Priority Exposure mode...P. 66, 110 Auto (White Balance) ...P. 95 Auto Bracketing...P. - Page 90 Index —continued Language...p. 32, 135, 152 Lens converter...P. 106 Long time exposure...P. 68 Macro Close-up mode...P. 61 Manual Exposure mode...P. 67, 110 Manual Focus ...P. 81 Matrix Metering...P. 97 Metering method ...P. 97 Multi-shot 16 ...P. 99 Monitor button...P. 16, 46 Monitor Options...P.
- Page 91 No reproduction in any form of this manual, in whole or in part (except for brief quotation in critical articles or reviews), may be made without written authorisation from NIKON CORPORATION. NIKON CORPORATION FUJI BLDG., 2-3, MARUNOUCHI 3-CHOME, CHIYODA-KU, TOKYO 100-8331, JAPAN...
Need help?
Do you have a question about the CoolPix 995 and is the answer not in the manual?
Questions and answers