Table of Contents
Advertisement
Quick Links
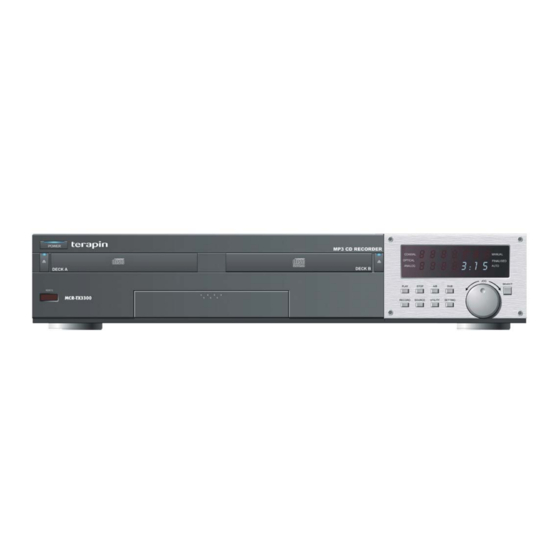
MP3 Audio CD Recorder
& Data CD Duplicator
Product Manual
MCR-TX3300
Before operating, please read all the instructions thoroughly.
Version 1.12
150 songs in just one cd...
Copyright Notice
All rights reserved. No part of these written materials or software may be reproduced or used in any form or by any means, electronic or mechanical,
including photocopying and recording and the use of any kind of information storage and retrieval system, without prior permission in writing from Serial
System Ltd. No liability is assumed with respect to written materials or software, or for damages resulting from the use of the information contained in
these written materials or of the software. Serial System Ltd reserves the right to alter the features and contents of this publication or software without
obligation or advanced notice.
Advertisement
Table of Contents

Related Manuals for Terapin MCR-TX3300

Summary of Contents for Terapin MCR-TX3300
- Page 1 MP3 Audio CD Recorder & Data CD Duplicator Product Manual MCR-TX3300 Before operating, please read all the instructions thoroughly. Version 1.12 150 songs in just one cd... Copyright Notice All rights reserved. No part of these written materials or software may be reproduced or used in any form or by any means, electronic or mechanical, including photocopying and recording and the use of any kind of information storage and retrieval system, without prior permission in writing from Serial System Ltd.
-
Page 2: Table Of Contents
If you are uncertain about your rights, Erasing an Audio CDRW ........58 contact your legal advisor. Under no circumstances will Erasing a MP3 CDR or CDRW ......59 Terapin Technology be responsible for the consequences of any illegal copying performed using the TX3300. -
Page 3: Safety Information
_ _ _ _ _ _ _ _ _ _ _ _ _ _ _ _ _ _ _ _ _ _ _ _ _ _ _ _ _ _ _ _ _ _ _ _ _ _ _ _ _ _ _ _ _ _ _ _ _ _ _ _ _ _ _ _ _ Attachments - Do not use attachments that are not recommended by Terapin as they may cause hazards. -
Page 4: Different Types Of Discs
About CD Recording The TX3300 plays all standard Audio CDs. For Rewritable Digital Audio and Consumer discs recording, the TX3300 requires special CDR/CDRW designed only for audio use. CDR/CDRWs designed for computer use will not record in Audio format in the TX3300. -
Page 5: Front Panel
Names & Functions Front Panel POWER Standby button 13 SOURCE button Press to switch the player on or to put it on standby. Press to select the recording source from Analog input, Optical input or Coaxial input. Applicable only Open/Close button for DECK A for recording from an external source. -
Page 6: Display Window
Display Window Display Window Message Display Audio Level Indicator This panel will display information about the current This indicates the volume of the current track. The operation. higher the number of dots, the higher the volume. MANUAL Indicator ANALOG Indicator When the MANUAL indicator is on, this will indicate This indicates that the source of the recording is that during recording, increasing of tracks is done... -
Page 7: Back Panel
Back Panel Back Panel AC Power In port Digital Coaxial Out jack Connect the power cord from the wall outlet to this This jack is for connecting to a stereo Hi-Fi system port. or amplifier for high-fidelity audio playback. Analog Audio In jack (Stereo) Ethernet jack This connection is for input from a two-channel This jack is for connection to a Local Area Network,... -
Page 8: Remote Control
Remote Control Remote Control Numeric Keys* Press to access a specific track for playback or to select a specific track during programming. In MP3 recording mode, press to access the text edit function. FORMAT Press to select either Audio CD or MP3 format. Applicable only for blank CDs in Deck B. - Page 9 Remote Control 15 MUTE* 29 ERASE Press to mute the audio. To undo the mute function, Press to erase the last track or the last album on a press this button again. recorded CD. You can also choose to erase the whole album or the whole disc.
-
Page 10: Connecting The Tx3300
Connecting the TX3300 The TX3300 is able to support several connections. Examples of external devices includes DVD, CD, Your choice will depend on your needs and the VCD and LD players, Radio and Hi-Fi Stereo systems, availability of ports on your particular external device. among others. -
Page 11: Digital Coaxial Connections
Digital Coaxial Connections Digital Coaxial Connections Digital Coaxial Playback For digital coaxial playback of Audio or MP3 CDs from Deck A and Deck B, connect the Coaxial Out of the TX3300 to the Digital In of your amplifier or stereo systems as shown in the diagram on the right. TX3300 Note: Digital Coaxial connections use the same type of RCA... -
Page 12: Digital Optical Connection
Digital Optical Connection USB Connection Digital Optical Connection Digital Optical Recording To record from an external device using an optical connection, connect the Optical In of the TX3300 to the Optical Out of your external device as shown in the diagram on the right. TX3300 Note: There are different types of optical connections that are... -
Page 13: Serial Port Connection
Serial Port Connection Serial Port Connection Serial Port Connection This connection is meant to be used only for upgrading the TX3300 or for recovery purposes. TX3300 For this connection, attach a Serial Cable to the Serial Port of the TX3300 and attach the other end to the COM Port of your PC or laptop. -
Page 14: Basic Operations
Basic Operations Inserting Discs If the disc is an Audio CD, the display window will show the total number of tracks and the total time of Connect the power cord and power-on the TX3300 all the tracks on the disc. If there are more than 20 by pressing the Power button. - Page 15 Basic Operations Please note that only Deck B will be able to Quick Reference recognize blank discs. Blank discs inserted in Deck A will result in a ‘NO DISC’ message. _ _ _ _ _ _ _ _ _ _ _ _ _ _ _ _ _ _ _ _ _ _ _ _ _ _ _ _ _ _ _ _ _ _ _ _ _ _ _ _ _ _ _ _ _ _ _ _ _ _ _ _ _ _ _ _ _ If the disc is a computer CD-ROM.
-
Page 16: Audio Cd Playback
Playback Functions The TX3300 is able to playback both Audio CDs To resume playback, press Play or the Pause and MP3 CDs. Only one deck can be active at any one button again. time, and the active deck is indicated by an amber light at the top of the Open/Close button of the active deck on the TX3300. - Page 17 Audio CD Playback To show the total playing time remaining of the Quick Reference current disc, press Display thrice. To revert to the default display, press Display again. _ _ _ _ _ _ _ _ _ _ _ _ _ _ _ _ _ _ _ _ _ _ _ _ _ _ _ _ _ _ _ _ _ _ _ _ _ _ _ _ _ _ _ _ _ _ _ _ _ _ _ _ _ _ _ _ _ Intro Play (Remote Control only) The TX3300 allows you to play the first 10 seconds...
- Page 18 Audio CD Playback Shuffle Play Repeat Play (Remote Control only) (Remote Control only) The TX3300 allows you to play all the tracks on an This function allows you to play the same track, the Audio CD in a random sequence. Each track will be same disc, or both Deck A and Deck B again.
-
Page 19: Mp3 Cd Playback
MP3 CD Playback MP3 CD Playback Quick Reference Normal Playback Insert a MP3 CD with the printed side facing up and wait for the TX3300 to finish detecting the inserted disc. Once the MP3 CD is detected, the display window will show the total number of albums in the disc (first line) and the total number of tracks in that album (second line). - Page 20 MP3 CD Playback Playback of a particular track You can change the display to show the time remaining on the current track by pressing Display Front Panel Control: once. To change back to show the current playing To skip to the next track, turn the Function Jog Dial time, press Display again.
- Page 21 MP3 CD Playback Press Intro on the remote control to enter into Intro Quick Reference Play mode. Press Play to start playing the first 10 seconds of each track in the selected album. The TX3300 will stop playing once it have finished playing all the tracks in the album.
- Page 22 MP3 CD Playback Shuffle Play Program Play (Remote Control only) (Remote Control only) The TX3300 allows you to play all the tracks in a This function allows you to create a playlist of your MP3 CD in a random sequence. Each track will be played favorite songs in your desired sequence from either Deck once till all the tracks in the album or in the disc have A, Deck B, or both.
- Page 23 MP3 CD Playback Once you are done with your selection, press Progr. Quick Reference again to go to Program Standby mode. The total number of tracks and the total playing time will be displayed. Press Play to start playing your programmed tracks. To switch back to Normal Play mode without clearing the programming, press Progr.
- Page 24 MP3 CD Playback Info Display Press Sel to view the software version. (Remote Control only) This function allows you to view the title of a MP3 track, album or the disc. Press Info once to select Disc Album. This is the To view the Rights Info, press Info again.
- Page 25 MP3 CD Playback Press Sel to view the Artist information, which is Quick Reference ‘Mary Jo’ in the example shown below. To select ID3 Album, press ID3 Tag thrice. Press Sel to view the title of the Album, which is ‘Best of Mary Jo’...
-
Page 26: Important Information
Recording Recording Functions (Internal) Functions The TX3300 that you own now is the world’s first dual-deck MP3 Audio CD Recorder that offers you the best in digital music entertainment. You can now easily convert Audio CD tracks to MP3 files for a relaxed marathon music playback, or convert MP3 files to Audio CD tracks for playback on common stereo systems. -
Page 27: Audio Cd Track To Audio Cd Track
Dubbing from Deck A to Deck B Audio CD track to Audio CD track Select 1x Dub Speed to dub any tracks in real-time. Quick Reference This will allow you to listen to the audio track currently being recorded. Please note that you will not be able to use CDRWs to record Audio CD tracks in 1x speed. - Page 28 Dubbing from Deck A to Deck B Press Select to confirm your selection. Press A/B to select Deck A as the active deck and You can stop the recording anytime to halt the use the Function Jog Dial to choose the track that dubbing process.
- Page 29 Dubbing from Deck A to Deck B Press A/B to select Deck A as the active deck and Quick Reference use the Numeric Keys, to choose the track that you want to dub. Press Dub to choose Dub One mode. To go into Dub All Tracks mode, press Dub twice.
-
Page 30: Mp3 Track To Mp3 Track
Dubbing from Deck A to Deck B MP3 track to MP3 track Front Panel Control: With Deck B as the active deck, press Setting once and turn the Function Jog Dial clockwise or anti- clockwise to choose MP3 Format. After stopping, you will be able to play the recorded Press Select to confirm your selection. - Page 31 MP3 track to MP3 track Lastly, you can also do a disc dub. To perform a Quick Reference Disc Dub, use the Function Jog Dial. The disc in Deck B must be a blank disc. Press Select to start dubbing. The TX3300 will select Deck B as the active deck, and after doing a copyright check, it will start recording at 1x.
- Page 32 MP3 track to MP3 track To change the dubbing speed, press Setting and To cancel, press Stop. turn the Function Jog Dial. To confirm your selection, press Select. To Dub Album, press Dub twice. To Dub All Tracks, press Dub three times. Remote Control: With Deck B as the active deck, press Format twice 10) To perform a Disc Dub, press Dub four times.
- Page 33 MP3 track to MP3 track Quick Reference 14) You can stop the recording anytime by pressing Stop to halt the dubbing process. The TX3300 will stop recording and proceed to close the current track that is being recorded. After stopping, you will be able to play the recorded track up to the point where you pressed Stop.
-
Page 34: Audio Cd Track To Mp3 Track
Audio CD track to MP3 track Audio CD track to MP3 track Instead of dubbing just one track, you can also choose to dub all the tracks as well. To go into Dub All Tracks mode, press Dub and turn the Function This function allows you to record an Audio CD track Jog Dial to select Dub All Tracks. - Page 35 Audio CD track to MP3 track You can stop the recording anytime by pressing Stop Quick Reference to halt the dubbing process. The TX3300 will stop recording and proceed to close the current track that is being recorded. After stopping, you will be able to play the recorded track up to the point where you pressed Stop.
- Page 36 Audio CD track to MP3 track Instead of recording into the existing last album in 11) Once the recording has finished, the TX3300 will Deck B, you can choose to create a new album. To stop automatically and update the disc. create one, press New.
-
Page 37: Mp3 Track To Audio Cd Track
MP3 track to Audio CD track MP3 track to Audio CD track Quick Reference This function allows you to record a MP3 track from Deck A into an Audio CD track onto a CDR in Deck B. For this recording mode, CDRWs are not supported and only 1x recording speed is possible. - Page 38 MP3 track to Audio CD track The third option is to record all the tracks in all the You can stop the recording anytime to halt the albums in Deck A to Deck B. To Dub All Tracks, dubbing process. The TX3300 will stop recording turn the Function Jog Dial.
- Page 39 MP3 track to Audio CD track To Dub All Tracks, press Dub three times. Quick Reference Press Sel to start dubbing. The TX3300 will select Deck B as the active deck and start recording at 1x. Once the recording has finished, the TX3300 will stop automatically and update the disc.
-
Page 40: Program Dub
MP3 track to Audio CD track Program Dub You can stop the recording anytime to halt the Press Sel to confirm your selection. dubbing process. The TX3300 will stop recording and close the current track that is being recorded. Insert the source disc into Deck A. You would first need to program a playlist of the tracks this disc to be recorded into the blank disc in Deck B. -
Page 41: Disc Dub
Program Dub Disc Dub Note: Quick Reference If there is insufficient space on the disc, you will be prompted whether you want to continue recording. To continue recording, press Select (or Sel for Remote Control). The TX3300 will record until the disc in the recording deck is full. - Page 42 Disc Dub Front Panel Control: Press Sel to start recording. Press Dub and turn the Function Jog Dial to select Disc Dub. Press Select to start recording. The TX3300 will start recording at a speed of 4x. Once the recording is done, the disc will be finalized automatically.
-
Page 43: Editing Of Mp3 Titles
Editing of MP3 titles Editing of MP3 titles Quick Reference (Remote Control only) When you record MP3 tracks, instead of naming it Track01 of Album01, with the default disc name of TOX MP3, you can personalize the titles. The TX3300 allows you to rename the Disc title, the Album title and the Track title. -
Page 44: Important Information
Recording Functions (External) Besides recording from Deck A to Deck B, the Note: TX3300 is also able to record from external sources such A CDR or CDRW can only be in one format. You will not as DVD players, VCD players, stereo Hi-Fi systems and be able to have both Audio tracks and MP3 tracks in televisions, among others. - Page 45 Recording from External Analog Source Press Select to confirm. The Analog indicator will Quick Reference now be lighted. Press Record and turn the Function Jog Dial to select Auto Record. Press Select to confirm, the TX3300 will go into Record Standby mode. Wait for the drive to be ready. Once the drive is ready, press Play on your external source.
- Page 46 Recording from External Analog Source If there is a 20-second silence, the recording Press Sel to confirm. The Analog indicator will now session will automatically stop. be lighted. If the TX3300 is not in Auto mode, press Auto/Man to select Auto Record mode. To stop recording at any time, press Stop.
- Page 47 Recording from External Analog Source If there is a 20-second silence, the recording Quick Reference session will automatically stop. To stop recording at any time, press Stop. Note: If there is insufficient space for the recording, the TX3300 will record until the disc is full and stop recording. _ _ _ _ _ _ _ _ _ _ _ _ _ _ _ _ _ _ _ _ _ _ _ _ _ _ _ _ _ _ _ _ _ _ _ _ _ _ _ _ _ _ _ _ _ _ _ _ _ _ _ _ _ _ _ _ _ Manual Record Mode Front Panel Control:...
- Page 48 Recording from External Analog Source Press Select to confirm your selection. To stop recording, press Stop. (Examples shown below are for MP3 Format only. There is no difference for Audio Format.) Press Source and turn the Function Jog Dial to select Analog Source.
- Page 49 Recording from External Analog Source Press Record, followed by Sel to start recording. Quick Reference In Manual Record mode, the TX3300 will start recording once the drive is ready, regardless of whether there is any audio signal. Hence, you will need to play your external source before pressing Record.
-
Page 50: Recording From External Coaxial Or Optical Source
Recording from External Analog Source Recording from External Coaxial or Optical Source Recording from External To resume recording, press Pause again. This will Coaxial or Optical Source also create a new track. This function allows you to record from an external Coaxial (known as Digital in some regions) or Optical source such as DVD players, stereo Hi-Fi systems and etc. - Page 51 Recording from External Coaxial or Optical Source Press Select to confirm. The Optical indicator will Quick Reference now be lighted. Press Record and turn the Function Jog Dial to select Manual Record. Press Select to confirm, the TX3300 will go into Record Standby mode, and if the TX3300 is in Auto mode, it will switch to Manual mode.
- Page 52 Recording from External Coaxial or Optical Source To stop recording, press Stop. Press Sel to confirm, the TX3300 will go into Record Standby mode, and if the TX3300 is in Auto mode, it will switch to Manual mode. Wait for the drive to be ready.
- Page 53 Recording from External Coaxial or Optical Source 10) To stop recording, press Stop. Quick Reference Note: If there is insufficient space for the recording, the TX3300 will record until the disc is full and stop recording. For MP3 CDs, the maximum number of MP3 tracks per album is 50, the maximum number of albums is 20 and you cannot create an album within an album.
- Page 54 Recording from External Coaxial or Optical Source Front Panel Control: Turn the Function Jog Dial again to select Sync All to record all the tracks on your external source. Press Setting and turn the Function Jog Dial to select either Audio Format or MP3 Format. Press Select to confirm.
- Page 55 Recording from External Coaxial or Optical Source Quick Reference When you are in Sync All mode, the TX3300 will add tracks automatically according to the digital information from your source player. When all the tracks have finished recording, the TX3300 will stop automatically. 10) To stop recording anytime, press Stop.
- Page 56 Recording from External Coaxial or Optical Source Remote Control: Press Sync again to select Sync All to record all the tracks on your external source. Press Format to select either Audio Format or MP3 Format. Press Sel to confirm, the TX3300 will go into Audio Format MP3 Format Record Standby mode, and if the TX3300 is in...
- Page 57 Recording from External Coaxial or Optical Source When you are in Sync All mode, the TX3300 will Quick Reference add tracks automatically according to the digital information from your source player. When all the tracks have finished recording, the TX3300 will stop automatically. 10) To stop recording anytime, press Stop.
-
Page 58: Finalizing A Cdr Or Cdrw
Finalizing & Unfinalizing Finalizing is a process that completes the recording Press Finalize to select Finalize Disc. of a disc so that it may be played back on common CD players or Deck A. Once finalized, you will not be able to edit any tracks or add any more tracks to the disc. - Page 59 Unfinalizing a CDRW Press Select to start unfinalizing the disc. Quick Reference Audio CD MP3 CD Once the finalizing is done, the Finalized Indicator will disappear. The disc is now unfinalized and you are now able to add more tracks to the CDRW. Remote Control: Insert the finalized disc into Deck B.
-
Page 60: Erasing An Audio Cdrw
Erasing If an Audio or MP3 CDRW is unfinalized, you will be Press Select to start the erasing process. able to erase the last recorded track, album or the entire disc. If you are using an unfinalized MP3 CDR, you will only be able to erase the last recorded MP3 track and album. -
Page 61: Erasing A Mp3 Cdr Or Cdrw
Erasing an Audio CDRW Erasing a MP3 CDR or CDRW Press Sel to start the erasing process. Quick Reference Note: Erasing an Audio CDR, even if it is unfinalized, is not possible. If the Audio CDRW is finalized, then you will only be able to erase the whole disc. - Page 62 Erasing a MP3 CDR or CDRW Press Select to start the erasing process. Press Sel to start the erasing process. To erase the whole disc, press Utility and turn the To erase the whole album, press Erase twice to Function Jog Dial to select Erase Disc. select Erase Album.
- Page 63 Erasing a MP3 CDR or CDRW Press Sel to start the erasing process. Quick Reference Note: When you erase a track or album of a MP3 CDR or CDRW, the disc space originally occupied by these tracks are not usable. Hence, there will be no increase in available space even when you have erased some tracks.
- Page 64 Connecting with a PC via USB An unique feature of the TX3300 is its connectivity. The installation process will now begin. You can connect it to a PC via a USB connection and download audio tracks in WAV format or MP3 format and write onto a blank CDR or CDRW to create either an Audio CD or a MP3 CD.
-
Page 65: Installing The Tx3300 Explorer
Once done, click [Next] to continue. Program icons will now be added to the Program Folder with a default name of ‘MCR-TX3300 Application’, and if you wish to change the name, simply key in a new one. Once done, click [Next] to continue. -
Page 66: Installing The Usb Device Driver
Installing the TX3300 Explorer Installing the USB Device Driver Once the installation is complete, there will be a Select either [CD-ROM] drive or [Specify a location]. confirmation message. Click [OK] to exit. If you select the latter, click on [Browse], and select the sub-folder [Win9x] or [Win2k] in the folder [Drivers] according to your PC’s operating system. -
Page 67: Using The Tx3300 Explorer
Using the TX3300 Explorer First, press USB on your remote control to activate USB mode. Run the TX3300 Explorer in your PC by clicking on [Start] [Programs] [MCR-TX3300] [Explorer]. Page 65 Page 65 Page 65 Page 65 Page 65... - Page 68 PC. Discs that are in Deck A will appear under MCR-TX3300 Player, and Creating an Audio CD discs that are in Deck B will appear under MCR-TX3300 Recorder. Insert a blank CDR or CDRW into Deck B...
- Page 69 Using the TX3300 Explorer Transferring WAV files to the PC Quick Reference Insert an Audio CDR into Deck B (You will need to disconnect the USB link first before inserting the disc.) Select the Audio tracks that you wish to download into your PC, right-click and choose [Copy] Select the destination folder, right-click and choose [Paste].
- Page 70 Using the TX3300 Explorer Select the Recorder drive, right-click and choose Erasing the last MP3 Track, Album or Disc [Paste]. The MP3 tracks will now be copied to the blank disc. A progress bar will appear to indicate the This function allows you to erase the last recorded status of the copying.
- Page 71 Using the TX3300 Explorer Finalizing a disc Quick Reference Ensure that the non-finalized disc is in Deck B. Select [Finalize a disc] from the [Tool] menu. A warning message will appear, confirming whether you want to finalize the disc. Once confirmed, a progress bar will appear showing the status of the finalizing.
-
Page 72: Upgrading The Tx3300
Insert the Utility CD into either Deck A or Deck Run the TX3300 Upgrade Utility by clicking on [Start] [Programs] [MCR-TX3300] [Upgrade]. Press Upgrade from the remote control to activate the upgrade function. Press Sel to confirm, and the TX3300 will now start the upgrading process. - Page 73 Upgrade via USB Connection Click [Select] to choose the .bin file that you have Quick Reference just downloaded and click [Open] to continue. The Upgrade Utility window will now show you the information of the file that you have chosen. Click [Start Upgrade] to start the upgrading process.
-
Page 74: Upgrade Via Serial Port
Type the following commands: cd.. [Enter] cd progra~1\mcr-tx~1 [Enter] upgrad~1 1 tx3300~1.bin [Enter] Where [Enter] is the Enter key of your keyboard, and [C:\Program Files\MCR-TX3300 Application] is the folder that you install the program in. Page 72 Page 72 Page 72... -
Page 75: Recovering Using The Utility Cd
Recovery Recovering using the Serial Port If during upgrading, the power goes off accidentally or there is an error in the process, the TX3300 will go into recovery mode. Before you can use the TX3300 To restore the system, please follow the steps in again, you will need to restore the system. -
Page 76: Troubleshooting Guide
Troubleshooting Guide If you experience the following problems while The sound is distorted or there is interference using the TX3300, this troubleshooting guide will be able to help you. Possible Causes: The disc is dirty or scratched No power The disc is warped Possible Causes: Solution: No AC power... -
Page 77: Maintenance
Maintenance Error Messages Handling CDs During the course of using the TX3300, you may encounter several error messages. This section explains To keep the disc clean, do not touch the playing these messages, and what you should do. surface. Do not attach paper or tape to the disc. Unknown Disc Cleaning CDs To clean a CD, wipe it in a straight line from the... - Page 78 Error Messages Album Full 10 Recovering If the power of the TX3300 goes out accidentally while recording, the unfinalized disc in Deck B might be damaged. If the MP3 disc already has 20 albums, no more When you switch on the TX3300 the next time, it albums can be created.
-
Page 79: Specifications
Specifications* General Inputs/Outputs System: Analog Input: Dual-Deck Compact Disc Digital Audio 1 x RCA Compatible Format: Analog Output: CD-DA, MP3, CD-ROM 1 x RCA Compatible CD Media (Audio): Digital Input: CDR Audio & CDRW Audio 1 x Coaxial 1 x Optical Compatible CD Media (MP3): CDR, CDRW Digital Output:... -
Page 80: Provisions Of Warranty
Warranty Certificate and equipment. a RMA Request Form (with RMA No. clearly stated) to a Terapin authorized service center. The RMA No. Terapin’s sole liability under this Warranty shall be can be obtained by contacting the respective limited to repairing or replacing the product and any authorized service centers. -
Page 81: About Terapin Technology
More importantly, the recorded disc is compatible with most PC, DVD and VCD players. Contacting Us In short, the Terapin CD Video Recorder is a simple solution to converting any audio/video source to VCDs. North & South America... - Page 82 www.terapin-mine.com...
Need help?
Do you have a question about the MCR-TX3300 and is the answer not in the manual?
Questions and answers