
Summary of Contents for Monitech ML064CT8025S
- Page 1 USER/INSTALL GUIDE MONITECH 8025/8020 Upgraded Fagor 8025/8020 ML064CT8025S/8020 M20A03-CT8020/8025...
- Page 2 IMPORTANT WARRANTY Before using any MONITECH product please carefully review this Manual as well as any additional documentation provided with your shipment. Attempting any of the following will void product warranty: • unauthorized repairs or parts replacement • inappropriate use or placement: exposing product to liquids, harmful gases, electrical shock, physical shock, temperatures beyond the range of -4°F to 140°F...
- Page 3 REMOVALE: Step #1) Turn off turn off main power, turn off machine. Unscrew the screws around the boarder of the HMI. Unplug the Step #2) communication cables and power. Take a Picture before unplugging any cables, so when you install the HMI back into your machine you will know where the cables attach.
- Page 4 Step #4) Remove the 4 nuts that hold your CRT Monitor. Step #5) Open the back cover & remove the power cable. Step #6) Open the front cover by unscrewing the four screws holding in place. Step #7) Unplug Video cable from the video card. Remove the video circuit board to give you access to remove the monitor.
-
Page 5: Installation
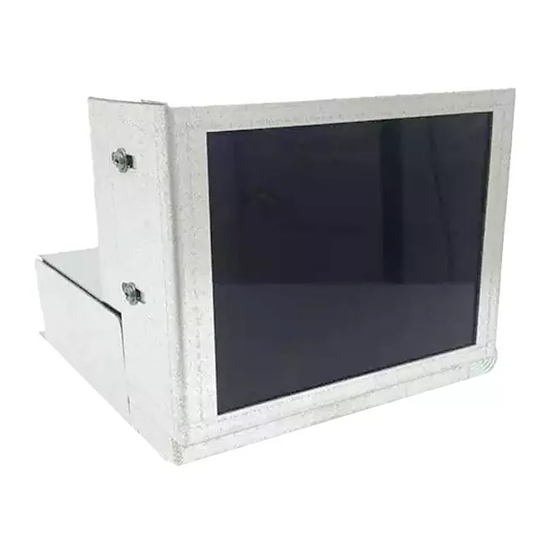
Step #8) Remove the monitor out of the HMI. INSTALLATION: Step 9) Take the Monitech monitor out of the box and mount it on to the machine using the holes that was holding the CRT in place. Use the nuts that held the CRT in place to fasten to the Monitech Monitor. - Page 6 Option #2) If option 1 does not work. Use MAP335. Cut & Strip both red wires and crimp to red butt connectors of MAV335. Screw in the ground wire as shown. Connect the black side of MAP335 into MAP307, then connect the power jack into your Monitech Monitor. M20A03-CT8020/8025...
- Page 7 (shown in picture) as shown in pictures. Step 12) Attach video cable (MAV116) and connect clip to ground terminal (JP5), or C13 or J6. Then Connect the VGA side of MAV116 into your Monitech Monitor. MAV116 Connect video cable...
- Page 8 OR. Connect grounding clip to C13 OR. Connect grounding clip to JP6 Connect the VGA side of MAV116 into the your Monitech Monitor Step 13) Reassemble the Unit. Put the I/O board back in. Attach the power supply back on the HMI. Fasten the video circuit board back on the HMI.
-
Page 9: Press The Menu Button
Monitech Monitor. Make sure you have a video signal. Once you have mounted your new Monitech LCD into your control panel with the video and power cables attached, the monitor will power up automatically. It should also start receiving the video signal from your machine. - Page 10 Press MENU again to select an item. When the item is selected, it will turn red. Press to adjust values. Press MENU again to go back to the list and use the arrows to move up and down in the list. As long as you are getting a video signal, your settings will be automatically saved.
- Page 11 Fine-tune your video image. To size your video image, focus on the first five items. WIDTH This is a very useful setting: use it to adjust the width of the video on your screen. Use it as well to eliminate vertical lines.
- Page 12 RESISTANCE 750 Ω is the default. If your video is saturated or text is “blooming” like the image on the left, change it to 75 Ω. BEFORE AFTER SCANNING Defaults to Progressive and rarely needs adjustment. RESOLUTION Defaults to 800x600. If the video still won’t fit on the screen after adjusting the WIDTH setting, change the resolution to 640x480.
-
Page 13: Troubleshooting Section
Troubleshooting Section M20A03-CT8020/8025... - Page 14 REFER TO OUR YOUTUBE PAGE: https://www.youtube.com/watch?v=Le6C6JMmAwY https://www.youtube.com/watch?v=iGN_5DyHr0U M20A03-CT8020/8025...
- Page 15 Enjoy your rejuvenated Monitor. Call us to order more replacement HMI parts. Keep your FAGOR’s up and running! ML121LL8050-12.1" ML104QT8050 for 12" Fagor LCD Upgrade for Fagor 8050M Motion Master VGA 8050 with 14" CRT ML121LL8035-12.1" ML080QT8050 - 10" Fagor 8050 CRT LCD Upgrade for Fagor 8035 with 14"...
- Page 16 For Technical Support, Call 1-877-493-6105 Support@Monitech.com 20 Howard Place Kitchener, Ontario N2K 2Z4 Canada 519-725-2222 www.monitech.com sales@monitech.com M20A03-CT8020/8025...
Need help?
Do you have a question about the ML064CT8025S and is the answer not in the manual?
Questions and answers