Table of Contents
Advertisement
Quick Links
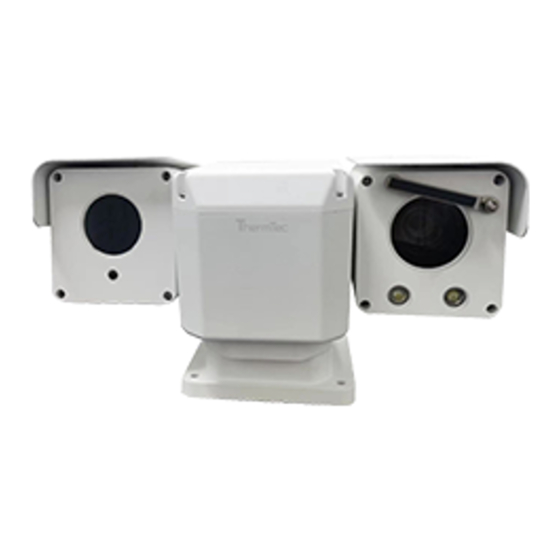
Mini YS Series PTZ User Manual
Mini YS Series PTZ User Manual --------------------------------------------------------------------------------- I
1. Safety matters -----------------------------------------------------------------------------------------------------1
2. Product introduction ------------------------------------------------------------------------------------------- 2
2.1 Product description and features --------------------------------------------------------------- 2
2.2 Technical parameters -------------------------------------------------------------------------------- 3
3. Product appearance dimensions and installation instructions ----------------------------5
3.1 Mini YS Series PTZ External dimensions --------------------------------------------------------- 5
3.2 Installation instructions -------------------------------------------------------------------------------- 5
4. Network and login configuration ------------------------------------------------------------------------ 6
4.1 Network configuration --------------------------------------------------------------------------------6
5. Preview --------------------------------------------------------------------------------------------------------------- 8
5.1 Device Home Interface ------------------------------------------------------------------------------ 8
5.2 Preview operation -------------------------------------------------------------------------------------- 8
5.3 Image adjustment -------------------------------------------------------------------------------------- 9
5.4 OSD configuration ------------------------------------------------------------------------------------ 10
5.5 Image connection ------------------------------------------------------------------------------------11
5.6 PTZ control ------------------------------------------------------------------------------------------------ 12
5.6.1 Direction control ------------------------------------------------------------------------------12
5.6.2 Zoom ----------------------------------------------------------------------------------------------- 12
5.6.3 Focus ----------------------------------------------------------------------------------------------- 12
5.6.4 Wiper ----------------------------------------------------------------------------------------------- 13
5.6.5 Auxiliary focusing ----------------------------------------------------------------------------- 13
5.6.6 Presets --------------------------------------------------------------------------------------------- 13
5.6.7 Cruise ---------------------------------------------------------------------------------------------- 13
6. Picture --------------------------------------------------------------------------------------------------------------- 14
7. System configuration -----------------------------------------------------------------------------------------14
7.1 System ------------------------------------------------------------------------------------------------------ 14
7.1.1 Device Information --------------------------------------------------------------------------14
7.1.2 RS485 ----------------------------------------------------------------------------------------------- 15
7.1.3 Time setting ------------------------------------------------------------------------------------- 15
7.1.4 Maintain ------------------------------------------------------------------------------------------ 16
7.1.5 Log -------------------------------------------------------------------------------------------------- 17
7.1.6 User management -------------------------------------------------------------------------- 17
7.2 Local storage --------------------------------------------------------------------------------------------18
7.3 Network ---------------------------------------------------------------------------------------------------- 18
7.3.1 TCP/IP ---------------------------------------------------------------------------------------------- 18
7.3.2 Multicast ------------------------------------------------------------------------------------------ 19
7.3.3 Port -------------------------------------------------------------------------------------------------- 20
7.3.4 Port Mapping ---------------------------------------------------------------------------------- 20
Table of Contents
I
Advertisement
Table of Contents

Subscribe to Our Youtube Channel
Summary of Contents for ThermTec Mini YS Series
-
Page 1: Table Of Contents
2.1 Product description and features --------------------------------------------------------------- 2 2.2 Technical parameters -------------------------------------------------------------------------------- 3 3. Product appearance dimensions and installation instructions ----------------------------5 3.1 Mini YS Series PTZ External dimensions --------------------------------------------------------- 5 3.2 Installation instructions -------------------------------------------------------------------------------- 5 4. Network and login configuration ------------------------------------------------------------------------ 6 4.1 Network configuration --------------------------------------------------------------------------------6... - Page 2 7.3.5 Email ------------------------------------------------------------------------------------------------21 7.3.6 FTP --------------------------------------------------------------------------------------------------- 22 7.3.7 White list -------------------------------------------------------------------------------------------22 7.4 Video Configuration --------------------------------------------------------------------------------- 23 7.4.1 Video Streaming ------------------------------------------------------------------------------23 7.5 VCA ---------------------------------------------------------------------------------------------------------- 25 7.5.1 Global Settings -------------------------------------------------------------------------------- 25 7.5.2 VCA settings ------------------------------------------------------------------------------------ 26 7.6 Image Configuration -------------------------------------------------------------------------------- 27 7.6.1 Image parameter settings --------------------------------------------------------------- 27 7.6.2 OSD Setting ------------------------------------------------------------------------------------- 28 7.6.3 PIP ----------------------------------------------------------------------------------------------------29 7.6.4 Blind element processing -----------------------------------------------------------------30...
-
Page 4: Safety Matters
1. Safety matters Warning - In the process of installation and use of the equipment, the various electrical regulations of the State and the areas in use must be strictly observed. - Please use the power adapter from a regular manufacturer. The specific requirements of the power adapter can be found in the product parameter table. -
Page 5: Product Introduction
non-original packaging materials. Quality requirements for installation and maintenance personnel - Has the qualification certificate or experience to install and repair the video monitoring system, and has the qualification to do related work. In addition, you must have the following knowledge and operational skills. - Basic knowledge and installation skills of video monitoring systems and components. -
Page 6: Technical Parameters
2.2 Technical parameters parameters Mini Y Series PTZ Thermal Module Detector type Uncooled FPA Resolution/Pixel spacing 384x288/12µm 640x512/17µm Spectral range 8-14µm NETD ≤35mK Focal length 25mm 35mm 50mm Mini Y3 10.5x7.9 7.5x5.7 5.3x4.0 Infrared Mini Y6 24.6x19.8 17.7x14.1 12.4x10.0 Aperture F1.0 Digital zoom 1-8X continuous... - Page 7 Up to 10 users, 3 levels: administrator, operator, Network User level general Support password protection, binding MAC ID and IP Security filtering Support third-party software such as Thermtec Client platform and ONVIF WEB browser Google Browser Communication interface RJ45 10 M/100 M Adaptive Ethernet interface...
-
Page 8: Product Appearance Dimensions And Installation Instructions
4.5kg 3. Product appearance dimensions and installation instructions 3.1 Mini YS Series PTZ External dimensions 3.2 Installation instructions During the installation and fixation of the device, the cables have been combed and connected. On the premise of ensuring the correct installation of the wick, connect the power supply for power-on self-check. -
Page 9: Network And Login Configuration
It is recommended to supply power to the device nearby. If you need to extend the power supply line, please ensure that the voltage and current of the extended line can meet the power supply standard. 4. Network and login configuration 4.1 Network configuration After the device is installed, it needs to configure the function and set the parameters. - Page 10 Connection diagram The default IP address of the device is 192.168.1.128. You need to set the IP address of the computer you are operating on to the same network segment as the device before you can login and use it properly.
-
Page 11: Preview
5. Preview 5.1 Device Home Interface 5.2 Preview operation Click the Preview button to enter the device preview interface and do the following preview: Color palette change: You can switch between nine false color pictures, and the selected false color can be clicked to save the false color state. -
Page 12: Image Adjustment
Zeroing: After clicking, the mechanical shield will move to calibrate the thermal imager. You can hear the sound of the calibration action of the mechanical shield. Screen segmentation: It can be divided into one picture and four pictures. Normally, it is only used to view three images, thermal image, white light and fusion image. -
Page 13: Osd Configuration
image. Parameter Description Contrast Adjust the brightness of the browsing screen Brightness Adjust the contrast of browsing screen Saturation Adjust the saturation of the browsing screen Sharpness Adjust the sharpness of the browsing screen Default Click this icon to restore the brightness, contrast, saturation and sharpness to the default values Parameter Description... -
Page 14: Image Connection
The channel name can be set according to the user's needs. The display name, display date and display week can be enabled or not according to the actual needs. Time format "24 hour system" and "12 hour system" are optional. ... -
Page 15: Ptz Control
5.6 PTZ control 5.6.1 Direction control 8 directions, up,down,left,right,top left,down left,top right,down right.Adjust the PTZ speed through the speed bar under the direction ; 5.6.2 Zoom : Used to observe distant targets, the observed field of view will be correspondingly smaller; :Used to observe close-range targets, the observed field of view will become larger accordingly;... -
Page 16: Wiper
:Used to observe close range target to adjust clarity; 5.6.4 Wiper :Wiper start 1 minute non-stop sweep back and forth, click the button again can directly interrupt the wiper sweep; 5.6.5 Auxiliary focusing :When the image is not clearly focused, auxiliary focusing can make the image presented by the device clearer;... -
Page 17: Picture
Click to stop cruise; Note: Add at least two preset points before starting the cruise. 6. Picture It is used to query and download captured images after an event is triggered. Channel: Visible/Infrared; Event Type: All of the VCA events as optional; Start time: Search time of start;... -
Page 18: Rs485
7.1.2 RS485 The interface can be matched by configuring the parameters of the serial port. Baud rate: "2400" - "115200" multiple options. Data bits: "5", "6", "7" and "8" are optional. Check digit: "None", "Odd check" and "Even check" can be selected. Stop bit: "1"... -
Page 19: Maintain
The timing methods are divided into NTP timing and manual timing. NTP timing: set the NTP server address, NTP port number and timing interval, and the device can be timed every other period of time according to the settings; Manual timing: set the device time manually. -
Page 20: Log
7.1.5 Log Log Search: Select the main type, sub type and query time of the log to be queried, and click Search to search for qualified log records. Log Information: The log list displays the log information of "SN", "Time", "main Type", "Sub Type", "User name", and "Remarks". -
Page 21: Local Storage
permissions and channel permissions of the added users, and then click OK Modify User: select the user to modify, and click Modify to enter the Modify User Interface. Users added or modified can set their Basic Permission and Channel ... -
Page 22: Multicast
default gateway" can be set for the network card parameter configuration. The automatic IP address acquisition is set to ON, and the device can automatically acquire the network address and related network parameters. DNS server configuration can be set to "preferred DNS server" and "alternate ... -
Page 23: Port
7.3.3 Port Support RTSP, ONVIF and other network protocol access The port configuration parameters can be set to "ONVIF port (default 8080)", "HTTP port (default 80)", "HTTPS port (default 443)", "RTSP port (default 554)", "TCP port (default 4321)", "Web Socket port (default 8877)" When accessing devices through the network, you can set corresponding ports as required. -
Page 24: Email
7.3.5 Email By setting mail parameters, when an alarm occurs, you can send mail to the specified mailbox. Sender information: enter the sender's email address, SMTP server address, SMTP port number (default 9537), user name, and password. Message encryption: SSL, TLS and no encryption can be selected. Picture attachment: After checking, an instant snapshot will be attached to the email. -
Page 25: Ftp
7.3.6 FTP By configuring FTP parameters, you can realize bidirectional file transmission on a specific FTP server. Set the address and port number of the FTP server, user name and password with upload permission, and check Set Date and Time. After the relevant parameters are modified, click Save to save the relevant settings. -
Page 26: Video Configuration
7.4 Video Configuration 7.4.1 Video Streaming You can set the image format and stream parameters of each stream according to the support of the device, and select to open the main stream and the sub stream according to the actual needs. - Page 27 Code Stream type: can be set to switch between visible and infrared image types Video Stream type: video parameters of main stream and sub stream can be set. Encode Type: H.265 and H.264 can be set. The specific encoding type is ...
-
Page 28: Vca
7.5 VCA 7.5.1 Global Settings VCA: support a key to open or close all VCA events Overlay intelligent information: overlay target identification box in the preview Overlay target information: overlay target type in the preview Overlay rule information: overlay the event rule in the preview ... -
Page 29: Vca Settings
7.5.2 VCA settings Through the VCA settings to configure VCA event Channel:There are two channels of visible light and thermal image, and the different channel VCA events need to be configured separately; Rule Type: Select the specific VCA event type, with a total of 5 VCA events, ... -
Page 30: Image Configuration
Alarm Linkage Mail linkage: The email address can be set in the network Settings, and this function can also send the information of alarm video and alarm capture to the mailbox. Before enabling this function, the Settings of alarm capture and video should be completed. -
Page 31: Osd Setting
Thermal image adjustment: "brightness", "contrast", "image noise reduction" and "image enhancement" of the camera can be adjusted according to the image effect 7.6.2 OSD Setting OSD is the character information overlay on the screen with the video image. OSD content includes time customization and other information. -
Page 32: Pip
content no more than 15 characters. Enter the required characters in the character content column. After saving, the entered characters will be displayed in the preview image. Drag the mouse to select the display position of the characters, and click Save to display the corresponding characters in the screen. -
Page 33: Blind Element Processing
7.6.4 Blind element processing Open blind element processing through the menu to check the changes of image display. If there are spot, spot or linear blind elements in the image, use the direction keys to control the place where blind element processing is required, and click the blind element processing to eliminate it. - Page 34 Alarm input Check to enable the alarm input linkage function. The alarm type can be set as normally open and normally closed. Click Edit to edit the deployment time. You can set the deployment of the whole week or one day of a week, and you can set the start time and end time of six time periods for a day in detail.
-
Page 35: Fire Source Detection
time periods for a day in detail. 7.7.2 Fire source detection Fire point detection When the device detects a fire source, it will display screens, link alarms and upload alarm information according to the configured strategy. The fire source detection can be used together by adjusting the sensitivity, which can improve the accuracy of detection and linkage, and is suitable for fire prevention environments such as indoors, scenic spots, forests, and tunnels. - Page 36 1) On the Fire Detection screen, you can set the option of enabling thermal imaging fire point detection; 2) Select Fire Detection to enable the fire detection function; 3) Select the corresponding fire point detection option; 4) Set the event sensitivity; ...
-
Page 37: Storage
1) Select smoking detection from mode option 2) Smoking detection parameters settings Sensitivity: The value ranges from 0 to 100. The higher the sensitivity, the easier it is to detect suspicious ignition points. However, the false alarm rate is higher ... -
Page 38: Sd Card Management
can set the start time and end time of six time periods for a day in detail. In addition, you can set the time interval of the video package (1-60 minutes). Snapshot Plan Set the capture of visible and thermal images respectively, and configure the corresponding defense time and capture mode, which can be divided into timing snapshot and event-triggered snapshot (check the snapshot linkage for corresponding events). - Page 39 Base Configuration Temp meas enable Temperature measurement enables, check to open the temperature measurement function Temp bar Check to indicate that the live view will display the information of the temperature bar. Stream temp overlay Check to indicate that the detected temperature and temperature measurement box information are overlay in the stream.
- Page 40 Represents the straight-line distance between the temperature measured target and the device. The distance is set according to the device and the temperature measured target. Refl. Temp Background ambient temperature of the device. Set the value based on the current ambient temperature.
- Page 41 Click Preview to open the thermal imaging channel image to view the maximum temperature and rule information of the ruled line. 3. Area/Box: It means to draw an area in the scene and measure the temperature of the image of the area. Type selection area. Click the live screen, drag the mouse to draw a polygon, and right-click to end the drawing.
-
Page 42: Alarm Center
Alarm linkage Alarm linkage: Check the alarm input, set the name and type. The alarm type can be set to normally open or normally closed, switch from normally open to normally closed, turn on the alarm; switch from normally closed to normally open, turn off the alarm, and the name of the alarm can be customized.
Need help?
Do you have a question about the Mini YS Series and is the answer not in the manual?
Questions and answers