Table of Contents
Advertisement
Quick Links
Esprecious Fresh Milk Installation
Esprecious Fresh Milk 설치법
I'm convidenced that the technicians from your company can install a Esprecious perfectly but with the Fresh milk unit
there's some extra information needed.
Esprecous Fresh Milk 를 완벽하게 설치하기 위해 추가적인 정보는 아래와 같다.
First of all the Esprecious L needs to have a drain connection.
첫 번째로 Esprecious L 버전은 배수 연결이 필요 함.
Under the Esprecious there's a metal bracket that needs to be placed, see the attached document "700.404.318" for the
instruction.
Esprecious 밑에 금속 브라켓이 있어야 함, 지시사항은 첨부 문서"700.404.318"을 참조하시오.
It's important that you place the bracket under the machine after you have unpacked the machine, so that there's no water
inside the machine yet.
기기를 개봉한 후에 브라켓을 기기 아래에 놓아 두어 기기 내부에 물이 없도록 해야 합니다.
The tube that goes from the metal bracked to the drain pipe needs to be lower at each point than the drip tray, otherwise
the waste water can't go to the drain pipe and the drip tray will overflow.
금속 브라켓에서 배수관으로 가는 튜브는 물받이의 각 지점보다 낮아야 합니다. 그렇지 않으면 폐수가 배수관으로 갈 수
없으며 물받이가 넘치게 됩니다.
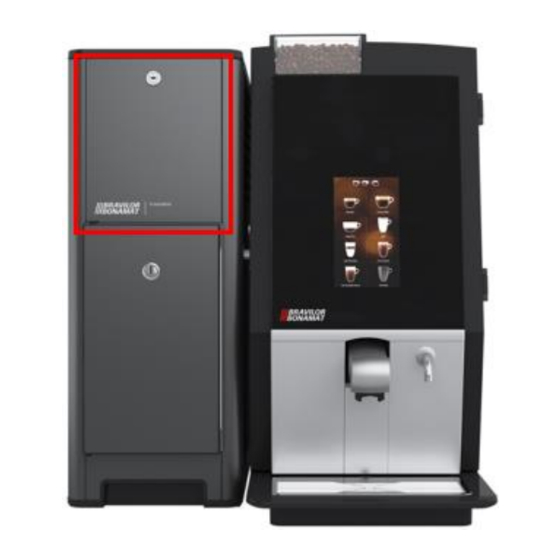
On the Fresh milk unit you need to place the milk tube on the milk pump that's behind the service hatch that you see
hereunder (also see the attached manual 700.403.783).
Fresh milk 장치의 우유 튜브는 서비스 해치(아래사진) 뒤에 있는 우유 펌프에 놓아야 합니다.
(700.403.783 첨부 문서를 참조하시오)
Connect the Milk unit to the Esprecious.
Milk 장치를 Esprecious 에 연결하시오.
- Connect the data cable (red circle in the picture hereunder) of the Fresh milk unit to the Esprecious.
- Fresh milk 장치의 데이터 케이블을 (아래 사진에서 빨간색 작은 원으로 표시) Esprecious 에 연결 하시오.
- Mount the milk frother with 2 screws and connect the tube from the outlet too the lower side of the milk frother (also red
circled in the picture hereunder).
- Milk frother 의 옆쪽 아래의 outlet 에 튜브를 연결 및 2 개 나사를 이용하여 milk frother 를 장착 (아래 사진에서 빨간색
큰 원으로 표시)
Advertisement
Table of Contents

Summary of Contents for BRAVILOR BONAMAT Esprecious L Series
- Page 1 Esprecious Fresh Milk Installation Esprecious Fresh Milk 설치법 I’m convidenced that the technicians from your company can install a Esprecious perfectly but with the Fresh milk unit there’s some extra information needed. Esprecous Fresh Milk 를 완벽하게 설치하기 위해 추가적인 정보는 아래와 같다. First of all the Esprecious L needs to have a drain connection.
- Page 2 When the Fresh milk unit is connected to the Esprecious and both machines are connected to water and power supply it’s important that first the Fresh milk unit is turned on and than the Esprecious. Fresh milk 장치가 Esprecious 에 연결되어 있고 두 기계가 물과 전원 공급 장치에 연결되어있을 때, fresh milk 장치를 Esprecious 보다...
- Page 3 Turning the air valve counter clockwise the foam bubbles will be bigger and the amount of foam will increase. 공기 밸브를 시계 반대 방향으로 돌리면 거품이 커지고 거품 양이 증가합니다 Turning the air valve to far one way or the other will result in almost no foam at all. 공기...
- Page 4 It is possible to let some room between the Esprecious and the Fresh milk unit but it is not optimum. Esprecious 와 Fresh Milk Unit 사이에 여유를 두는 것이 가능하지만 최적이 아닙니다. For this reason we have made an accessory with an instruction for making a hole in the door and put a different lock in the front side of the door (the drills are not included).


Need help?
Do you have a question about the Esprecious L Series and is the answer not in the manual?
Questions and answers