Table of Contents
Advertisement
Available languages
Available languages
Advertisement
Chapters
Table of Contents

Related Manuals for Troy-Bilt TB304BC


Summary of Contents for Troy-Bilt TB304BC
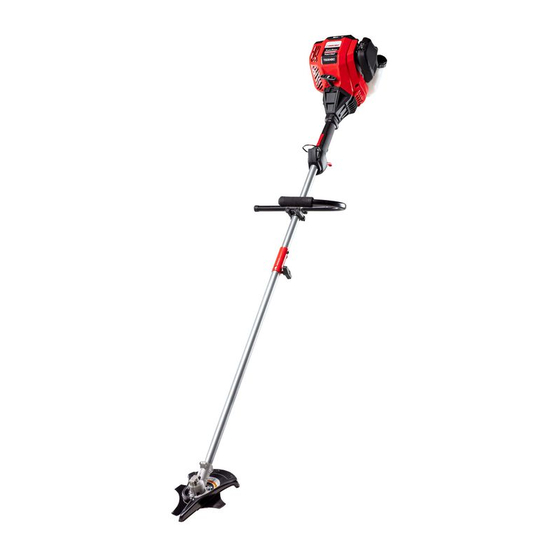
- Page 1 Operator’s Manual TB304BC Electric Start Capable 4-Cycle Brushcutter / Trimmer SAVE THESE INSTRUCTIONS IMPORTANT: Read this manual thoroughly before using this product. Follow all instructions. 769-24370 / 00 11/19...
-
Page 2: Table Of Contents
TABLE OF CONTENTS SERVICE Service ..........2 DO NOT RETURN THIS UNIT TO THE RETAILER. - Page 3 • IMPORTANT SAFETY INSTRUCTIONS • READ ALL INSTRUCTIONS BEFORE OPERATING SAFETY WARNINGS FOR GAS UNITS WARNING: WARNING: When using the unit, all safety Gasoline is highly flammable and instructions must be followed. Please read these its vapors can explode if ignited. Take the following instructions before operating the unit in order to ensure the precautions: safety of the operator and any bystanders.
- Page 4 TRIMMER SAFETY • Always turn the unit off when operation is delayed or when carrying the unit from one location to another. Make sure all • Only use the trimming line described in the Specifications section moving parts come to a complete stop. of this manual.
- Page 5 • SAFETY & INTERNATIONAL SYMBOLS • This operator's manual describes safety and international symbols and pictographs that may appear on this product. Read the operator's manual for complete safety, assembly, operating and maintenance and repair information. SYMBOL MEANING SYMBOL MEANING •...
-
Page 6: Know Your Unit
KNOW YOUR UNIT APPLICATIONS Spark Plug Muffler As a brushcutter: Choke Lever • Cutting weeds and light brush up to 1/2 inch (1.27 cm) in diameter Starter Rope Grip As a trimmer: • Cutting grass and light weeds. Throttle Lockout •... -
Page 7: Assembly
ASSEMBLY INSTALLING AND REMOVING THE ATTACHMENT The coupler enables the use of various optional attachments. WARNING: Before using any attachment, read and understand the manual that came with the attachment. Follow all safety information contained within. Loosen WARNING: To avoid serious personal injury and damage to the unit, shut the unit off before removing or installing an attachment. - Page 8 INSTALLING AND ADJUSTING THE HANDLE Bolts (x4) Top Clamp Installing the Handle Handle 1. Place the handle between the top clamp and middle clamp (Fig. 4). If necessary, rotate or flip the middle clamp until the holes in the top clamp and middle clamp align.
- Page 9 ASSEMBLING AND USING THE SHOULDER STRAP WARNING: To avoid serious personal injury, always use Buckle the shoulder strap when operating the unit as a brushcutter. Center Slot Assembling the Shoulder Strap 1. Push the strap up through the center slot in the buckle (Fig. 6). Clip 2.
- Page 10 CONVERTING THE UNIT FROM A BRUSHCUTTER TO A Shaft Bushing Hole TRIMMER WARNING: To avoid serious personal injury, always wear gloves when handling the blade. Output Shaft Locking Rod Slot WARNING: Bushing To avoid serious personal injury, always stop the engine and allow the unit to cool before installing or removing any parts.
- Page 11 CONVERTING THE UNIT FROM A TRIMMER TO A BRUSHCUTTER WARNING: To avoid serious personal injury, always wear gloves when handling the blade. WARNING: To avoid serious personal injury, always stop the engine and allow the unit to cool before installing or removing any parts.
-
Page 12: Oil And Fuel
INSTALLING AND REMOVING THE CUTTING HEAD SHIELD Screws (x3) Cutting Head Shield WARNING: To prevent serious personal injury, when using the unit as a trimmer, never operate the unit without the cutting head shield in place. Blade Shield WARNING: DO NOT install the cutting head shield when operating the unit as a brushcutter. - Page 13 USING THE RIGHT FUEL The use of old fuel is the most common cause of performance problems. Use only fresh, clean unleaded gasoline. NOTE: This unit has a four-cycle engine. DO NOT mix oil with gasoline. Definition of Blended Fuels Today's fuels are often a blend of gasoline and oxygenates such as ethanol, methanol or MTBE (ether).
-
Page 14: Starting And Stopping
STARTING AND STOPPING WARNING: On/Off Switch Operate this unit only in a well-ventilated outdoor area. Carbon monoxide exhaust fumes can be (I = On / O = Off) lethal in a confined area. WARNING: Avoid accidentally starting the unit. To avoid serious injury, the operator and the unit must be in a stable Throttle position when pulling the starter rope (Fig. - Page 15 USING THE ELECTRIC START ACCESSORY This unit can be started with an optional electric start accessory (items sold separately). Refer to the electric start accessory operator’s manual for the proper use of this feature. Please contact your local retailer, call the Customer Support Department or visit our website for more information.
-
Page 16: Operation
OPERATION HOLDING THE UNIT WARNING: Always wear appropriate eye, hearing, hand, foot and body protection to reduce the risk of injury when operating this unit. Wear head protection. Use a full face shield when needed. Refer to the Safety section for appropriate safety equipment information. - Page 17 ADJUSTING THE TRIMMING LINE LENGTH This unit is equipped with a bump head. Trimming line can be released from the cutting head without stopping the engine. To release more line, lightly tap the bump knob on the ground (Fig. 24) while operating the unit at high speed.
- Page 18 EDGING (AS A TRIMMER) The trimmer attachment can be used for edging (Fig. 26). Alternatively, a bladed lawn edger attachment can also be purchased for use with this unit. Rotating the Trimmer Attachment WARNING: To avoid serious personal injury and damage to the unit, shut the unit off before rotating the attachment.
-
Page 19: Maintenance
MAINTENANCE MAINTENANCE SCHEDULE WARNING: To avoid serious personal injury, always stop the engine and allow it to cool before cleaning or maintaining Perform these required maintenance procedures at the frequency the unit. Never perform cleaning or maintenance while the stated in the table. These procedures should also be a part of any unit is running. - Page 20 NOTE: If too little line is left protruding, it could retract inside the Bump Knob cutting head. Removing Old Trimming Line and Obstructions 1. When the trimming line runs out, the last piece should automatically eject from the cutting head. If it does not, push the bump knob down and pull the remaining line out of the cutting head.
- Page 21 CHECKING THE OIL LEVEL WARNING: Check the oil level before each use. The importance of maintaining the proper oil level cannot be overemphasized. 1. Stop the engine and allow it to cool. 2. Set the unit on a flat, level surface, such as a workbench or table.
- Page 22 MAINTAINING THE AIR FILTER Slots Air Filter Cover Failure to maintain the air filter can result in poor performance or can cause permanent damage to the engine. Engine failure due to improper air filter maintenance is not covered by the product warranty. Cleaning the Air Filter Tabs 1.
-
Page 23: Cleaning And Storage
CLEANING AND STORAGE CLEANING STORAGE • Never store a fueled unit where fumes may reach an open flame WARNING: To avoid serious personal injury, always stop or spark. the engine and allow it to cool before cleaning or maintaining • Allow the engine to cool before storing. -
Page 24: Troubleshooting
TROUBLESHOOTING PROBLEM SOLUTION THE ENGINE WILL NOT START The fuel tank is empty Fill the fuel tank with fresh fuel The primer bulb was not pressed enough Press the primer bulb 10 times The fuel is old (over 30 days) Drain the fuel tank and add fresh fuel The spark plug is fouled Replace the spark plug... -
Page 25: Warranty
Troy-Bilt for use with the product(s) covered by this manual will void your warranty as to any resulting damage. This warranty is limited to ninety (90) days from the date of original retail purchase for any Troy-Bilt product that is used for rental or commercial purposes, or any other income-producing purpose. - Page 26 NOTES...
- Page 27 Manuel de l’utilisateur TB304BC Débroussailleuse / taille-bordure à 4 temps avec possibilité de démarrage électrique CONSERVEZ CES INSTRUCTIONS IMPORTANT : Lisez attentivement ce manuel avant d'utiliser ce produit. Respectez toutes les instructions. 769-24370 / 00 11/19...
-
Page 28: Service
TABLE DES MATIÈRES SERVICE Service ..........28 NE RAMENEZ PAS CET APPAREIL CHEZ LE DÉTAILLANT. - Page 29 • CONSIGNES DE SÉCURITÉ IMPORTANTES • VEUILLEZ LIRE TOUTES LES INSTRUCTIONS AVANT AVERTISSEMENTS DE SÉCURITÉ POUR LES APPAREILS À GAZ AVERTISSEMENT : AVERTISSEMENT : Lorsque vous utilisez l'appareil, toutes les consignes de sécurité doivent l’essence est être respectées. Veuillez lire ces consignes avant d’utiliser extrêmement inflammable et ses vapeurs peuvent exploser l’appareil pour assurer la sécurité...
- Page 30 • Ne vous penchez pas trop en avant. Conservez toujours une • N'affûtez pas la lame. L'affûtage de la lame peut causer la rupture position stable et un bon équilibre. Redoublez de prudence de la pointe de la lame en cours d'utilisation. Il peut en résulter lorsque vous travaillez dans des escaliers, des pentes ou des des blessures graves.
- Page 31 • SYMBOLES DE SÉCURITÉ ET INTERNATIONAUX • Le présent manuel de l’opérateur décrit les symboles et pictogrammes de sécurité et internationaux, susceptibles d’apparaître sur ce produit. Veuillez lire le manuel de l’opérateur pour connaître les informations complètes sur la sécurité, l’assemblage, l’utilisation, l’entretien et la réparation.
-
Page 32: Apprenez À Connaître Votre Appareil
APPRENEZ À CONNAÎTRE VOTRE APPAREIL APPLICATIONS Bougie Pot d’échappement Comme débroussailleuse : Levier d’étrangleur • Coupez les mauvaises herbes et les broussailles allant jusqu'à Poignée du câble 1,27 cm (0,5 po) de diamètre de démarreur Comme taille-bordure : Verrouillage de la •... -
Page 33: Assemblage
ASSEMBLAGE INSTALLATION ET RETRAIT DE L'ACCESSOIRE Le coupleur permet l'utilisation de différents accessoires en option. AVERTISSEMENT : avant d'utiliser un accessoire, lire et comprendre le manuel livré avec l'accessoire. Respectez toutes les consignes de sécurité qu’il contient. Desserrer AVERTISSEMENT : pour éviter toute blesse grave ou dommage, arrêtez l’appareil avant de démonter ou d’installer un accessoire. - Page 34 INSTALLATION ET RÉGLAGE DE LA POIGNÉE Boulons (x4) Collier de serrage supérieur Installation de la poignée Poignée 1. Placez la poignée entre le collier de serrage du milieu et le collier de serrage supérieur (Fig. 4). Le cas échéant, faites pivoter ou retournez le collier de serrage du milieu jusqu'à...
- Page 35 ASSEMBLAGE ET UTILISATION DE LA BANDOUILIÈRE AVERTISSEMENT : Pour éviter des blessures graves, Boucle utilisez toujours la bandoulière lors de l'utilisation de Fente l'appareil comme débroussailleuse. centrale Assemblage de la bandoulière Attache 1. Poussez la courroie à travers la fente centrale de la boucle (Fig. 6). 2.
- Page 36 CONVERSION D'UNE DÉBROUSSAILLEUSE À UN Orifice du logement d'arbre TAILLE-HAIE AVERTISSEMENT : Pour éviter des blessures graves, portez toujours des gants lorsque vous manipulez la lame. Douille d'arbre Fente de la tige AVERTISSEMENT : de sortie Pour éviter des blessures graves, de verrouillage coupez toujours le moteur et laissez refroidir l'appareil avant d'installer ou de retirer des pièces.
- Page 37 CONVERSION D'UN TAILLE-HAIE À UNE DÉBROUSSAILLEUSE AVERTISSEMENT : Pour éviter des blessures graves, portez toujours des gants lorsque vous manipulez la lame. AVERTISSEMENT : Pour éviter des blessures graves, coupez toujours le moteur et laissez refroidir l'appareil avant d'installer ou de retirer des pièces. N'installez ou n'enlevez jamais des pièces lorsque l'appareil est en marche.
-
Page 38: Huile Et Carburant
INSTALLATION ET RETRAIT DU BOUCLIER DE LA TÊTE Vis (x3) Carter de protection DE COUPE de la tête de coupe AVERTISSEMENT : ppour éviter toute blessure grave, lorsque vous utilisez l'appareil comme taille-bordure, n’utilisez jamais cet appareil quand le carter de protection Capot de lame de la tête de coupe n’est pas en place. - Page 39 UTILISATION DU CARBURANT APPROPRIÉ L'utilisation de carburant usagé est la cause la plus courante de problèmes de performances. Utilisez uniquement une essence sans plomb neuve et propre. REMARQUE : Cet appareil est doté d'un moteur à quatre temps. NE MÉLANGEZ PAS l'huile et l'essence. Définition des carburants mélangés Les carburants d’aujourd’hui sont souvent un mélange d’essence et de produits oxygénés, comme l’éthanol, le méthanol ou l’éther...
-
Page 40: Mise En Marche Et Arrêt
MISE EN MARCHE ET ARRÊT AVERTISSEMENT : Interrupteur Marche/Arrêt utilisez cet appareil uniquement dans une zone extérieure bien aérée. Des émanations de (I = Marche / O = Arrêt) monoxyde de carbone dans un endroit confiné peuvent être mortelles. AVERTISSEMENT : évitez tout démarrage accidentel Verrouillage du de l’appareil. - Page 41 UTILISATION DE L'ACCESSOIRE DE DÉMARRAGE ÉLECTRIQUE Vous pouvez démarrer cet appareil à l'aide d'un accessoire électrique en option (articles vendus séparément). Reportez-vous au manuel de l'opérateur de l'accessoire de démarrage électrique pour le bon usage de cette fonction. Veuillez communiquer avec votre détaillant local, appelez le service d'assistance à...
-
Page 42: Utilisation
UTILISATION TENUE DE L’APPAREIL AVERTISSEMENT : Portez toujours des lunettes de sécurité, des protections auditives, des gants, des chaussures protectrices et une protection corporelle pour réduire le risque de blessure lors de l'utilisation de cet appareil. Portez un casque. Protégez-vous le visage avec un masque intégral au besoin. - Page 43 RÉGLAGE DE LA LONGUEUR DU FIL Cet appareil est équipé d’une tête de coupe Bump Head. Le fil de coupe peut être libéré de la tête de coupe sans arrêter le moteur. Pour libérer davantage de fil, tapez légèrement le bouton de butée sur le sol (Fig.
- Page 44 BORDURE (COMME TAILLE-BORDURE) L’accessoire coupe-herbe peut être utilisé pour les bordures (Fig. 26). Dans d'autres cas, l'accessoire pour pelouse à lame peut également être acheté afin d'être utilisé avec cet appareil. Rotation de l’accessoire coupe-herbe AVERTISSEMENT : pour éviter de vous blesser gravement et d’endommager l’appareil, éteignez l’appareil avant de tourner l’accessoire.
-
Page 45: Entretien
ENTRETIEN PROGRAMME D’ENTRETIEN AVERTISSEMENT : pour éviter toute blessure grave, arrêtez toujours le moteur et laissez-le refroidir avant de Effectuez ces procédures d’entretien obligatoires aux intervalles nettoyer ou de procéder à un entretien de l’appareil. indiqués dans le tableau. Ces procédures doivent également faire N'effectuez jamais de nettoyage ou d'entretien lorsque partie d’une mise au point saisonnière. - Page 46 5. Tournez le bouton de butée pour enrouler le fil jusqu'à ce Bouton de butée qu'environ 12,5 cm (5 po) dépassent de chaque côté de la tête de coupe (Fig. 30). REMARQUE : NE POUSSEZ PAS le bouton de butée vers le bas lors de l'enroulement du fil.
- Page 47 VÉRIFICATION DU NIVEAU D'HUILE AVERTISSEMENT : Vérifiez le niveau d'huile avant chaque utilisation. On ne saurait trop insister sur l'importance de maintenir le niveau huile approprié. 1. Arrêtez le moteur et laissez-le refroidir. 2. Réglez l'appareil sur une surface plane, comme un établi ou une table.
- Page 48 ENTRETIEN DU FILTRE À AIR Couvercle du Fentes filtre à air Le non-entretien du filtre à air peut entraîner une mauvaise performance ou des dommages permanents du moteur. Une panne de moteur découlant d’un mauvais entretien du filtre à air n’est pas couverte par la garantie du produit.
- Page 49 ENTRETIEN DE LA BOUGIE 1. Arrêtez le moteur et laissez-le refroidir. Saisissez fermement le chapeau de la bougie et retirez-le de la bougie. 2. Nettoyez tout autour de la bougie. Retirez la bougie de la culasse avec une douille de 16 mm (5/8 po.), en tournant dans le sens horaire inverse.
-
Page 50: Nettoyage Et Entreposage
NETTOYAGE ET ENTREPOSAGE NETTOYAGE ENTREPOSAGE • Ne rangez jamais l’appareil quand le réservoir contient encore AVERTISSEMENT : pour éviter toute blessure grave, de l’essence dont les vapeurs pourraient entrer en contact avec arrêtez toujours le moteur et laissez-le refroidir avant de une flamme nue ou une étincelle. -
Page 51: Dépannage
DÉPANNAGE PROBLÈME SOLUTION LE MOTEUR NE DÉMARRE PAS Le réservoir de carburant est vide Remplissez le réservoir avec du carburant frais La poire d’amorçage n’a pas été comprimée suffisamment Appuyez sur la poire à 10 reprises Le carburant est vieux (plus de 30 jours) Vidangez le réservoir de carburant et ajoutez du carburant neuf La bougie est encrassée Remplacez la bougie... -
Page 52: Garantie
États-Unis, ses possessions et territoires. Troy-Bilt garantit ce produit contre tout défaut de pièces et de main d’œuvre pendant une période de deux (2) ans à compter de la date d’achat initiale et s’engage à titre gratuit à réparer ou à remplacer, à sa discrétion, toute pièce présentant un défaut de pièces et de main d’œuvre. - Page 53 REMARQUES...
- Page 54 REMARQUES...
- Page 55 REMARQUES...
Need help?
Do you have a question about the TB304BC and is the answer not in the manual?
Questions and answers
Does it take mixed gas ?