
Summary of Contents for Heil Trailer 1600
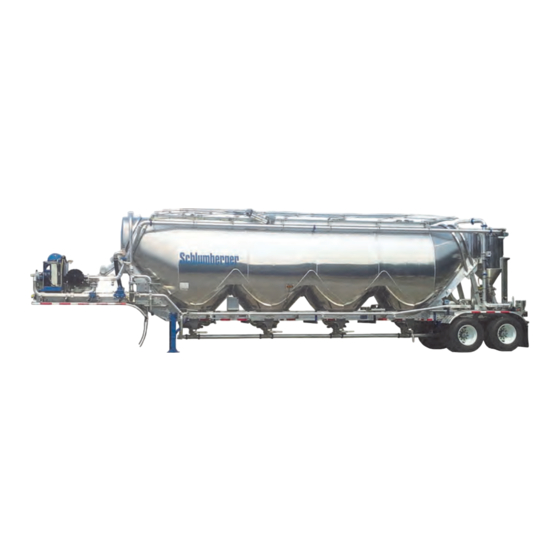
- Page 1 Heil Trailer International, Co. ISO 9001, ISO 14001, OSHAS 18001 - Certified Schlumberger 1600 Guar Transport Owner’s/Operator’s Manual © 2013 by Heil Trailer International, Co. All Rights Reserved.
- Page 2 REPAIR THE TRAILER OR PRODUCT. Recommended operating practices furnished in this manual are general practices. HEIL cannot possibly know, evaluate, or advise anyone of all conceivable ways a Heil trailer or product might be used, operated, maintained, set up, adjusted, re- paired or of all possible consequences of each way.
- Page 3 WARRANTY STATEMENT Heil Trailer International, Co. warrants trailers sold by us to be free from defects in material and workmanship. This coverage is subject to and limited to coverage periods listed in the Heil Trailer International, Co. Limited Silver Warranty Sub Part A - Limita- tions document and as defined in the Heil Trailer International, Co.
-
Page 4: Table Of Contents
The information and specifications included in this publication were in effect at the time of approval for printing. Heil Trailer International, Co. Athens, TN USA reserves the right, however, to discontinue or change specifications or design at any time without notice and without incurring any obligation... -
Page 5: Introduction
TO THE OWNER We at the Heil Trailer International, Co. take pride in the products we manufac- ture. We trust you will be well satisfied with your purchase. Properly operated and maintained, the Dry Bulk Materials Transport will provide many years of low -cost, trouble-free service. -
Page 6: Important Safety Message
IMPORTANT SAFETY MESSAGES THESE SAFETY ALERT SYMBOLS INDICATE IMPORTANT SAFETY MESSAGES THROUGH- OUT THIS MANUAL. WHEN YOU SEE THESE SYMBOLS, CAREFULLY READ THE MESSAGES THAT FOLLOW AND BE ALERT TO THE POSSIBIL- ITY OF ENVIRONMENTAL AND/OR PROPERTY DAMAGE, PERSONAL INJURY OR DEATH TO YOURSELF OR OTHERS. - Page 7 IMPORTANT SAFETY MESSAGES...
- Page 8 IMPORTANT SAFETY MESSAGES...
- Page 9 IMPORTANT SAFETY MESSAGES...
- Page 10 IMPORTANT SAFETY MESSAGES...
- Page 11 IMPORTANT SAFETY MESSAGES...
- Page 12 IMPORTANT SAFETY MESSAGES...
- Page 13 IMPORTANT SAFETY MESSAGES...
-
Page 14: Safety Decals
SAFETY DECALS SAFETY DECALS ARE PROVIDED WITH YOUR HEIL DRY BULK MATERIALS TRANSPORT . PLEASE CAREFULLY READ THE MESSAGES CONTAINED WITHIN THE DECALS AND BE ALERT TO THE POSSIBLILITY OF PERSON- AL INJURY OR DEATH. WARNING Do not exceed working pres- sure. - Page 16 CAUTION Vehicle safety checks should be performed daily prior to operation. CAUTION CAUTION If a leak is discovered during To avoid spillage, product dis- operation, shut down immedi- charge valves must be closed ately and repair the leak. prior to loading while in transit.
-
Page 19: General Nomenclature
GENERAL NOMENCLATURE 1. TANK PROPER - Aluminum, construction; 4 hopper; capacity 1600 2. MANHOLES – Located above hopper; equipped with 6 latches, two safety latches, aluminum cams, rubber stop and self-seating gasket. 3. LADDER - Steps to access the top of trailer and manholes. - Page 21 PIPING SYSTEM COMPONENTS Rear View 19. Vacuum/Filter/Canister 20. Silo Dust Collector Suction Inlet Connection and Valve 21. Eductor System In-Breather Valve 22. Eductor Line and Valve 23. Clean Out and/or Vacuum Dump Valve 24. Control Valve (air-actuated) For Vacuum To Vessel 25.
- Page 22 PIPING SYSTEM COMPONENT DESCRIPTIONS 1. BLOWER PRESSURE OUTPUT SUPPLY– Transfers air from air supply to discharge and aeration lines. 2. BLOWER PRESSURE OUTPUT EXHAUST VALVE - Allows air to exhaust from blower when in vacuum loading operation. 3. VACUUM PUMP VALVE/BLOWER AIR INLET VALVE– Allows air into blower when in pressure discharge (unloading) operation.
- Page 23 PIPING SYSTEM COMPONENT DESCRIPTIONS 4. DISCHARGE PRESSURE SUPPLY MAIN VALVE— To be opened when using on-board blower for pressure discharge (unloading) operation. To be closed when using auxiliary air inlet for pressure discharge. When closed, prevents air from alternative source from flowing upstream. 5.
- Page 24 PIPING SYSTEM COMPONENT DESCRIPTIONS 7. DISCHARGE ASSIT/BOOSTER CONTROL VALVE– Allows air flow into rear discharge line to aid in pushing product out/down-stream. 8. TOP AIR VALVE - Controls the flow air to the top of the tank. Top air is used when aeration is not required.
- Page 25 PIPING SYSTEM COMPONENT DESCRIPTIONS 10. PRESSURE CONTROL VALVE - Controls product line pressure. Used to pressurize product line to discharge product from line to silo/receiver vessel. 11. AERATION CONTROL VALVE– Controls main air supply line pressure. Used to control air to aerators. 12.
- Page 26 PIPING SYSTEM COMPONENT DESCRIPTIONS 13. PRODUCT DISCHARGE VALVE - Regulates the flow of aerated material from the hopper to the product tee. 14. AERATION - Induces air into hopper to aerate product and make it flow- able. See Figure 10 for identification of aeration units. Refer to Aeration System Operation on page 28 for detailed description.
- Page 27 PIPING SYSTEM COMPONENT DESCRIPTIONS 16. BLOW DOWN VALVE - Opens and closes blow-down line to atmosphere, exhausts tank. 17. PRODUCT DISCHARGE OUTLET - Extension of product line to rear of trailer. Used to connect vessel to silo/receiving vessel. 18. VACUUM RELIEF VALVE - Prevents exceeding maximum vacuum pressure.
- Page 28 19. VACUUM/FILTER/CANISTER - A dust collection system. Air is suctioned into filter from tank and then returned back to the blower. 20. CLEAN OUT VALVE - Valve that allows filtered product to be sent to educator line to be put back in trailer. 21.
- Page 29 EDUCTOR LINE - Returns filtered product back to the product load line to be returned to tank. 23. VACUUM DUMP VALVE - Relieves pressure from vacuum filter and suction line to atmosphere. Also used for emptying residual product from bottom canister. 24.
- Page 30 25. SILO DUST COLLECTOR SUCTION INLET CONNECTION AND VALVE - Valve that allows air to flow into vacuum from silo dust collector. 26. LOAD LINE CONNECTION AND VALVE - Connection point for vacuum loading product into vessel. 27. FILTER CANISTER VIBRATOR AND AERATOR CONTROLS - To assist in cleaning loose product from interior walls of canister.
- Page 31 AERATION SYSTEM OPERATIONAL DESCRIPTION In the aeration system, compressed air is injected at the base of each hopper and filters upward to aerate the cargo and make it flow-able. If the cargo does not require aeration, the tank is pressurized through the top air line. When sufficient pressure is built up in the tank, the operator opens the pressure control valve and the individual hopper discharge valves so that the air-borne product flows through the discharge line into the storage facility.
-
Page 32: Operating Instructions
OPERATING INSTRUCTIONS HOOKING TRACTOR TO TRAILER WARNING Never operate this bulk transport unless you are fully aware of the location of all the control valves and shut down procedure. Prior to backing tractor under trailer, check the following items: 1. Trailer brakes are set or wheels blocked to prevent trailer from rolling. 2. - Page 33 Vacuum Operation INTRODUCTION The Heil Tube Dust Collection System is displayed in Figure 4. Contami- nated air is brought in through the bottom of the filter assembly from the top of the tank. The air flows through porous plastic tubes with mil- lions of tiny holes which allows clean air to escape through the top of the filter tube assembly.
- Page 35 Vacuum Operation Pre-Loading Instructions 1. Refer to page 36 for general loading instructions. 2. Ensure all manholes are properly latched. 3. Ensure all hoses are secured to piping. 4. Identify all valves and their location from Figure 4. 5. If unloading unpressurized rail car, open rail car’s manhole. 6.
- Page 36 SAFETY CHECK A vehicle safety check should be performed daily prior to operation. See Preventive Maintenance Section. START-UP DANGER NEVER open manhole unless tank is completely depressurized. Even a slight amount of residual pressure will cause manhole to fly open when unlatched.
- Page 37 Vacuum Loading a Vacuum Pneumatic Trailer From Standard Railcar or Silo 1. Position trailer so the hoses will have the least amount of bends for most efficient loading. 2. Close the blow-down valve and top air valve. 3. Connect the product transfer hose to the rail car or silo’s product discharge line and the tank’s pneumatic loading line.
- Page 38 Vacuum Loading From Pressure Differential Rail Car A pressure differential car allows for the most efficient loading. A “PD” car is pressurized by a blower which creates a push-pull loading process when loaded with a vacuum pneumatic trailer. This this greatly minimizes the load time. 1.
- Page 39 UNLOADING 1. Position trailer for optimum unloading. 2. Open vacuum dump/blower air inlet valve. See silo dust collection on page 33 if using dust suction feature on trailer Close blower pressure output valve. Close air operated valve between tank and filter canister, at rear. 5.
- Page 40 17. Readjust pressure control valve if necessary. 18. When tank pressure begins to drop rapidly, close hopper discharge valve. NOTICE When pressurizing unit, look for air leaks. If any are found, shut down immediately and repair the leak. 19. Open aeration valve on the other center hopper. 20.
- Page 41 26. When tank pressure begins to drop rapidly, close front hopper dis- charge valve. 27. Purge unit by opening all aeration valves and opening and closing discharge valves rear to front. CAUTION Before opening blow-down line, make sure no one is in line of air stream.
-
Page 42: Operating Tips
OPERATING TIPS MINIMIZING UNLOADING TIME The Heil Vacuum Pneumatic Trailer is designed with one of the fastest vacuum discharges in the industry. Unloading time will depend, however, on variables such as type of product being unloaded, unloading site, condition of equipment, etc. The following points should be considered. - Page 43 When Comparing product flow through a hose in the vertical portion of hose (Figure 7). It can readily be seen that vertical positioning of hose results in smoother product flow. Figure 7. Vertical Product Flow NOTICE If discharge hose must be run horizontally for any considerable distance, elevate the hose at intervals to create slight “humps”...
- Page 44 MINIMIZING UNLOADING TIME (CON’T.) 2. The relative density (product to air ratio) decreases as the elevation increases. The higher the storage facility, the longer it will take to unload. Figure 8, illustrates the relative density at various elevations. Note that as the product head decreases, the air velocity will increase and air pressure will decrease.
- Page 45 Landing Gear Operating Instructions WARNING: Before attempting to operate the landing gear, you must read and understand the following procedures 1. Perform all procedures in lighted area clear of obstacles and other personnel. 2. Always grip the crank handle securely with both hands. 3.
- Page 46 1635 Blower Skid Operation 1. Install hydraulic hoses to unit. 2. Open trailer un-loading valve. 3. Idle engine to warm up blower at zero pressure. 4. Slowly increase engine speed to 1600RPM at zero blower pressure. 5. Close trailer un-loading valve. 6.
- Page 47 1635 Blower Skid Operation 1635 Blower Skid Parts List Description Part Number Quantity Oil Cooler ASA 0256AH12 Hyd Un-loader Valve Doering 44H7372773 Hyd Un-loader Ram HR9-4410-04 Hyd Un-loader Gate Valve SK1600MGVB Bracket Hyd Needle Valve NDV25S-20 1 1/4 Hyd Needle Valve NDV12N 1/2 Hyd Motor M5100A767ADNK20-00...
-
Page 48: Preventive Maintenance Instructions
A vehicle safety check should be performed daily prior to operation. LUBRICANTS It is not the policy of the Heil Trailer International, Co. to guarantee lubricant performance. The responsibility for the quality of any lubricant rests solely with the distributor or manufacturer of the lubricant. -
Page 49: Maintenance Schedule
PREVENTIVE MAINTENANCE SCHEDULE DAILY Anti-Lock Brake System…………………………………Check for proper operation Lights and Wiring…………………………….Check all lights for proper operation All Bolts………………………………………………………….Visually check for tightness Air Reservoirs…………………………………………….Drain at the end of each shift Tires…………………………………………………Check for proper inflation and inflate WEEKLY Wheel Seals………………………………………….Check for oil leakage and oil level Wheel Lugs……………………………………………………….…Check for proper torque Wiring………………………………………………………….………..Check all connections Suspension Bolts..…………………………………………….…Check for proper torque... - Page 50 PREVENTIVE MAINTENACNE SCHEDULE EVERY 5000 MILES King Pin Alignment…………………………………………Check for proper alignment. Brakes……………………………………………………………..…….………Adjust as needed. Wiring..........Check for chafed or broken wires, ground wire connections, loose wire retaining clips and dielectric grease. Upper 5 Wheel……………………….....………………..………………...Lubricate. Suspension…………………………………………………..Check for proper bolt torque. Piping……………………………….Check all piping supports, tighten if necessary. Aeration…………………………Check all aeration tee bolts - hand tighten only.
- Page 51 Lubrication and Service Chart Drain any water from air reservoirs Check manhole clamps, cover closures and gaskets Clean manhole and lubricate its clamps Check the operation of all lights Check all wiring connections Check for broken or chafed wires Check brake operation Adjust brakes (Pg.
- Page 52 LUBRICATION & SERVICE Manhole Cover-(Weekly)-check clamping device for proper cover clo- sure; check gasket for damage. (Monthly)-Clean manhole gasket and lubricate clamps. 2. Lights and Wiring-(Daily)-check all lights for proper operation. (Weekly)-Check all connections. (Every 5000 miles)-Check for chafed or broken wires. 3.
-
Page 53: Aeration System
LUBRICATION AND SERVICE (CONTINUED) 14. Upper 5 Wheel-(Every 5000 miles) Lubricate with multipurpose grease. 15. Compressor or Blower-Service according to manufacturer’s recommendations. GENERAL INSPECTION-AERATION SYSTEM The following inspection should be performed monthly. 1. Check pressure gauges for accuracy. 2. Close manhole covers. Close all valves except aeration valves. Remove dust cap from product line. - Page 54 5. When inspection is complete, open blow-down valve to exhaust the air in the tank. Replace dust cap on product line. If one or more hoppers does not discharge properly, and there are no leaks in tank or valves, the following service procedure is recommended. 1.
-
Page 55: Vacuum/Filter
Vacuum/Filter Maintenance Cleaning Instructions 1. Close the top cyclone cleanout valve (bottom valve should remain closed). 2. Open both cleanout ball valves and allow the line to clear. 3. Close the cleanout ball valves. 4. Open the bottom cyclone cleanout valve. Filter System Maintenance Normal maintenance suggested for all filters is a three part process: Reverse the flow of blower air from clean side... - Page 56 BRAKES-MAINTENANCE & ADJUSTMENT NOTICE For more information reference the manufactures web literature or call their customer support. The wheel brakes are equipped with slack adjusters for easy brake adjustment to compensate for brake lining wear. It is recommended that slack adjuster arm travel be held to a minimum for most efficient braking action.
- Page 57 DISC BRAKE INSPECTION & PREVENTIVE MAINTENANCE Basic Inspection w/ wheel mounted 1. For vehicles with electronic wear indicators, use the dash indicator(s) and/or the hand-held diagnostic tool to regularly monitor the pad wear. 2. In all cases, visually inspect the wear indicator every three months (or keep track of the results of maintenance inspections to schedule checks 4 to 5 times during the pad lifetime).
-
Page 58: Rollover Protection And Abs
ROLLOVER PROTECTION AND ABS INTRODUCTION The rollover protection available on Heil trailers is an electronic, self-monitoring system that works with standard air brakes to enhance the safety and reduce the potential of trailer rollover accidents. Electronic rollover protection systems monitor many factors that may cause a rollover accident; vehicles speed, wheel speed, air suspension pressure, and lateral acceleration along the vehicles roll axis. - Page 59 ROLLOVER PROTECTION AND ABS NOTICE Remove all air pressure and electrical power from the brake system before beginning any work on system. DIAGNOSTICS/TROUBLESHOOTING Most ABS or Roll Stability problems are related to: 1. Cut, corroded, or abraded wires. 2. Corroded connectors and terminals. 3.
- Page 60 ROLLOVER PROTECTION AND ABS DIAGNOSTICS/TROUBLESHOOTING Diagnostic Trouble Fault Codes List (HALDEX) Power Supply Fault Code List ECU TIME OUT or NO LINK No supply on ignition switched line. Check truck fuses, 7-way connection, 5-way ABS connection, power cable connections. Check diagnostic cable for corrosion. PWR ISO7638 FAILI Intermittent power loss.
- Page 61 ROLLOVER PROTECTION AND ABS DIAGNOSTICS/TROUBLESHOOTING Sensor/Sensor Extension Fault Code List (cont..) S1A SIGNAL Low sensor output. 1. Rotate the wheel at 1 rev / 2 sec and S1B SIGNAL measure AC voltage at the sensor plug, it should be > 200 S2A SIGNAL millivolts.
- Page 62 ROLLOVER PROTECTION AND ABS DIAGNOSTICS/TROUBLESHOOTING Modulators Fault Code List (cont..) EPRV 21 SLOW REC Wheels are slow to recover after brakes are released. Make EPRV 22 SLOW REC sure foundation brakes are operating properly, delivery hoses not pinched, speed sensors not crossed with modulator, cor- rect side-by-side plumbing.
- Page 63 ROLLOVER PROTECTION AND ABS DIAGNOSTICS/TROUBLESHOOTING Blink Code Diagnostics (WABCO) There are two kinds of faults: active and stored. Active faults are those currently existing in the system, such as a broken wire. Active faults can be diagnosed through blink codes or TOOLBOXTM Software.
-
Page 64: Wheel Bearing And Seals
Check oil level and for leaks around the oil seal at least once a week. If low, refill hub to oil level line on hub cap. Heil Trailer International, Co. uses 75W90 Synthetic Gear Oil. For best results and wheel end life, use only compatible lubricant products. - Page 65 Wheel Bearing Adjustment (continued) 2. Back off inner jam nut 1/3 turn to allow the wheel to rotate freely. 3. Install washer and tighten outer jam nut. 4. Final bearing adjustment should be with 0.001” to 0.005” end play. Tighten nuts at this position. Figure 15.
- Page 66 Oil Seal Replacement (continued) d. Using axle tool, drive the axle ring firmly on shoulder. Edge of axle ring must be parallel and flush with shoulder face. Remove excess sealer, if used. 4. Install oil seal in wheel hub as follows: a.
- Page 67 WHEEL & TIRE MAINTENANCE Proper tire inflation and correct installation of rims and wheels is essential to safe, economical, trouble-free service. Check tire pressures daily. Recommended inflation pressure is noted on VIN Data Plate. DO NOT over-inflate tires, as this is a common cause of rim failures and accidents.
- Page 68 NOTICE Insufficient mounting torque can cause rim slip, resulting in broken valves, worn parts and damaged tires. Excessive mounting torque can cause damage by stripping studs, collapsing spacer bands or forcing rims into an out-of round condition. Figure 16. Disc Wheel Installation Recommended Installation Procedure-Disc Wheels 1.
-
Page 69: Suspension
AXLE ALIGNMENT NOTICE Insufficient mounting torque can cause wheel shimmy, resulting in damage to parts and extreme tire tread wear. Excessive mounting torque can cause studs to break and discs to crack in the stud hole area. Improper axle alignment will cause dog-tracking and excessive tire wear. To check alignment of axles to king pin, use the following procedure: 1. - Page 70 Axle Alignment (continued) 9. Measure from front axle center extensions to rear axle center extensions. This distance should be the same of both sides (C = D). If not, remove and install new pivot bolts leaving them loose enough to adjust rear axle to parallel with front axle.
- Page 71 Figure 18. Quick-Align Operation 11. Using an E20 Torx socket, tighten the shear-type bolt axle pivot connection until the Torx head shears off. This ensures the proper torque of 550 ft. lbs. (±45 ft. lbs.). Pivot bolts must be replaced when trailer is aligned. DO NOT attempt to reuse old pivot bolts.
- Page 72 LIFT AXLE ALIGNMENT LIFT AXLE ALIGNMENT Following the procedures below will provide the proper axle alignment. Note: Does not apply to units that are pre-aligned. 1. With chassis on a flat level surface set suspension at the proper ride height with no load.
- Page 73 Trailer Suspension System Components and General Maintenance Guidelines HEIGHT CONTROL VALVE - The height control valve on the trailer air suspen- sion automatically responds to the relative position of the axle and vehicle frame. It meters air into or out of the air springs. Variations in load or temperature only affect the adding or exhausting of air.
- Page 74 Trailer Suspension System Components and General Maintenance Guidelines The ride height can also be found on the suspensions ID tag located on the inside of the curbside beam (Figure 22). Figure 22. Suspension ID Tag RIDE HEIGHT ADJUSTMENT 1. Connect the vehicle to a compressed air supply with approximately the pressure of the normal supply system.
- Page 75 Trailer Suspension System Components and General Maintenance Guidelines 6. Adjust the HCV linkage to fit between HCV lever and lower linkage attachment. 7. Once set to the designed ride height, test drive the trailer. After the test drive, check the ride height to assure an accurate adjustment. AIR SPRINGS - Air springs will last almost indefinitely in most applications.
- Page 76 Trailer Suspension System Components and General Maintenance Guidelines PIVOT CONNECTION - A correct pivot connection is crucial to the life of the suspension. The pivot fastener must continually provide a sufficient clamp load through the bushing to prevent premature suspen- sion failure.
- Page 77 TORQUE SPECIFICATIONS RECOMMENDED SUSPENSION TORQUE RECOMMENDED WHEEL TORQUES...
-
Page 78: Notes
Notes: ___________________________________________________ ____________________________________________________ ____________________________________________________ ____________________________________________________ ____________________________________________________ ____________________________________________________ ____________________________________________________ ____________________________________________________ ____________________________________________________ ____________________________________________________ ____________________________________________________ ____________________________________________________ ____________________________________________________ ____________________________________________________ ____________________________________________________ ____________________________________________________ ____________________________________________________ ____________________________________________________ ____________________________________________________ ____________________________________________________ ____________________________________________________ ____________________________________________________ ____________________________________________________ ____________________________________________________ ____________________________________________________ ____________________________________________________ ____________________________________________________ ____________________________________________________ ____________________________________________________ ____________________________________________________ ____________________________________________________ ____________________________________________________ ____________________________________________________ ____________________________________________________... -
Page 79: Reporting Safety Defects
However, NHTSA cannot become involved in indi- vidual problems between you, your dealer or Heil Trailer International, Co. To contact NHTSA, you may either call the Auto Safety Hot-... - Page 80 CORPORATE OFFICE Heil Trailer International, Co. 1850 Executive Park Drive N.W. Cleveland, TN 37312 Phone: (423) 745-5830 MANUFACTURING PLANTS Heil Trailer Athens Heil Trailer Texas 1125 Congress Pkwy. 500 Randall Street Athens, TN 37303 Rhome, TX 76078 Phone: (423) 745-5830...
Need help?
Do you have a question about the 1600 and is the answer not in the manual?
Questions and answers