
Summary of Contents for NO DIG VM500
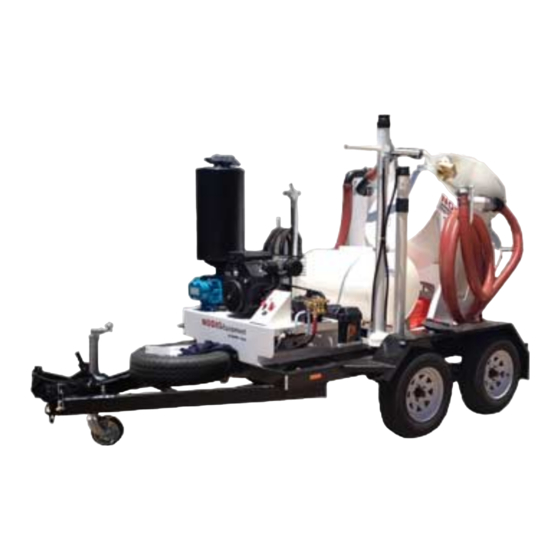
- Page 1 VM500 Vacuum Excavation System Directional Boring Mud Slurry Clean-Up Potholing to Locate Buried Utilities Valve Box, Catch Basin, Manway Cleanout...
-
Page 2: Table Of Contents
Owners Manual Table of Contents Important..........................3 Safety Precautions – Summary....................4 Towing..........................4 Parking & Set-up.........................4 Operating Environment.......................4 Operating Water Blaster......................4 Operating Vacuum Sucker....................4 Emptying Storage Tank......................4 Machine Overview........................5 Operating Principles.......................6 Operating Instructions......................7 Towing the Vacuum Excavator...................7 Parking and Set-Up......................9 Operating Environment.....................10 Operating Vacuum Excavator...................11 Operating Water Blaster....................15... -
Page 3: Important
Refer to correct operating instructions detailed in this manual. With correct operation, maintenance and care, the VM500 Vacuum Excavator is designed for many hours of operating use. If it does not function correctly, please consult the fault finder list for potential causes and remedies. -
Page 4: Safety Precautions - Summary
Safety Precautions – Summary The following safety precautions must be observed with the VM500 Vacuum Excavator: - Towing Parking & Set-up The towing vehicle must have:- When parking and setting up: - A two (2) tonne towing capacity;... -
Page 5: Machine Overview
Machine Overview... -
Page 6: Operating Principles
Operating Principles The Vacuum Excavator works on the principle of air velocity in order to produce suction at the end of the hose nozzle. Therefore if the end of the suction hose is fully plunged into either a solid or liquid no air flow will occur and there will be no suction. The vacuum system uses a 3 stage filtration system in order to filter dirt from the air stream. -
Page 7: Operating Instructions
Operating Instructions Towing the Vacuum Excavator Task Step Key Points Trailer 1. Complete a trailer ACTIVITY inspection inspection using the Check that the following items on checklist on the right. the trailer: - Any obvious damage to the trailer structure. ... - Page 8 Only tow the VM500 Vacuum Machine trailer at the following maximum speeds: - 80 km/hr on good sealed roads. ...
-
Page 9: Parking And Set-Up
Parking and Set-Up Task Step Key Points Positioning the 1. Position trailer with towing Use the towing vehicle to position the Vacuum Machine in the correct location. Trailer for vehicle. operation 2. Install override-brake Prior o reversing the trailer into position it is necessary to swing the reversing leaver locking latch if reversing. -
Page 10: Operating Environment
Operating Environment Task Step Key Points Check for 1. Check that the operating DANGER!!! adequate fresh area has adequate fresh DO NOT operate the Vacuum air in operational air. Machine in an enclosed or mostly area. enclosed building, tank or underground basement without providing adequate fresh air to the operator’s position. -
Page 11: Operating Vacuum Excavator
Operating Vacuum Excavator Task Step Key Points Perform pre- 1. Perform pre-start check of ACTIVITY start check. the trailer engine and Complete the Engine and Blower blower. pre-start check list section of the Vacuum Excavator Lay out suction 1. Set up the suction hose Unroll the suction hose from the machine and lay it out on the ground. - Page 12 Task Step Key Points 3. Initial ground breaking. First operate the water blaster from a distance to wet the ground or completely wet it with a garden hose. This will minimise dust generation. As the ground becomes wetter, bring the water blaster nozzle closer to the ground surface, but not too close to cause extensive splash back.
- Page 13 Task Step Key Points Shutting down 1. Shut down water blaster. Switch off the water pump on the control panel in order to stop the water blaster. the Vacuum Excavator 2. Empty the suction line. Lay the suction hose down with the nozzle completely open to allow any material in the suction hose to be sucked into the collection drum.
- Page 14 Task Step Key Points 5. Washing inside of the Use the water blaster to wash out any remaining material. collection drum. NOTE Do not water blast the rubber seal at the end of the drum, otherwise the seal can become damaged and prevent correct vacuum seal for the next operation.
-
Page 15: Operating Water Blaster
Operating Water Blaster Task Step Key Points Perform a pre- 1. Perform pre-start check of ACTIVITY start check. the water blaster. Complete the Water Blaster pre- start check list section of the Vacuum Excavator Lay out pressure 1. Set up water pressure Uncoil water pressure hose from the machine and lay it out on the ground. - Page 16 Task Step Key Points Completed 1. Switch off water pump. When water blasting has been completed, switch water pump to the “Off” position. Water Blasting 2. Disconnect water Lance Disconnect the water blasting gun from the hose using the quick connect coupling.
-
Page 17: End Of Day (Shift) Servicing Of The Vacuum Machine
End of Day (Shift) Servicing of the Vacuum Machine Task Step Key Points End of day 1. Shutdown and if required DANGER!!! (shift) servicing. isolate the engine, using The machine drive engine must battery isolator. be shut down. If required by your worksite, switch off battery isolator and lock it out prior to performing any servicing tasks. -
Page 18: Trouble Shooting Guide
Replace filter housing 8. Air in water system b) Loose fitting(s) b) Tighten fittings For further assistance, please call No Dig Equipment Service Department on (08) 9493 0642. Our technician will be pleased to assist you with your questions... -
Page 19: Determining Tank Fill Level
Note: applicable to trailer units only. The VM500 is designed as a potholing machine and its general operation is suck and dump. It can be used to cart spoil but caution must be exercised to ensure the trailer is not overloaded. -
Page 20: Daily (Shift) Pre-Start Checklist
Daily (Shift) Pre-Start Checklist The following two page checklist should be used at the start of each working day (shift) relevant to the area(s) of the Vacuum Machine that will be used during the working day. A relevant section of the checklist may be filled out prior to the area of the machine being used. -
Page 21: Pre-Start - Vacuum Excavation
Pre-Start – Vacuum Excavation Pre-Start Check Requirement Initials Check that the cartridge filter is correctly installed. Severe blower damage can occur if not fitted. Check that the collection drum door is correctly closed. Check that the collection drum door valve is closed. Check that the blower has correct oil level –... -
Page 22: Operational Risk Assessment
Operational Risk Assessment A number of Occupational, Workplace Health and Safety and Mining Safety Acts or Regulations require an operational risk assessment to be supplied by the equipment provider to the end user. Detailed on the following pages is an operational risk assessment for the towing, set up, operational use and cleaning of the Vacuum Excavator including water blasting and vacuum excavating.