
Related Manuals for Arctica Solar 1500 Series

Summary of Contents for Arctica Solar 1500 Series
- Page 1 1500 Series, Gen 3 Solar Air Heater / Solar Furnace Owner’s Manual V5, Released 03.21.2022 to print Questions? Issues? Email: info@arcticasolar.com | Website: www.arcticasolar.com |Phone: (714)-698-9779 Copyright 2022, Arctica Solar. All Rights Reserved...
- Page 2 Thank you for purchasing the Arctica Solar 1500 Series Solar Air Heater / Solar Furnace, Gen 3 design. This heater is a simple product, and with proper installation and maintenance should bring you years of free, renewable, supplemental heating to the adoptive space. Under full sunlight it can generate close to 1,500 W / 5,000 BTU / hr of space heating.
- Page 3 Section 1.0 - Items Included and not Included with the Heater The following items are included with your heater shipment. • 1x 1500 SERIES SOLAR AIR HEATER, GEN 3 • 4X WALL MOUNTING BRACKETS, 4x 2.5” STAINLESS LAG BOLTS & WASHERS, 4x HEX, STAINLESS, #8 x ½”...
- Page 4 8X SELF PIERCING LATH SCREWS, #8 x 3/4” – 4x per intake and 4x per exhaust collar attachment to the heater metal backsheet. • 1X 10W SOLAR PANEL WITH MALE DC OUT– for plugging into intake collar assembly power Copyright 2022, Arctica Solar. All Rights Reserved...
- Page 5 1X 6’ PCS OF METALIZED DUCT TAPE – for securing wiring harness to back of the heater prior to install and covering up unused intake and exhaust duct hole options on heater metal backsheet Copyright 2022, Arctica Solar. All Rights Reserved...
- Page 6 These items are likely needed to complete your installation but are not provided with the heater itself. They are typically in stock inventory at nearly all big box hardware stores (Lowes, Home Depot, ect) • 4” ducting / flexible insulated ducting (available from all big box hardware stores) Copyright 2022, Arctica Solar. All Rights Reserved...
- Page 7 For insulated / insulated flexible ducting – Cordless drill, a 6 3/8” hole drill bit – available at most hardware stores in electrical section, common tool for recessed lighting installation. For prepping the heater – Snip pilers, box knife with 1” blade, impact driver with Philips bit OR Philips head screwdriver. Copyright 2022, Arctica Solar. All Rights Reserved...
- Page 8 (Figure 2a). Figure 3 shows how the 4x mounting brackets interface with the heater to provide mounting support. Figure 3 shows detailed views of the mount bracket and solar panel bracket install. Figure 1: 1500, Gen 3 Heater Physical Dimensions Copyright 2022, Arctica Solar. All Rights Reserved...
- Page 9 CHECK YOUR TEMPLATE ALIGNMENT TO YOUR SPECIFIC HEATER by overlaying the template with holes cut onto the back of the heater to make sure the TEMPLATE holes properly align with the desired INTAKE and EXHAUST holes on the heater. Copyright 2022, Arctica Solar. All Rights Reserved...
- Page 10 Exhaust and intake need to be located on opposing ends of the heater. Heater can be mounted portrait or landscape, as guided in Section 4.0. Copyright 2022, Arctica Solar. All Rights Reserved...
- Page 11 2-3”. Use duct tape to secure switch wiring to the heater wall and backing as shown. The thermal switch is OPEN when the heater is below 30 C and CLOSED when the interior of the heater is above 30 C and ready to deliver useful heating. Copyright 2022, Arctica Solar. All Rights Reserved...
- Page 12 4x provided self-tapping lath screws to the back plane of the heater. Do not over torque the screw as it will strip the heater back material! Copyright 2022, Arctica Solar. All Rights Reserved...
- Page 13 – bottom right picture of Step 3.2.2. Tape thermal switch wires to the back of the heater using provided 6’ of metalized all weather duct tape Copyright 2022, Arctica Solar. All Rights Reserved...
- Page 14 Secure the intake collar with a silicone bead and 4x self-tapping lath sheet metal screws, same process as with the exhaust collar, Step 3.2.3. Copyright 2022, Arctica Solar. All Rights Reserved...
- Page 15 It is best to mount the heater closest to the point of use as possible to cut down on heat loss through the transport of air to the use space, and fan pressure head loss due to long duct runs. Copyright 2022, Arctica Solar. All Rights Reserved...
- Page 16 If routing through a wall where sealing the vapor barrier is required: The use of insulated ducting is recommended. We recommend using a 6” ABS riser pipe / tube installed as a conduit for the flexible insulated ducting as seen in the process below. Copyright 2022, Arctica Solar. All Rights Reserved...
- Page 17 Route 4” insulated ducting into the conduit. Secure the inner membrane of the interior side ducting to the end of a 6” air diffuser with duct tape as shown. Copyright 2022, Arctica Solar. All Rights Reserved...
- Page 18 Heater exhaust and intake collars interface with 4” ducting. Secure the duct to the collar using a screw clamp or duct tape. Once connected slide insulation and vapor barrier back over the clamp and wrap with duct tape or an additional screw clamp to secure in place. Copyright 2022, Arctica Solar. All Rights Reserved...
- Page 19 This will discourage dust, debris, moisture, ect from accumulating between the heater and the install wall during its lifetime. Select the thickness of weather stripping appropriate for your mounting wall texture or type. Not required but recommended. Copyright 2022, Arctica Solar. All Rights Reserved...
- Page 20 The heater can then be inserted into the bottom bracket and tilted back vertical against the wall and held in place by the installer until the top brackets are also installed. Copyright 2022, Arctica Solar. All Rights Reserved...
- Page 21 #8 self-drilling hex head screws. The heater should be snug in its mounting brackets, but do not over torque which may impart too much stress into the heater or its glass. Copyright 2022, Arctica Solar. All Rights Reserved...
- Page 22 We recommend roof mounts be completed by a licensed HVAC or roofing contractor to ensure best practice during the mounting and routing of ducting. Roof Copyright 2022, Arctica Solar. All Rights Reserved...
- Page 23 3/8” length Philips sheet metal screws and 4x #8 stainless washers for securing the solar panel to the solar panel mounting bracket. Also included are 2x #8 stainless, 3/8” length hex head self-drilling screws Copyright 2022, Arctica Solar. All Rights Reserved...
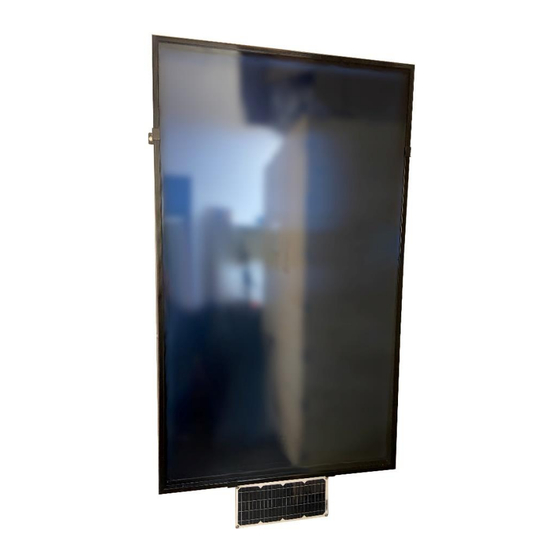
- Page 24 An installed solar panel + solar panel mounting bracket is shown on the image below. Copyright 2022, Arctica Solar. All Rights Reserved...
- Page 25 Power to the heater can also be provided with a 12V AC to DC wall plug, which has a similar 5.5mm x 2.5 mm MALE power out as the provided solar panel, or another means of 12V DC power such as a battery. Copyright 2022, Arctica Solar. All Rights Reserved...
- Page 26 Different indoor intake and exhaust grill options exist at local big box hardware stores and online retailers. New filter material such as is shown below can also be purchased at local and online retailers as well as directly from Arctica Solar. Section 7.0 – Connection to the Heat-Only Thermostat The 1500 heater has the option to be controlled by a heat-only thermostat provided with the heater.
- Page 27 Section 8.0 – Heater lifetime care guide and suggestions With proper maintenance, your 1500 Series, Gen 3 Solar Air Heater should bring you years of free and renewable supplemental space heating. Here are suggestions for caring for the heater over its lifetime.
- Page 28 In extreme soiling cases, the heater may need to be removed from the wall, intake and exhaust collars removed and vacuuming out of the interior of the heater itself with proper shop vacuum attachments or vacuum snake. Copyright 2022, Arctica Solar. All Rights Reserved...
- Page 29 The rail caps will deflect and bend with this operation, try to keep bending to a minimum as these caps will need to be re-installed after new glass is attached. Copyright 2022, Arctica Solar. All Rights Reserved...
- Page 30 If the absorber is damaged or dirty beyond use, you can order a new absorber panel from Arctica Solar or remove the existing absorber panel and paint it black with “high heat black” paint such as Rust-Oleum 248903.
- Page 31 With two people, place the glass on top of the furnace frame, and the use 2-4x hand clamps per side to hold the glass in place against the frame for no less than 24 hrs so the adhesive can fully cure. Copyright 2022, Arctica Solar. All Rights Reserved...
- Page 32 Doing so may overly stress and break the glass. Careless installation is the number one cause of damage to the heater during its lifetime! Copyright 2022, Arctica Solar. All Rights Reserved...
Need help?
Do you have a question about the 1500 Series and is the answer not in the manual?
Questions and answers