
Summary of Contents for Medema Fitform Nordic
- Page 2 1. POINTS OF ATTENTION UPON DELIVERY 1.1. All chairs All chairs are packed in a box on a pallet. Remove all packaging before preparing the chair. Mounting the backrest in the correct position: For transportation purposes the backrest is assembled on the chair but not yet connected to the backrest motor.
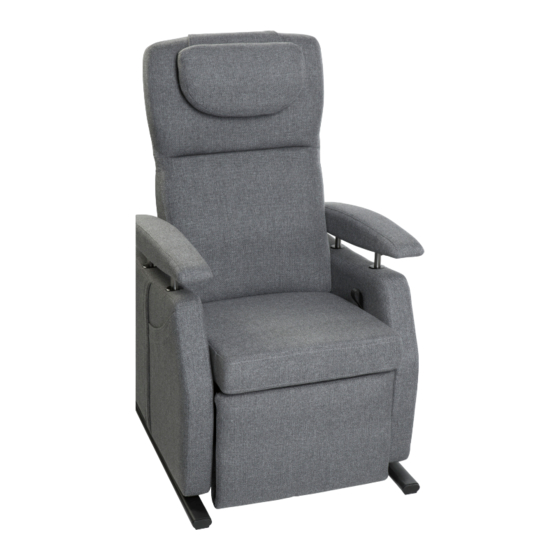
- Page 3 Positioning the adjustable headrest: The headrest of the chair is adjustable. Adjust the headrest by taking the top of the headrest (on both sides) into your hands and moving it forwards or backwards. (This can also be done by the user while sitting in the chair). (A headrest with electrical adjustment is optionally available) 1.2.
- Page 4 1.3. Chairs with swivelling side panel To prevent transport damage, the pivot part of the chair has been protected with a so-called ‘transport protection screw’. Remove this ‘transport protection screw’ before using the swivelling side panel. Fully extend the footrest. ...
- Page 5 Remove the rear wing bolts with which the side panels are connected to the mechanism (both left and right) Extend the footrest completely by using the hand control (if the chair also has a tilt function, tilt the chair by using the hand control to maximum level backwards) ...
- Page 6 2.3. Assembly of the backrest (required time: approx. 3 minutes) Gently shove the backrest forwards into the mechanism at the desired sitting depth Place the mounting bolts into the holes that correspond with the desired sitting depth and fasten them ...
- Page 7 Extend the footrest completely by using the hand control (if the chair also has a tilt function, tilt the chair by using the hand control to maximum level backwards) Fasten the front wing bolts with which the side panels get connected to the mechanism (both left and right) ...
- Page 8 INSTALLING THE REVOLVING PLATFORM UNDER AN EXISTING CHAIR Let the chair rise to the stand-up position. Place the chair on its left side ( be aware of the hand control). Take off the two side bars . ...
- Page 9 Mount the handling mechanism on the back beam of the lower frame with the M6 bolt and nut. Attach it approximately in the middle of the beam, but keep it clear from the revolving wheels. Service Information Fitform 574 Vario Nordic - 2016...
- Page 10 INSTALLING A PIVOTING SIDE PANEL ON AN EXISTING 574 VARIO NORDIC 4.1 Disassembly of the current side panel Loosen the Velcro attachment of the rear flap. Remove the rear wing bolts with which the side panel to replace is connected to the mechanism.
- Page 11 4.2 Disassembly of the rear board Loosen the nuts with which the rear board brackets are fastened and remove the rear board. 4.3 Placing the pivoting side panel Place the new pivoting side panel on the chair, by hanging the mounting strip over the side plate of the mechanism.
- Page 12 Drill a Ø8mm hole in the middle of the beam through the key hole in the pivoting bracket. (Temporarily remove the backrest if this provides more desirable work space. Use service manual point 2.2) Fill up the space between the rear beam and the pivoting bracket with large washers, until the pivoting bracket is positioned straight.
- Page 13 Fill up the space between the pivoting bracket and the mechanism side plate with thick washers. Fasten the pivoting bracket onto the side plate with the provided countersunk M6 screws, nuts and washers. The screw heads should go on the outside of the side plate.
- Page 14 Tilt back the side panel and make sure the short mounting strip falls correctly over the mechanism side plate. (If it does not, use thicker of thinner fill up washers between the pivoting bracket and the side plate.) 4.4 Remounting the rear board ...
- Page 15 5. INSTALLING A MOBILITY KIT ON AN EXISTING 574 VARIO NORDIC Let the chair rise to the stand-up position. Place the chair on its left side ( be aware of the hand control). Take off the two side bars. ...
- Page 16 Apply the Mobility Kit operating bracket to the backrest frame. (with 2x blind rivet on the lumbar plate and with the provided bolt in the backrest bracket. Position the chair on it’s side and guide the Bodown cables around the back of the chair, through the openings in the Mobiltity Kit side bars.
- Page 17 Now fasten the ring on the end of the inner cable to the brake bracket with the provided screw. Position the chair in upright position and re –apply the backrest cushion and the provided Mobility Kit backrest upholstering. 6.
- Page 18 Place the wheel brackets in the backside of both side bars and tighten them with the provided screws. 7. INSTALLING A LUMBAR SUPPORT ON AN EXISTING 574 VARIO NORDIC Remove the backrest upholstering and backrest cushion Service Information Fitform 574 Vario Nordic - 2016...
- Page 19 Mount the lumbar support onto the lumbar plate of the backrest frame: o Apply the lock nut in the right slot connection loose enough, so that movement through the slot is still possible. o Apply the adjustment knob in the left slot tightly and the lock nut with enough space between it and the adjustment knob, so that it is possible to loosen the knob for height adjustment of the lumbar support.
- Page 20 8. INSTALLING A SMALL COFFEE TABLE ON AN EXISTING 574 VARIO NORDIC Mount the table top onto the table stand Stick 3 felt pads on the underside of the side bar fastening bracket. Then mount the table onto the side bar fastening bracket Service Information Fitform 574 Vario Nordic - 2016...
- Page 21 Drill two holes of Ø9 mm through the middle of the side bar profile on which the table will be mounted. First hole is positioned 183mm from the front side. The second hole is positioned 160mm from the centre of the first hole. ...
- Page 22 9. INSTALLING A TRANSPARENT TABLE ON AN EXISTING 574 VARIO NORDIC Remove the front side bar cap, from the side bar on which the transparent table will be mounted. Now drill a Ø8mm hole through the top of the side bar profile through the middle of the already present side bar cap hole.
- Page 23 Mount the table top onto the upper table stand and fasten the upper table stand onto the lower table stand at the desired height. Now mount the assembled table into the side bar with the provided leveler. Service Information Fitform 574 Vario Nordic - 2016...
- Page 24 10. INSTALLING A HEIGHT ADJUSTABLE WORK TABLE ON AN EXISTING 574 VARIO NORDIC Remove the front side bar cap, from the side bar on which the work table will be mounted. Now drill a Ø8mm hole through the top of the side bar profile through the middle of the already present side bar cap hole.
- Page 25 11. REPLACING UPHOLSTERED PARTS & COVERS 11.1. Replacing the upholstered seat cushion The loose seat cushion is positioned on the seating frame with Velcro. It is therefore very easy to take it out en replace it. 11.2. Replacing only the cover of the seat cushion The cover has a zipper.
- Page 26 11.4. Replacing only the cover of the backrest The cover of the backrest can easily be removed without taking out the backrest. All you have to do is unzip and then loosen the Velcro. Into the cover there is a 11.5.
- Page 27 11.6. Replacing only the cover of the armrest For replacing the cover of the armrest you could take it out first, but it can also be done while it is still mounted on the chair. Loosen de Velcro and take the cover of. Place a new cover by tightening the Velcro.
- Page 28 11.10. Replacing the hand control In order to replace the hand control you have to disassemble the side panel with the hand control. You can find the Instructions under 2.1. When the side panel is loose, mount the new hand control into the side panel, the wire goes through the hole in the side panel.
- Page 29 12.2. Changing the sitting depth Loosen flap on the back. Loosen back frame hinge bolts Adjust back hinge to the required seat depth: in increments of 2 cm see scale. Re-install hinge bolts into the seat frame. ...
- Page 30 12.4 Changing the length of the footrest Use the hand control to let the footrest come out. Loosen the flap on the back and on the side (both fixed with Velcro) Loosen the U-profile side screws. Adjust footrest to the required dimensions (overall length footrest should not exceed 40 cm) ...
- Page 31 12.5. Changing the riser movement The stand-up movement of the Fitform Vario 574 Nordic can be adjusted to 4 different movements, from straight up to tilting far forward. Disconnect the 230 V cable from the power socket Lay the chair on its left side. ...
-
Page 32: Technical Specifications
13. TECHNICAL SPECIFICATIONS Body wooden frame with MDF Backrest metal frame with webbing Seat frame plywood with steel no-sag springs Seat cushion polyurethane moulded foam densitiy 65 Back cushion polyurethane moulded foam densitiy 65 Mechanism standard up to 175 kg. body weight Drive system Linak 3 motors 6000 N. - Page 33 14. MECHANISM, MOTORS & SPARE PARTS 14.1 Warning The mechanism has been fitted with a very powerful motor (4000-6000 Newton). Always take utmost care when working on the chair to ensure that you do not get trapped between the moving parts of the mechanism. The motors operate at a (safe) voltage of 24 Volts.
- Page 34 14.3 Spare parts Service Information Fitform 574 Vario Nordic - 2016...
- Page 35 Understell stol oppreis Fitform Nordic svingbart sb51 hreg automatisk låsing montsett FN120-51 Understell stol oppreis Fitform Nordic svingbart sb57 hreg automatisk låsing montsett 170kg FN120-57 Understell stol oppreis Fitform Nordic svingbart sb63 hreg automatisk låsing montsett 250kg FN120-63 Utløser t/svingskive Fitform...
- Page 36 Pute sete stamdardkonfigurasjon stol oppreis Fitform Nordic 63cm hud sort FN140-63-S08 Pute sete stamdardkonfigurasjon stol oppreis Fitform Nordic 63cm stoff grå FN140-63 Pute rygg stamdardkonfigurasjon stol oppreis Fitform Nordic 45cm rh72 hud sort FN610-4572-S08 Pute rygg stamdardkonfigurasjon stol oppreis Fitform Nordic 45cm rh72 stoff grå FN610-4572...
- Page 37 14.4 Instructions for the Linak actuator software “Hot plugging” the handcontrol IMPORTANT If you intent to place or remove the hand control from the control box, you ALWAYS need to take the 230 Vac. cable from the wall socket first. If you forget, there is a slight chance that the control box will be damaged permanently.
- Page 38 14.5 Troubleshooting - What to do? The easiest way to solve (electronic) failures, is to replace parts. This costs relatively little time, so the user replacement. Problem: Chair does not operate: Verify that the power plug is plugged in and/or that there is power. When the chair still does not operate, replace the transformer, supply unit or the hand control.
- Page 39 Medema Norge AS - Stamveien 6 - 1481 Hagan - tlf 67064900 -firmapost@medema.no www.medema.no...
Need help?
Do you have a question about the Fitform Nordic and is the answer not in the manual?
Questions and answers