
Related Manuals for Heiko POOL 5


Summary of Contents for Heiko POOL 5
- Page 1 User manual of the heat pump HEIKO POOL Before operating this product, please read this manual carefully and keep it for future reference.
- Page 2 Thank you for choosing our quality product. Please read this instruction sheet carefully before use and follow the sheet to operate the unit in order to prevent damages on the device or injuries to staff. Specifications are subject to change without notice for further improvement.
-
Page 3: Table Of Contents
Content 1. Safety Precautions 2. Outlines and Dimensions 3. Specification 4. System and main components 5. Installation 5.1 Pre-requirements 5.2 Location 5.3 Installation layout 5.4 Connecting the condensation draining kit 5.5 Installing the unit on noise-damping supports 5.6 Hydraulic connection 5.7 Electrical installation 5.8 Electrical connection 6. - Page 4 This heat pump contains a fammable refrigerant R32. Any intervention on the refrigerant circuit is prohibited without a valid authorization. Before working on the refrigerant circuit, the following precautions are necessary for safe work. 1. Work procedure The work must be carried out according to a controlled procedure, in order to minimize the risk of presence of fammable gases or vapors during the execution of the works.
- Page 5 Dear Customer, Thank you for your purchase and for your confdence in our products. These are the result of many years of research in the feld of design and production of heat pumps for swimming pools. Our aim is to provide you with an exceptional high performance quality product.
-
Page 6: Safety Precautions
1. Safety Precautions 1. Safety Precautions This appliance is not intended for use by persons, including children, with reduced physical, sensory or mental capabilities, or lack of experience and knowledge, unless they have been given supervision or instruction concerning use of the appliance by a person responsible for their safety. - Page 7 1. Safety Precautions 1. Safety Precautions Copper Fu se Steel Please select the correct fuse or breaker as When the power cord gets loose or is per recommended. Steel wire or copper wire damaged, always get a qualified person to cannot be used as substitute for fuse or fix it.
-
Page 8: Outlines And Dimensions
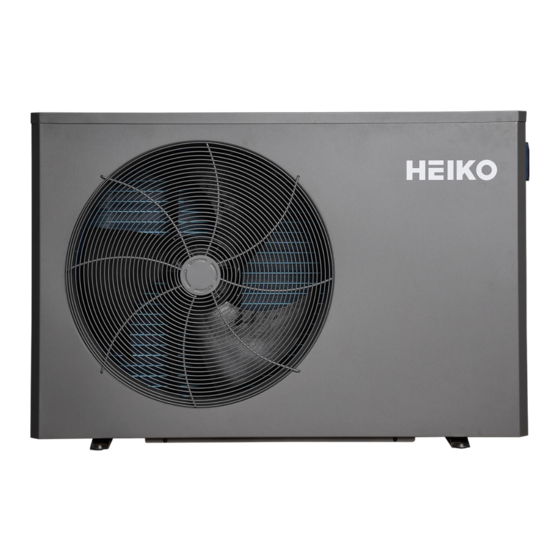
2.Outlines and Dimensions 2.Outlines and Dimensions Heiko Pool 5 6 43 10 3 26 0 3 34 82 4 5 90 H e ik o Pool 7 Heiko Pool 9 9 32 6 43 33 0 3 34 9 08... -
Page 9: Specification
3. Specifivation 3. Specifivation HEIKO POOL 5 HEIKO POOL 7 HEIKO POOL 9 HEIKO POOL 11 HEIKO POOL 15 Test conditions 7.20~2.04 9.50~2.30 13.0~2.35 14.70~2.50 19.8~2.77 Heating power (kW) 3.74~2.04 4.90~2.20 6.50~2.35 7.35~2.50 10.80~2.77 Power in mode Silence (kW) 26°C Water 26°C... -
Page 10: System And Main Components
4. System and main components 4. System and main components Condenser 4-Way valve Capillary Compressor Evaporator Figure 2-1 The working fluid, in its gaseous state, is pressurized and circulated through the system by a compressor. On the ischarge side of he compressor, the hot and highly pressurized gas is cooled in a heat exchanger, called a condenser, until it condenses into a high pressure, moderate temperature liquid.The condensed valve, capillary tube, or possibly a work-extracting device such as a turbine. -
Page 11: Installation
5. Installation 5. Installation WARNING: Installation must be carried out by a qualifed engineer. This section is provided for information purposes only and must be checked and adapted if necessary according to the actual installation conditions. 5.1 Pre-requirements Equipment necessary for the installation of your heat pump: Power supply cable suitable for the unit’... -
Page 12: Installation Layout
5. Installation 5. Installation 5.3 Installation layout Heat pump Automated treatment system 4-way valve (salt chlorinator, metering pump) Valve 1 Valve 5 Valve 2 Water outlet Water intake Elevating studs Valve 4 Condensation Circulating Filtration draining pump FROM THE POOL TOWARDS THE POOL Valves 1,2 and 3: Bypass valves Valves 4 and 5:Regulating valves... -
Page 13: Hydraulic Connection
5. Installation 5. Installation WARNING: Installation must be carried out by a qualifed engineer. This section is provided for information purposes only and must be checked and adapted if necessary according to the actual installation conditions. 5.6 Hydraulic connection By-Pass assembly Open valve Half-open valve The heat pump must be connected to the pool by... - Page 14 5. Installation 5. Installation By-Pass assembly for one heat pump TOWARDS THE POOL Automated treatment system POOL Filtration + Pump FROM THE POOL Half-open valve Open valve By-Pass assembly for more than one heat pump TOWARDS THE POOL Automated treatment system POOL Filtration + Pump...
-
Page 15: Electrical Installation
In places open to the public, it is mandatory to install an emergency stop button close to the heat pump. Protection Cable diameter Models Electricity supply Max. current Thermal-magnetic (D curve) protection HEIKO POOL 5 RO2V 3x2.5 mm 1-phase HEIKO POOL 7 RO2V 3x2.5 mm 220-240V/1N~50Hz HEIKO POOL 9 RO2V 3x2.5 mm... -
Page 16: Electrical Connection
5. Installation 5. Installation 5.8 Electrical connection WARNING: The heat pump’ s power supply MUST be disconnected before any operation. VPlease comply with the following instructions to electrically connect the heat pump. Step 1: Detach the electrical side panel with a screwdriver to access the electrical terminal block. Step 2: Insert the cable into the heat pump unit by passing it through the opening provided for that purpose. -
Page 17: Use
6. U se 6. U se 6.1 Wired remote control 6.2 Control box displays Before starting, ensure that the filtration pump is working and that water is circulating through the heat pump. Cooling mode Speed compressor Full Inverter Heating Mode Fan speed Full Inverter Automatic mode... -
Page 18: Operating Mode Selector
6. Use 6. Use 6.3 Operating mode selector Push on to change the operating mode. The different modes appear in the following order: Heating mode Full Inverter Cooling Mode Full Inverter Heating mode Boost Cooling mode Boost Heating mode Eco silence Cooling mode Eco silence Automatic mode... -
Page 19: Setting The Clock
6. Use 6. Use 6.6 Setting the clock Step 1 : Press 5s to to enter current time setting. Step 2 : Press to , the hours are blinking, push to to adjust the hours. Step 3 : Press to , the minutes are blinking, push to to adjust the hours. -
Page 20: Programming Start/Stop
6. Use 6. Use 6.7 Programming Start/Stop ROOM VALUE This function is for programming the Start/Stop timing. You can programme up to 3 different Start/Stop timings. Setting is as follows: Step 1 : Push to to enter into timer functions. Step 2 : Timer 1 blinking, press to enter timer ON 1 hour setting,press to modify the value of... -
Page 21: System Parameter Query
6. Use 6. Use 6.9 system parameter query WARNING : This operation is used to assist servicing and future repairs. The default settings should only be modifed by an experienced professional person. ROOM VALUE WARNING : Any change to the reserved settings will automatically void the warranty. The status values can be checked via the remote control by following these steps ROOM VALUE... -
Page 22: Wifi
6. Use 6. Use 6.11 WiFi 1.Download and install APP: Search “Smart Life” in APP store,download and install it “ ” Or scan the code to enter a website and download it available for Android and IOS Start up APP After installation, click the icon “... - Page 23 6. Use 6. Use 2.Registration If you don’t have an account, please create a new account as follows: 1. Sign up; 2. Choose “Agree”; 3. Enter mobile number or email address; 4. “Get Verification Code”, then enter the verification code received by email or phone to validate your account; 5.
- Page 24 6. Use 6. Use 3.Log in 3.1 If you have existing account, please log in as follows: 1. Click “Log In”, 2/3.Enter “account” and “password”,then click “Log In” 3.2 If the password is forgotten, please set a new password as follows: 1.
- Page 25 6. Use 6. Use 4. Connect heat pump to APP in default WIFI mode: WIFI connection Step 1: Connect mobile phone to available WIFI in the house, for example “XinC” as below: Step 2: Open “Smart life” APP, and log in, 1.
- Page 26 6. Use 6. Use Step 3: 1. Select WIFI network,choose the same WIFI as mobile phone is connecting (For example XinC), and enter correct password; 2. Click “Next”; 3. Reset the device first. On operation panel, press “ ” + “ ”...
- Page 27 6. Use 6. Use 5. Connect heat pump to APP in hot spot mode Step 1: Open “Smart life” APP, and log in, 1. Click “╋” or “Add Device”, 2/3. Choose “Large Home Appliances” and click “Smart Heat Pump (Wi-Fi)”...
- Page 28 6. Use 6. Use Step 2: Select WIFI network as the hot spot from mobile phone, and enter correct password. Then click “Next”. 2. Reset the device first on the operation panel. 1. Press “ ” + “ ” at the same time for 5 seconds, to enter “hot spot WIFI mode”, 2.
- Page 29 6. Use 6. Use After the device is added, Click , you can rename the device. Can be renamed If the connection is failed, please try it again.
- Page 30 6. Use 6. Use 6. Operation of APP After the heat pump is bounded, on the main interface, click “Pool Heat Pump”to operate it. Return The device can be renamed Failure information Set temperature Current temperature Increase or decrease the set temperature ON/OFF the unit Timer ON/OFF...
- Page 31 6. Use 6. Use 6.1 Press “Switch”, to turn on or off the unit; 6.2 Press “ ” or “ ” , to increase or decrease the set temperature; 6.3 Press Mode to choose the mode among Eco Heat “ ”...
- Page 32 6. Use 6. Use...
-
Page 33: Operation
7. Operation 7. Operation 7.1 Operation Conditions of use For the heat pump to operate normally, the ambient air temperature must be between -7°C and 43°C. Recommendations prior to start-up Before activating the heat pump, please: Check that the unit is firmly secured and stable. Check that the gauge indicates a pressure greater than 80 psi. -
Page 34: Using The Pressure Gauge
7. Operation 7. Operation 7.3 Using the pressure gauge The gauge is for monitoring the pressure of the refrigerant contained in the heat pump. The values it indicates can vary considerably, depending on the climate, temperature and atmospheric pressure. When the heat pump is in operation: The gauge’s needle indicates the refrigerant pressure. -
Page 35: Maintenance And Servicing
8. Maintenance and servicing 8. Maintenance and servicing 8.1 Maintenance and servicing WARNING:Before undertaking maintenance work on the unit, ensure that you have disconnected the electrical power supply. Cleaning The heat pump’s casing must be cleaned with a damp cloth. The use of detergents or other household products could damage the surface of the casing and afect its properties. -
Page 36: Repairs
9. Repairs 9. Repairs WARNING:Under normal conditions, a suitable heat pump can heat the water in a swimming pool by 1°C to 2°C per day. It is therefore quite normal to not feel any temperature difference in the system when the heat pump is working. -
Page 37: List Of Faults
9. Repairs 9. Repairs 9.2 List of faults Error list Error Code Failure Status of Unit Course Solution 1.Flow switch failed 1.Replace flow switch Er 03 Flow switch protection Unit stops 2.Insufficient water flow rate 2.Check water pump and water system Unit stops if Er 18 Discharge temperature sensor failure Er 18... - Page 38 9. Repairs 9. Repairs Error list Error Code Failure Status of Unit Course Solution Recover by repowering. Check water system Too high delta T between inlet/outlet Er 11 AL 15 Unit stops Insufficient water flow rate water temperature (happened 3 times) and water pump 1.Leakage of refrigerant 1.Check if there is any leakage point...
-
Page 39: Annex
10. Annex 10. Annex 10.1 Parameter checking To enter the verification parameters, Keep pressing press for 3 seconds, then scroll through the parameters with the buttons Code Name Note Air discharge temp. Air suction temp. Inlet water temp. Outlet water temp. Outdoor coil temp. -
Page 40: System Parameter Query
10. Annex 10. Annex 10.2 System parameter query Keep pressing 3 s until you enter the settings. Code Name Range Default Water pump working mode 0: ON constantly 1: OFF 60s after compressor of,Pump ON 5 min Per L1 min. Water pump working period In standby mode,water pump work 5min per L1 min, L1=3~180 Timer setting... -
Page 41: Exploded View
11.Exploded View 11.Exploded View Part Name Part Name Part Name Top panel Service valve Control board Top bracket Compressor Terminal block Back panel Front panel Bulkhead Cable gland Fan guard Reactor Titanium pipe heat exchanger Fan blade Controller Wired controller DC fan motor Side panel Fan motor bracket... -
Page 42: Wiring Diagram
12.Wiring Diagram 12.Wiring Diagram HEIKO POOL 5 HEIKO POOL 7 HEIKO POOL 9... - Page 43 12.Wiring Diagram 12.Wiring Diagram HEIKO POOL 11 HEIKO POOL 15...
- Page 44 NCSMS00393A00-A...
Need help?
Do you have a question about the POOL 5 and is the answer not in the manual?
Questions and answers