
Related Manuals for TATSOUL 370-S


Summary of Contents for TATSOUL 370-S
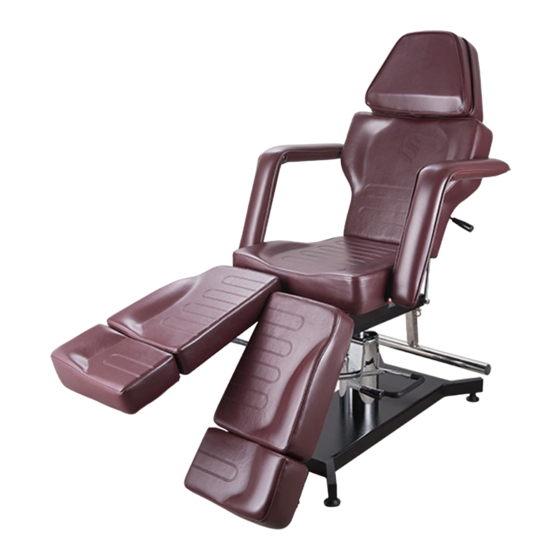
- Page 1 Correct Position When a client is getting on the chair, ALWAYS have the chair locked and the bed set in a parallel position to the base as shown. P9-1...
- Page 2 CONTENTS P1(60027)Connector Bolt S1 (60030) Spring Hook 1 pcs W (60040) Adjustable Foot Pegs φ48x10x30 4 pcs M10x25 1 pcs S2 (60031) Connector Washer φ6x13x1 1 pcs P2(60028)Connector Washer φ10X20X1.5 1 pcs S3 (60032) Hook Screw P3(60029) Split Lock Elastic Gasket M6x16 1 pcs φ10 1 pcs X1(60041) Back Teeth Bolts...
- Page 3 Step2. Fasten base to lift with Base Bolts & Washers. (W(60040)) Step1. Screw foot pegs into base. U1(60035) U2(60036) Step4. Fasten Seat Frame Bracket to bottom of seat with frame bolts & washers. X1 (60041) S1 (60030)/S2 (60031)/S3(60032) Step5. Fasten Back Teeth to seat Step3.
- Page 4 (Y(60042)) (O1(60047)\O2(60048)) Step6. Insert Leg Rest Bars into Step7&8. Tighten Hinge Bolt on leg rest bars. handle of seat frame and fasten stopper bolt and washer. Step9. Place Seat Frame Bracket on to lift piston, aligning seat frame notch with piston peg. P9-4...
- Page 5 X2 (60037) Step10. Insert Back Adjustment Step11. Attach Spring to Seat Back Bar into Back Teeth, then fasten Adjustment Bar and Spring Hook Bracket. back teeth crossbar over top with cross bar mounting screws. P1 (60027)/P2 (60028)/P3(60029) Step12. Insert Adjustable Foot Rest Step13.
- Page 6 P9-6...
- Page 7 P9-7...
- Page 8 VINYL AFTERCARE 1.Use soft cleaning implements. Only clean your vinyl seats with soft sponges, dish cloths, and soft-bristled brushes. This will ensure your vinyl seats last for many years. Using steel wool, sharp cleaning tools, or similarly abrasive cleaning implements could cause your vinyl seating to tear.
- Page 9 P9-9...
Need help?
Do you have a question about the 370-S and is the answer not in the manual?
Questions and answers