Advertisement
Available languages
Available languages
Quick Links
NEDERLANDS
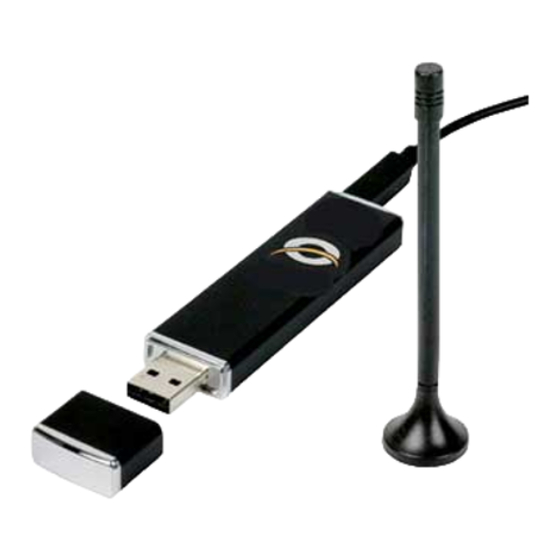
Conceptronic CTVDIGU2
Snelstart handleiding
Hartelijk gefeliciteerd met de aanschaf van uw
Conceptronic DVB-T USB Adapter.
In de bijgaande Snelstart handleiding wordt stap voor stap uitgelegd hoe u de
Conceptronic CTVDIGU2 installeert.
Ingeval van problemen adviseren wij u onze support-site te bezoeken (ga naar:
www.conceptronic.net en klik op 'Support'). Hier vindt u een database met
veelgestelde vragen waar u hoogstwaarschijnlijk de oplossing voor uw probleem
kunt vinden.
Heeft u andere vragen over uw product die u niet op de website kunt vinden,
neem dan contact met ons op via e-mail: support@conceptronic.net
Voor meer informatie over Conceptronic producten kunt u terecht op de
Conceptronic website: www.conceptronic.net.
Bij software/drivers installatie: het is mogelijk dat onderstaande installatie iets
afwijkt van de installatie op uw computer. Dit is afhankelijk van de Windows
versie die u gebruikt.
1
Advertisement

Subscribe to Our Youtube Channel
Related Manuals for Conceptronic CTVDIGU2


Summary of Contents for Conceptronic CTVDIGU2
- Page 1 In de bijgaande Snelstart handleiding wordt stap voor stap uitgelegd hoe u de Conceptronic CTVDIGU2 installeert. Ingeval van problemen adviseren wij u onze support-site te bezoeken (ga naar: www.conceptronic.net en klik op ‘Support’). Hier vindt u een database met veelgestelde vragen waar u hoogstwaarschijnlijk de oplossing voor uw probleem kunt vinden.
- Page 2 • Stilstaande en bewegende videobeelden vastleggen • Opnemen en afspelen van TV beelden Notitie: Radio functionaliteit wordt niet ondersteund door de CTVDIGU2. 1.3 Minimale Systeemeisen • Intel Pentium 4 2,6Ghz of hogere Processor. (Voor het Centrino Mobile platform: 1,6Ghz of hogere Processor).
- Page 3 NEDERLANDS –Stuurprogramma installatie voor Windows XP / 2000 2. Stuurprogramma Installatie Windows XP / Windows 2000 Volg de onderstaande stappen om de CTVDIGU2 te installeren: Plaats de DVB-T USB Adapter in een vrije USB poort van uw computer. De computer zal nieuwe hardware detecteren. Negeer de “Nieuwe Hardware Wizard”...
- Page 4 NEDERLANDS –Stuurprogramma installatie voor Windows XP / 2000 Selecteer de optie “Install Drivers” in het Autorun Menu. De Conceptronic CTVDIGU2 Driver Installer zal getoond worden. Klik op “Start” om de installatie van het stuurprogramma te starten. Alleen Windows 2000: Tijdens de stuurprogramma installatie zal u 3x de melding “Digitale Handtekening niet gevonden”...
- Page 5 Notitie: De CTVDIGU2 wordt geleverd met Cyberlink PowerCinema software. Dit softwarepakket is alleen te gebruiken met Windows XP. Als u de CTVDIGU2 gebruikt binnen Windows 2000, volg dan de DVB-T installatie-instructies bij hoofdstuk 4. Volg de onderstaande stappen om de PowerCinema applicatie te installeren: Selecteer de optie “Install Software”...
- Page 6 NEDERLANDS – Cyberlink Software Installatie (Alleen Windows XP) Selecteer de Installatiemap en klik op “Next” om door te gaan. Selecteer de Startmenu map en klik op “Next” om door te gaan. Klik op “Next” om de installatie van de applicatie te starten. Als de installatie is voltooid kunt u op “Finish”...
- Page 7 NEDERLANDS – Cyberlink Software Installatie (Alleen Windows XP)
- Page 8 NEDERLANDS – Cyberlink Software Installatie (Alleen Windows XP)
- Page 9 NEDERLANDS – Cyberlink Software Installatie (Alleen Windows XP)
- Page 10 NEDERLANDS – Cyberlink Software Installatie (Alleen Windows XP)
- Page 11 NEDERLANDS – Cyberlink Software Installatie (Alleen Windows XP) Als u de Wizard succesvol heeft doorlopen dan kunt u de DVB-T USB Adapter gebruiken door de optie “TV” in de PowerCinema applicatie te kiezen.
- Page 12 NEDERLANDS – DVB-T Plus Software Installatie (Alleen Windows 2000) 4. DVB-T Plus Software Installatie (Alleen Windows 2000!) Notitie: De CTVDIGU2 CD-ROM bevat 2 softwarepakketten. De PowerCinema applicatie in het Autorun Menu is alleen geschikt voor Windows XP. Om de DVB-T Plus applicatie voor Windows 2000 te installeren dient u onderstaande stappen te volgen.
- Page 13 NEDERLANDS 4.1 Configuratie van DVB-T Plus Start de applicatie met de snelkoppeling op uw bureaublad. Volg de stappen van de “Setup Wizard” om de DVB-T Plus applicatie te configureren.
- Page 14 NEDERLANDS Selecteer uw land en klik op “Next”.
- Page 15 NEDERLANDS Klik op “Start” om het zoeken naar kanalen te starten.
- Page 16 NEDERLANDS Klik op “Finish” als het scanproces is voltooid. Als alle instellingen zijn gemaakt is de CTVDIGU2 klaar voor gebruik!
- Page 17 When you have other questions about your product and you cannot find it at our webiste, then contact us by e-mail: support@conceptronic.net For more information about Conceptronic products, please visit the Conceptronic Web Site: www.conceptronic.net The Software installation as described below, may be slightly different from the installation on your computer.
- Page 18 Capture still image & full motion video • Record/ Play TV images Note: Radio functionality is not supported by the CTVDIGU2. 1.3 Minimum System Requirements • Intel Pentium 4 2,6Ghz or higher Processor. (For Centrino Mobile platform: 1,6Ghz or higher Processor).
- Page 19 ENGLISH –Driver installation for Windows XP / 2000 2. Driver Installation Windows XP / Windows 2000 To install the drivers for the CTVDIGU2, follow the steps as below: Place the DVB-T USB Adapter in a free USB port on your computer. The computer will recognize new hardware.
- Page 20 ENGLISH –Driver installation for Windows XP / 2000 Select the option “Install Drivers” in the Autorun Menu. The Conceptronic CTVDIGU2 Driver Installer will be shown. Press “Start” to install the drivers. Only for Windows 2000: During driver installation, you will get 3 messages “Digital Signature Not Found”.
Need help?
Do you have a question about the CTVDIGU2 and is the answer not in the manual?
Questions and answers