Advertisement
Quick Links
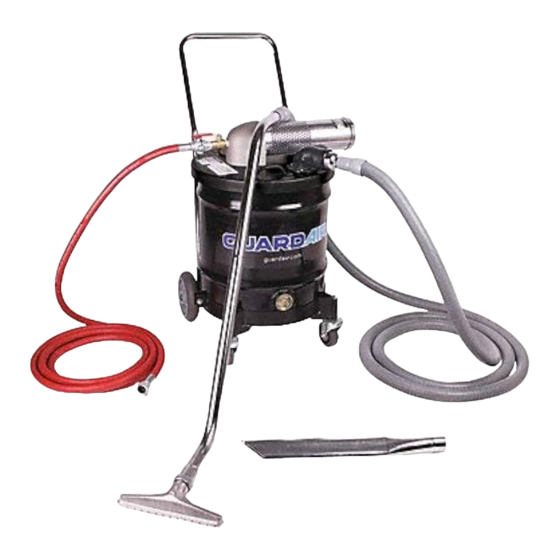
OPERATING INSTRUCTIONS
FOR GUARDAIR STANDARD, NED AND PULSAIR™ COMPRESSED AIR-POWERED VACUUMS
Please save these instructions and the accompanying replacement
FOR YOUR SAFETY
Turn off all compressed air connections with the
compressed air source at the nearest valve. Disconnect
compressed air connections only after the compressed
air supply has been turned off and the air supply hose
vented by opening the valve on the vacuum head. NEVER
disconnect a pressurized compressed air hose.
AIR SUPPLY
An adequate supply of compressed air is essential
for the proper performance of your Guardair vacuum.
Compressed air requirements for vacuum units and
vacuum generating heads equipped with the following
Venturi types are listed below:
"Dual B" Venturi
N552B Series ..................................................................... 110 cfm
"B" Type Venturi
N551B Series, N301B Series ................................................ 68 cfm
"D" Type Venturi
N551D Series, N301D Series, N201DC, N101DC .................. 47 cfm
"S" Type Venturi
N201SC, N101SC ................................................................ 20 cfm
"M" Type Venturi
N101MC, N051MC ............................................................... 20 cfm
Please note that these requirements are for compressed
air volume, not pressure. The recommended compressed
air inlet operating pressure is 100 psi for all vacuum units.
All units will function at lower operating pressures, but
with a corresponding reduction in performance.
Units featuring a "B" or "D" Type Venturi include a
Chicago-style connector. A 3/4" ID or larger compressed
air supply hose is recommended for these models.
Units featuring an "S" Type Venturi include a 1/2"
industrial interchange male connector. A 1/2" ID
parts information for your future reference.
or larger compressed air supply hose is recommended for
these models. Units featuring an "M" Type Venturi include
a 3/8" industrial interchange male connector. A 3/8" ID
or larger compressed air supply hose is recommended for
these models.
FOR ALL MODELS: To ensure maximum performance,
clean or replace the internal filter as necessary. In
addition, clean or replace the exhaust silencer (inside
the exhaust housing) as necessary. Inspect the cover
gasket for deterioration and replace if necessary. On
all vacuum units, use of a smaller diameter air hose or
smaller size air fittings will seriously restrict performance.
Use the recommended hoses and fittings.
Be certain that the drum has no dents along the seams
and is airtight. The cover gasket under the vacuum
generating head must form a complete seal with the
top edge of the drum.
CAUTION: Drums used with Guardair vacuum generating
heads must meet the steel gauge requirements in the
table below. Thinner gauges of steel run the risk of
drum collapse.
DRUM
55 gal
GAUGE
19
REPLACING GASKETS
On 55, 30 & 20 Gallon Models, remove the gasket to be
replaced. On the new gasket, remove the protective tape
covering the adhesive, then apply gasket to lid.
On 10 & 5 Gallon Models, the lid gasket is adhered to
the lid by hot glue. The hot glue can easily be removed
with rubbing alcohol. Let the rubbing alcohol sit for one
minute, then simply peel off with a flat head screwdriver.
We recommend using hot glue when installing new gasket.
1
30 gal
20 gal
10 gal
18
18
20
5 gal
20
Advertisement

Subscribe to Our Youtube Channel
Related Manuals for GuardAir N552B Series

Summary of Contents for GuardAir N552B Series
- Page 1 OPERATING INSTRUCTIONS FOR GUARDAIR STANDARD, NED AND PULSAIR™ COMPRESSED AIR-POWERED VACUUMS Please save these instructions and the accompanying replacement parts information for your future reference. FOR YOUR SAFETY or larger compressed air supply hose is recommended for Turn off all compressed air connections with the these models.
- Page 2 SET-UP AND OPERATION, 55-GALLON, 30-GALLON 20 Gallon Drum Dolly: Assemble the drum dolly for AND 20-GALLON MODELS: 20-gallon model as shown below (Compatible with 30 gallon) Place the vacuum generating head on the drum. There are no clamps required to form an airtight seal. When HEX NUT the vacuum is in operation, the negative pressure within QTY: 2...
- Page 3 Also check interior of the cloth pre-filter Guardair NED vacuums. All components must fit together bag and empty out dust and debris if necessary. firmly, including the static conductive vacuum hose, which Fit fresh cartridge filter underneath vacuum lid.
-
Page 4: Limited Warranty
Guardair, or from modification or failure of warranty. All labor and material costs of repair or replace- servicing of the product by anyone other than Guardair or its ment under this warranty shall be the responsibility of Guardair. - Page 5 Should this vacuum need to be returned to the factory, and if a return has been pre-authorized by Guardair, the unit MUST in original condition. Returns will not be accepted unless received in the original packaging and accompanied by the original accessories.
-
Page 6: Parts Lists
PARTS LISTS 55 AND 30 GALLON SINGLE VENTURI VACUUM KIT Part Number Description N606 3/4" ID X 20' Air Supply Hose N606NED 3/4" ID X 20' Static Conductive Air Supply Hose N610 1/2" NPT Chicago Coupler N630 30 Gallon Steel Drum N635 Standard Cartridge Filter For 30/55 Gallon Vacuums N635ATEX... - Page 7 20 GALLON VACUUM KIT Part Number Description N200 20 Gallon Drum N649 N644D N685C N685 N686 N681 N651 N204 20 Gallon Dolly N6481D, N6481S N610 N606 3/4" ID X 20' Air Supply Hose N606NED 3/4" ID X 20' Static Conductive Air Supply Hose N6182 N607 1/2"...
- Page 8 10 GALLON VACUUM KIT (N101MC MODEL) Part Number Description 2000F01 Filter 2000M02 Liquid Shut Off Cage N053 5 and 10 Gallon Lid N053Q Vacuum Inlet Gasket N054Q 5 and 10 Gallon Lid Gasket N100 10 Gallon Canister With Lid Clamps and Handles N104 1 1/2"...
- Page 9 SINGLE VENTURI VACUUM GENERATING HEAD Part Number Description N610 1/2" NPT Chicago Coupler N6182 1/2" NPT X 1/2” Male US Industrial Inter- change Coupler N6273 Venturi Box Mounting Hardware (Set) N644 B Series Venturi N644D D Series Venturi N644M M Series Venturi N6481B B Series Orifice N6481D...
- Page 10 SINGLE VENTURI VACUUM GENERATING HEAD WITH PULSEAIR™ UNIT Part Number Description N635B Pre-Filter Bag N635H1 HEPA Cartridge Filter N640MNEDPA, Lid for PulseAir 30/55 Gallon Drum N641MNEDPA N644 B Series Venturi N644D D Series Venturi N610 1/2 NPT Chicago Coupler N6481B B Series Orifice N6481D D Series Orifice...
- Page 11 Guardair Static Conductive Pneumatic Vacuums are intended to control and eliminate static electric shocks only to the operators of the vacuums. Guardair vacuums are NOT APPROVED OR SAFE to use in any hazardous (classified) location, such as locations determined under NFPA 70 (National Electrical Code) to be Class I (flammable liquids, gases and vapors –...
- Page 12 47 Veterans Drive • Chicopee, MA 01022-1062 Toll-Free: 800-482-7324 | Local: 413-594-4400 | Fax: 413-594-4884 N600A01-4 Email: info@guardair.com • guardair.com 09.22.22...
Need help?
Do you have a question about the N552B Series and is the answer not in the manual?
Questions and answers