Advertisement
Quick Links
Advertisement

Summary of Contents for IMPATIA LUNGOLINEA
- Page 1 LUNGOLINEA ASSEMBLY INSTRUCTION...
-
Page 2: Preliminary Operations
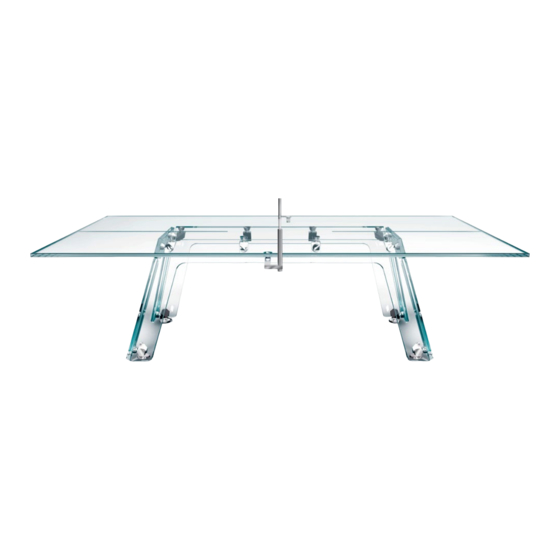
PRELIMINARY OPERATIONS Check the dimensions of the room and prepare for the assembly by selecting the final positioning for the ping pong table. Once assembly has started, it is not recommended to move the table. MODELS Lungolinea CHROME/ BLACK CHROME Lungolinea WOOD EDITION minimum room dimensions: 580x330 cm / 228”x130”... - Page 3 Insert the metal joints in the 4 corners of the long leg and the upper and lower corners in the short leg, as shown in the figure. To connect the joints, simply push the pin into the cone. When you hear the “click” the joint is connected, attaching the first two legs together.
- Page 4 Place the 4 central joints into position on the long legs. Posizionare i 4 giunti centrali sulle gambe lunghe. upper central joint with 2 pins Place the top two glass plates in place. Be very careful not to hit the edges when positioning the second top plate.
- Page 5 Move the table tops as close together as possible and check the lateral alignment. Once aligned, lock them in place by tightening the 8 metal rings at the base of each pin with the provided special key. Avvicinare il più possibile i piani tra loro e verificare l’allineamento laterale.
- Page 6 If necessary proceed with leveling the table by adjusting the feet with the provided special key. Procedere con la messa in bolla del tavolo agendo sui perni dei piedini con la parte più stretta della chiave speciale. Position the L-shaped net support base as shown in the figure and secure them with the appropriate knob.
- Page 7 Position the cylinder net support with the adjustment ring at the bottom and tighten the the screw in the L-shaped support with the provided hex key. Posizionare i supporti cilindrici della rete con la ghiera di regolazione in basso e stringere il grano preinserito nel supporto a forma di L con la chiave a brugola fornita (verificare che il grano sia allineato con l’asola ribassata del cilindro).
- Page 8 0 11 Pass the string of the net inside the holes of the two metal disks and immediately after the second, make a knot. Reposition the cylindrical support cover. Far passare il filo della rete all’interno dei fori dei due dischi metallici e subito dopo il secondo realizzare un nodo.
-
Page 9: Disassembly Guidelines
DISASSEMBLY GUIDELINES To release a metal joint, simply push and hold the conical part of the joint outwards and remove the pin. Per sganciare un giunto metallico è sufficiente spingere e tenere premuta la parte conica verso l’esterno. In questo modo il perno risulta libero e può... - Page 10 Before removing the top pieces, protect the top edges of the glass as seen in the diagram (for d 02 glass versions only); Release the conical joint (d01) of the upper part of the central joints (1). Rotate the joint slightly until it clears the pins completely (2).
- Page 11 Game Time! IMPATIA srl - Via Mentana, 7 - 21052 Busto Arsizio (VA) - Italy - tel. +39 0331 322 581 - info@impatia.com - www.impatia.com...
Need help?
Do you have a question about the LUNGOLINEA and is the answer not in the manual?
Questions and answers