Table of Contents
Advertisement
Quick Links
Item # 1001591933
Model #38710-HBC
Item # 1001591904
Model # 38710-HBCG
USE AND CARE GUIDE
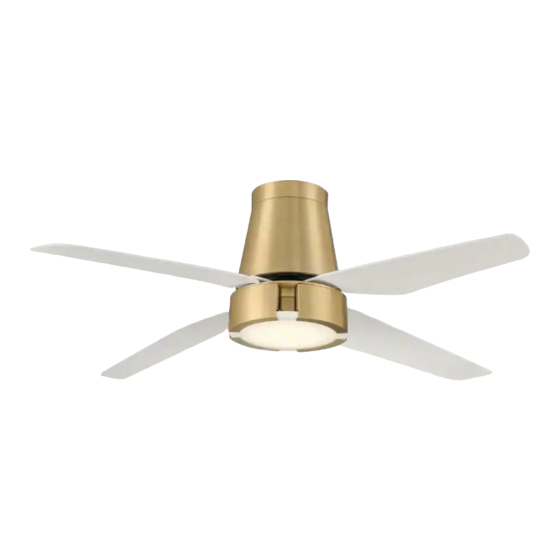
HUGH 52-INCH INDOOR LED CEILING FAN
HOMEDEPOT.CA
THANK YOU
We appreciate the trust and confidence you have placed in Gluckstein Elements through the purchase of this ceiling fan. We strive to continually
create quality products designed to enhance your home. Visit us online to see our full line of products available for your
home improvement needs. Thank you for choosing Gluckstein Elements!
Advertisement
Table of Contents

Related Manuals for GLUCKSTEIN ELEMENTS HUGH 38710-HBC


Summary of Contents for GLUCKSTEIN ELEMENTS HUGH 38710-HBC
- Page 1 THANK YOU We appreciate the trust and confidence you have placed in Gluckstein Elements through the purchase of this ceiling fan. We strive to continually create quality products designed to enhance your home. Visit us online to see our full line of products available for your...
-
Page 2: Table Of Contents
Table of Contents Table of Contents ..............2 Assembly ................7 Safety Information ............... 2 Operation ................11 Warranty ................3 Care and Cleaning ............. 12 Pre-Installation ..............3 Troubleshooting ..............13 Installation ................6 IC Statement ..............13 Safety Information READ AND SAVE THESE INSTRUCTIONS. -
Page 3: Warranty
Warranty We warrant the fan motor to be free from defects in workmanship and material present at time of shipment from the factory for a period of a lifetime after the date of purchase by the original purchaser. We warrant that the light kit to be free from defects in workmanship and material at the time of shipment from the factory for a period of five years after the date of purchase by the original purchaser. - Page 4 Pre-Installation (continued) HARDWARE INCLUDED NOTE: Hardware not shown to actual size. Description Part Quantity Mounting screw (preassembled) Blade screw (preassembled) Fiber washer (preassembled) Wire nuts Wood screw Metal washer Light kit plate screw (preassembled) Lamp screw (preassembled) Decorative sheet screws (preassembled) Remote control holder screw...
- Page 5 Pre-Installation (continued) PACKAGE CONTENTS Part Quantity Description Part Quantity Description Fan blade Lamp shade Mounting plate Decorative sheet Fan motor assembly Remote control Light kit plate Remote control holder Battery AAA 1.5 V Lamp HOMEDEPOT.CA...
-
Page 6: Installation
Installation MOUNTING OPTIONS WARNING: To reduce the risk of fire, electric shock, or personal injury, mount to outlet box marked “acceptable for fan support of 15.9 Kg (35 lbs) or less” using the screws provided with the outlet box. An outlet box commonly used for the support of lighting fixtures may not be acceptable for fan support and may need to be replaced. -
Page 7: Assembly
Assembly - Hanging the Fan Attaching the mounting bracket to Hanging the fan-motor assembly the electrical box □ Carefully lift the fan-motor assembly (C) and engage the slot in the motor bracket on the top of the fan motor assembly (C) WARNING : To reduce the risk of fire, electric shock with the hook on the mounting plate (B) so that it is securely... - Page 8 Assembly - Hanging the Fan (continued) Making the electrical connections WARNING: To avoid possible electrical shock, ensure the electricity is turned off at the circuit breaker or main fuse box before wiring. WARNING: Check to see that all connections are tight, including the ground, and that no bare wire is visible at the wire nuts, except for the ground wire.
- Page 9 Assembly - Hanging the Fan (continued) Completing the fan assembly Attaching the blades □ □ Remove the two mounting screws (AA) on two diagonal sides Remove the face of the motor. Discard any rubber blocks from the top of the mounting plate (B) and loosen the other attached to these screws.
- Page 10 Assembly - Hanging the Fan (continued) Installing the lamp shade Installing the lamp □ A wire connector (male) is located inside the electrical switch □ Place the lamp shade (F) onto the light kit and rotate until housing and a female connector extends from the lamp. Push secure.
-
Page 11: Operation
Operation REMOTE CONTROL OPERATING INSTRUCTIONS 1. Press and release the button, the fan will turn ON and OFF accordingly. 2. Press and release the button, the light will turn ON and OFF accordingly. 3. Fan speed Press the respective FAN SPEED button, you can select fan speed 1-3. □... -
Page 12: Care And Cleaning
Operation (continued) INSTALLING THE REMOTE CONTROL HOLDER □ Install the wall plug onto the wall, and then attach the remote control holder (I) with the two remote control holder screws (JJ). Care and Cleaning WARNING: Make sure the power is off before cleaning your fan. -
Page 13: Troubleshooting
Troubleshooting Problem Solution The fan will not start. □ Check the main and branch circuit fuses or breakers. □ Check the line wire connections to the fan and switch wire connections in the switch housing. □ Check the battery in the remote control. □... - Page 14 HOMEDEPOT.CA Retain this manual for future use.
Need help?
Do you have a question about the HUGH 38710-HBC and is the answer not in the manual?
Questions and answers
how to switch the rotation of the fam
To switch the rotation of the GLUCKSTEIN ELEMENTS HUGH 38710-HBC fan, use the reverse switch located on the surface of the motor assembly. Move the switch to the left for forward (counterclockwise) rotation and to the right for reverse (clockwise) rotation. Make sure the fan is completely stopped before changing the direction.
This answer is automatically generated
Where can I purchase a replacement remote