Huawei NetCol8000-C070 Quick Manual
In-room chilled water smart cooling product
Hide thumbs
Also See for NetCol8000-C070:
- User manual (254 pages) ,
- Quick manual (22 pages) ,
- User manual (236 pages)
Advertisement
Quick Links
NetCol8000-C(070-260) In-room Chilled
Water Smart Cooling Product
Quick Guide
Issue: 05
Date: 2019-01-15
1
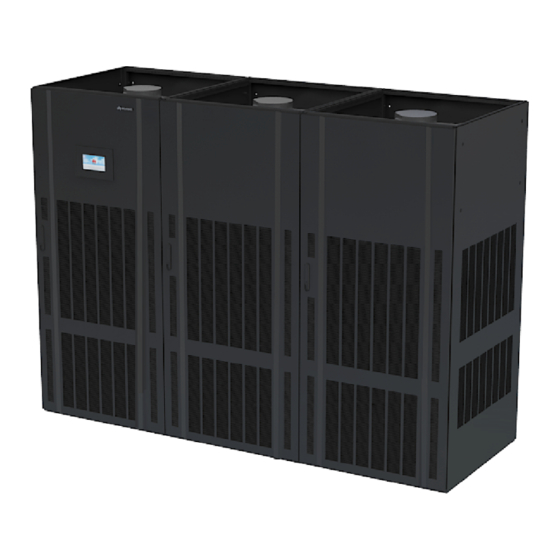
Product Overview
Product Model
NetCol8000-C070
NetCol8000-
C100/110/130
NetCol8000-
C150/160/190
NetCol8000-C260
Note: The upflow units include only NetCol8000-C070, NetCol8000-C130, and NetCol8000-C190.
Upflow components
Pipe
Dimensions Without Packing (H
Routing
2000 x 900 x 1000 (single-door)
2000 x 1800 x 1000 (double-door)
Routed
from
2000 x 2700 x 1000 (triple-door)
bottom or
left
2000 x 3600 x 1000 (quadruple-
x W x D) (mm)
door)
Copyright © Huawei Technologies Co.,
1
Ltd. 2019. All rights reserved.
Optional Component
Electric heater, wet film
humidifier, motorized damper,
differential pressure sensor,
water leakage sensor,
temperature and humidity
sensor outside the cabinet,
and direct free-cooling
plenum, cap
Advertisement

Related Manuals for Huawei NetCol8000-C070


Summary of Contents for Huawei NetCol8000-C070
- Page 1 2000 x 3600 x 1000 (quadruple- and direct free-cooling NetCol8000-C260 door) plenum, cap Note: The upflow units include only NetCol8000-C070, NetCol8000-C130, and NetCol8000-C190. Upflow components Copyright © Huawei Technologies Co., Ltd. 2019. All rights reserved.
- Page 2 Downflow components Engineering Materials Hoop iron, cable tie, push mount tie, single cord end terminal of the cable connecting the indoor units, OT ground terminal of the power cable to the indoor Materials unit, network cable for teamwork, stainless press explode; slow-blow fuse Delivered with (delivered with models with dual power supplies only);...
- Page 3 Cable It is recommended that 4x6 mm cables be used for the active power supply to NetCol8000-C220 and NetCol8000-C260 when they are equipped with heating and humidification functions. If 4x10 cables are to be used, change the screws on the power cable clip. Find the corresponding screws in the accessory.
- Page 4 Model Configurati Cable Diameter Maximum Current Recommended (with Heating and Switch (with Humidification/Without Heating and Heating or Humidification/W Humidification) ithout Heating or Humidification) NetCol800 Single route 38.3 A/17.3 A C50/C25 4 x 6 mm /4 x 4 mm 0-C220 Active: 38.3 A/17.3 A Active: C50/C25 Active: 4 x 6 mm /4 x 4...
-
Page 5: Installing The Cabinet
If there is a hiss sound, the system is well sealed, and you need to open the exhaust valve to exhaust the nitrogen. If there is no hiss sound, contact Huawei technical support. After nitrogen is exhausted, remove the desiccant bag bound to the fan. - Page 6 Removing the Pallet 1. For a single-door and double-dour cabinet, remove the four screws from both sides. 2. For downflow units, remove the fan maintenance baffle plate at the front door before removing the bolts. Open the front door and remove the rear door.
- Page 7 5. Use a flat-head screwdriver to remove the hold 4. Connect the main pipe using hoses. hoop from the condensate pipe joint of the module Secure the pipe ports using black sealing 3. Pull out the condensate pipe from the module 2, rings, and clamp them using hold hoops.
- Page 8 5. Unscrew the pipe hold hoops using a 15# socket wrench, move the black sealing rings to the other end of the pipes, and disconnect the pipes, as shown in the following figure. Save the black sealing rings for later use during cabinet assembly. 6.
- Page 9 1. Secure the base to the ground using six M12x60 expansion bolts. 2. Move the cabinet onto the base. Secure the cabinet to the base using six bolts. Install a shock pad between the base and the cabinet. Lowering a Fan (Applicable to Downflow Units) 1.
- Page 10 c. Turn the fan to 45 degrees to the d. Place the fan support beam under the fan, secure cabinet bottom, push the fan along the the beam to the cabinet using screws, and secure guide rails at both sides, and press the fan to the cabinet.
- Page 11 Side Pipe Routing The direction (in step 2) in which the main pipes are tightened by using hold hoops is for reference only. The onsite situation prevails. 1. Loosen the left knocking-off padding cover of the cabinet using a Phillips screwdriver. Take out the cover and remove the knocking-off padding.
- Page 12 1. Remove the pipe clamp securing the Side Pipe Routing vertical pipe using a Phillips screwdriver. (Install the removed pipe clamp to the cabinet side door in step 7.) 2. Remove the elbow hoops securing the horizontal pipe using a 15# socket wrench, and then take out the bend.
- Page 13 Connecting the Drainpipe Upflow Connection method Downflow 3.10 (Optional) Connecting the Water Inlet Pipe for the Wet Film Humidifier Upflow Connection method Downflow...
- Page 14 (Optional) Leakage Test with Nitrogen 3.11 1. Rotate the chilled water valve to the maximum openness (OPEN). • If the pressure decreases, apply soapy 2. Check that the needle valves and exhaust valves water on the pipes, especially pipe on the pipeline are closed. joints to check for any leakage.
-
Page 15: Connecting Cables
Connecting Cables Cables must be routed in through cable clips. Route and bind the cables along the beams and columns of the unit. The cabinet has no input neutral wire. You can cut the blue neutral wire and wrap it using ... - Page 16 Connecting the Power Cable (Downflow) Overhead cabling/single power supply Overhead cabling/dual power supplies Side cabling/single power supply Side cabling/dual power supplies...
- Page 17 Underfloor cabling/single power supply Underfloor cabling/dual power supplies Connecting the Equipotential Bonding Cable (Downflow) A ground cable must be routed from the equipotential bonding point of the cabinet to the ground. The following figures show the equipotential bonding points of the cabinet. Upflow Downflow (Optional) Connecting the Gravity Damper (Applicable to Upflow Units)
- Page 18 (Optional) Connecting the Direct free-cooling plenum NOTE For details about how to install the direct free-cooling plenum, see the documents delivered with it. After powering on the NetCol8000, choose Settings > System Settings > Indoor Fan, and set Direct free- cooling to Enable.
- Page 19 Downflow 1. Secure the differential pressure sensor inside the cabinet using two M3 screws. 2. Connect the shorter PU hose to the Lo (-) port above the differential pressure sensor, and secure the hose to the air return side using cable ties. (The pressure inlet is suggested to be at the middle of the top beam in the figure.
- Page 20 1. Connect one end of the two-core cable for the water leakage sensor to the water leakage sensor. 2. (Upflow) Route the cable through the cable hole from the bottom of the cabinet, and bind it along the beam at the bottom of the cabinet. (Downflow) Route the cable through the cable hole at the bottom, and route it along the post and beam of the cabinet through the cable trough under the electric control box.
- Page 21 4.10 (Optional) Teamwork Settings The default networking mode is CAN network. If the CAN teamwork function needs to be enabled onsite, set Teamwork CAN resistor enable for the first and last smart cooling products to Yes over the LCD. Smart cooling products in a teamwork group must be of the same model.
- Page 22 CAN teamwork networking The figures below use side cable routing as an example. Top cable routing is also supported. Downflow Upflow FE monitoring CAN Teamwork Networking and Northbound RS485 Monitoring Set the northbound RS485 grouping switches, namely, toggle switches 2 and 3 on the main control module, for the smart cooling product addressed 4 x N to OFF, except the smart cooling product in the end.
- Page 23 In CAN networking, one teamwork network supports a maximum of 32 smart cooling products. The following figure shows the teamwork connections between 32 smart cooling products. 4.11 (Optional) Installing the Cap (Applicable to Upflow Units) It takes two persons to install the cap using a 2 m step ladder. ...
-
Page 24: Installation Verification
2. Secure the left and right sides of the cap 1. Remove the cap front panel using a Phillips using six M5 screws and the front and screwdriver. Place the cap on the top of the rear of the cap using four M5 screws. cabinet. -
Page 25: Equipment Power-On
Check Item Expected Result Actual Result The water inlet solenoid valve is secured. The humidifier water pump is secured reliably and steadily. The wet film humidifier is (Optional) Wet □Passed □Failed secured reliably and steadily. The humidifier float and its film humidifier fasteners are secured reliably. - Page 26 (Optional) Teamwork Settings The table uses 32 smart cooling products in teamwork as an example. Item Teamw Teamwor Number Total Require Teamwork k CAN Teamwor Teamwo Rotation Network number ment group unit address resistor k function rk mode running time of units control enable...
- Page 27 The indoor fan is a mandatory commissioning item. Other components can be commissioned depending on actual requirements. The Service Expert app can be downloaded from Huawei App Store. The app is supported by only Android at present. The Service Expert app supports both online boot and offline boot. The offline boot is taken as an example in the following part.
-
Page 28: Routine Maintenance
Routine Maintenance Component Item Troubleshooting Frequency Check that the air filter is clean and not Monthly Clean the air filter with water. blocked. Air filter Check that the air filter is not damaged or Replace the air filter. Monthly distorted. Appendix 1: Base Dimensions 1. - Page 29 Double-Door Cabinet Base (unit: mm) NetCol Triple-Door Cabinet Base (unit: mm) NetCol...
- Page 30 Downflow Single-Door Cabinet Base (unit: mm) NetCol Double-Door Cabinet Base (unit: mm) NetCol...
-
Page 31: Appendix 2: Precautions Against Adding Glycol
Triple-Door Cabinet Base (unit: mm) NetCol Quadruple-Door Cabinet Base (unit: mm) NetCol Appendix 2: Precautions Against Adding Glycol For details about adding glycol, refer to the NetCol8000-C(070-260) In-room Chilled Water Smart Cooling Product User Manual. To prevent glycol solution from corroding pipes and the heat exchanging coil, corrosion inhibitor should be mixed into the glycol solution. - Page 32 Huawei Technologies Co., Ltd. Huawei Industrial Base, Bantian, Longgang Shenzhen 518129 People's Republic of China www.huawei.com...
Need help?
Do you have a question about the NetCol8000-C070 and is the answer not in the manual?
Questions and answers