Table of Contents
Advertisement
Quick Links
Advertisement
Table of Contents

Subscribe to Our Youtube Channel
Related Manuals for Medion MD 16580


Summary of Contents for Medion MD 16580
- Page 1 User Manual PREMIUM STAND MIXER MD 16580...
-
Page 2: Table Of Contents
Contents Contents Information about this user manual ......................4 Explanation of symbols ............................4 Proper use ..............................5 Safety instructions ............................5 Setting up the appliance ............................7 Handle the appliance with care ..........................7 Package contents ............................8 Appliance overview ............................. 9 Main unit................................... 9 Overview of accessories ............................10 Preparations for use ........................... -
Page 3: Information About This User Manual
Information about this user manual Information about this user manual Thank you for choosing our product. We hope you enjoy using this appliance. Please read the safety instructions and the user manual carefully before using the appliance for the fi rst time. -
Page 4: Proper Use
Proper use Proper use This appliance may only be used to knead and stir foods such as dough, crèmes, creams and egg whites in the mixing bowl. The mincer attachment is designed for chopping foods and for preparing minced meat, sausages, pasta, shortbread biscuits or kibbeh with the respective attachments. - Page 5 Safety instructions DANGER! Risk of choking and suffocation! Packaging fi lm can be swallowed or used improperly, creating a risk of choking and suffocation. − Keep packaging material such as plastic fi lm or plastic bags away from children. − Do not let children play with the packaging material. WARNING! Risk of electric shock/short circuit! There is a risk of electric shock/short circuit from live parts.
-
Page 6: Setting Up The Appliance
Safety instructions − Do not expose the appliance to extreme conditions. Avoid: – high humidity or wet conditions – extremely high or low temperatures – direct sunlight – naked fl ames. Setting up the appliance − Place the appliance on a stable, level surface. −... -
Page 7: Package Contents
Package contents − If the cutting tool becomes blocked during operation, unplug the appliance and remove the blockage (see section “Cleaning” on page 22). Package contents DANGER! Risk of choking and suffocation! There is a risk of choking and suffocation due to swallowing or inhaling small parts or plastic wrap. -
Page 8: Appliance Overview
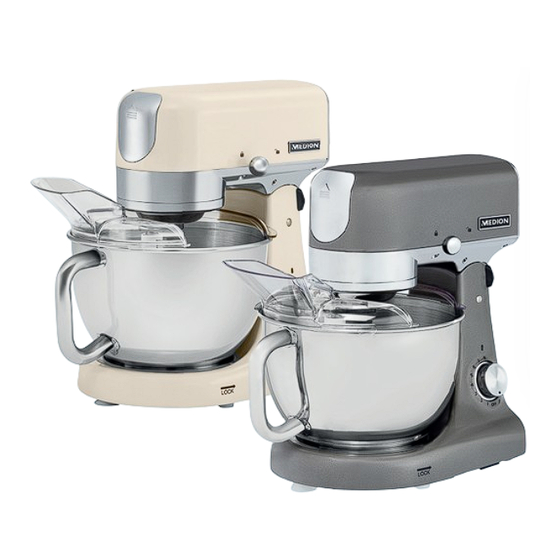
Appliance overview Appliance overview Main unit Ventilation slots Swivel arm lever Handle when swivelling Operating LED Power level dial Mains cable with mains plug Suction feet Feet Base plate Mixing bowl handle Mixing bowl Mincer connection cover Mincer release button (beneath the cover, not shown) -
Page 9: Overview Of Accessories
Appliance overview Overview of accessories Stirring attachments Dough hook Beater Whisk Splash-guard lid with fi ller opening Mincer accessories Pusher Worm housing Filling tray... - Page 10 Appliance overview Biscuit press attachment Attachment ring Holder for biscuit press attachment Worm gear for biscuits Worm screw Sausage fi lling nozzle Kibbeh attachment Sausage attachment Kibbeh nozzle Cross blade Perforated cutting blade discs Pasta attachments...
-
Page 11: Preparations For Use
Preparations for use Preparations for use − Remove all packaging materials. − Before using for the fi rst time, rinse the accessories thoroughly with warm water and washing-up liquid. Dry everything thoroughly. CAUTION! Risk of injury! There is a risk of crushing due to rotating and moving parts. −... -
Page 12: Using The Mincer
Preparations for use 3. Place the mixing bowl onto the holder on the base plate , rotate the mixing bowl in the direction of the arrow (see the LOCK imprint) until it comes to a stop to lock the mixing bowl 4. - Page 13 Preparations for use 4. Place the worm housing in the mincer connection as shown in Fig. 4 and turn one rotation to the left so that the fi ller opening is pointing upwards (see Fig. 5). Make sure that the worm housing is seated securely in the mincer connection on the food processor.
-
Page 14: Equipping The Mincer For Mincing
Preparations for use Equipping the mincer for mincing To produce minced meat (to mince), use the cross blade and one of the three perforated cutting blade discs depending on the required result. − Place the cross blade onto the worm screw and the perforated cutting blade discs together in the order shown in Fig. -
Page 15: Equipping The Mincer With The Sausage Attachment
Preparations for use Equipping the mincer with the sausage attachment Processing prepared sausage meat Use the sausage attachment and sausage fi lling nozzle to fi ll sausage meat into natural or artifi cial sausage skins. When processing prepared sausage meat, proceed as follows: −... - Page 16 Preparations for use − Place the meat into the fi lling tray and use the pusher to push the meat into the feed chute. Equipping the mincer for making biscuits To make biscuits from biscuit dough, mount the holder and biscuit press attachment as well as the worm gear in the order as shown in Fig.
-
Page 17: Equipping The Mincer For Making Pasta
Preparations for use Equipping the mincer for making pasta To make pasta from pasta dough, use one of the four pasta attachments (see Fig. 13). − Assemble the accessories as shown in Fig. 13. − Screw the attachment ring clockwise onto the thread of the worm housing −... -
Page 18: Using The Food Processor
Using the food processor − Place the fi lling tray from above onto the worm housing feed chute (see Fig. 15). − Place the kibbeh mixture into the fi lling tray and use the pusher to push the kibbeh mixture into the feed chute. -
Page 19: Mixing Milkshakes, Cocktails Or Other Liquids
Using the mincer Mixing milkshakes, cocktails or other liquids − Use the whisk for mixing milkshakes, cocktails and other liquids. − Mix the ingredients according to your recipe for approx. 3 to 5 minutes at a power level of 1 to 8. −... -
Page 20: Recommended Settings
Recommended settings Recommended settings Level Ideal for ... Notice! Stirring For short, powerful and continuous pulse Use level 1 for stirring, mixing or combining. Use this level for adding movements, turn the liquids to dry ingredients or for adding dry ingredients (e.g. fl our) to power level dial to “P”... -
Page 21: After Use
After use After use − Switch off the appliance. − Unplug the mains plug. When using the food processor − Press the swivel arm lever toward the symbol, the swivel arm raises. − Remove the stirrer. To do this, open the lock buy turning anti-clockwise. −... -
Page 22: Troubleshooting
Troubleshooting NOTICE! Possibility of damage to the appliance! Sensitive surfaces − Do not use any aggressive or abrasive cleaning agents, sharp or metallic cleaning implements such as wire brushes, knives or hard spatulas. − Do not put the appliance in the dishwasher, this would irreversibly damage the appliance. −... -
Page 23: Disposal
Appliance dimensions (W x H x D): Approx. 32.5 x 34 x 20.5 cm EU declaration of conformity MEDION AG hereby declares that this appliance complies with the fundamental requirements and the other relevant provisions of: • EMC Directive 2014/30/EU •... -
Page 24: Spare Parts
Spare parts Spare parts Please visit our MEDION Service Shop at https://www.medion.com/medionserviceshop. to order any spare parts you need. You will be able to fi nd all suitable spare parts for your product there. All available spare parts can be purchased for a period of 7 years. -
Page 25: Supplier/Producer/Importer
Privacy statement Dear customer, We wish to inform you that we, MEDION AG, Am Zehnthof 77, D-45307 Essen, Germany process your personal data as a data controller. For matters regarding data protection, we are supported by our company data protection offi cer who can be contacted at MEDION AG, Datenschutz, Am Zehnthof 77, D-45307 Essen;... - Page 26 PRODUCED IN CHINA FOR: MEDION AG AM ZEHNTHOF 77 45307 ESSEN GERMANY AFTER SALES SUPPORT 819721/819722 0333 3213106 1 800 992508 National rate Free Hotline www.medion.co.uk YEAR MODEL: WARRANTY MD 16580 11/2022...
Need help?
Do you have a question about the MD 16580 and is the answer not in the manual?
Questions and answers
Bonjour, l'appareil ne démare pas , alors que l'alimentation est correcte et securité ok