Table of Contents
Advertisement
Quick Links
Advertisement
Table of Contents

Summary of Contents for FutureRetro ORB
- Page 1 al...
- Page 2 TABLE OF CONTENTS Credits Playing MIDI Modules Table of Contents MIDI Example Introduction Playing CV Synths Controls CV Example Maintenance Acting as Master Clock Support Master Clock Example Analog Connections Syncing to Ext Clock MIDI Connections Ext Clock Example Sequencer Overview MIDI to CV Conversion Playing Patterns...
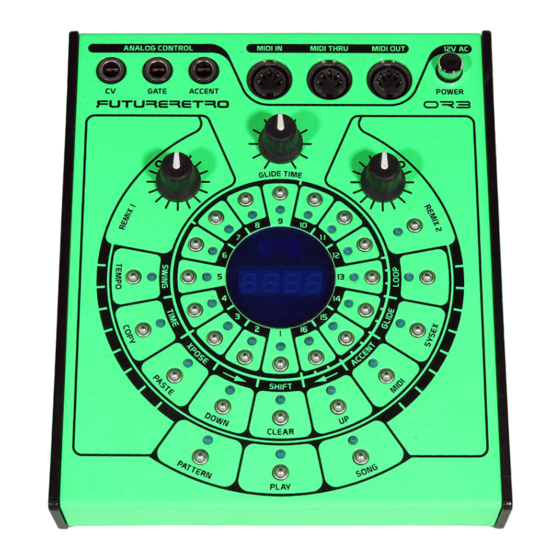
- Page 3 The Orb is based on the same sequencer design used in our Revolution synthesizer/sequencer. In fact, patterns created in the Orb can also be used in the Revolution units and vice versa. The Orb is designed to illustrate loop-based music in a much more natural way than has been provided in the past with traditional instruments.
-
Page 4: Maintenance
BACKUP BATTERY The Orb comes with a 1 year limited warranty covering any The Orb contains an internal 3.6 volt lithium backup battery for the mechanical or electrical defects. This warranty does not cover sequencer’s RAM. This battery will last for approximately damage due to misuse or abuse of this product. - Page 5 Gate Input of an analog synthesizer to trigger its envelopes. ACCENT OUT When the Orb plays a note written with an Accent on that step, a +10 volt (positive polarity) gate signal is generated at this output for controlling analog equipment. The duration of this Accented gate signal will last for 100% of a pattern’s step.
-
Page 6: Sequencer Overview
USING THE SEQUENCER The Orb is a single-track programmable digital step sequencer for The Orb’s sequencer has two main modes that you will work with. recording and playing back musical patterns and songs. All the This is what we call Pattern mode and Song mode. When the Song information for a pattern can be edited while the sequencer is either key indicator is on, the machine is in Song mode. -
Page 7: Selecting Patterns
Patterns may also be selected remotely from another MIDI point for the currently playing pattern is reached, the sequencer device by setting up the Orb to respond to MIDI Program Change will change the playback direction. messages. Please refer to the MIDI section about Program Change messages on page 41 for more details on how to do this. -
Page 8: Entering Notes
To edit patterns, you must be in Pattern mode (the Song key NOTE ON indicator will be off). First select the desired bank and pattern for To enter notes, you must be in Pattern Edit mode (Pattern key the pattern you wish to edit. Once the pattern is selected, press the indicator will be off). -
Page 9: Changing A Note's Pitch
The Step key indicators for these positions will also change to CHANGING A NOTE’S PITCH show how the previous sustained note was shortened. Once notes exist in a pattern, you can change the pitch that each By writing a sustained note over previous notes, the previous one is to play. - Page 10 When controlling an external MIDI synthesizer, notes set to the Loop key. glide in the Orb will be transmitted as two notes playing slightly overlapped with one another. In most MIDI synthesizers, this playing of two notes slightly overlapped can then be used to CLEARING THE LOOP POINT initiate a glide within the external synthesizer.
- Page 11 3 will have the greatest effect. The range of notes the Orb can play is C1 to D#6. If a pattern’s notes are transposed beyond this range, the notes will be interpreted as rests.
-
Page 12: Shifting Patterns
SHIFTING PATTERNS Since a copy of the pattern is placed in temporary memory, you It is possible to shift all the contents of a pattern forward or can now select and play other patterns to find a location to paste backward in time from where they currently are. - Page 13 When the Remix function is on, the two rotary switches located in the Remix 1 and Remix 2 sections will be used to select different remix patterns. If you enter Pattern Edit mode, you can see the new order in which the remix is selecting steps of the pattern to play.
-
Page 14: Working With Songs
SELECTING PATTERNS FOR A SONG STEP WORKING WITH SONGS When in Song mode, the display will show the current step being edited or played. You can select the desired song step by using the SELECTING SONGS Up/Down keys. You can also reset the song to Step 1 at any time Selecting a song is done in the same way that patterns are selected, by pressing the Shift/Clear key. -
Page 15: Setting The Loop Point For A Song
To reset the transposition to a value of 0 for all the song steps, ADVANCED SONG EDITING press and hold the Shift/Clear key, and then press the Xpose/Paste It is possible to jump from the currently selected song step to key. - Page 16 Song Name: Tempo: Song Name: Tempo: Step Bank Pattern Transpose Step Bank Pattern Transpose...
-
Page 17: Midi Modes
When a glide is programmed into the Orb, the sound module For this setup, connect the MIDI Out of the Orb to the MIDI In of will see this as the first note overlapping the second note for a short the external MIDI sound module. - Page 18 As a general rule, always turn the power off for devices when making connections. For this setup, first connect the CV Out of the Orb to the CV input of the external analog device using a 1/4" mono cable. You will also need to connect the Gate Out of the Orb to the Gate input of the external device using another 1/4"...
- Page 19 Orb acts as the master device that allows it to control the start, stop, and tempo for all the sequencers connected. For this setup, connect the MIDI Out of the Orb to the MIDI In of the devices you wish to synchronize. To set up the MIDI parameters in the Orb, press the Song key (the Song indicator should turn on) to enter Song mode.
- Page 20 Avoid having the master sequencer send MMC or MTC as the clock. All the Orb needs to receive is simple MIDI Clock/Start/Stop To set up the Orb’s MIDI mode, first press the Song key (the Song commands. key indicator should be on) to enter Song mode.
- Page 21 Gate output for the duration the note is held. In addition, the Orb will generate a control voltage representing the note’s pitch at the CV output. A gliding note can be created by having the Orb receive two MIDI notes played slightly overlapped in time.
-
Page 22: Midi Program Change
To send program change messages to an external device, connect Stop the unit’s playback, and press the Song key (the Song key the MIDI Out of the Orb to the MIDI In of the external device. indicator should turn on) to enter Song mode. -
Page 23: Midi System Exclusive
Once this has been done, select “save” in the Orb’s The Orb supports MIDI System Exclusive messages (SysEx), for SysEx mode, and then press the Play key on the Orb to start the saving and loading your patterns and songs to other Orb units, our SysEx Dump. - Page 24 SYSEX INFORMATION PACKET SIZE INFORMATION 1 BANK 1 PACKET 604 BYTES MFG ID=07 CHANNEL#=01 ALL BANKS 16 PACKETS 9,499 BYTES MODEL#=77 1 SONG 14 PACKETS 8,313 BYTES RAW DATA TRANSFER/PACKET=512 BYTES ALL SONGS 224 PACKETS 132,843 BYTES PACKET SIZE ENCODED=604 BYTES When transferring SysEx data to another device, make sure the receiving device has the available buffer size GENERAL HEADER INFORMATION...
-
Page 25: Additional Notes
Play key indicator off), then press the Shift/Clear key to take you your music. back to the beginning of the song, and finally re-cue the Orb by pressing the Play key once again (Play key indicator will be on). - Page 26 C2, C#2, D2, D#2, E2, F2, F#2, and so on, plays Out of the Orb to the Gate In of the XS, and the Accent Out of the them back in their original sequential order. Create a similar Orb to the Velocity In of the XS.
- Page 27 For this setup, you will need to connect the CV Out of the Orb to perfect time with one another. the OSC MOD In of the XS, the Gate Out of the Orb to the Gate In Now imagine having, for example, three Orb units controlling of the XS, and the Accent Out of the Orb to the Velocity In of the an XS semi-modular synthesizer.
- Page 28 Before making any adjustments, turn the unit’s power on and let the unit warm up for at least 15 minutes. You may find it easier to calibrate this trimmer by setting the Orb on its side on a soft surface so you have access to the front panel controls and the bottom trimmer access hole at the same time.
-
Page 29: Specifications
SPECIFICATIONS SEQUENCER NUMBER OF PATTERNS: 256 patterns (16 banks x 16 patterns) • RECORDED PATTERN CONTENT: note duration, pitch, accent, • glide, loop point, time signature, swing amount NUMBER OF STEPS PER PATTERN: 3/4 time=12 steps max, • 4/4 time=16 steps max NOTE PITCH RANGE: C1 to D#6 (internal), C2 to D#7 (MIDI) •...
Need help?
Do you have a question about the ORB and is the answer not in the manual?
Questions and answers