Table of Contents
Advertisement
Available languages
Available languages
Quick Links
Advertisement
Chapters
Table of Contents

Summary of Contents for Mont Karlo HB330560
- Page 1 Type HB330560 INSTRUCTION MANUAL BRUKSANVISNING...
- Page 2 DEAR CUSTOMER, The oven is exceptionally easy to use and extremely efficient. After reading the instruction manual, operating the oven will be easy. Before being packaged and leaving the manufacturer, the oven was thoroughly checked with regard to safety and functionality. Before using the appliance, please read the instruction manual carefully.
-
Page 3: Table Of Contents
TABLE OF CONTENTS Safety instructions ......................4 Description of the appliance ..................... 8 Installation ......................... 10 Operation ........................... 12 Baking in the oven – practical hints ................16 Test dishes...........................19 Cleaning and maintenance ....................21 Technical data ........................26... -
Page 4: Safety Instructions
SAFETY INSTRUCTIONS Warning: The appliance and its accessible parts become hot during use. Care should be taken to avoid touching heating elements. Children less than 8 years of age shall be kept away unless continuously supervised. This appliance can be used by children aged from 8 years and above and persons with reduced physical, sensory or mental capabilities or lack of experience and knowledge if they have been given supervision or instruction concerning... - Page 5 SAFETY INSTRUCTIONS Danger of burns! Hot steam may escape when you open the oven door. Be careful when you open the oven door during or after cooking. Do NOT lean over the door when you open it. Please note that depending on the temperature the steam can be invisible.
- Page 6 HOW TO SAVE ENERGY Using energy in a respon- sible way not only saves money but also helps the environment. So let’s save energy! And this is how you can do it: Do not uncover the pan too often (a watched pot never boils!).
- Page 7 DISPOSAL OF THE APPLIANCE UNPACKING During transportation, protec- Old appliances should not sim- tive packaging was used to ply be disposed of with normal protect the appliance against household waste, but should any damage. After unpack- be delivered to a collection and ing, please dispose of all recycling centre for electric and elements of packaging in a...
-
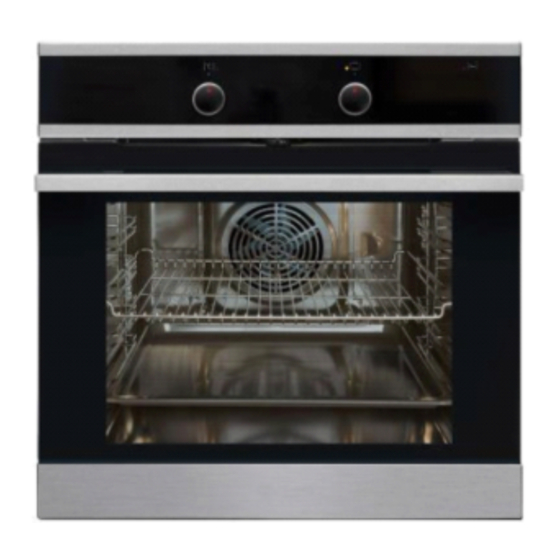
Page 8: Description Of The Appliance
DESCRIPTION OF THE APPLIANCE 1 Temperature control knob 2 Oven function selection knob 3 Temperatureregulatorsignal light 4 Oven operation signal light 5 Drawer... - Page 9 SPECIFICATIONS OF THE APPLIANCE Oven fittings: Grill grate (drying rack) Baking tray Roasting tray Side racks...
-
Page 10: Installation
INSTALLATION Electrical connection Installing the oven The oven is manufactured to work with The kitchen area should be dry and aired a one-phase alternating current (230V and equipped with efficient ventillation. 1N~50 Hz) and is equipped with a 3 x 1,5 When installing the oven, easy access to connection lead of 1.5 mm length all control elements should be ensured. - Page 11 INSTALLATION Mounting scheme with dimensions 5 6 0 6 0 0 5 6 0 5 6 0...
-
Page 12: Operation
OPERATION Before using the oven for the first time Remove packaging, clean the interior of the oven. Take out and wash the oven fittings with warm water and a little washing–up liq- uid. Switch on the ventillation in the room or open a window. - Page 13 OPERATION Oven with automatic air circulation Oven is off (including a fan and ring heater) Rapid Preheating The oven can be heated up using the bottom Ring heater and roaster on. Use to and top heaters, the grill or the ultra-fan he- preheat the oven.
- Page 14 OPERATION Bottom heater on Convection with ring heating ele- When the knob is set to this position ment and bottom heater on the oven is heated using only the With this setting the convection fan bottom heater. Baking of cakes from and bottom heater are on, which in- the bottom until done (moist cakes creases the temperature at the bottom...
- Page 15 OPERATION Use of the grill The grilling process operates through infrared rays emitted onto the dish by the incandes- cent grill heater. In order to switch on the grill you need to: Set the oven knob to the position marked grill ...
-
Page 16: Baking In The Oven - Practical Hints
BAKING IN THE OVEN – PRACTICAL HINTS Baking we recommend using the baking trays which were provided with your cooker; it is also possible to bake in cake tins and trays bought elsewhere which should be put on the drying rack; for baking it is better to use black trays which conduct heat better and shorten the baking time;... - Page 17 BAKING IN THE OVEN – PRACTICAL HINTS ECO fan assisted heating ECO fan assisted heating is an optimised heating function designed to save energy when preparing food. You cannot reduce the cooking time by setting a higher temperature; preheating ...
- Page 18 BAKING IN THE OVEN – PRACTICAL HINTS Oven with automatic air circulation (including a fan and ring heater) Type of Type Temperature ( Level Time dish of heating (min.) Sponge cake 160 - 200 2 - 3 30 - 50 Yeast cake/ 160 - 170 25 - 40...
-
Page 19: Test Dishes
TEST DISHES. According to standard EN 60350-1. Baking Type of dish Accessory Level Type Temperature Baking of heating time (min.) Baking tray 160 - 170 25 - 40 Baking tray 155 - 170 25 - 40 Baking tray 155 - 170 25 - 40 Small cakes 2 + 4... - Page 20 TEST DISHES. According to standard EN 60350-1. Grilling Type of dish Accessory Level Type Temperature Time of heating (min.) Wire rack 1,5 - 2,5 White bread toast Wire rack 2 - 3 Wire rack + 4 - wire rack roasting tray 1st side 10 - 15 Beef burgers 3 - roasting...
-
Page 21: Cleaning And Maintenance
CLEANING AND MAINTENANCE By ensuring proper cleaning and mainte- Wire shelf supports nance of your cooker you can have a sig- nificant influence on the continuing fault-free Wire shelf supports are esay to remove for operation of your appliance. wasking. - Page 22 CLEANING AND MAINTENANCE Replacement of the oven light bulb In order to avoid the possibility of an electric shock ensure that the appliance is switched off before replacing the bulb. ● Set all control knobs to the position “●”/“0” and disconnect the mains plug, ●...
- Page 23 CLEANING AND MAINTENANCE Removing the inner panel Door removal 1. Using a flat screwdriver unhook the up- per door slat, prying it gently on the sides In order to obtain easier access to the oven (fig. B). chamber for cleaning, it is possible to remove 2.
- Page 24 CLEANING AND MAINTENANCE 3. Pull the inner glass panel from its seat Regular inspections (in the lower section of the door). Re- move the inner panel (fig. D). Besides keeping the oven clean, you should: 4. Clean the panel with warm water with ●...
- Page 25 CLEANING AND MAINTENANCE Regular inspections Caution! Besides keeping the oven clean, you All repairs and regulatory activities should: should be carried out by the ap- carry out periodic inspections of the con- propriate service centre or by an trol elements and cooking units of the appropriately authorised fitter.
-
Page 26: Technical Data
TECHNICAL DATA Voltage rating 230V~50 Hz Power rating max. 3,6 kW Oven dimensions H/W/D 59,5 / 59,5 / 57,0 cm Basic Information: The product meets the requirements of European standards EN 60335- 1; EN60335-2-6. The data on the energy labels of electric ovens is given according to standard EN 60350-1 / IEC 60350-1. - Page 27 Lycka till med din nya-ugn • Bekanta dig med din nya ugn och dess olika användningsfunktioner i den ord nings följd de beskrivs i bruksanvisningen. • Var uppmärksam på alla upp lys ningar och förklaringar gällande korrekt an vänd ning och be hand ling.
- Page 28 INNEHÅLLSFÖRTECKNING Säkerhetsinstruktioner för användningen..............29 Produktbeskrivning......................33 In stalla tion..........................35 An vänd ning........................37 Använding av ugnen-praktiska råd..................41 Testrätter..........................44 Rengöring och un der håll....................46 Åtgärder vid fel........................50 Tekniska data........................51...
-
Page 29: Säkerhetsinstruktioner För Användningen
SÄKERHETSINSTRUKTIONER FÖR ANVÄNDNINGEN Obs. Produkten och de komponenter som du kommer åt blir varma under användningen. Var noga med att inte röra vid uppvärmningselementen. Barn under 8 år får inte använda produkten, utom om de står under uppsikt. Produkten får användas av barn över 8 år och av per- soner med fysiska, sensoriska eller psykiska funktion- shinder, eller med bristande erfarenhet av och kunskap om produkten, om de står under uppsikt eller har blivit... - Page 30 SÄKERHETSINSTRUKTIONER FÖR ANVÄNDNINGEN Använd inte utrustning som rengör med ånga när du rengör produkten. • Ugnen är mycket het vid an vänd ning och en stund efter att den stängts av. • Värmeelementen blir mycket heta under gräddning och grillstekning. För att förhindra eventuell flam bild ning får värmeelementet inte komma i kontakt med den mat som grillas eller med eventuell ugns-/stekfolie.
- Page 31 HUR MAN SPARAR ENERGI Undgå att öppna ugnsluckan, om det inte är nödvändigt. • Använd ugnen endast vid tillagning av större mängder. Det är mer sparsamt att tillaga kött som vä ger mindre än 1 kilo på hällen. • Utnyttja eftervärmen. Då...
- Page 32 Kassering av förbrukade produkter Miljöskydd När produkten är förbrukad får Tänk på att emballage, an- den inte kasse ras som van- vända el appa ra ter, re serv de- ligt avfall, utan man bör över- lar o.s.v. är återanvändbara lämna den till en organisation ma te rial.
-
Page 33: Produktbeskrivning
BESKRIVNING AV PRODUKTEN Vred för reglering av ugnstemperatur Kontrollvred för ugnsfunktioner Värmeindikator för ugn Kontrollampa Barnlås... - Page 34 UPPGIFTER ANGÅENDE UTRUSTNING Ugnstillbehör Rostfritt grillgaller Bakplåtar Långpanna Ugnsfalsar...
-
Page 35: Installation
INSTALLATION Vid inbyggnad ska ugnen placeras så nära strömförsörjningen som möjligt. Lyft aldrig ugnen via ugnsluckans handtag! Inbyggnadsskåpet kan efter eget val ut rus tas med lister eller en mellanbotten med ventila- tionsutskärning. En mellanbotten krävs om en låda ska placeras under ug nen. Nödvändiga mått framgår av bilden. - Page 36 INSTALLATION Inbyggnadsmått 5 6 0 6 0 0 5 6 0 5 6 0...
-
Page 37: Användning
ANVÄNDNING Innan man börjar använda ugnen Ugnen är utrustad med infällbara vred. För att välja en funktion, gör följande: • Innan du kan börja använda din nya 1. Tryck försiktigt in vredet och släpp, ugn måste den rengöras noggrant. An- 2. - Page 38 ANVÄNDNING Ugnens funktioner och användning Tillagning med varmluft Ugnen kan värmas upp med ett undervärme- En varmluftsfläkt som sitter på ugnens bakre element, ett övervärmeelement, ett grillele- vägg ger konstant luft cir ku la tion. Därmed ment och ett ringvärmeelement (för varmluft). uppnås en bättre vär meö...
- Page 39 ANVÄNDNING Ugnens funktionsknapp - In ställ ning: Varmluft När denna funktion aktiveras star- tas en fläkt på bakre ugnsväggen. Snabbuppvärmning Den ger konstant och jämn lu ft- Ring-värmeelement och grill. cir ku la tion inne i ugnen. Denna uppvärmning me tod har följan de förde lar: •...
- Page 40 ANVÄNDNING Kontrollampor GRILLSTEKNING Aktivering av ugnen signaleras genom att Användning av grill två kontrollampor börjar lysa – en (3) och en (4). När den (4) kontrollampan lyser Grillprocessen görs genom an vän dande bety der det att ugnen arbetar. När den (3) av infraröda strålar på...
-
Page 41: Använding Av Ugnen-Praktiska Råd
AVÄNDNING AV UGNEN - PRAKTISKA RÅD Bakning • Vi rekommenderar att du gräddar kakor på de bakplåtar som medföljer spisen från fabriken. • När du använder varmluftfunktionen behöver du inte förvärma ugnen. • Kontrollera kakan med en provsticka innan du tar ut den ur ugnen. •... - Page 42 AVÄNDNING AV UGNEN - PRAKTISKA RÅD ECO uppvärmning ECO uppvärmning är en optimerad funktion för att spara energi under tillag- ningen. Du kan inte förkorta tillagningstiden genom att ställa in en högre temperatur, vi rekommenderar inte att du förvärmer ugnen. Ändra inte temperaturinställningen under tillagning och öppna inte ugnsluckan.
- Page 43 AVÄNDNING AV UGNEN - PRAKTISKA RÅD Ugn med automatisk luftcirkulation (inklusive fläkt och ring-värmeelement) Maträtt Ugnens funktion Temperatur ( Nivå Tid (min.) Sockerkaka 160–200 2–3 30–50 Jästkaka / 160–170 25–40 pundskaka Jästkaka / 155–170 25–40 pundskaka Pizza 200–230 2–3 15–25 Fisk 210–220 45–60...
-
Page 44: Testrätter
TESTRÄTTER. I enlighet med standard EN 60350-1. Bakning Maträtt Tillbehör Nivå Uppvärm- Temperatur Bak-/stek- ning (min.) Bakplåt 160–170 25–40 Bakplåt 155–170 25–40 Bakplåt 155–170 25–40 Småkakor 2 + 4 Bakplåt 2 – bakplåt 155–170 25–50 Grillplåt eller grillplåt 4 – bakplåt Bakplåt 150–160 30–40... - Page 45 TESTRÄTTER. I enlighet med standard EN 60350-1. Grilla Maträtt Tillbehör Nivå Uppvärm- Temperatur ning (min.) Galler 1,5–2,5 Varm macka av ljust bröd Galler 2–3 Galler + stekplåt 4 – galler 1:a sidan 10–15 Hamburgare (för att samla 3 – stekplåt 2:a sidan 8–13 upp droppande fett)
-
Page 46: Rengöring Och Underhåll
RENGÖRING OCH UNDERHÅLL (De utdragbara skenorna finns inte i alla Se till att ugnen är avslagen och att samt- ugnsmodeller.) liga vreden är ställda i läge ”” / “0”. Rengöringen skall påbörjas först när ug- Ugn är utrustad med lätt uttagbara ugnsfalsar nen är kall. - Page 47 RENGÖRING OCH UNDERHÅLL Byte av ugnslampa Vid byte av lampan i ugnen skall ugnen göras strömlös. Detta görs för att undgå skador så som elektrisk stöt. Vrid alla vred till possition “”/“0” och stäng av strömmen till ugnen. Ta bort skyddsglaset vid lampan, genom att vrida glaset till vänster.
- Page 48 RENGÖRING OCH UNDERHÅLL Avmontering av det innersta glaset Demontering av ugnslucka 1. Använd en vanlig skruvmejsel för att ta av För att bättre komma åt ugnskammaren i luckans övre kantlist och försiktigt lossa si- samband med rengöring kan man ta bort dorna (fig.
- Page 49 RENGÖRING OCH UNDERHÅLL 3. Därefter kan glasskivan tas bort (fig. D). Efter rengöring upprepas beskrivningen i omvänd turordning. Viktigt! Tryck inte in den övre profilen på luckans bägge sidor samtidigt. För att passa in luckans övre profil på rätt sätt pla- cerar du profilens vänstra ände mot luckan och trycker sedan in den högra änden tills du hör ett „klick”.
-
Page 50: Åtgärder Vid Fel
ÅTGÄRDER VID FEL Vid ev. problem ska du alltid: • Stänga av ugn • Slå av strömmen till ugn • Vissa småfel kan du själv åtgärda genom att följa anvisningarna i tabellen. Kontrollera de enskilda felen i tabellen innan du kontaktar service. PROBLEM ORSAK ÅTGÄRD... -
Page 51: Tekniska Data
TEKNISKA DATA Märkspänning 230V~ 50 Hz Märkeffekt 3,6 kW Mått 59,5 / 59,5 / 57,0 cm Allmän information Produkten uppfyller kraven i EU-standarderna EN 60335- 1; EN60335-2-6. Informationen på elugnarnas elskyltar har angivits i enlighet med standarden EN 60350-1 / IEC 60350-1. - Page 52 IO-CBI-1987 / 8510283 (11.2020 / v2)
Need help?
Do you have a question about the HB330560 and is the answer not in the manual?
Questions and answers