Table of Contents
Advertisement
Quick Links
+050003238 rel. 1.2 - 08.05.2015
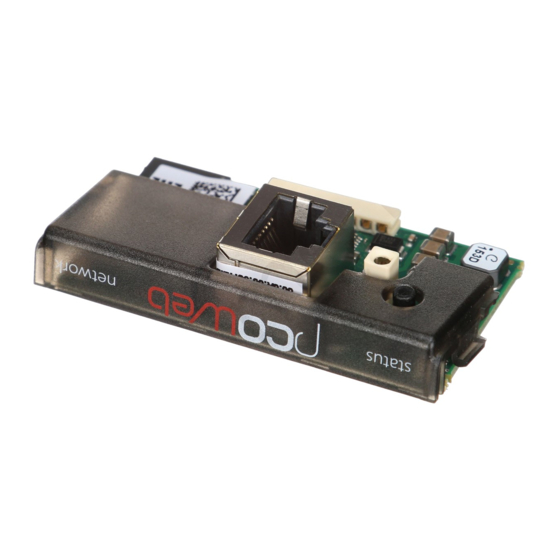
PCO1**0WB0 - pCOWeb - Scheda di interfaccia Ethernet per pCO* / Ethernet interface board for pCO*
Installazione / Installation
Caratteristiche generali
Condizioni di funzionamento:
0T55 °C, 20/80% U.R. non condensante
Condizioni di immagazzinamento: -20T70 °C, 20/80% U.R. non condensante
Grado di inquinamento ambientale: normale
Interfaccia Ethernet:
connettore RJ45 per Ethernet 10BaseT; utilizzare un cavo
schermato classe 5, max 100 m.
Protocolli gestiti:
HTTP, FTP, SNMP v1, v2c, DHCP, DNS, BACnet/IP
(Addenda A/Annex J), Modbus
®
TCP/IP
CPU:
ARM7 TDMI@74MHz clock
Sistema operativo:
LINUX 2.4.21.
General characteristics
Operating conditions:
0T55 °C, 20/80% U.R. non-condensing
Storage conditions:
-20T70 °C, 20/80% U.R. non-condensing
Degree of environmental pollution: normal
Ethernet interface:
RJ45 connector for Ethernet 10BaseT; use a class 5
shielded cable, max 100 m.
Protocols managed:
HTTP, FTP, SNMP v1, v2c, DHCP, DNS, BACnet/IP
®
(Addenda A/Annex J), Modbus
TCP/IP
CPU:
ARM7 TDMI@74MHz clock
Operating system:
LINUX 2.4.21.
La scheda opzionale pCOWeb (PCO10*0W*0) permette l'interfacciamento di tutti i controllori della serie pCO
sistema, tranne pCO
B
, (di seguito nominati pCO*) ad una rete Ethernet. Il seguente foglio fa riferimento all'ultima ver-
sione disponibile, leggibile tramite pagine HTML di confi gurazione.
Installazione:
l'installazione nel pCO* si ottiene a macchina non alimentata secondo la seguente procedura:
1. togliere lo sportellino "Serial Card" del pCO* con un cacciavite (Fig. 1);
2. inserire la scheda nel corrispondente connettore a pettine, assicurandosi che sia ben inserita e a contatto dei due appoggi
posti sul contenitore del pCO* (Fig. 2). Questa operazione può risultare diffi coltosa a causa dello spazio esiguo, si
consiglia, quindi, di inserire obliquamente la scheda e di farla poi ruotare fi no a far combaciare i connettori.
3. richiudere lo sportellino, utilizzando quello in dotazione alla scheda facendo combaciare il connettore della scheda
seriale con il foro presente sullo sportellino (Fig. 3);
4. (opzionale): incollare una o entrambe le etichette in dotazione all'esterno e/o all'interno del quadro elettrico in pros-
simità del pCO*, in modo che il MAC ADDRESS sia consultabile anche senza necessità di aprire il quadro elettrico.
5. Per la connessione alla rete Ethernet utilizzare un cavo del tipo S/FTP categoria 5e o migliore.
Connessione a rete Ethernet:
la scheda pCOWeb consente di collegare il controllore pCO* ad una rete Ethernet 10
Mbps e di realizzare le seguenti funzioni:
•
accesso alle informazioni del pCO* (variabili di rete e parametri) mediante un browser per Internet come Internet
Explorer™ installato su un PC e collegato in rete via TCP/IP a pCOWeb (vedi Web server);
•
collegamento a rete di supervisione che utilizzi uno dei seguenti protocolli standard:
- SNMP v1 & v2c; - BACnet/IP (Addenda A/Annex J); - Modbus
Utilizzo parametri di fabbrica:
al fi ne di accedere alla confi gurazione (si veda la sezione Confi gurazione), è
Fig. 1
possibile avviare pCOWeb con i seguenti valori "factory bootswitch parameters": - IP address= 172.16.0.1; - Net mask=
255.255.0.0; - "root" user password: froot; - "httpadmin" user password: fhttpadmin; - "carel" user password: fcarel; -
"guest" user password: fguest. Per avviare pCOWeb con questi parametri procedere come indicato di seguito:
•
da pCOWeb spenta:
- accendere il controllore pCO* con pCOWeb già inserita e mantenere premuto il pulsantino a lungo per almeno
20 s, fi no a che il LED status inizia a lampeggiare LENTAMENTE 3 volte rosso-spento;
- lasciare il tasto mentre il LED sta lampeggiando, dopo aver concluso i 3 lampeggi il LED diventa verde, quindi,
per confermare il riconoscimento del tasto, il LED lampeggerà RAPIDAMENTE 3 volte rosso-spento.
Per il completo avvio di pCOWeb saranno necessari circa altri 50 s fi no ad ottenere il LED Status regolarmente
lampeggiante, solo da questo momento in poi sarà possibile accedere via rete a pCOWeb.
•
da pCOWeb già accesa:
- riavviare il software di pCOWeb (vedi "Riavvio del software");
Fig. 2
- dopo il riavvio, procedere come da pCOWeb spenta (vedi sopra).
IMPORTANTE: nella modalità "factory bootswitch parameters" pCOWeb non memorizza i parametri così richiama-
ti ma li utilizza soltanto, per cui, al successivo riavvio senza pressione del pulsante riutilizzerà i parametri impostati
dall'utente (nel caso appena acquistata, DHCP).
Riavvio del software:
per ottenere un riavvio del software da scheda a regime (cioè con LED Status regolarmente lampeg-
giante), tenere premuto il pulsante per un numero di secondi compresi tra 5 e 10, dopo circa 10 s dal rilascio il LED Status smet-
terà di lampeggiare, e dopo altri 15 il software sulla scheda si riavvierà (si veda "sequenza di avvio" sezione "Interfaccia Utente").
Confi gurazione:
Attenzione: prima di connettere pCOWeb ad una rete Ethernet si consiglia vivamente di con-
tattare l'amministratore di rete, in quanto una errata confi gurazione di pCOWeb può temporaneamente bloccare tutta
la rete. Per un corretto funzionamento di pCOWeb devono essere impostati alcuni parametri di base, quali indirizzo IP
Fig. 3
e Net mask; ogni dispositivo collegato ad una rete Ethernet, per comunicare con un host deve avere un indirizzo IP
univoco. pCOWeb viene fornito con funzionalità DHCP già attiva. Pertanto, in una rete servita da server DHCP pCOWeb,
acquisirà in automatico i parametri necessari senza bisogno di confi gurazione, mentre, nel caso di una rete senza DHCP,
è necessario confi gurare i parametri manualmente (vedi sezione "Accesso alla confi gurazione Utente... " ).
Accesso alla confi gurazione Utente (tramite rete Ethernet e pagine Web di confi gurazione)
Rete con DHCP: chiedere all'amministratore di rete l'indirizzo che è stato attribuito in automatico a pCOWeb già colle-
gata, il quale avrà bisogno di conoscere il MAC ADDRESS di pCOWeb (vedi Fig. 4).
Rete senza DHCP: al primo utilizzo della scheda si consiglia di connettere direttamente pCOWeb ad un computer via cavo
Ethernet utilizzando un cavo incrociato; avviare quindi la scheda con i parametri "factory bootswitch" (vedi "Tasto Pushbutton").
Per permettere al PC di accedere al pCOWeb:
•
il PC utilizzato per la confi gurazione deve stare sulla stessa sottorete di pCOWeb; impostare i parametri di rete del
PC nel seguente modo: - IP address= se DHCP: chiedere all'amministratore di rete; se con "factory bootswitch para-
meters": 172.16.xxx.xxx (con xxx.xxx a piacere purché diversi da 0.1 già utilizzato da pCOWeb);
- Netmask= 255.255.0.0.
•
il browser sul PC deve avere l'opzione relativa all'utilizzo di un server proxy disabilitata.
Se le impostazioni di rete del PC e quelle del browser sono corrette, digitando sulla barra degli indirizzi del browser l'in-
dirizzo IP di pCOWeb, si otterrà accesso alla home page di default di pCOWeb. Entrare quindi nell'area riservata all'am-
ministratore utillizzando l'apposito link (Go to Administrator Area) e il seguente account preimpostato: -username=
admin; - password= fadmin. I parametri di base per la comunicazione e gli accessi si trovano nell'area "Confi guration".
Scegliere "Network": sarà possibile impostare l'indirizzo IP primario della scheda e tre alias. Per confi gurare la funziona-
lità DHCP scrivere "DHCP" al posto dell'IP address. Se la rete non utilizza DHCP, chiedere all' amministratore di rete un
indirizzo IP ed una Net mask validi per la rete locale a cui il pCO* andrà collegato.
nafter pCO*), except for the pCOB, to an Ethernet network. The following sheet refers lastest version, as read on the
HTML confi guration pages.
Installation:
1. remove the "Serial Card" cover from the pCO* using a screwdriver (Fig. 1);
2. insert the board in the corresponding plug-in connector, making sure it is sully inserted and in contact with the two
3. close the cover again, using the cover supplied with the board, lining up the connector on the serial board with the ope-
4. (optional): stick one or both labels supplied outside and/or inside the electrical panel near the pCO*, so that the MAC
5. for the connection to the Ethernet network, use an S/FTP cable, category 5e or higher.
Connection to the Ethernet network:
Ethernet network and consequently perform the following functions:
•
•
®
TCP/IP.
Using the default parameters:
can be started using the "factory bootswitch parameters": - IP address= 172.16.0.1; - Net mask= 255.255.0.0; - "root"
user password: froot; - "httpadmin" user password: fhttpadmin; - "carel" user password: fcarel; - "guest" user password:
fguest. To start the pCOWeb with these parameters, proceed as follows:
•
- switch on the pCO* controller with the pCOWeb already inserted and hold the button for at least 20 s, until the
- release the button while the LED is fl ashing, after having fl ashed 3 times the LED turns green, then, to confi rm
•
- restart the pCOWeb software (see "Restarting the software");
- after restarting, proceed as above for when the pCOWeb is off (see above).
simply uses them, and therefore, when next restarted without pressing the button, it will use the parameters set by the
user (if just acquired, with DHCP).
Restarting the software:
fl ashing regularly), press and hold the button for between 5 and 10 seconds; after around 10 s from releasing the but-
ton, the status LED will stop fl ashing, and after a further 15 seconds the software on the board will restart (see "starting
sequence", "User interface" section).
Confi guration:
to contact the network administrator, as the incorrect confi guration of the pCOWeb may temporarily shutdown the enti-
re network. For the correct operation of the pCOWeb, a number of basic parameters need to be set, such as the IP address
and Netmask; each device connected to an Ethernet network, to communicate with a host, must have a unique IP ad-
dress. pCOWeb is supplied with the DHCP function already active. Therefore, in a network served by a DHCP server, pCO-
Web will automatically acquire the necessary parameters without requiring confi guration, while, in the case of a network
without DHCP, the parameters need to be confi gured manually (see the "Accessing the user confi guration... " section).
Accessing the user confi guration (via Ethernet network and confi guration web pages)
Automatic network confi guration (DHCP): ask the network administrator for the address that has automatically been assig-
ned to the pCOWeb already connected; the administrator will need to know the MAC ADDRESS of the pCOWeb (see Fig. 4).
Network without DHCP: when fi rst using the board, it is recommended to connect pCOWeb directly to a computer
using a crossed Ethernet cable; then start the board with the "factory bootswitch" parameters (see "Pushbutton").
To allow the PC to access the pCOWeb:
•
- Netmask= 255.255.0.0.
•
If the network settings on the PC and the browser are correct, typing the IP address of the pCOWeb in the address bar
will access the default home page of the pCOWeb. Then enter the area reserved for the administrator, using the special
link (Go to Administrator Area) and the following pre-set account: - username = admin; - password = fadmin. The basic
parameters for communication and access are located in the "Confi guration" area. Choose "Network": the primary IP
address of the board and three aliases can be set. To confi gure the DHCP function type "DHCP" in the place of the IP
address. If the network does not use DHCP, ask the network administrator for a valid IP address and Netmask for the
local network that the pCO* will be connected to.
The optional pCOWeb board (PCO10*0W*0) is used to interface all of the pCO sistema series controllers (herei-
The board is installed in the pCO* controller, when off , as follows:
supports located on the case of the pCO* (Fig. 2). This operation may be diffi cult due to the limited space, conse-
quently, it is recommended to insert the board at an angle and then turn it until aligning the connectors;
ning in the cover (Fig. 3);
ADDRESS can be read without needing to open the electrical panel;
The pCOWeb board is used to connect the pCO* controller to a 10 Mbps
access the information on the pCO* (network variables and parameters) using an Internet browser, such as Inter-
net Explorer™ installed on a PC and connected to the pCOWeb via TCP/IP (see Web server);
connection to a supervisory network that uses one of the following standard protocols: - SNMP v1 & v2c; - BACnet/IP
(Addenda A/Annex J); - Modbus® TCP/IP.
In order to access the confi guration (see the Confi guration section), the pCOWeb
when the pCOWeb is off :
status LED starts fl ashing SLOWLY 3 times, red-OFF;
the recognition of the button, the LED will fl ash QUICKLY 3 times, red-OFF.
To complete the pCOWeb boot phase, wait around another 50 s until the status LED fl ashes regularly; from this
moment on the pCOWeb can be accessed via the network.
when the pCOWeb is already on:
IMPORTANT: in "factory bootswitch parameters" mode, the pCOWeb does not save the parameters recalled, but
To restart the software when the board is in stable operation (that is, with the status LED
Important: before connecting the pCOWeb to an Ethernet network, it is strongly recommended
the PC used for the confi guration must be in the same sub-network as the pCOWeb; set the network parameters on
the PC as follows: - IP address= if DHCP: ask the network administrator; with "factory bootswitch parameters": 172.16.
xxx.xxx (with xxx.xxx as desired, as long as diff erent from the 0.1 already used by pCOWeb);
the browser on the PC must have the option corresponding to the use of a proxy server disabled.
Advertisement
Table of Contents

Summary of Contents for Carel PCO1 0WB0 Series
- Page 1 “factory bootswitch parameters”: - IP address= 172.16.0.1; - Net mask= 255.255.0.0; - “root” 255.255.0.0; - “root” user password: froot; - “httpadmin” user password: fhttpadmin; - “carel” user password: fcarel; - user password: froot; - “httpadmin” user password: fhttpadmin; - “carel” user password: fcarel; - “guest” user password: “guest”...
- Page 2 è in grado di comunicare utilizzando il protocollo SNMP (v1 & v2c). Si comporta quindi da gateway en the CAREL proprietary protocol and SNMP. The information available via SNMP relates to all the data sent to the tra il protocollo proprietario CAREL e SNMP. Le informazioni disponibili via SNMP sono tutte quelle inviate in supervi- The Status LED shows the status of communication with the controller, as well as the status supervisors by the application loaded on the pCO*.
Need help?
Do you have a question about the PCO1 0WB0 Series and is the answer not in the manual?
Questions and answers