
Related Manuals for joyami JW1

Summary of Contents for joyami JW1
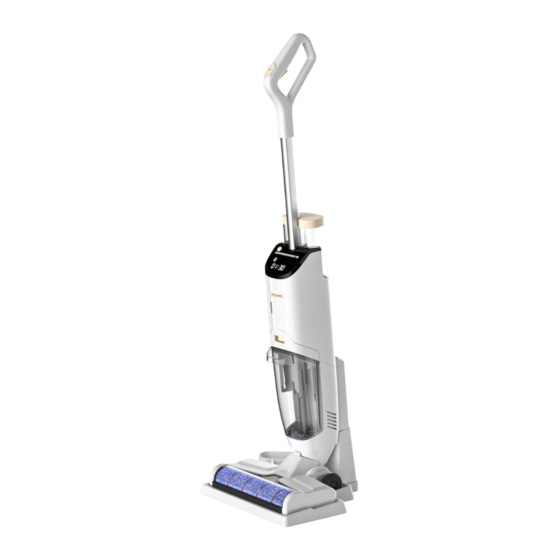
- Page 1 JW1 Cordless wet & dry vacuum cleaner User Manual For your safety and good experience, please read user manual carefully before you use the product, and keep it properly for future use.
-
Page 2: Table Of Contents
CONTENTS Product Introduction..............18 Cleaning & Maintenance.............27 Important Safeguards............18 Maintain the main body............27 Recycling..................20 Maintain the foot..............27 Remove the rechargeable battery........20 Clean the dirty water tank...........27 Clean the float,filter elementand filter net....27 Product Description.............21 Install the dirty water tank...........28 Clean the rolling brush............28 List of Accessories..............22 Clean the charging base............28 Storage..................28... -
Page 3: Product Introduction
Do not disassemble or assemble the product by yourself, to avoid any damage or danger to it. · Immediately stop using the product and make a call to joyami after sales for professional maintenance in case of current leakage, overtemperature and abnormal noise of the motor, overheating, abnormal noise, peculiar smell, and weak suction. - Page 4 Replace the rolling brush only after powering off the product. · Do not use any accessories or parts produced by other manufacturers or not specifically recommended by joyami. Use of such accessories or parts will void the warranty of the product.
-
Page 5: Recycling
Electromagnetic Field (EMF) The product complies with all applicable standards and regulations relating to exposure to electromagnetic fields. Recycling · When disposing of the product, do not put it together with general household garbage, but send it to the recycling center designated by the government for environmental protection. -
Page 6: Product Description
Follow the following steps to remove the rechargeable battery. 1. Disconnect the power supply of the product and allow the product to continue running until the motor stops rotating. 2. Press the buttons on both sides of the battery pack and pull the battery pack downwards to remove it. Product Description On/Off Key Switch Key... -
Page 7: List Of Accessories
List of Accessories Charging Base Power Adapter Rolling Brush Multi-function Long-handle Holder Rolling Brush Cleaning Brush Functions of Keys On/Off Key Press once the On/Off key to turn on the product, and again to turn it off. The Standard stage is default when the product is turned on. Switch Key The Standard stage is default when the product is turned on. -
Page 8: Introduction To Led Panel
Introduction to LED Panel The squares on the right side of the battery capacity indicate the battery capacity, and every square represents 1/12 of the total battery capacity. It displays the usage time in the form of “minute: second (XX:XX)”. The suction and spraying flow of the product is in the Auto Mode. -
Page 9: Dismantle And Install The Handle
Dismantle and install the handle Installation: Insert the handle to the corresponding Screwdriver hole in the main body. If a click sound is heard, it means the handle is properly installed. (as shown in Figure 1) Small hole Tip: Install the handle in a correct orientation. Dismantlement: Insert a properly sized screwdriver or tool into the small hole in the back of the handle to easily remove the handle. -
Page 10: Dismantle And Install The Rolling Brush
Dismantle and install the rolling brush Installation: Align the bayonet on the rolling brush latch with the slot, push the rolling brush to the bottom to make it fully contact the rolling brush shaft by turning it clockwise to the bottom, and close the latch. If a click sound is heard, it is installed successfully. -
Page 11: Fill The Clean Water
Fill the clean water Fill the clean water tank with clean water, tightly screw the cover, and then install the clean water tank. Max Water Level Self-cleaning Water Level Turn on Step on the bottom cover, hold the handle and pull it backwards to tilt the main body to a proper angle, and press the On/Off key to start working. -
Page 12: Cleaning & Maintenance
Cleaning & Maintenance Before maintenance, remove the power plug from the socket, turn off the power supply, and remove the battery from the product. Maintain the main body For daily maintenance, gently wipe the main body with dry cloth. Do not rinse the main body with water. -
Page 13: Install The Dirty Water Tank
Install the dirty water tank Put dry filter and filter net into the top cover of the dirty water tank, and then install the top cover on the dirty water tank. Finally, tightly install the dirty water tank back to the main body. Clean the rolling brush Remove the rolling brush as described in the "Dismantle and install the rolling brush"... -
Page 14: Clean Water Tank Alarm Calibration
Clean water tank alarm calibration 1. Turn off the power, dismantle the clean water tank; 2. Turn on the power, press the “Spray Key” until the clean water shortage indicator is flashing, then turn off the power. 3. Press “On/Off Key” and “Switch Key” at the same time until the display blinks twice. On/Off Key Switch Key Spray Key... -
Page 15: Troubleshooting
Troubleshooting This chapter summarizes some common problems occurring in the use of the product. If you cannot solve a problem according to the following information, please contact our after-sales service personnel or the customer service center in your country/region. Fault Cause Solution The dirty water reaches the max... -
Page 16: Basic Parameter
Basic Parameter Product name Product model B61-B Multi-surface dry wet vacuum cleaner Rated voltage DC 25.2V Rated frequency 150W Charging voltage DC 30V Charging current 0.8A Rated Input of Adapter 100-240V~ 50-60Hz 0.8A MAX After-sale Service Please visit the official website at http://tokitglobal.com,if you need after-sales service or other information, or encounter any problem.
Need help?
Do you have a question about the JW1 and is the answer not in the manual?
Questions and answers