Advertisement
Saftey & Operating Instructions
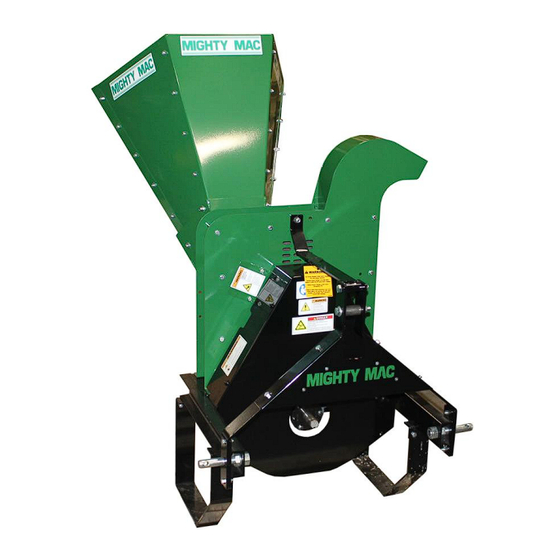
Gravity Self-Feeding Chipper
Serial No.
P/N: 950-4000
Published: 10/11/2019
Read and understand this manual and all instructions before operating or servicing this 3-Point Hitch MIGHTY MAC
GRAVITY SELF-FEEDING Chipper.
TPH475
MacKissic Inc.
Toll-free phone: 1-800-348-1117
Website: www.MacKissic.com
Advertisement

Related Manuals for Mighty Mac TPH475

Summary of Contents for Mighty Mac TPH475
- Page 1 Saftey & Operating Instructions Gravity Self-Feeding Chipper TPH475 Serial No. P/N: 950-4000 MacKissic Inc. Toll-free phone: 1-800-348-1117 Website: www.MacKissic.com Published: 10/11/2019 Read and understand this manual and all instructions before operating or servicing this 3-Point Hitch MIGHTY MAC GRAVITY SELF-FEEDING Chipper.
-
Page 2: Table Of Contents
Table of Contents Chapter 1: General Safety Rules ......................3 Chapter 2: Setting Up Your 3-POINT HITCH MIGHTY MAC GRAVITY SELF-FEEDING CHIPPER ..8 Chapter 3: Operating Your 3-POINT HITCH MIGHTY MAC GRAVITY SELF-FEEDING CHIPPER ..16 Chapter 4: Maintaining Your 3-POINT HITCH MIGHTY MAC GRAVITY SELF-FEEDING CHIPPER . 20 Chapter 5: Troubleshooting ...................... -
Page 3: Chapter 1: General Safety Rules
Shown below are copies of all the safety and operation labels that appear on the equipment. Take a moment to study them and make a note of their location on your 3-Point Hitch MIGHTY MAC GRAVITY SELF-FEEDING Chipper as you assemble and before you operate the unit. - Page 4 930-0022 091-0458 930-0024 091-0385 091-0445 930-0025 3-POINT HITCH Mighty Mac Gravity Self-Feeding CHIPPER...
- Page 5 Do not use the machine while barefoot or wearing open sandals. • Wear long pants while operating the 3-Point Hitch MIGHTY MAC GRAVITY SELF-FEEDING Chipper. • Use ear protectors or ear plugs rated for at least 20 dba to protect your hearing.
- Page 6 • The Mighty Mac 3-Point Hitch Chipper must be operated with the weight of the machine on the ground. Operating the machine while it is off the ground can result in injury to yourself or others, or can cause damage to the machine which is not covered under warranty.
- Page 7 Before transporting, be certain the 3-Point Hitch MIGHTY MAC GRAVITY SELF-FEEDING Chipper is correctly and securely attached to your tractor and the safety chains of the PTO are in place. • Make sure the 3-Point Hitch MIGHTY MAC GRAVITY SELF-FEEDING Chipper is raised high enough to clear all obstacles during transportation. •...
-
Page 8: Chapter 2: Setting Up Your 3-Point Hitch Mighty Mac Gravity Self-Feeding Chipper
This chapter outlines unpacking and a few simple steps you will need to follow to set up your new machine before you use it. It may be helpful to familiarize yourself with the controls and features of your 3-POINT HITCH MIGHTY MAC GRAVITY SELF-FEEDING CHIPPER as shown in Figure 1 before beginning these procedures. - Page 9 Warranty Shipping Dimensions Chute Card 54" L x 46" W x 46" H Shipping Weight 382 lbs Assembling the 3-POINT HITCH MIGHTY MAC GRAVITY SELF-FEEDING CHIPPER Owner’s Manual Parts supplied (Figure 2): • 3-POINT HITCH MIGHTY MAC GRAVITY SELF-FEEDING CHIPPER •...
- Page 10 2. Position the Discharge Chute with the discharge opening facing away from the Hopper as shown and secure with the two Bolts and Locknuts Discharge using two 1/2" Wrenches. Chute Figure 5 Bolts and Locknuts 3-POINT HITCH Mighty Mac Gravity Self-Feeding CHIPPER...
- Page 11 Installing Lift Arm Pins Screwdriver Screwdriver Frame or Shaft or Shaft There are two styles of Pins we use for the Lift Arm Pins. One style has a shoulder and the other style does not. Installation methods for both styles are explained here so follow the steps that apply to the style you received.
- Page 12 Upper (pivot) Draft Attaching the 3-POINT HITCH MIGHTY MAC GRAVITY SELF-FEEDING CHIPPER Before performing the following procedure, be sure your tractor engine is off, brake is set, and the key removed for safety. Note: The PTO Driveshaft provided with your new machine is sized to fit a standard category 1 PTO (1-3/8"...
- Page 13 2. Raise the Chipper up until the Tractor PTO Shaft and Chipper PTO End of tractor Shaft are parallel with each other. Measure from the end of the Tractor End of Chipper PTO shaft PTO Shaft PTO Shaft to the end of the Chipper PTO Shaft and record this dimension in the “SHAFTS LEVEL”...
- Page 14 3-Philips 3-Phillips Modifying the PTO Shaft-if required Screws Screws The PTO Shaft included with your new MIGHTY MAC Chipper may be too long for your tractor. To shorten the Driveshaft, proceed as follows: Tools and Supplies Needed: • Hacksaw •...
- Page 15 Attaching the PTO Shaft to the Tractor and Chipper 1. Insert the Key into the 3-Point Hitch Drive Shaft of the Chipper (Figure 20). 2. Align the Key Slot of the PTO Shaft with the Key in the Shaft and slide it onto the Shaft.
-
Page 16: Chapter 3: Operating Your 3-Point Hitch Mighty Mac Gravity Self-Feeding Chipper
• The Mighty Mac 3-Point Hitch Chipper must be operated with the weight of the machine on the ground. Operating the machine while it is off the ground can result in injury to yourself or others, and can cause damage to the machine which is not covered under warranty. - Page 17 Use ear protectors or ear plugs rated for at least 20 dba to protect your hearing. The chipper hopper must be securely bolted to your MIGHTY MAC GRAVITY SELF-FEEDING Chipper and the blowback shield in place before using the machine! Use common sense when using the machine.
- Page 18 • Your MIGHTY MAC GRAVITY SELF-FEEDING CHIPPER can process dry or green wood up to 4.75" in diameter. • The Chipper will self-feed the wood once it contacts the knife edge so forcing the branches into the Hopper is not necessary if the knife is sharp.
- Page 19 To Free a Jammed Flywheel Disengage PTO, shut down the tractor engine, remove the key, wait for all moving parts to come to a complete stop, disconnect the PTO shaft from the tractor, then wait 5 minutes before moving or performing maintenance/inspection on the chipper.
-
Page 20: Chapter 4: Maintaining Your 3-Point Hitch Mighty Mac Gravity Self-Feeding Chipper
Chapter 4: Maintaining Your 3-POINT HITCH MIGHTY MAC GRAVITY SELF-FEEDING CHIPPER This chapter covers regular maintenance procedures that will ensure the best performance and long life of your 3-POINT HITCH MIGHTY MAC GRAVITY SELF-FEEDING CHIPPER. Maintenance Kits and Accessories are available through our website at www.MacKissic.com. - Page 21 Flywheel Bearing Grease Fittings Your GRAVITY SELF-FEEDING CHIPPER was greased at the Factory. The operator needs to periodically lubricate the four Bearings of the Chipper Assembly and the PTO Shaft. Screws Disengage PTO, shut down the tractor engine, remove the key, wait for all moving parts to come to a complete stop, disconnect the PTO shaft from Grease the tractor, then wait 5 minutes before performing any maintenance procedure...
- Page 22 Tension Spring Hooks is 5-1/4" (Figure 30). Note: Loosen the Locking Nut as needed to get the spring to the proper tension. 3. Tighten the Locking Nut to secure when the proper adjustment is made. Figure 29 3-POINT HITCH Mighty Mac Gravity Self-Feeding CHIPPER...
- Page 23 Bushing Key Bolt. Note: Make sure that the Belt or Sheave is not hitting the Frame. Note: The belt on your MIGHTY MAC 3-POINT HITCH CHIPPER is tensioned with a spring- loaded idler arm and pulley that is set at the factory.
- Page 24 Routinely check the wear plate for a sharp square edge. Using a rounded or chipped wear plate will decrease performance and cause excessive vibration that will cause damage to the MIGHTY MAC GRAVITY SELF- Figure 32 FEEDING Chipper and make chipping difficult for the operator.
- Page 25 Removing and Replacing the Chipper Knife Tools Needed: • 7/16" Wrench • Cover 1/2" Socket with extension • 3/16" Allen wrench • Awl or Sharp Tool • Gloves 1. Remove the Belt Cover (see “Removing, Replacing and Adjusting the Drive Belt” in this Chapter) and Shredder Hopper (see “VISUAL inspection of the Wear Plate (every 8-10 hours)”...
- Page 26 If you detect any of these, inspect the machine for damage, or any loose parts. Repair or replace any damaged parts and tighten any loose parts before starting the MIGHTY MAC GRAVITY SELF-FEEDING Chipper. 3-POINT HITCH Mighty Mac Gravity Self-Feeding CHIPPER...
- Page 27 Chipper Knife Sharpening • You should never attempt to sharpen the Chipper Knife freehand. • Chipper It is extremely important to consistently maintain the 45-degree Knife angle for proper performance (Figure 41). • Excessive heat generated during the sharpening process will damage Knives and weaken the metal.
- Page 28 NOTE: If the Wear Plate is filed enough times that the proper gap between the Knife and Wear Plate cannot be set with the Gap Gauge, Figure 42 you will need to replace the Wear Plate. 3-POINT HITCH Mighty Mac Gravity Self-Feeding CHIPPER...
-
Page 29: Chapter 5: Troubleshooting
Chapter 5: Troubleshooting Most problems are easy to fix. Consult the Troubleshooting Table below for common problems and their solutions. If you continue to experience problems, contact us at www.MacKissic.com or call MacKissic Inc. for support. Disengage PTO, shut down the tractor engine, remove the key, wait for all moving parts to come to a complete stop, disconnect the PTO shaft from the tractor, then wait 5 minutes before performing any maintenance procedure or inspection on the chipper. - Page 30 Knife to Wear Plate Gap. See Chapter 5. PTO turns but the flywheel Loose Drive Belt; Replace Belt. See Chapter 5. doesn’t rotate. Remove any built-up debris from the Chipper Hopper Inlet and Discharge Chute. 3-POINT HITCH Mighty Mac Gravity Self-Feeding CHIPPER...
-
Page 31: Chapter 6: Chipper Accessories
Chapter 6: Chipper Accessories Disengage PTO, shut down the tractor engine, remove the key, wait for all moving parts to come to a complete stop, disconnect the PTO shaft from the tractor, then wait 5 minutes before performing any maintenance procedure or inspection on the chipper. -
Page 32: Chapter 7: Parts List And Schematic Diagrams
Chapter 7: Parts List and Schematic Diagrams Schematic – Drive Assembly 3-POINT HITCH MIGHTY MAC ® GRAVITY SELF-FEEDING™ CHIPPER... - Page 33 Parts List – Drive Assembly ITEM PART NUMBER DESCRIPTION 950-4010-BL FRAME 950-4201 TPH475 BASIC UNIT 090-0460 NUT, NYLON LOCK, 5/16-18 090-0066 5/16-18 X 3/4" HHCS 090-0461 3/8-16 Nylock Nut 913-0302-BL SPRING MOUNT BRACKET 030-0333 1" SK BUSHING 080-0081 .25 X 1.25 KEY...
- Page 34 Schematic – Unit Assembly 3-POINT HITCH MIGHTY MAC ® GRAVITY SELF-FEEDING™ CHIPPER...
- Page 35 Parts List – Unit Assembly ITEM PART DESCRIPTION NUMBER 950-4010-BL FRAME 950-4201 TPH BASIC UNIT 030-0659 2 BOLT BEARING, 1" BORE 090-0551 CARRIAGE BOLT, 5/16-18 X 1 090-0460 NUT, NYLON LOCK, 5/16-18 950-4018-BL FRONT BELT GUARD 950-4017-BL SIDE BELT GUARD 950-0297 CENTER BRACE ASSEMBLY 940-4016-BL...
- Page 36 Schematic – Basic Unit 3-POINT HITCH MIGHTY MAC ® GRAVITY SELF-FEEDING™ CHIPPER...
- Page 37 Parts List – Basic Unit ITEM PART NUMBER DESCRIPTION 950-2104-GR CHUTE SIDE PLATE WELDMENT 940-2107-GR MEDIUM SCROLL WELDMENT 950-2103-GR VENT SIDE PLATE 940-4250-R FLYWHEEL 090-0702 5/26-18 X 4-1/2" BOLT 090-0048 5/16-18 GRIPCO LOCKNUT 940-2017-GR SCROLL TUBE 090-0720 SPACER 030-0449 1-1/4" RETAINING RING 030-0530 DODGE 1-1/4"...
- Page 38 090-0060 Bolt, HCS, 1/4-20 X 1, Gr5 930-2064-GR Swivel Top, Pin Side 930-0010 Label, Warning, High Speed Discharge 930-2063-GR Spacer, Swivel 930-0011 Label, Danger, Rotating Knife & Flywheel 940-2077-GR Flange, Side, HD 3-POINT HITCH MIGHTY MAC ® GRAVITY SELF-FEEDING™ CHIPPER...
- Page 39 Notes www.MacKissic.com CONTACT US AT...
- Page 40 Notes...
- Page 41 Notes www.MacKissic.com CONTACT US AT...
- Page 42 • When not in use, your MIGHTY MAC GRAVITY SELF-FEEDING Chipper should be stored out of the reach of children. NOTE: Please refer to the Safety and Operation Manual that came with the PTO Shaft for specific PTO Shaft procedures.
Need help?
Do you have a question about the TPH475 and is the answer not in the manual?
Questions and answers