Table of Contents
Advertisement
Quick Links
Repair
HV-9500 Maintenance
and Repair
Diaphragm-Jet
For non-contact dispensing of viscous material in industrial environments.
For Professional Use only.
Important Safety Instructions
Read all warnings and instructions in this manual
and all related manuals before using this
equipment. Save these instructions.
™
Technology
PROVEN QUALITY. LEADING TECHNOLOGY.
3A5910A
EN
Advertisement
Table of Contents

Summary of Contents for Advanjet HV-9500 Series
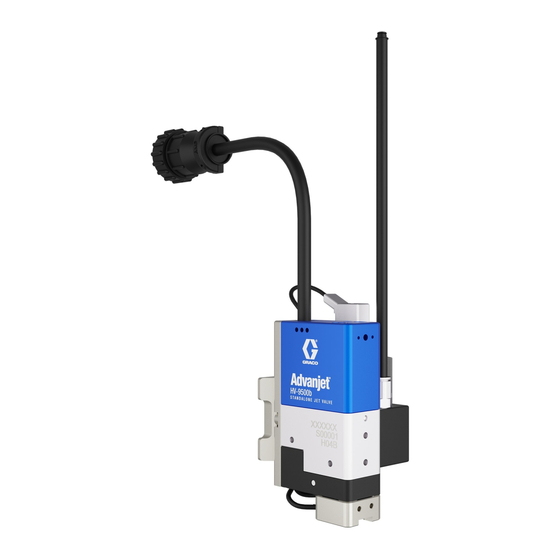
- Page 1 Repair HV-9500 Maintenance and Repair 3A5910A ™ Diaphragm-Jet Technology For non-contact dispensing of viscous material in industrial environments. For Professional Use only. Important Safety Instructions Read all warnings and instructions in this manual and all related manuals before using this equipment.
-
Page 2: Table Of Contents
3.4.1 Heater Block and Cable ..............19 3.4.1a BK-2001 (Existing Heater Block) ........19 3.4.1b HK-9500 (New Heater Block) ........19 3.4.2 Position the Heater Block .............. 19 3.4.3 Attach the Heater Block ..............19 Page 2 of 26 Advanjet HV-9500 Maintenance and Repair 3A5910A... - Page 3 4.2.4 Attach the Jet ................24 Measure the Gap ..................25 4.3.1 Connect the Jet ................25 4.3.2 Reading the Dial ................25 Adjust the Gap ..................25 GRACO STANDARD WARRANTY ................26 3A5910A Advanjet HV-9500 Maintenance and Repair Page 3 of 26...
-
Page 4: Related Manuals
Related Manuals Manuals are available at www.graco.com. Component manuals below are in English: 3A5928 HV-9500 Standalone Jet Setup and Operation 3A5908 Advanjet Jet Maintenance Tool Kit (JKT-9500) Technical Assistance For technical assistance: Phone: +1 760-294-3392 Web: www.advanjet.com E-mail: info@advanjet.com Page 4 of 26... -
Page 5: Safety Guidelines
Protective equipment includes but is not limited to: • Protective eyewear, and hearing protection. • Respirators, protective clothing, and gloves as recommended by the fluid and solvent manufacturer. 3A5910A Advanjet HV-9500 Maintenance and Repair Page 5 of 26... -
Page 6: Required Parts And Tools
HEATER CABLE SETSCREW (2) M3 X 3 HEATER BLOCK SCREWS (2) M3 X 30 FHMS - and – JET SPRING P/N 60-2102 WASHER P/N 60-2116 HEATER SEAL P/N 03-2261-00 BUSHING P/N 03-2162-00 Page 6 of 26 Advanjet HV-9500 Maintenance and Repair 3A5910A... -
Page 7: Jet Repair Kit (Jk-9500)
MAIN AIR (JET HAMMER) CYLINDER ASSEMBLY P/N 60-2266 SILENCER P/N 60-2107 LEVER P/N 03-2281-00 PIVOT BOLT P/N 60-2104 JET SPRING P/N 60-2102 WASHER P/N 60-2116 HEATER SEAL P/N 03-2261-00 BUSHING P/N 03-2162-00 3A5910A Advanjet HV-9500 Maintenance and Repair Page 7 of 26... -
Page 8: Required Tools
(P/N 90-0010) Other Tools #1 Phillips screwdriver #2 Phillips screwdriver 3-mm hex wrench 2.5-mm hex wrench 150-mm adjustable wrench 13-mm open end wrench Loctite® is a registered trademark of Henkel. Page 8 of 26 Advanjet HV-9500 Maintenance and Repair 3A5910A... -
Page 9: Jet Disassembly
Remove built-up threadlocker as necessary. After reassembling the jet, the jet hammer gap must be set using the procedure in Section 4. 3A5910A Advanjet HV-9500 Maintenance and Repair Page 9 of 26... -
Page 10: Disassembled Hv-9500 Jet
Disassembled HV-9500 Jet (HV-9500R with HF option jet shown) JET REPAIR KIT BUSHING HF OPTION Page 10 of 26 Advanjet HV-9500 Maintenance and Repair 3A5910A... -
Page 11: Remove Top Cover, Syringe Holder, And Plates
The two screws that secure the nozzle plate 2.3.3 Remove the Mounting Plate KEEP Use the 3mm driver to remove the two screws securing the mounting plate; set aside. KEEP 3A5910A Advanjet HV-9500 Maintenance and Repair Page 11 of 26... -
Page 12: Remove Heater Block Assembly
Disconnect the heater cable from the solenoid and the jet cable and remove. HK-9500 KEEP ATTACHED BK-2001 KEEP SCREWS If only the BK-2001 or HK-9500 kit is being installed, skip to section 3.3. Page 12 of 26 Advanjet HV-9500 Maintenance and Repair 3A5910A... -
Page 13: Remove Spacer Assembly
Use the #1PH to loosen the screw on the solenoid connector and the screws securing the solenoid to the valve mount. Remove and discard the solenoid. Use a wrench to remove the silencer; discard. JK-9500 3A5910A Advanjet HV-9500 Maintenance and Repair Page 13 of 26... -
Page 14: Check For Parts/Screws Set Aside
Check that these parts and screws have been set aside as specified below. If necessary, remove built-up threadlocker on screws. Page 14 of 26 Advanjet HV-9500 Maintenance and Repair 3A5910A... -
Page 15: Install New Parts And Reassemble The Jet
Attach the solenoid connector Attach the dovetail plate and syringe holder After the jet is assembled, follow the procedures in Section 4 to set the jet hammer gap. 3A5910A Advanjet HV-9500 Maintenance and Repair Page 15 of 26... -
Page 16: Install Jet Hammer Cylinder
Position the shutoff spring in the spacer so that it Apply a light coating of Loctite 243 to the threads rests in the lever spring bore. Attach the spacer. of the spacer screws and install (#1PH). Page 16 of 26 Advanjet HV-9500 Maintenance and Repair 3A5910A... -
Page 17: Align The Lever
Screw in the pivot bolt with the driver until it is barely snug. Verify that the lever is not binding— the hammer cylinder hat should move up and down freely. HAT MOVES UP AND DOWN 3A5910A Advanjet HV-9500 Maintenance and Repair Page 17 of 26... -
Page 18: Install Heater Block Bushing
Heater Block Bushing Place the hammer spring on top of the washer. Leave grease in place. Press in new bushing. (If installing a new heater block, the bushing is pre-installed.) Page 18 of 26 Advanjet HV-9500 Maintenance and Repair 3A5910A... -
Page 19: Attach Heater Block
Align the pins in the heater block with the heater Apply Loctite 243 to the tips of the two heater seal as shown below. block screws and attach the heater block (#1PH). 3A5910A Advanjet HV-9500 Maintenance and Repair Page 19 of 26... -
Page 20: Install Solenoid And Silencer
Install the silencer into the valve mount and finger-tighten. OVER-TIGHTENING CAN The fit should be snug, but not so tight that it EASILY BREAK THIS PLASTIC crushes the rubber washer Page 20 of 26 Advanjet HV-9500 Maintenance and Repair 3A5910A... -
Page 21: Reassemble The Jet
Thread a cable tie around cables and fasten. PRESS FIRMLY Carefully tuck the wires and connectors into the lower portion of the top cover. 3A5910A Advanjet HV-9500 Maintenance and Repair Page 21 of 26... -
Page 22: Attach The Mounting Plate
(2.5mm). Continue to the next section—Set the Jet Hammer Gap. Page 22 of 26 Advanjet HV-9500 Maintenance and Repair 3A5910A... -
Page 23: Set The Jet Hammer Gap
Note: The Gap Set Fixture is a sensitive calibration tool for maintaining the jet. The spacer protecting the tip should remain in place at all times except for calibrating the tool to zero and taking the measurement. 3A5910A Advanjet HV-9500 Maintenance and Repair Page 23 of 26... -
Page 24: Prepare The Gap Set Fixture
Attach the Jet Zeroing Plate Loosen the two With the mounting plate facing up, use the nozzle plate screws to secure the thumbscrews securing jet body to the fixture. the zeroing plate. Page 24 of 26 Advanjet HV-9500 Maintenance and Repair 3A5910A... -
Page 25: Measure The Gap
Cycle the jet several times (OPEN-CLOSE) and validate that the gap is stable. “CLOSE” the jet and remove. Replace the tip protector and the zeroing plate on the Gap Set Fixture. The jet is ready to use. 3A5910A Advanjet HV-9500 Maintenance and Repair Page 25 of 26... -
Page 26: Graco Standard Warranty
For the latest information about Graco products, visit www.graco.com. For patent information, see www.graco.com/patents. For customer service and technical assistance, e-mail info@advanjet.com TO PLACE AN ORDER, contact your Graco distributor, go to www.graco.com and select “Where to Buy” in the top blue bar, or call to find the nearest distributor.
Need help?
Do you have a question about the HV-9500 Series and is the answer not in the manual?
Questions and answers