
Summary of Contents for JF 5D
- Page 1 OPERATION TECHNICAL MANUAL MANUAL TÉCNICO DE OPERACIÓN Í C O I N A M Á JF 5D - 10D MILL - MOLINO Rev. 00...
- Page 3 OPERATION TECHNICAL MANUAL - MILL 5D - 10D 1 - Introduction Congratulations! You have just purchased an excellent grain chopper JF 5D-10D, easy to operate and maintain. Besides grain chopper, this machine can be configured to work as forage chopper.
-
Page 4: Table Of Contents
4.5- Machine levelling and positioning 5- Adjusts of operation 5.1- To operate the JF 5D - 10D as grain chopper 5.2- To operate the JF 5D - 10D in forage chopper mode 5.3- Machine work speed adjustments 6- Step by step operation 6.1- Operating the machine in grain chopper mode... -
Page 5: When Operating The Machine
You must never operate the Harvester without Protectors, Closures and Fairings. 2.2- When operating the machine 1- The JF 5D - 10D is designed exclusively to desintegrate grains and chop forage. 2- When supply the machine, never introduct the hands into the feeding chute (1). -
Page 6: When Making Maintenance In The Machine
5- Never use the machine to chop tree branchs or another rigid material. 6- Never attempt to adjust or repair components with the machine running. 7- Do not leave the machine in a place that can be operated by children or not qualify people. 8- The cover belt is not included with the machine when it leaves the factory without a motor coupled, but its use is MANDATORY as safety NR12 (Item 12.38. -
Page 7: 3- Machine Presentation
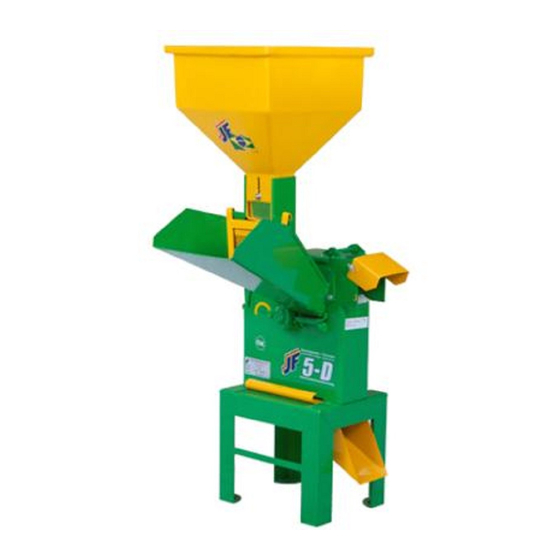
OPERATION TECHNICAL MANUAL - MILL 5D - 10D 3- Machine presentation 3.1- Parts identification 1- Grain hopper 2- Feeding nozzle 3- Protection screen 4- Upper product output (forage) 5- Deflector (forage) 6- Forage counterknife 7- Inferior product outlet (desintegrated grains) -
Page 8: Operation
3.2- Operation The JF 5D - 10D Mill machine is a simple, strong and versatile machine, designed to help you on daily animal feed. The machine offers two operation types: A- Cereals mill: corn, sorghum, soybean etc. For this function, use the grain chopper (1), lower outlet (2) and one of 4 sives (3). -
Page 9: Technical Specifications
OPERATION TECHNICAL MANUAL - MILL 5D - 10D 3.3- Technical specifications Models JF 5D JF 10D Drive Electric motor Electric motor Power 7,5 until 10,0 cv 10,0 until 15,0 cv 5,5 until 7,5 Kw 7,5 until 11,0 Kw 4.200 until 4.400 rpm 3.800 until 4.000 rpm... - Page 10 Frontal view without cyclone Right hand side view without cyclone Right hand side view with cyclone Frontal view with cyclone...
-
Page 11: 4- Assembling Prior Operation
OPERATION TECHNICAL MANUAL - MILL 5D - 10D 4- Assembling prior operation 4.1- Assembly of the detached parts The parts following mentioned are delivered disassembled. Assemble it according next step: Feeding nozzle (1) Assemble the feeding nozzle (1) according the picture aside, fastening it with three bolts (1a). - Page 12 5h- Sliding rails 5d- Pulley with 2 grooves 5i- Machine fastening elements 5e- Machine driving chain See instructions on next page to install the rack (5). ATTENTION: Items 5d and 5e only accompany the machines that leaves the factory with the motor.
-
Page 13: Assembling The Machine On The Suport
4.3- Assembling the motor on the support IMPORTANT: Check the necessary power of the JF 5D or JF 10D on the page 10. There you can find the ideal working speed to each machine model, and the motor pulley diameter (5d) and the machine (6). -
Page 14: Cyclone (Optional Item)
+ washers + nuts (5f), according picture aside. c) Make the alignment between the motor pulleys (5d) and the machine (6), according instructions on page 30. d) Install both of the belts (7) according illustrated and adjust the tightening according instructions on page 31. - Page 15 OPERATION TECHNICAL MANUAL - MILL 5D - 10D c) Place the pulley (3) of the engine. d) Place and align the belts. e) Attach the cover of the fan housing (4) and the cyclone fan (5). f) Place the fan housing (6) and fix the machine.
-
Page 16: Machine Levelling And Positioning
h) Fit the curve of the cyclone (8) and place the cyclone (9). 4.5- Machine levelling and positioning The machine must be installed on even, leveled as rigid ground to a good performance. To end the job, fit the four dumper rubbers (9) under the support (5), on the points indicated on picture. -
Page 17: To Operate The Jf 5D - 10D As Grain Chopper
OPERATION TECHNICAL MANUAL - MILL 5D - 10D 5- Operation adjustments 5.1- To operate the JF 5D - 10D as grain chopper a) Loosen latch (1) and raise the cover (2). b) Remove the countercover (3). c) Select one of the sieves (4, 5, 6 or 7), according desired product chips size and install it under the impeller according picture aside. - Page 18 Install a bag or other recipient to collect the material which flow out from the inferior outlet (11). Sieve chart - JF 2D on grain desintegrator configuration Sieve Holes Diameter Usage...
- Page 19 OPERATION TECHNICAL MANUAL - MILL 5D - 10D 5.2- Para usar o JF 5D - 10D como forrageira a) Loosen latch (1) and raise the cover (2). b) Remove the countercover (3). c) Install lower sealing (12) under mill rotor, according picture below.
-
Page 20: Machine Work Speed Adjustments
5.3- Machine work speed adjustment See on page 10 the speed ratio to operate the JF 2D. To have diferent speeds in this zone. Its necessary change the pulleys combination, that is, use diferents diameters. The formulas below will hep you to discover which diameter is better to each pulley, according the desired speed. -
Page 21: 6- Step By Step Operation
OPERATION TECHNICAL MANUAL - MILL 5D - 10D 6- Step by step operation 6.1- Operating the machine in grain chopper mode a) VERY IMPORTANT: See the instructions of the item "Motor mounting on the easel" to start the engine properly. -
Page 22: 7- Maintenance Instructions
The forage jet will be thrown by the upper output chute (1). Manioc flour production For the manioc flour (manioc meal) production it is necessary to use JF 5D - 10D in the two work configuration, as it proceeds: a) Cut the manioc roots using the machine in the forage configuration. -
Page 23: Chopper Knives Sharpening
OPERATION TECHNICAL MANUAL - MILL 5D - 10D 7.2- Chopper knives sharpening This operation is more important on machine maintenance, because aim at good performance and durability of the knives (1). The sharpness should be made in such a way to preserve the characteristics of the knives and the tempering of the steel. -
Page 24: Gap Adjustments Between Knife And Counterknife
(6). IMPORTANT: It cannot have interferance between the knives and counterknife during the operation. Therefore, JF recommends a minimum gap 0,05 to 0,15 mm. d) Check the gap through feeding nozzle (7), turning the impeller (4) manually and slowly. -
Page 25: Counter Knife Replacement
OPERATION TECHNICAL MANUAL - MILL 5D - 10D 7.4- Counter knife replacement If the counterknife (1) is worn, with the edge rounded, invert it to use the other side. a) Remove the feeding chute according item ¨a¨ of previous page. -
Page 26: Change Of Grinder Hammers
7.5- Change of grinder hammers The grinder hammers (1) will wear along the time of use, overchanging the machine. If the machine is losing efficiency, in the mill configuration, check the hammer status and change them of position if necessary, according order on picture below. Mill Impeller Notes: 1- The hammers have 4 positions of assembly, or either, 4 mill faces (A, B, C and D),... - Page 27 OPERATION TECHNICAL MANUAL - MILL 5D - 10D Procedure: a) Remove the feeding chute (2) loosing the bolts (3). b) Loosen latch (4) and raise the cover (5). c) Remove the countercover (6). d) Remove destructively the cotter pin (7) of each one of the pins (8).
-
Page 28: Pulley Alignment
7.6- Pulley aligment The correct alignment between the motor pulley (1) and machine pulley (2) is fundamental for the good performance and the long useful life of the belt (3). a) Loose (don’t remove) the four nuts (4) of the motor fastening. -
Page 29: Belts Tension Adjustment And Replacements
OPERATION TECHNICAL MANUAL - MILL 5D - 10D 7.7- Belts tension adjustment and replacements The motor is fastened in a mobile base, whose movement (leftward and righward) is controlled by the lever (1). This lever have two functions: 1º- The lever (1) ought to be moved to right hand side to move the motor, eliminating the belt tension (2). - Page 30 Procedure: a) Tighten the belts (2) according illustrated on picture. The belt clearance (deflection) must be between 5 mm and 10 mm. b) If necessary, adjust the tension by the lever (1), according instructions on previous page. c) IMPORTANT: After obtain the suitable tension install the locking pin (3) in the hole (4) nearly the bar (5) to lock the motor, according illustrated on previous page.
-
Page 31: 8- Detached Items That Come Along With The Machine
OPERATION TECHNICAL MANUAL - MILL 5D - 10D 8- Detached items that come along with the machine 1- Feeding nozzle 2- Grain chopper 3- Protection screen 4- Rubber shims ¨anti-vibration¨ 5- Flow control plate 6- Sieve assembly 7- Double grooves pulley (to motor) - Page 32 9- Adhesives found on the machine...
- Page 33 OPERATION TECHNICAL MANUAL - MILL 5D - 10D 10- Troubleshooting Problem Causes Solution Excessive machine vibration The machine is not on a Put the machine on a leveled proper base and rigid base The anti-vibration rubbers Install it according page 15...
-
Page 34: 10- Technical Assistance
11 - Technical Assistance 11.1- Machine serial number JF 5D - 10D is identified with a serial number located on the plate (1) fastened at the front of the machine. Write down here the serial number of your machine: Notes:... -
Page 35: Warranty Term
Warranty Term The Agricultural Equipment described in this manual is guaranteed by JF Máquinas Agrícolas Ltda. for a period of 01 (one) year from the puchase bill issue date to the first owner/consumer of this product, confirmed through the Technical Delivery Voucher. - Page 38 In the case the dealer has not carried out the Technical Delivery, fill in only the heading. After filling it in (partially or full) the client should keep this copy. In the case the dealer has not carried out the Technical Delivery, fill in only the heading.
-
Page 39: 1- Introdución
MANUAL TÉCNICO DE OPERACIÓN - MOLINO 5D - 10D 1 - Introducción Felicitaciones! Usted ha adquirido el desintegrador de ganos (Molino) JF 5D - 10D, una máquina de operación y mantenimiento muy sencillo, ideal para picar maíz y/o hacer harinas. - Page 40 11.1- Número de serie de la máquina Término de garantia Comprobante de entrega técnica Nota: JF Máquinas Agrícolas Ltda., tiene como objetivo la constante actualización y perfeccionamiento de sus productos, reservándose el derecho de introducir modificaciones en sus componentes y accesorios sin previo aviso.
-
Page 41: 2- Recomendaciones De Seguridad
MANUAL TÉCNICO DE OPERACIÓN - MOLINO 5D - 10D 2- Recomendaciones de Seguridad 2.1- Al leer el Manual de Instrucciones Observa también las recomendaciones del Manual de su tractor, para una operación segura y eficiente. Notas: Significa que será presentado un detalle, que podrá ser operacional o de seguridad. -
Page 42: Al Realizar El Mantenimiento De La Máquina
5- Nunca utilice la máquina para picar gajos de árboles u outros materiales rigidos. 6- Nunca intente ajustar o arreglar componentes con la máquina en movimiento. 7- No deje la máquina en local donde pueda ser accionada por niños o personas no preparadas para hacerlo. -
Page 43: 3- Presentación De La Máquina
MANUAL TÉCNICO DE OPERACIÓN - MOLINO 5D - 10D 3- Presentación de la máquina 3.1- Identificación de los componentes 1- Molienda de granos 2- Boquilla de alimentación 3- Rejila de protección 4- Salida superior del producto (para forraje) 5- Deflector (para forraje) -
Page 44: Principio De Funcionamiento
3.2- Principio de funcionamiento Los desintegradores JF 5D - 10D son máquinas simple, resistentes y versatilles, proyectadas para ayudarlos en el tratamiento diario de animales. Estas máquinas ofrecen dos tipos de operación: A- Desintegrador de granos como maíz, sorgo, soya etc. -
Page 45: Especificaciones Técnicas
MANUAL TÉCNICO DE OPERACIÓN - MOLINO 5D - 10D 3.3- Especificaciones técnicas Modelos JF 5D JF 10D Acionamiento Motor eléctrico Motor eléctrico Potencia del motor 7,5 hasta 10,0 cv 10,0 hasta 15,0 cv 5,5 hasta 7,5 Kw 7,5 hasta 11,0 Kw 4.200 hasta 4.400 rpm 3.800 hasta 4.000 rpm... - Page 46 Vista delantera sin ciclón Vista lateral derecha sin ciclón Vista lateral derecha con ciclón Vista delantera con ciclón...
-
Page 47: 4- Montajes Antes De La Operación
MANUAL TÉCNICO DE OPERACIÓN - MOLINO 5D - 10D 4- Montajes antes de la operación 4.1- Montaje de piezas sueltas Los itenes descriptos en la secuencia son suministrados desmontados de manera a facilitar el transporte de la máquina. Realice el ensamble según la descripción: Boquilla de alimentación (1) - Page 48 5i- Elementos de fijación de la máquina 5e- Correas de accionamiento de la máquina. Vea en la próxima página como hacer el ensamble del caballete (5). NOTA: Los elementos 5d y 5e sólo acompañan las máquinas que salen de la fábrica con el motor.
-
Page 49: Montaje De La Máquina Sobre El Caballete
4.3- Montaje del motor sobre el caballete IMPORTANTE: Comprobe la potencia necesaria del motor para la JF 5D o JF 10D en la página 10. En esta página también se encuentran las rotaciones correctas de trabajo para cada modelo de máquina, así como el diâmetro de la polea de motor (5d) y de la máquina (6). -
Page 50: Montaje Del Ciclón (Itene Opcional)
(5h) fijándolo con los cuatro tornillos + arandelas + tuercas (5f), según las figuras al lado. c) Realice el alineación entre las poleas del motor (5d) y de la máquina (6), según instrucciones de la página 30. d) Instale las dos correas (7) según se vea y ajuste su tensión en conformidad con las instrucciones de la... - Page 51 MANUAL TÉCNICO DE OPERACIÓN - MOLINO 5D - 10D c) Coloque la polea (3) del motor. d) Posicionar y alinear las correas. e) Coloque la cubierta de la caja del ventilador (4) y el ventilador del ciclón (5). f)Posicionar la caja del ventilador (6) y fije en la máquina.
-
Page 52: Fijación Y Nivelación De La Máquina
h) Encajar la curva del ciclón (8) y posicione el ciclón (9). 4.5- Fijación y nivelación de la máquina La máquina debe ser colocada sobre piso llano, en nivelación y firme para proporcionar mayor estabilidad a la máquina. Para terminar el ensamble, encaje los cuatro tacos de goma ¨anti vibración¨... -
Page 53: 5- Ajustes Para Operación
MANUAL TÉCNICO DE OPERACIÓN - MOLINO 5D - 10D 5- Ajustes para operación 5.1- Para emplear la JF 5D/ 10D como molino a) Afloje la cerradura (1) y levante la tapa (2). b) Quite la contratapa (3). c) Elija una de las cribas (4, 5, 6 ó 7), según el tamaño deseado para las partículas del producto y encájela por... - Page 54 Instale una bolsa o recipiente para colectar el material que escurre por la salida inferior (11). Tabla de cribas - JF 2D en la condición de desintegrador de granos Criba Diámetro de los agujeros Aplicación 10 mm Maíz picado grueso y similares...
-
Page 55: Para Emplear La Jf 5D/ 10D Como Forrajera
MANUAL TÉCNICO DE OPERACIÓN - MOLINO 5D - 10D 5.2- Para emplear la JF 5D/ 10D como forrajera a) Afloje la cerradura (1) y levante la tapa (2). b) Quite la contratapa (3). c) Instroduzca el sello inferior (12 - página anterior) por debajo del rotor desintegrador, según la figura a... -
Page 56: Ajuste De La Rotación De Trabajo De La Maquina
5.3- Ajuste de la rotación de trabajo de la máquina Vea en la página 10 la gama de rotación ideal para operar la JF 2D. Para obtener diferentes rotaciones dentro de ésta gama, es necesario alterar la combinación de poleas, o sea, usar diâmetros diferentes. -
Page 57: 6- Operación Paso A Paso
MANUAL TÉCNICO DE OPERACIÓN - MOLINO 5D - 10D 6- Operación paso a paso 6.1- Operando la máquina en la condición de molino a) MUY IMPORTANTE: Vea las instrucciones del ítem "Montaje del motor en el caballete" para accionar el motor correctamente. -
Page 58: 7- Instrucciones De Mantenimiento
El chorro de forraje será arrojado por la boquilla superior (1). Fabricación de polvillo Para la fabricación de polvillo (almidón) es necesario usar la JF 5D/ 10D en dos condiciones de trabajo, según se describe a seguir: a) Pinche las raíces de mandioca usando la máquina en la condición Forrajera. -
Page 59: Afilado De Las Cuchillas Del Rotor Picador
MANUAL TÉCNICO DE OPERACIÓN - MOLINO 5D - 10D 7.2- Afilado de las cuchillas del rotor picador Esta es una de las operaciones más importantes en el mantenimiento de la máquina, pues mantiene el buen desempeño y durabilidad de las cuchillas (1). -
Page 60: Ajuste De La Distancia Entre Las Cuchillas Y Contracuchilla
(5) de la contracuchilla (6). IMPORTANTE: No puede haber roce entre las cuchillas y la contracuchilla durante la operación. Por eso, JF recomienda una luz mínima de 0,05 a 0,15 mm (espesor de una hoja de papel) entre ellas. -
Page 61: Cambio De La Contracuchilla
MANUAL TÉCNICO DE OPERACIÓN - MOLINO 5D - 10D 7.4- Cambio de la contracuchilla Si la contracuchilla (1) está con desgaste, con el borde redondo, reemplácela por una nueva. a) Quite la boquilla de alimentación según el punto ¨a¨ de la página anterior. -
Page 62: Reemplazamiento De Los Martillos Desintegradores
7.5- Reemplazamiento de los martillos desintegradores Los martillos desintegradores (1) pierden su capacidad (sufren desgaste) con el tiempo, sobrecargando la máquina. Si la máquina comienza a perder rendimiento, en la calidad de desintegrador, verifique el estado de los martillos y cámbielos de posición si necesario, observando el orden de montaje en la figura abajo. - Page 63 MANUAL TÉCNICO DE OPERACIÓN - MOLINO 5D - 10D Procedimiento: a) Quite la boquilla de alimentación (2) aflojando los tres tornillos (3). b) Afloje la cerradura (4) y levante la tapa (5). c) Quite la tapa (6). d) Quite el pasador doble (7) de cada uno de los pernos (8).
-
Page 64: Alineación Entre Las Poleas
7.6- Alineación entre las poleas La correcta alineación entre la polea del motor (1) y polea de la máquina (2) es fundamental para el buen funcionamiento de la máquina y la larga vida útil de la correa (3). a) Quite la cubierta (4) aflojando las 3 tuercas mariposa (5). -
Page 65: Ajuste De La Tensión Y Cambio De Las Correas
MANUAL TÉCNICO DE OPERACIÓN - MOLINO 5D - 10D 7.7- Ajuste de la tensión y cambio de las correas El motor de accionamiento es fijado sobre una base móvil, cuyo movimiento (hacia izquierda y hacia derecha) es controlado por la palanca (1). -
Page 66: Conservación De La Máquina
Procedimiento: a) Apriete las correas (2) en el punto central indicado por la saeta al lado. La correa se debe dejar combar entre 5 y 10 mm. b) Se necesario, ajuste la tensión a través de la palanca (1), según instrucciones en la página anterior. c) IMPORTANTE: Tras de obtener la tensión adecuada, instale el perno de traba (3) en el agujero (4) lo más próximo de la barra (5) para calzar el motor, según se vea... -
Page 67: 8- Piezas Sueltas Que Acompañan La Máquina
MANUAL TÉCNICO DE OPERACIÓN - MOLINO 5D - 10D 8- Piezas sueltas que acompañan la máquina Boquilla de alimentación Molienda de granos Rejilla de protección Tacos de goma ¨antivibración¨ Placa de control de caudal 6- Conjunto de cribas 7- Polea de 2 vias (para el motor) NOTA: Los elementos 7, 8 y 10 sólo acompañan... -
Page 68: 9- Adhesivos Encontrados En La Máquina
9- Adhesivos encontrados en la máquina... -
Page 69: 10- Diagnóstico De Anormalidades Y Soluciones
MANUAL TÉCNICO DE OPERACIÓN - MOLINO 5D - 10D 10- Diagnóstico de anormalidades y soluciones Anormalidad Causas Solución Máquina con vibración La máquina no está sobre una Coloque la máquina sobre una excesiva base adecuada base nivelada y firme Los tacos de goma no han sido Instalar según página 15... -
Page 70: 11- Asistencia Técnica
Anote aqui el nº de serie de la máquina: Notas: 1- Al enviar comunicaciones o solicitar auxilio del service JF, informe siempre el nº de serie y el modelo de la máquina, los cuales constan en la placa de identificación (1). -
Page 71: Término De Garantia
MANUAL TÉCNICO DE OPERACIÓN - MOLINO 5D - 10D Término de Garantia El equipo agrícola descrito en este manual es garantizado por la JF Máquinas Agrícolas Ltda. Por un período de 01 (un) año a partir de la fecha de la emisión de la factura de venta al primer propietario/ consumidor de este producto, confirmando a través del... - Page 74 Si el revendedor no ha efectuado la Entrega Técnica, llene apenas el encabezado. Después del llenado (parcial o total), el cliente debe permanecer con esta copia. En el caso que el revendedor no haya efectuado la Entrega Técnica, llene apenas el encabezado. Después el llenado (parcial o total), encamine esta segunda copia del Formulario al Departamento de Post Ventas, conforme la dirección en la contratapa de este manual.
- Page 76 THE SOLUTION FOR THE PRODUCER LA SOLUCIÓN PARA EL PRODUCTOR JF Máquinas Agrícolas Ltda CNPJ: 46.127.635/0001-55 Address / Dirección ............. Rua Santa Terezinha, Nº921. Jd. Guarujá - Itapira - SP - Brasil Cep: 13973-900 Post Sale Department Caixa Postal: 114.
Need help?
Do you have a question about the 5D and is the answer not in the manual?
Questions and answers