
Related Manuals for LSC Nexus 1

Summary of Contents for LSC Nexus 1
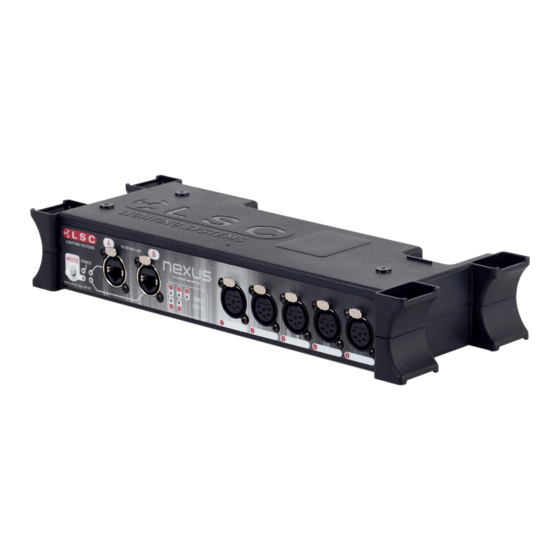
- Page 1 Nexus 1 Nexus 5 Rack Mount Nexus 5 Truss Mount Ethernet / DMX Interface & NexLan Software User Manual LSC Control Systems © +61 3 9702 8000 info@lsccontrol.com.au Version 2.11 www.lsccontrol.com.au November 2022...
- Page 2 Information contained in this manual is subject to change without notice. In any event, LSC Control Systems Pty Ltd cannot be held liable for any direct, indirect, special, incidental, or consequential damages or loss whatsoever (including, without limitation,...
-
Page 3: Table Of Contents
2.3.1 Select ........................ 8 2.3.2 Defaults......................9 3 Typical Applications ....................10 Typical Nexus 1 applications ................10 3.1.1 ArtNet or sACN to DMX converter ..............10 3.1.2 Back-up switching of Lighting Controllers ............11 3.1.3 DMX to ArtNet or sACN converter ..............11 Typical Nexus 5 applications ................ - Page 4 Nexus User Manual Overview ......................16 DMX port as an Output ..................16 DMX port as an Input ..................16 5 NexLan Software ...................... 17 Overview ......................17 Software Setup ....................17 5.2.1 Windows ......................17 5.2.2 Apple Mac OS X ..................... 17 Network Settings On Your Computer ..............
- Page 5 Nexus User Manual 7.7.4 Network Item Control ..................33 Toolbar Window ....................33 Property Window ....................34 7.10 LOG ........................34 7.11 Preferencee ............Error! Bookmark not defined. 7.12 Universes ......................34 7.13 Fixtures ....................... 34 7.14 Network Item ...................... 35 7.15 Groups........................
-
Page 6: Introduction
Nexus User Manual Introduction 1.1 Conventions used in this Manual Throughout this manual, certain conventions have been used to make the meaning clearer. • A word in Bold text represents a button • Emphasis is indicated by underlining • Notes or Hints are displayed in italic font 1.2 Overview DMX is the industry standard for the transmission of digital control signals between lighting equipment. -
Page 7: Nexus 1
2. If you have any old Nexus units that are still using version 1 of the firmware you must upgrade them to version 2. There are separate firmware upgrades for the Nexus 1 and the Nexus 5. These firmware updates can be downloaded from www.lsccontrol.com.au Updating the Nexus firmware is performed using the “Firmware Update.exe”... -
Page 8: Nexus Units
The port has MDIX auto sensing which means that cross over cables are not required. This connection must also supply PoE (Power over Ethernet) to the Nexus 1. Both versions of PoE (data-pairs/spare-pairs) are supported. Devices (such as network switches) that provide PoE are available from most computer suppliers. -
Page 9: Ethernet Ports
Nexus User Manual Rack Mount Nexus 5 2.2.1 Ethernet Ports The two Ethernet ports use standard UTP network connections to an internal 10/100 Mbit Ethernet switch. The ports have MDIX auto sensing which means that cross over cables are not required. 2.2.2 Ethernet LEDs Each LED indicates data activity on its Ethernet port. -
Page 10: Defaults
Nexus User Manual 2.3.2 Defaults Press and hold the button on the Nexus for 10 seconds. This will reset the Nexus to the default settings that are listed below: Nexus 1 DMX Port Input/Output Mode Universe Output Single Nexus 5... -
Page 11: Typical Applications
ArtNet or sACN universes to it and merge them as you require. All configuration is performed via the NexLan software. The following examples show some typical applications for Nexus 1 units and Nexus 5 units. You can also use combinations of Nexus 1 and Nexus 5 units to create you required configuration. -
Page 12: Back-Up Switching Of Lighting Controllers
Main and backup lighting controllers have ArtNet, sACN or Shownet outputs on different universes. Nexus 1 receives both universes and the DMX output port is configured for Priority Mode which will auto changeover from primary to secondary on loss of the primary universe. -
Page 13: Typical Nexus 5 Applications
Nexus User Manual 3.2 Typical Nexus 5 applications 3.2.1 ArtNet or sACN to DMX converter Ethernet Lighting Controller DMX Devices on Universe 0.0 with LAN output on Nexus 5 multiple ArtNet, DMX Devices on Universe 0.1 sACN or Shownet DMX Devices on Universe 1.1 Universes DMX Devices on Universe 1.2 NexLan... -
Page 14: Dmx Backup
Nexus User Manual 3.2.3 DMX Backup DMX Normal Input Lighting Controller with DMX 3 DMX O/p’s Output DMX Devices Nexus 5 DMX Devices NexLan Computer DMX Devices Ethernet DMX Backup Input Back-Up Controller with DMX Output 2 ports are configured as inputs. One is configured as a “normal” input and the other as a “backup” input. -
Page 15: Automatic Control Switching
Nexus User Manual 3.2.5 Automatic Control Switching DMX Input Conventional DMX Lighting Controller DMX Output 1 Ethernet Conventional Fixtures Moving Light Controller with Nexus 5 Moving Fixtures ArtNet, sACN or Shownet output DMX Output 2 NexLan Computer This setup allows a conventional lighting controller to control all fixtures. However, if a specialized “moving light”... -
Page 16: Softpatch Merging
Nexus User Manual 3.2.7 Softpatch Merging Ethernet Primary Controller Port set to O/P and Softpatch Secondary Nexus 5 Network DMX Devices switch Tertiary NexLan Computer Softpatch merging is a very powerful tool. Use the Nexlan software to configure each Nexus port as an output and set its “Output Mode”... -
Page 17: Dmx Port Options
Nexus User Manual DMX Port Options 4.1 Overview The NexLan software allows you to configure the Nexus devices to your requirements. The software is fully described in section 5. You can configure each DMX port on a Nexus as Disabled, Output or Input. -
Page 18: Nexlan Software
NexLan Software 5.1 Overview NexLan” software is used to both configure and control the LSC Nexus 1 and LSC Nexus 5 units and to monitor the lighting network. It can also be used to test and control lighting fixtures. After the initial setup, the software is not required for the operation of the lighting network but can be used as a tool to monitor the network. -
Page 19: Basic Software Description
Nexus User Manual 5.4 Basic Software Description Note: See section 7 for detailed descriptions of the software. The screen has a menu bar and 4 windows: 1. Main window. 2. Toolbar window. Menu 3. Properties window. 4. Control window. Toolbar Main window window... -
Page 20: Configuring A Nexus
Nexus User Manual Configuring a Nexus When Nexus units are shown in the main screen they can be configured to your requirements. Nexus units are listed as “Network Items”. You can see them in the “Network Items” tab and also in the “Plan View”... -
Page 21: Generic
6.1.3 Port If the selected device is a Nexus 1 or Nexus 5 then the Property window will display the DMX Port information for that device. Clicking the [+] box beside each DMX port name expands the display to show the properties of that port. -
Page 22: Dmx Output Options
Nexus User Manual universe. If the universe returns or another sender starts sending the same universe, the input will return to backup monitoring mode. 6.1.5 DMX Output Options If the DMX port “Type” is set as an Output, then the following “Mode” options are available: •... - Page 23 Nexus User Manual Click in the “Softpatch” field then click on the [...] button. This will open the “Softpatch” window: Click on an output channel to select it. To select multiple channels, hold [Ctrl] whilst selecting. To select a range of channels, hold [Shift] whilst selecting the first and last channels in the range. Clicking on “Select”...
- Page 24 Nexus User Manual Clicking on “Advanced” allows you to select multiple channels multiple times with gaps and beginning and end limits……. When you have selected a channel(s), set the merge for these channel(s) by clicking the “Merge Type” button. The DMX output for each channel can be either: •...
-
Page 25: Additional Dmx Output Options
Nexus User Manual Set the “Channel” number of the input universe to which the selected output channel is to be patched and click “OK”. If a range of channels has been selected you can patch them in sequential order by setting the first “Channel”... -
Page 26: Identify Nexus
When you click on a “Nexus” unit in the Network window (or click on its icon), the “Control” window displays an “Identify” button. Clicking on the button will flash the “POWER” led of the selected LSC Nexus allowing you to easily identify that Nexus in a multiple Nexus setup. 6.3 DMX Universe window All of the DMX Universes on the network are automatically shown and new universes can be added. -
Page 27: Universe Properties
Nexus User Manual 6.3.2 Universe Properties By selecting a universe, you can use the Property window to change its properties. Each Universe can be given a meaningful name by clicking on the existing name and entering a new name. The icon color (used in the Plan window) can be changed by clicking on the “Color” line then on the three dots that appear and using the color picker. -
Page 28: Fixture Groups
Nexus User Manual Lighting fixtures can be added manually via the menu [Edit], [Add Fixture]. The Fixture window contains the info of the fixtures: • ID – An identifying number. You should try to match it to the console’s fixture IDs •... -
Page 29: Fixture Control
Nexus User Manual • Unpatched - The fixture is not patched so it cannot be controlled by the NexLan software. • Patch to Universe - The fixture is patched to a universe and channel number. The NexLan software will calculate through all the soft patching and merging required to control the fixture. -
Page 30: Scenes
Nexus User Manual The “Test” tab can be used to test each parameter of a fixture by cycling it continuously from minimum to maximum and back. Select a parameter to test from the drop down box and click [Run]. To stop the test, click [Release]. 6.7 Scenes The “Capture Scene”... -
Page 31: Detailed Software Descriptions
Nexus User Manual Detailed Software Descriptions 7.1 Main Window The main window contains several Tabs. A Tab can be either a list or a view. Lists have columns for each device that show information such as: • ID - The ID is set in the device and is automatically loaded. A separate ID is required for each device. -
Page 32: Property Window
Nexus User Manual 7.2 Property window. The property window is dynamic. The properties of the item selected in the Main Window (network item, universe or fixture) are displayed here and can be changed to suit your requirements as described below. 7.3 Control window. -
Page 33: Universe View
Nexus User Manual • Show Mouse Position Shows/Hides the mouse position beneath the buttons (m) • Show Connections Shows/Hides the connections from Nodes to Universes (c) • Show Details Shows/Hides the details in the objects (d) • Set Grid Size Changes the grid size •... -
Page 34: Fixture Control
Nexus User Manual 7.7.2 Fixture Control If a Fixture is selected, the Control window automatically provides controls for the Fixture. There are tabs for “Basic”, “Colour”, “Beam”, “Extra” and “Test”. The “Basic” tab has some generic control buttons: Release all parameters of the selected fixtures Release Set all parameter to their default value (usually Open White 50/50) Grab... -
Page 35: Property Window
Nexus User Manual The ToolBar Window can be hidden by clicking the close button in the upper right corner and shown by the “View” menu in the menu bar. 7.9 Property Window In the Property Window the properties of the selected objects can be edited. If the selected objects have different value for a property, <..>... -
Page 36: Network Item
Nexus User Manual 7.14 Network Item Network Items can be added by selecting the “Edit” menu in the menu bar. The wizard guides you through the options. There are shortcuts to configure a port. Examples for a bi-directional port: i,s1 Input, Normal, sACN Universe 1 Input, Normal, Default Universe Type 1 i, n, 1... -
Page 37: Filters
Nexus User Manual Each list features a filter, and a “Predefined Filter”. The predefined filter is a filter which is applied at the background and is not visible in the filter box. This filter can be set in the List Wizard and modified by Right Clicking on the Tab Header. -
Page 38: Shortcuts
Nexus User Manual If you were not looking for “Manufacturer” but for “Mode”, you can step through the suggestions by pressing the up and down arrows. To select all current shown items, press alt+enter. 7.20 Shortcuts Action Windows Open Preferences Cmd + Ctrl + New File... -
Page 39: Firmware Upgrade
To upgrade your Nexus firmware, carry out the following steps: Download the firmware file from www.lsccontrol.com.au and save it to a known location on your computer. There are separate firmware files for the Nexus 1 and Nexus 5. • The Nexus 1 firmware is called NXS1. -
Page 40: Fixture Library
The library file is made up from a basic file “fixture.lib”. This is a text file which can include sub text files. All files are found in the “Program Files\LSC\NexLan\Fixture Library” directory. Example of the main fixture.lib file. - Page 41 Nexus User Manual parameter = Tilt, fine parameter = Colour 1 Mode parameter = Colour 1 parameter = Gobo 1 Mode parameter = Gobo 1 parameter = Gobo 1 <> parameter = Prism parameter = Prism <> parameter = Focus parameter = Iris parameter = Shutter highlight = 255...
- Page 42 Nexus User Manual Parameters are added in the DMX channel order. “fine” represents the fine channel of the parameter. Add break if the fixture has more than one DMX range, for example a VL5 has a separate dimmer. parameter = name [, fine] [, break] A default can be added (if the value is not 0), this value is used when disabling the fixture.
-
Page 43: Specifications
Nexus User Manual 10 Specifications NXS1 NXST(Truss) NXSR(Rack) Number of outputs Output connectors 5 Pin XLR standard 5 Pin XLR standard - 3-pin XLR options available Ethernet Ports Second Ethernet Port ( hub or backup). Artnet, Shownet and sACN data protocols DMX512 data LED All outputs isolated Galvanic Isolation barrier... -
Page 44: Terminology
Nexus User Manual 11 Terminology 11.1 DMX 512 DMX512 is the industry standard for the transmission of digital control signals between lighting equipment. It utilizes just a single pair of wires on which is transmitted the level information for the control of up to 512 DMX slots. As the DMX512 signal contains the level information for all slots, each piece of equipment needs to be able to read the level(s) of the slots(s) that apply only to that piece of equipment. -
Page 45: Sacn
Shownet is a DMX over IP protocol developed by Strand Lighting. See the Strand Lighting website for details. 12 Compliance Statements The Nexus from LSC Control Systems Pty Ltd meets all required CE (European), RCM (Australian) and UKCA (United Kingdom) standards. European Committee for Electrotechnical Standardization (CENELEC).
Need help?
Do you have a question about the Nexus 1 and is the answer not in the manual?
Questions and answers