Table of Contents
Advertisement
Quick Links
Advertisement
Table of Contents

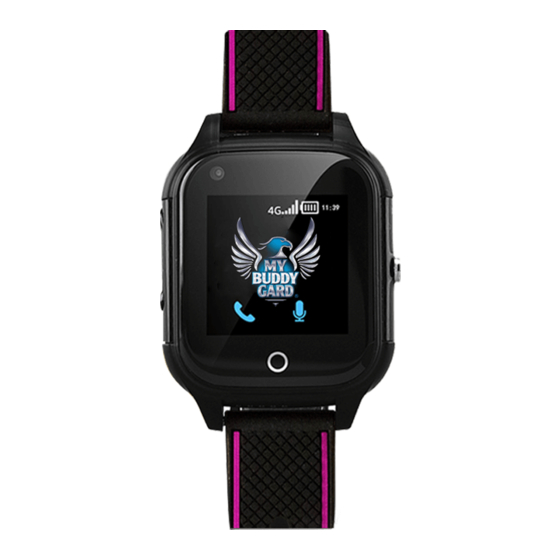
Summary of Contents for MY BUDDY GARD KIDS BUDDY WATCH
-
Page 2: Table Of Contents
......................30 How to change automatic location update frequency ............30 How to change the screen sleep timer on Kids Buddy Watch ......... 32 How to adjust the screen brightness on Kids Buddy Watch ........... 33 How to adjust volume on Kids Buddy Watch ............... 34 How to restart Kids Buddy Watch ................... - Page 3 How to use “Listen-In” feature ....................52 Kids Buddy Features ........................54 Kids Buddy Watch Support ....................... 54...
-
Page 4: Kids Buddy Watch Support
Adult or Kids Watch will block all the other numbers that are not in the contacts list (E.g., Telemarketers)!!! How to place a phone call with Kids Buddy Watch? – Go to page 15 How to add contacts to Kids Buddy Watch? – Go to page 16... -
Page 5: Tips And Tricks For Extending Battery
SMS/Email notifications with a touch of a button in case of an emergency!!! How to set the SOS number into your Kids Buddy Watch? – Go to page 18 How to set the SOS ALERTS and notifications? – Go to page 20 How to place an SOS call from your Kids Buddy Watch? –... -
Page 6: How To Insert Sim Card To Kids Buddy Watch
How to insert sim card to Kids Buddy Watch Step by step instructions Below you’ll find the steps for inserting SIM card into your Kids Buddy Watch. Step 1 Prepare the tools and sim card. Check the picture on the right for the recommended tools. - Page 7 Step 3 Unscrew the SIM card protector cover with the screwdriver that came with your Kids Buddy Watch ❗❗❗ PRO TIP❗❗❗ Place the screws and cover inside the tracker box so you wouldn’t lose them as they are tiny screws.
- Page 8 If you see mobile signal bars on the screen once you have turned it on and it has sufficient amount of battery, then you are ready for the next step. How to turn on you Kids Buddy Watch? – Go to page 11 Continue setting your Kids Buddy Watch...
-
Page 9: How To Turn Off The Kids Buddy Watch
SIM card. How to turn off the Kids Buddy Watch Step by step instructions Below you’ll find the steps for turning off your Kids Buddy Watch. Step 1 Click on the SOS button (0.5 seconds) to activate the screen. -
Page 10: How To Charge Your Kids Buddy Watch
Click OK How to charge your Kids Buddy Watch Step by step instructions Below you’ll find the steps for charging your Kids Buddy Watch with the default charging cable that comes along with it. Step 1 Use only My Buddy Gard provided wall charger❗❗❗... - Page 11 Plug in the USB wire to Buddy Wall Charger or Computer USB port Step 3 Connect the magnetic charging wire to your Kids Buddy Watch. ❗❗❗ Please note ❗❗❗ The wire can only be connected in one direction. It won’t let you connect the wire in the opposite direction.
-
Page 12: How To Turn On Your Kids Buddy Watch
How to turn on your Kids Buddy Watch Step by step instructions Below you’ll find the steps for turning on your Kids Buddy Watch. Step 1 Click and hold the SOS button on the side of the watch until the screen turns on. -
Page 13: How To Login To Track Map
Your Watch is now turned on How to login to Track Map Step by step instructions Below you’ll find the steps for login to your My Buddy Gard Track Map account. Step 1 Type the following URL into your browser or click on it https://www.trackmap.com.au... - Page 14 Enter your email address and password. Step 3 Click on Sign-in Social Network Login Options My Buddy Gard Track Map also offers Google & Facebook sign in options as well. Simply click on the corresponding button below and log into your account.
-
Page 15: How To Register Kids Buddy Watch To Track Map
How to register Kids Buddy watch to Track Map Step by step instructions Below you’ll find the steps for registering your Kids Buddy Watch to My Buddy Gard Track ❗❗❗Please note❗❗❗ 1. Locate the IMEI code behind your watch. 2. Have your sim card phone number ready and activated. -
Page 16: How To Make A Phone Call With Kids Buddy Watch
How to make a phone call with Kids Buddy Watch Step by step instructions Below you’ll find the ways to make phone call from your Kids Buddy Watch. Step 1 Click on the SOS button (0.5 seconds) to activate the screen. -
Page 17: How To Add Contacts To Buddy Tracker
Click on Contacts function. How to add contacts to the Buddy contact list? – Go to page 16 ❗❗❗Please Note❗❗❗ All the incoming calls from numbers that are not in the contacts list will be blocked automatically by the Buddy Tracker (E.g., Telemarketers…) Then…... - Page 18 You can add up to 10 Buddy Contacts into any Buddy Tracker!!! Once you are finished adding the Buddy Contacts click SEND Step 6 Buddy Contacts successfully updated Click DONE How to place a phone call with Kids Buddy Watch? – Go to page 15...
-
Page 19: How To Set Sos Number To Buddy Tracker
❗❗❗Troubleshooting and Errors❗❗❗ If you receive the message that says device not online, then you can queue the contacts update for when the Buddy Tracker next connects to the Track Map. See below Buddy Contacts Queueing Click on the SEND button to try again or QUEUE to place the command into the que for when the device next connects to the Track Map. - Page 20 If still no reply, click on SEND BY SMS which works well in low mobile reception areas. How to activate SOS call from Kids Buddy Watch? – Go to page 23 How to set SOS alerts via SMS & Email? – Go to page 20...
-
Page 21: How To Set Up Sos Alerts
How to set up SOS Alerts Step by step instructions Below you’ll find the steps for setting up SOS button Alerts via SMS/Email etc. Step 1 Click on the Rules Trigger icon Step 2 Click on the Add rule trigger button. Step 3 Type in the Rule Name ❗❗❗The name is just for your own reference if you have multiple rules on your account❗❗❗... - Page 22 Step 7 Let’s set up the Actions (also known as notifications) There are 3 types of notifications (SMS, Track map notification and Email) For SMS notification, select the following. Step 8 Enter the mobile phone number that will receive the SMS Notification.
-
Page 23: How To Use Merge Fields
Step 11 Click on Save Rule once you have finished adding the actions. Congratulations You have successfully set up the alerts for SOS button. Notification examples Track Map Notification Email Notification SMS Notification How to use Merge Fields �� Click on the Dropdown list, Select the merge field (Eg Device Name) and then Click on Insert Field Track map will automatically populate the field for you. -
Page 24: How To Activate The Sos Call On Kids Buddy Watch
Set the SOS number on the Track Map first if you haven’t already done How to set the SOS number on the Kids Buddy Watch? – Go to page 18 How to set the SOS Alerts via SMS & Email? – Go to page 20 Step 2 Watch is now dialing the SOS number. -
Page 25: How To Connect Kids Buddy Watch Into Wifi Network
How to connect Kids Buddy Watch into WiFi network Step by step instructions Below you’ll find the steps for connecting your Kids Buddy Watch to WiFi network Step 1 Click on the SOS (0.5 seconds) to activate the screen. ❗❗❗ Please note ❗❗❗... - Page 26 Step 5 Click on the WiFi ON toggle switch. Step 6 Click on the WiFi network you want to connect to Step 7 Click on the Password field Step 8 Start typing the password in. ❗❗❗Please Note❗❗❗ As I needed the capital letters then I had to click on the blue button on the side to change to Capital Letters.
- Page 27 Step 10 If you need to select the NUMBERS MODE, then click on the yellow button once. ❗❗❗Please Note❗❗❗ To see other numbers on the screen, simply swipe your finger up or down the screen! Step 11 To change to SPECIAL CHARACTER MODE, click on the YELLOW button again! ❗❗❗Please Note❗❗❗...
-
Page 28: How To Set Up Wifi Disconnection Alerts
Kids Buddy Watch has now connected to your home WiFi you can also see the WiFi signal icon on the main screen at the top of the screen How to set up WiFi Disconnection Alerts? – Go to page 27... - Page 29 Step 6 Let build the WiFi Range Disconnection trigger. 1. Choose the WiFi Trigger 2. Choose the applicable WiFi Network from the dropdown list 3. Choose the action Note❗ As WiFi range varies in our homes and some parts have almost no wifi signal, then you might get false alerts.
- Page 30 Step 9 Enter the mobile phone number that will receive the SMS Notification. Then type in the message you’d like to receive when the SOS button has been pushed into the Text to send text box. You can also leave the Text to send box as it is and our system will construct the message automatically PS❗...
-
Page 31: How To Use Merge Fields
Email Notification SMS Notification How to use Merge Fields �� Click on the Dropdown list, Select the merge field (E.g. Device Name) and then Click on Insert Field Track map will automatically populate the field for you. It’s very handy when you have multiple Buddy Trackers on your account and need to differentiate which device pushed the SOS button. - Page 32 Step 2 Click on Update Frequency Step 3 Type in the upload frequency into the text box and click SEND. ❗❗❗Please Note❗❗❗ The current plan allows between 180 – 84600 seconds. The higher the number, the more time it takes between the location updates.
-
Page 33: How To Change The Screen Sleep Timer On Kids Buddy Watch
How to change the screen sleep timer on Kids Buddy Watch Step by step instructions Below you’ll find the steps for adjusting the screen sleep timer on your Kids Buddy Watch. Step 1 Click on the SOS button (0.5 seconds) to activate the screen. -
Page 34: How To Adjust The Screen Brightness On Kids Buddy Watch
❗❗❗Please Note❗❗❗ Click on the link below for more battery saving tips and tricks. How to get the most out of your Kids Buddy Watch battery? – Go to page 4 How to adjust the screen brightness on Kids Buddy Watch Step by step instructions Below you’ll find the steps for changing the screen brightness on your Kids Buddy Watch. -
Page 35: How To Adjust Volume On Kids Buddy Watch
❗❗❗Please Note❗❗❗ Click on the link below for more battery saving tips and tricks. How to get the most out of your Kids Buddy Watch battery? – Go to page 4 How to adjust volume on Kids Buddy Watch Step by step instructions Below you’ll find the steps for adjusting the volume your Kids Buddy Watch. -
Page 36: How To Restart Kids Buddy Watch
❗❗❗Please Note❗❗❗ Click on the link below for more battery saving tips and tricks. How to get the most out of your Kids Buddy Watch battery? – Go to page 4 Step 6 Once you are happy with your volume level. Click on the back button (the small circle as show in the picture or SOS button on the side of the watch for a second, as show on Step 1 of this article). - Page 37 If the screen doesn’t turn on, then the battery might be flat or the device is already turned off. How to charge your Kids Buddy Watch? – Go to page 9 Step 2 Swipe left until you reach to MORE and click on it.
-
Page 38: How To Change The Date Format On Kids Buddy Watch
How to change the date format on Kids Buddy Watch Step by step instructions Below you’ll find the steps for changing the date format on your Kids Buddy Watch. Step 1 Click on the SOS button (0.5 seconds) to activate the screen. - Page 39 Scroll down and select 24-hour format or untick for 12-hour format. The watch needs to be restarted after you change the time zone. How to reboot your Kids Buddy Watch? – Go to page 35 Step 6 Once you have made a selection, click on one of the back buttons shown on the image.
-
Page 40: How To Change The Time Format On Kids Buddy Watch
How to change the time format on Kids Buddy Watch Step by step instructions Below you’ll find the steps for changing the time format on your Kids Buddy Watch. Step 1 Click on the SOS button (0.5 seconds) to activate the screen. - Page 41 Scroll down and select 24-hour format or untick for 12-hour format. The watch needs to be restarted after you change time zone. How to reboot your Kids Buddy Watch? – Go to page 35 Step 6 Once you have made a selection, click on one of the back buttons shown on the image.
-
Page 42: Choosing The Correct Sim Card For Your Region
Australian operators offer competitive pricing, fast internet speed and wide data coverage, which gives you flexibility to choose any sim card that suits your needs and budget. All networks offer you 4G Nano SIM cards, so you don’t need to worry about My Buddy Gard device-compatibility issues. - Page 43 Below you’ll find a few of the various ways to extend the battery before having to charge How to adjust the Upload Frequency to the Track Map? – Go to page 30 Kids Buddy Watch Battery Tips ⚡ – Go to page 4 6. Set up a Geo-Fence All Buddy Trackers are capable of alerting when geo-fence is breached.
- Page 44 ❗❗❗Please Note❗❗❗ My Buddy Gard strongly suggests to check in with the wearer facilitator and make them aware of the potential of this feature so you wouldn’t come across any unwanted legal snags.
-
Page 45: What Is Track Map
Do you worry about your car getting stolen? Would you like to feel more in control 24/7? Well, here’s how My Buddy Gard can help! Simply add your Buddy Tracker and any smart devices to our “Track Map” to give you the ability to find, monitor and set boundaries for each device. - Page 46 Easy Alerts Setup Instead of setting all the triggers separately per tracking device, you are able to set one trigger which applies to any paired device you need and when you need it. It can be an awkward conversation, but sometimes you need to know that your loved ones are following the rules for their own sake.
-
Page 47: How To Set Up A Geo-Fence And Alerts
Power On Alert Car stolen and thieves take off into low or no mobile reception area! With Power On trigger you’ll know instantly when it comes back online again and you’ll be able to see the location from the map. Set the trigger and action to instantly notify you and locate the vehicle. Alerts Scheduling Want the triggers to only work during working hours? No worries, Rules Engine can be customised to action the triggers at the set times or days of the week! -
Page 48: Alerts
3. Custom fence – helps to create a freeform geofence. 4. Rectangle – helps to create a rectangular geofence. Step 5 Click and hold the mouse button on the desired area on the map and start dragging the mouse while holding the button. ❗... - Page 49 Step 4 Select the applicable Buddy Trackers the following rule will apply Step 5 Schedule what hours of the day and which days of the week the rule applies to Step 6 Select the geofence trigger from the list. Step 7 Let’s refine the trigger, in this instance I am defining the rules for EXIT if you need to set up alerts for ENTRY to this geofence, then choose ENTER.
- Page 50 Enter the mobile phone number that will receive the SMS Notification. Then type in the message you’d like to receive when the SOS button has been pushed into the Text to send text box. You can also leave the Text to send box as it is and our system will construct the message automatically PS❗...
-
Page 51: How To Use Merge Fields
SMS Notification How to use Merge Fields �� Click on the Dropdown list, Select the merge field (E.g., Device Name) and then Click on Insert Field Track map will automatically populate the field for you. It’s very handy when you have multiple Buddy Trackers on your account and need to differentiate which device pushed the SOS button. - Page 52 Location update usually takes around 5 – 20 seconds depending on the GPS and mobile network signal. Sometimes refreshing the Track Map page in your browser or My Buddy Gard APP at the top left corner helps as well if it doesn’t seem to update the position.
- Page 53 Send via SMS My Buddy Gard Track Map will always try to send the most of the commands via DATA channel to save on your SMS credits but if the data network is weak or not available, then the Track Map will offer to SEND by SMS which works well in low reception areas.
- Page 54 Step 3 Type in the phone number that will receive the Listen-In (silent) phone call from the Buddy Watch and click SEND. Step 4 Buddy Tracer is now going to silently call the number you entered. You can listen what is happening around the wearer once you pick up the call Click DONE and wait for the phone to ring.
- Page 55 WiFi is present in almost all of our homes. Which is a great support for 4G LTE to make sure your Kids Buddy Watch is always connected. But us at Buddy HQ discovered, why not use this information to send you an alert when the watch is either in range or out of range of the allocated WiFI network and send you an alert as a safety feature.
- Page 56 By holding down the SOS button on the side of the Kids Buddy Watch, it will call the stored SOS number, send current location update to the Track Map and also notifies the allocated people with an SMS, Email or Track Map notification which you can fully configure.
- Page 57 Especially a wearer with a neuro diverse condition as they might forget to put it back on their wrist. Kids Buddy Watch is water resistant with IP67 rating.
- Page 58 How to adjust the Upload Frequency to the Track Map and why❓ Most important❗❗❗ How to adjust the volume of your Kids Buddy Watch? – Go to page 34 How to charge your Kids Buddy Watch? – Go to page 9 How to adjust the screen brightness? –...
- Page 59 ❗❗❗Please Note❗❗❗ My Buddy Gard strongly suggests to check in with the wearer facilitator and make them aware of the potential of this feature so you wouldn’t come across any unwanted legal snags. How to activate the listen in feature? – Go to page 52 17.
Need help?
Do you have a question about the KIDS BUDDY WATCH and is the answer not in the manual?
Questions and answers