Table of Contents
Advertisement
Quick Links
Advertisement
Chapters
Table of Contents

Related Manuals for Thompson TM-SAV26DS


Summary of Contents for Thompson TM-SAV26DS
- Page 1 路徑導航掃地機器人 Model: TM-SAV26DS V1.0...
-
Page 2: Table Of Contents
目錄 使用安全 ......................... 1 產品特徵 ......................... 2 ........................ 2 人性化設計 ......................2 集塵盒可用水洗 ..................... 2 電子水箱功能說明 ......................3 地圖自動導航 產品組成 ......................... 4 ........................ 4 主機及附件 ........................5 主機圖解 ..................... 7 集塵盒與滾刷組件 ..................... 9 充電基座與遙控器 產品操作 ....................... 10 ......................10 觸摸按鍵操作 ........................ -
Page 3: 使用安全
使用安全 使用本產品前,請閱讀以下安全說明並遵循所有常規的安全預防措施。 !請仔細閱讀本說明書 !請保留好本說明書 !任何與本說明書不符的操作都很有可能導致本產品損壞 注意 1. 只有授權的技術人員方可拆卸本產品,嚴禁自行拆解本產品; 2. 本產品只能使用包裝原配備的變壓器,使用其他變壓器將可能導致產品受損; 3. 雙手潮濕時請勿接觸電線、插座或變壓器; 4. 請勿使布簾、各類纏繞物質或用戶身體部位捲進產品驅動輪; 5. 請勿將本產品靠近煙頭、打火機或者其他明火; 6. 如果產品需要清潔,請在充電結束後對本產品進行清潔; 7. 請勿過度折彎電線,或將重物及尖銳物品擱置於機器之上; 8. 本產品為戶內家用產品,請勿在戶外使用; 9. 本產品禁止重壓; 10. 請勿在潮濕環境中使用本產品(如浴室); 11. 使用本產品前,請移除地面所有易損物品(如玻璃杯、燈具等)以及有可能纏住 邊刷和吸風通道的物品(如電線、紙片、窗簾等); 12. 請勿將本產品置於易掉落的地方(如桌椅上); 13. 運輸過程中或長時間不使用本產品時,請關掉機器側面的電源開關; 14. 充電前請仔細檢查電源變壓器是否已和插座接好; 15. 為預防絆倒,本產品工作時請告知房間內的其他成員; 16. 集塵盒已滿時請先清空再使用本產品; 17. 本產品使用環境溫度為 0℃ 至 40℃; 18. -
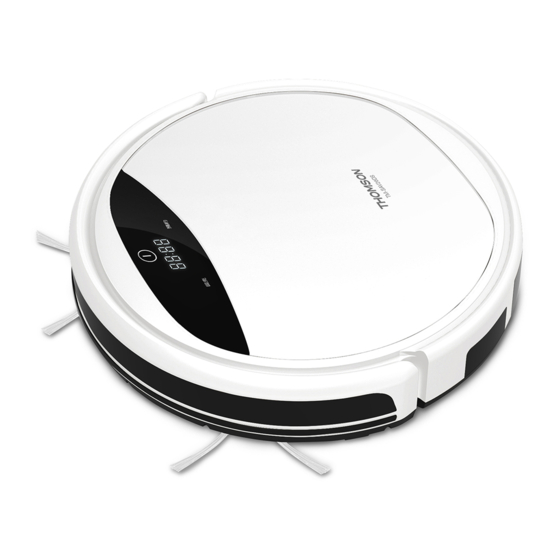
Page 4: 產品特徵
產品特徵 本產品是一款與眾不同的具有劃時代的自動清掃機器人,本機器具有普通的掃地功能,雙邊刷及強 力吸塵,帶電子水箱,還具有滾刷組件功能。並自行決定機器的工作方式,讓機器更加有效的清潔 地板。 人性化設計 操作簡單、易上手。 只需輕輕一按 鍵,便可操控機器。 集塵盒可用水沖洗 將集塵盒內的 HEPA 濾網 (不可沖洗)取出後,集塵盒及初級濾網都可以直接用水進行沖洗,不需花費 您過多的勞動;而且用水沖洗集塵盒還可以避免灰塵飛揚造成的二次污染。 標準集塵盒 拖地集塵盒 HEPA 濾網 HEPA 濾網 電子水箱功能說明 機器帶電子水箱正常清掃時,通過智能控制出水量,以保證拖 地布均勻打濕。... -
Page 5: 地圖自動導航
產品特徵 地圖自動導航 1. 使用前,請將機器靜止平放於地面。 2. 打開側邊電源總開關,然後輕按主機 按鍵或遙控器“開/關”按鍵;顯示幕顯示“5、4、 3、2、1”倒數,語音提示“系統啟動中,請稍等”。 3. 倒數完畢後按鍵背景燈全亮,此時可按主機 按鍵或遙控器“開/關”按鍵開始工作,工作 開始是會先沿邊一段距離去校正機器清掃角度。 4. 若沒有放置充電座,機器清掃完成後將會回到最初開始工作的地方附近。(圖一) 若清掃過程中放置了充電座,機器清掃結束後將會自動尋找充電座。(圖二) (圖一) 起點 充 電 (圖二) 座... -
Page 6: 產品組成
產品組成 主機及附件 序號 描述 數量 主機(含標準集塵盒) 拖地集塵盒+電子水箱 充電基座 變壓器 遙控器(不含電池) 邊刷*2 更換備品*2 拖地布 HEPA 濾網(標準集塵盒*1 拖地集塵盒*1 備品*1) 清潔刷 說明書... -
Page 7: 主機圖解
產品組成 主機圖解 標準集塵盒 輕觸按鍵 裝飾片 面蓋 防撞條 保險桿 電源總開關 滾刷蓋板 滾刷 左邊刷 自動充電極片 萬向輪 你 右邊刷 左輪子 主機下蓋 電池蓋 右輪子 塵盒開關 按鈕 充電插口 標準集塵盒... - Page 8 產品組成 拖地集塵盒+電子水箱 拖地集塵盒 電子水箱 把拖地布平整地對 齊水箱底部的邊 沿,貼上並用手按 壓平整 拖地布...
-
Page 9: 集塵盒與滾刷組件
產品組成 集塵盒與滾刷組件 標準集塵盒 塵盒開關按鈕 HEPA 支架 集塵盒下蓋 HEPA 濾網 集塵盒中隔板 集塵盒上蓋 拖地集塵盒 塵盒卡扣 集塵盒上蓋 HEPA 濾網 集塵盒中隔板 集塵盒下蓋... - Page 10 產品組成 滾刷組件 滾刷蓋板 滾刷棒 滾刷支架 滾刷馬達...
-
Page 11: 充電基座與遙控器
產品組成 充電基座 充電座上蓋 充電座中蓋 充電端點 電源插口 遙控器 1. 開/關按鍵 2. 方向鍵 (機器處於待機模式時此按鍵才有效) 3. 強力清掃 4. 自動回充 5. 模式選擇 注意: 1. 遙控器使用前請先安裝 2 顆 4 號電池。(4 號電池 2 顆須自購)。 2. 機器運行時則無法以遙控按鍵控制方向。 3. 若長時間不使用遙控器,請將電池取出。... -
Page 12: 產品操作
產品操作 “開/關”按鍵 “預約”按鍵 “回充”按鍵 觸摸按鍵操作 清掃鍵 按下 啟動機器,再按一次按鍵機器進入自動清掃模式。 B. 從睡眠模式切換到待機模式;或者長按 3 秒使機器從待機模式切換到睡眠模式; C. 在預約清掃模式下,按此鍵完成並確認預約; D. 在時間設置模式下,按此鍵完成並確認時間; E. 在待機模式下,按此鍵使機器開始工作。 2. “回充”自動回充/數字+鍵 A. 在預約設置或時間設置模式下,按此鍵使設置的預約時間增加或系統時間增加; (分鐘增加至 60 後歸 0 重新增加,小時增加至 24 後歸 0 重新增加) B. 在其他模式下,按此鍵使機器自動尋找充電基座。 3. “預約”預約按鍵 A. 待機/充電模式下,短按此鍵進入/退出,當前時間設定。 B. 待機/充電模式下,長按此鍵進入/退出,預約時間設定。... -
Page 13: 注意事项
產品操作 注意事項 因居家環境格局程度不同,產品在一次清掃過程中可能會出現遺漏區域的情況。為了達到有效的清潔 效果,建議你每天使用本產品,並在清掃前為產品排除會影響的阻礙,本產品將會達到最佳的清潔效 果。 ● 可能絆住或纏繞產品請移除 ● 請將地毯流蘇邊卷起壓好 ● 傢俱底部應高於機器 0.5cm 以上, ● 樓中樓邊緣應放置防護欄, 如需清潔請墊高 確保產品安全運行 ● 傢俱物品擺放整齊,以利產品順利 ● 請不要站在門檻和走道等狹窄地方 清潔達最佳效果 ,避免區域遺漏清掃... -
Page 14: 電池充電
產品操作 電池充電 1.放置好充電基座 a. 把充電基座置於靠牆邊位置,充電基座需左右各 1 米, 前方 2 米淨空區,請將所有障礙物移除,如右圖所示。 b. 若機器處於關機狀態請打開側邊電源總開關再充電。 2.用戶可以用以下兩種方式之一對機器進行充電 a. 直接將電源變壓器插孔插到機器上,另-頭接通電源,如圖 a 所示: b. 將電源變壓器插孔插在充電基座上,按主機或遙控器上“回充”按鍵,使機器自動尋找充電座, 如圖 b 所示。 注意: a. 機器充電時,顯示幕會從左到右顯示“11 :11”字樣; b. 充電完成時,顯示幕會顯示“FULL”; c. 待機模式下電量不足時,機器會播報語音“請充電”; d. 工作模式下電量不足時,機器會自動尋找充電座充電。 有效延長電池壽命方法: a. 首次使用請讓機器充滿 5 個小時; b. 電量不足時,請儘快進行充電; c. 清掃完成或者電量過低時,機器會自動開始尋找充電基座充電; d. -
Page 15: 開/關機/待機/睡眠
產品操作 開/關機/待機/睡眠 1. 開/關機 a. 先確定電源總開關處於“ON”位置(電源總開關在機器的側邊),如果短期間不使用機器,請將 電池充滿電,把機器的電源總開關處於“OFF”位置。 b. 在待機模式下,按主機 或遙控器“開/關”鍵使機器開始工作。 注意: 若機器處於睡眠模式,按主機 鍵使機器從睡眠模式切換到待機模式,再接-次開始工作。 2. 待機 待機是指機器電源導通(螢幕顯示狀態中),等待用戶操作,可由以下方式進入 工作狀態下,按主機 鍵停止工作,進入待機模式。 工作狀態下,按遙控器上的“開/關”鍵使機器停止,進入待機模式。 3. 睡眠 (螢幕不顯示) 睡眠模式下,按主機 鍵或遙控器“開/關”鍵可喚醒機器,進入待機模式。 可由以下方式進入睡眠模式,可節約電池使用壽命。 1. 待機模式下,長按主機 鍵 3 秒以上進入睡眠模式; 2. 待機模式下,若連續 2 分鐘以上無操作,則機器自動進入睡眠模式。 當前時間設置 在機器顯示幕上設置當前機器時間(請確認機器處於待機狀態) a. 顯示幕顯示為當前機器時間。 b. 短按 “預約 ”鍵進入機器時間設置,此時顯示幕左側兩位閃爍,按“回充”鍵,小時數數字 +1,加至... - Page 16 產品操作 注意: 1. 在設置過程中隨時按“預約”鍵,會退出時間設置並不保存此次的時間設定值。 預約設定功能,可使機器每天在固定的同一時間自動開始清掃。 2. 比如,設定預約時間為 9: 00,則機器會對照機器當前時間,在每天的 9:00 自動開始清掃 一旦設定,則機器每天都會在設定的時間自動開始清掃(電源總開關請保持處於 ON 位置)。 取消預約設置 依照預約設置步驟,請將預約時間小時/分鐘全部設置為 “00:00”,再按 ,機器會 告示音提示預約已取消。 提示語音啟動/關閉 待機模式下,同時按下按鍵“預約”+“回充”發出(登)的聲音,即取消或打開提示語音設定完 成。...
-
Page 17: 多重清掃模式
產品操作 多重清掃模式 本產品共有四種清掃模式,滿足您的不同需求。 1. 自動清掃 在待機時,按主機 鍵或遙控器“開/關” 鍵,機器進入 自動清掃模式。 2. 模式清掃 按遙控器“MODE”鍵進入遙控器區域清掃模式: a. 選擇“模式”清掃 mode1,遙控器顯示幕顯示 MODE1,主機顯 示幕顯示 nod1,機器將會按沿邊模式進行清掃。 b. 選擇“MODE”清掃 mode2,遙控器顯示幕顯示 MODE2,主機顯 示幕顯示 nod2,機器會在 2*2m 範圍內清掃。 c. 選擇“MODE”清掃 mode3,遙控器顯示幕顯示 MODE3,主機顯 示幕顯示 nod3,機器會按隨機模式進行清掃。 選擇“MODE”清掃 mode4,遙控器顯示幕顯示 MODE4,主機顯示 幕顯示 nod4,機器會按深度清潔模式清掃房間。 e. 再按一次“MODE”,遙控器顯示幕不顯示 MODE,機器進入待機。 3. -
Page 18: 標準集塵盒安裝
產品操作 滾刷組件和標準集塵盒安裝 按如下步驟進行安裝(參照下圖) 步驟 2:再放入滾刷 蓋板 滾刷蓋板 步驟 1:先放入滾刷 滾刷 主機 集塵盒 步驟 3:將集塵盒 對入卡槽推入主機... -
Page 19: 電子水箱組件和拖地集塵盒安裝
產品操作 電子水箱和拖地集塵盒安裝 按如下步驟進行安裝(參照下圖) 步驟 4:按圖中箭頭所示把水 箱膠塞打開,向裏面加滿水後 蓋緊水箱膠塞 水泵 電子水箱 步驟 5:將集塵盒放入水箱對應 位置,並把集塵盒提手放下 集塵盒 步驟 6:將裝好的水 箱組件裝入主機對 應位置 步驟 7:將裝 好的水箱組 件裝入主機 對應位置 注意:當機器不工作時,請將機器放置在水準位置。... -
Page 20: 產品維護
產品維護 邊刷清潔 1. 檢查邊刷是否受損或有異物; 2. 用清潔工具或抹布清潔邊刷: 3. 若發生捲曲或變形,可將邊刷取下置於溫水中約 5 秒; 4. 當邊刷受損無法使用時,請及時更換,邊刷最大使用壽命 12 個月。 集塵盒及濾網清潔( ) 圖一為拖地集塵盒,圖二為標準集塵盒 每次使用後請清空集塵盒,具體步驟如下圖所示: 注意: a. 當初級濾網使用 15-30 天後,建議水洗一次,HEPA 濾網建議使用 6 個月後更換; b. 安裝前,請確保濾網處於乾燥狀態; c. HEPA 濾網和初級濾網都是可以更換的附件; d. 請勿將濾網置陽光下曝曬。 A.手掌托起水箱底部,大拇指向下按壓水箱按鈕後往外抽出水箱 B.把集塵盒提手拉起 D. 掰開集塵盒上蓋 E. 拉開集塵盒蓋並取出初級濾網 將集塵盒從水箱中提起 和... - Page 21 產品維護 A.手掌托起塵盒底部,大拇指向下按壓塵盒按鈕後往外抽出塵盒 B.取出集塵盒 C.按壓集塵盒按鈕後,掰開集塵 D. 拉開集塵盒蓋並取出初級濾網和 盒上蓋 HEPA 濾網 E. 倒掉集塵盒裏的垃圾 F. 用水沖洗集塵盒及初級濾網,用清潔刷清理 HEPA 濾網,請勿用水沖洗 HEPA 濾網 G.將初級及濾網和 HEPA 濾網重新裝入塵盒 (圖二)...
-
Page 22: 感測器及輪子清潔
產品維護 感測器及輪子清潔 用清潔工具或軟布輕輕拭擦感測器及輪子,如下圖示記的位置。 充電端子清潔 用清潔工具或軟布清潔充電基座及主機上的充電端子,如下圖示記的位置。 出現接觸不良,請用乾抹布擦拭 再使用 出現接觸不良,請用乾抹布擦拭再 使用 滾刷組件清潔 將滾刷組件從機器上取下,拆出滾刷棒,然後用清潔工具或軟布清潔滾刷棒或滾 刷蓋板,如下圖所示。(滾刷棒可用水洗) 注意:用水清洗滾刷後,要等滾刷上的水完全乾後再組裝使用。... -
Page 23: 常見故障
常見故障 序號 顯示代碼 故障原因 解決方案 充電時電源開關斷開 請檢查電源開關是否打開 電源電壓低或回充失敗 請手動為機器充電 左跌落 右跌落 前跌落 請把機器置於安全位置 左輪跌落 右輪跌落 萬向輪掛起 前擋左側開關故障 將機器重啟並檢查前檔開 前擋右側開關故障 關是否正常 前擋正前開關故障 左輪超載 排除卡塞,異物纏繞 右輪超載 排除卡塞,異物纏繞 左邊刷超載 排除卡塞,異物纏繞 右邊刷超載 排除卡塞,異物纏繞 風扇超載 重啟機器 滾刷超載 排除卡塞,異物纏繞 低電 請充電 11:11 正在充電 正在充電 FULL 充電完成 充電完成... -
Page 24: 產品規格
產品規格 產品規格 分類 專案 參數 直徑 325mm 結構類 高度 79mm 淨重 2.5KG 電壓 14.4V 電子類 電池規格 LI 2600mAh 標準集塵盒容量 0.5L 拖地集塵盒容量 0.3L 水箱容量 0.2L 功能參數 充電類型 手動充電/自動充電 清潔模式 自動清掃,模式清掃,強力 清掃,預約清掃 充電時間 6 小時 清潔時間 120 分鐘 電子水箱工作時間 90 分鐘 主機按鍵類型 觸摸按鍵... - Page 25 Contents Safety Instructions............................. 1 Product Features............................2 User Friendly Design..........................2 Washable Dust Bin..........................2 Electronic Water Tank Instruction.......................2 Maps Navigation........................... 3 Product Components..........................4 Main Body and Accessories........................4 Main Body Diagram..........................5 Dust Bin..............................7 Rolling Brush Module........................... 8 Charging Station/Remote Control...................... 9 Product Operation............................10 Touch Panel Operation........................
-
Page 26: Safety Instructions
Safety Instructions Before using this product, please read and follow safety instructions. Read this instruction manual thoroughly and carefully before using the product. Keep this user manual for future reference. Any usage that fails to follow the instructions in this manual may lead to damage to users or ... -
Page 27: Product Features
Product Features TM-SAV26DS is a distinctive epoch-making automatic cleaning robot, it has a common sweeping function, double side brush and electronic water tank, and comes with a rolling brush kit. It can determine how the robot works to make it more efficient in cleaning the floor. -
Page 28: Maps Navigation
Product Features Maps Navigation 1. Please stop the appliance and place it on the ground before using. 2. Turn off the power switch, then press or remote control “ON/OFF”; the panel will display “5, 4, 3, 2, 1” counting down, and the voice prompt will say “system is starting, please wait a moment”... -
Page 29: Product Components
Product Components Main Body and Accessories Item Description Quantity Main Body(including Standard Dust Bin ) Mopping-Collecting Dust Bin+Electronic Water Tank Charging Station adaptor Remote Control (battery not included) Side Brushes*2 and spare brushes*2 Mopping Cloths HEPA Filter(Standard Dust Bin*1 Mopping-Collecting Dust Bin *1 present *1)... -
Page 30: Main Body Diagram
Product Components Main Body Diagram Standard Dust Bin Touch Button Lightly Decorative Sheet Panel Cover Anti-collision Sheet Bumper Power Switch Rolling Brush Cover Plate Rolling Brush Left Side Brush Automatic Charging Pole Universal Wheel Right Side Brush Left Wheel Bottom Cover Battery Cover Right Wheel Dust... - Page 31 Product Components Mopping-Collecting Dust Bin/ Electronic Water Tank Dust Bin Water tank Hold mopping cloth against the edge of the water tank bottom, and press it steadily with hand Mopping Cloth...
-
Page 32: Dust Bin
Product Components Dust Bin Standard Dust Bin Dust Bin Button HEPA Support Dust Bin Bottom HEPA Filter Cover Dust Bin Baffle Dust Bin Upper Cover Mopping-Collecting Dust Bin Dust Bin Buckle Dust Bin Upper Cover Dust Bin Upper Cover HEPA Filter Dust Bin Baffle Dust Bin Bottom Cover... -
Page 33: Rolling Brush Module
Product Components Rolling Brush Module Rolling Brush Cover Plate Rolling Brush Bar Rolling Brush Support Rolling Brush Motor... -
Page 34: Charging Station/Remote Control
Product Components Charging Station Docking Top Cover Docking Middle Cover Charging Poles Charging Socket Remote Control 1. ON/OFF 2. Direction buttons 3. Max: robot changes to a stronger cleaning mode. (Only works when robot in standby status) 4. Auto charging 5. -
Page 35: Product Operation
Product Operation 回充 預約 PLAN HOME Touch Panel Operation Cleaning Operation Press to start the robot, and press again to enter auto cleaning mode. Make the robot change from Sleeping status to Standby; or press for over 3 seconds to make the robot change from Standby to Sleeping status. -
Page 36: Attention
Product Operation Attention As the complexity of home environments vary, the product may miss out certain areas in the process of cleaning. In order to achieve better cleaning results, you are advised to use the product consistently as well as remove obstacles for the product before carrying out the cleaning. The product will offer you a clean home in return. -
Page 37: Battery Charging
Product Operation Battery Charging 1. Charging Station Placement Place charging station against the wall, and remove obstacles situated around 1m on either side and 2m in front of the station. Please remove obstacles as shown in the figure on the right. If robot is switched off, switch on the robot first before charging. -
Page 38: Start Up/Shut Down/Standby/Sleep
Product Operation Start Up/Shut Down/Standby/Sleep 1. Start Up/Shut Down Please ensure that the switch is ON (at right side of the robot). If you don’t operate the product soon afterwards, please charge it fully and ensure that the switch is OFF. While in Standby status, press on the robot or “ON/OFF”... -
Page 39: Setting On/Off Of Scheduling Cleaning Time
Product Operation Setting ON/OFF Of Scheduling Cleaning Time A. Schedule Time Setting (make sure the robot in Standby or Power On status) Press “PLAN” for more than 5 seconds to enter robot schedule setting, and the two left numbers on LED display panel will flash. Press “HOME”... -
Page 40: Multiple Cleaning Modes
Product Operation Multiple Cleaning Modes TM-SAV26DS have 4 different cleaning modes to meet different cleaning request. 1. Automatic Cleaning Mode While in standby status, press on the robot body or press “ON/OFF” on the remote control, and the robot will enter automatic cleaning mode. -
Page 41: Main Brush And Standard Dust Bin Installation
Product Maintenance Main Brush and Standard Dust Bin Installation Installation as outlined by the following steps Step 2: Install rolling brush cover plate Rolling brush cover plate Step1:Insert rolling brush Rolling Brush Robot main body Dust Bin Step3: Aim dust bin at edge of robot bottom, push it into robot with hand... -
Page 42: Electronic Water Tank And Mopping-Collecting Dust Bin Installation
Product Maintenance Electronic Water Tank and Mopping-Collecting Dust Bin Installation Installation as outlined by the following steps Step4: As shown by the arrows in the diagram, open water tank rubber plug, then tighten it after filling up the water tank. Water Pump Electronic Water Tank Step5:... -
Page 43: Product Maintenance
Product Maintenance Cleaning Side Brushes Clean the side brush when it become dirty and replace it if it’s damaged. The maximum life span of the side brush is 12 months. Note: Before replacing side brushes, check and ensure that the L/R mark on the side brush match with the L/R mark on the bottom base of the robot. - Page 44 Product Maintenance A. Hold the bottom of dust bin, and press down on the button using your B. Take out dust bin. thumb to take out of the dust bin. D. Open dust bin cover and take out the C. After press down button E.
-
Page 45: Cleaning Sensors And Wheels
Product Maintenance Cleaning Sensors and Wheels Use cleaning tools or soft micro fiber to wipe the sensors and wheels as shown below: Cleaning Charging Poles Use cleaning tools or soft micro fibers to wipe the charging poles of the charging dock and robot as shown below: Use dry micro fiber to wipe poles when connection is... -
Page 46: Trouble Shooting
Trouble Shooting Item Error Cause Solutions Code During charging, the power is Please check whether power switch is Charging power voltage low or Please charge robot manually auto-recharge fail Left side anti-fall error Right side anti-fall error Front side anti-fall error Please keep robot in a secure position Left wheel fall error Right wheel fall error... -
Page 47: Product Specifications
Product Specifications Classification Item Details Diameter 335mm Mechanical Specifications Height 79mm Weight 2.5kg Electrical Specifications Voltage 14.4V Battery 2600 MAH Li-ion Standard Dust Bin 0.5L Capacity Functional Specifications Mopping-Collecting 0.3L Dust Bin Capacity Electronic Water Tank 0.2L Capacity Recharge System Manual charge / auto recharge Cleaning Mode Auto/ Max/ Mode/PLAN... - Page 48 THOMSON is a trademark of Technicolor SA used under license by IFI HK.Ltd ENVIRONMENT-FRIENDLY DIPOSAL You can help protect the environment! Please remember to respect local regulations: Deliver non-working electrical equipment to an appropriate waste disposal centre.