Accu-Chek Guide - Blood Glucose Monitoring System Quick Start Guide
- User manual (49 pages) ,
- User manual (132 pages) ,
- User manual (63 pages)
Advertisement
For in vitro diagnostic use only

- Keep new and used batteries away from children. See the User's Manual for additional information.
![]()
- This Quick Start Guide does not replace the User's Manual for your Accu-Chek Guide blood glucose meter. The User's Manual contains important cleaning and disinfecting procedures and additional information.
- The meter and lancing device are for single patient use. Do not share them with anyone, including other family members! Do not use on multiple patients!
- All parts of the kit are considered biohazardous and can potentially transmit infectious diseases from bloodborne pathogens, even after you have performed cleaning and disinfecting.

NOTE
- Always have a spare set of batteries.
- Battery life may vary due to factors such as temperature and battery manufacturer.
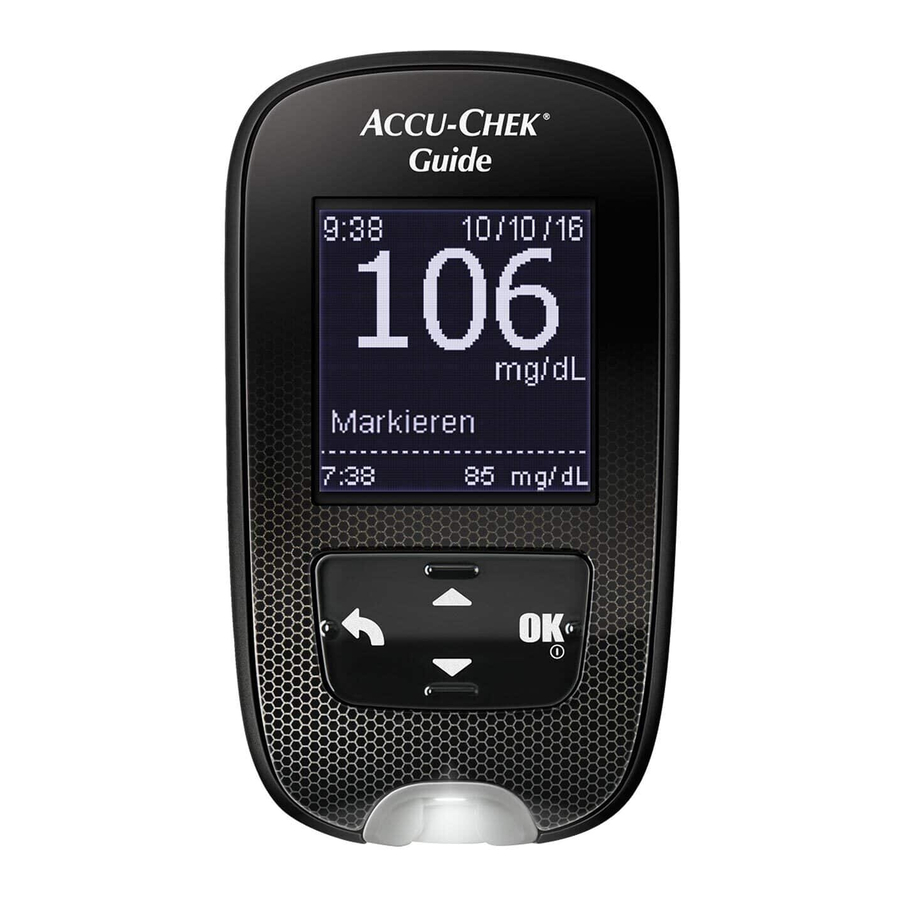
Overview

- Display
- Back Button
![]()
- Up Arrow and Down Arrow Buttons
![]()
- Power/Set/OK Button
![]()
- Test Strip Slot with Light
- Battery Door
- Micro USB Port
- Test Strip Ejector


Set the Meter Language
- Turn the meter on by briefly pressing
![]() . Language appears. Press
. Language appears. Press ![]() or
or ![]() to highlight the desired language.
to highlight the desired language.
![]()
- Press
![]() to set the language and return to Main Menu.
to set the language and return to Main Menu.
![]()


Set up the Lancing Device
- Familiarize yourself with the Accu-Chek Softclix lancing device.

- Get a lancet from the pocket in the carrying case.

- Remove the cap by pulling it straight off. Do not twist the cap.

- Insert the lancet into the lancing device until it clicks.

- Twist off the lancet's protective cap.

- Replace the cap on the lancing device. Make sure the notch on the cap lines up with the notch on the lancing device.

- Adjust the lancet depth to a comfortable penetration level. Start at 2. For tougher skin, dial to a higher number.

- Press the priming button in as far as it will go, like a pen. Do not press the release button while pressing the priming button. The release button turns yellow when the lancing device is ready.

- Set the lancing device aside until you are ready to perform a fingerstick.


Perform a Blood Glucose Test
- Wash and dry your hands before and after you perform a blood glucose test.

- Check the Use By date on the test strip container. Do not use test strips past the Use By date.

- Remove a test strip from the test strip container. Close the cap tightly.

- Insert the metallic end of the test strip into the meter.
The meter turns on. Preparing to test appears.

- Press the lancing device firmly against the side of your fingertip and press the yellow release button to prick your finger.

- Touch the yellow edge of the test strip to the blood drop. Remove your finger from the test strip when Analyzing appears. Do not put blood on top of the test strip.
The test result appears on the display in less than 4 seconds.


Remove the lancing device cap. Point the lancet away from you. Slide out the ejector to release the lancet.
Connect the Accu-Chek Guide meter to the mySugr app
- Using your smartphone, download the mySugr app from the App Store or Google Play and create your mySugr account.
![]()
![www.apple.com]()
![play.google.com]()
- Turn on Bluetooth® on your smartphone (if it's not on already).

- Open the mySugr app, and select Connections on the menu. Select Accu-Chek Guide, and then Connect now. Follow the step-by-step directions for pairing.

- After your meter is successfully connected to the mySugr app, data from your device is imported automatically. Now you can easily keep your diabetes data under control!


To find diabetes management apps that are compatible with your meter, visit www.accu-chek.com.
Roche Diabetes Care, Inc.
9115 Hague Road
Indianapolis, IN 46256
www.accu-chek.com
ACCU-CHEK, ACCU-CHEK GUIDE, SOFTCLIX, and MYSUGR are trademarks of Roche.
APPLE, APPLE logo, and APP STORE are trademarks of Apple Inc. GOOGLE PLAY is a trademark of Google Inc.
The Bluetooth® word mark and logos are registered trademarks owned by Bluetooth SIG, Inc. and any use of such marks by Roche is under license.
© 2021 Roche Diabetes Care
08100942005-0121


Documents / Resources
References
Download manual
Here you can download full pdf version of manual, it may contain additional safety instructions, warranty information, FCC rules, etc.
Download Accu-Chek Guide - Blood Glucose Monitoring System Quick Start Guide
Advertisement


Need help?
Do you have a question about the Guide and is the answer not in the manual?
Questions and answers