
Related Manuals for ArchWork ARCTAB


Summary of Contents for ArchWork ARCTAB
- Page 1 ARCTAB - ARCPILOTPRO TOUCH-SENSITIVE DMX INTERFACE Manuale Utente User Manual...
- Page 2 Music & Lights S.r.l. si riserva ogni diritto di elaborazione in qualsiasi forma delle presenti istruzioni per l’uso. La riproduzione - anche parziale - per propri scopi commerciali è vietata. Al fine di migliorare la qualità dei prodotti, la Music&Lights S.r.l. si riserva la facoltà di modificare, in qualunque momento e senza preavviso, le specifiche menzionate nel presente manuale di istruzioni.
-
Page 3: Table Of Contents
ARCTAB - ARCPILOT PRO INDICE Sicurezza Avvertenze generali 5. 4 Modalità retc Attenzioni e precauzioni per l’installazione 5. 5 Costruzione di scene Informazioni generali 5. 6 Applicare un effetto alla Timelines 1 Introduzione 6 Gli effetti 1. 1 Descrizione 6. 1 Static level 1. -
Page 4: Avvertenze Generali
ARCTAB - ARCPILOT PRO ATTENZIONE! Prima di effettuare qualsiasi operazione con l’unità, leggere con attenzione questo manuale e conservarlo accuratamente per riferimenti futuri. Contiene informazioni importanti riguardo l’installazione, l’uso e la manutenzione dell’unità. SICUREZZA Avvertenze generali • I prodotti a cui questo manuale si riferisce sono conformi alle Direttive della Comunità Europea e per- tanto recano la sigla . -
Page 5: Introduzione
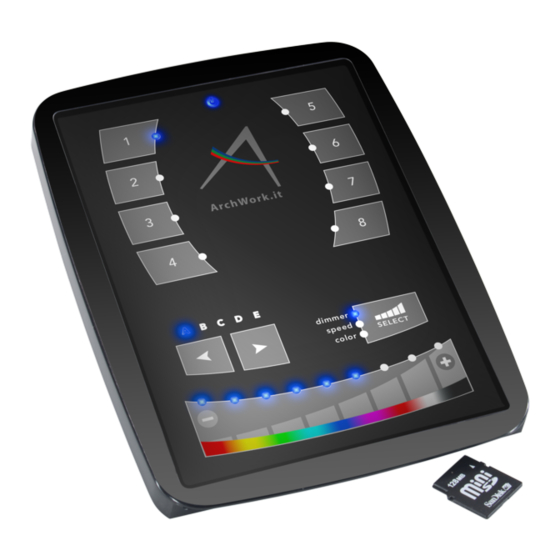
- 1 - INTRODUZIONE 1.1 DESCRIZIONE ARCTAB è un’interfaccia di controllo DMX touch-sensitive, con funzionamento stand-alone per la gestione di sistemi di illuminazione LED e RGB. La superficie sensibile al tocco è facilmente programmabile da PC, per la creazione e la memorizzazione delle scene, l’assegnazione dei corpi illuminanti alle zone e l’impostazione delle funzioni stand-alone ti-... -
Page 6: Elementi Di Comando E Di Collegamento
ARCTAB - ARCPILOT PRO 1.3 ELEMENTI DI COMANDO E DI COLLEGAMENTO RS232TX GND DMX RS232RX DMX1- PORT 7 DMX1+ PORT 6 DMX2- PORT 5 DMX2+ PORT 4 RELAY PORT 3 3.3V PORT 2 IR RX PORT 1 PORT 0 Vista frontale... -
Page 7: Installazione
- 2 - INSTALLAZIONE 2.1 MONTAGGIO L’interfaccia ARCTAB può essere installata in una scatola elettrica standard. Si può inserire l’adattatore AC/ DC sia all’interno che all’esterno della scatola elettrica. • Montare la piastra posteriore dell’interfaccia al muro con 2 o più viti. -
Page 8: Software Arcpilotpro
• 256 MB di memoria video 3.2 INSTALLAZIONE SOFTWARE Collegare l’interfaccia ARCTAB al computer tramite la porta USB. Si richiede l’installazione dei driver. Il pro- gramma di installazione del software copia i driver nel sistema. Una volta installato il software, collegare l’interfaccia al computer e Windows avvierà... -
Page 9: Creazione Di Uno Show
ARCTAB - ARCPILOT PRO - 4 - CREAZIONE DI UNO SHOW Dopo aver avviato il software, prima di tutto è necessario salvare lo “show”. I file verranno salvati con l’estensione .arc. • Fare click sull’icona “Salva con nome” posizionata in alto a sinistra sulla barra principale. -
Page 10: L'area Patch
ARCTAB - ARCPILOT PRO 4.2 L’AREA PATCH Una volta che la patch è pronta, è necessario creare e configurare le zone (aree). È possibile impostare di- verse zone (aree) in modo da riprodurre, nel caso di installazioni multi-room, scene diverse per ogni zona. - Page 11 ARCTAB - ARCPILOT PRO Cliccando sulla paletta “Proiettori” è possibile visualizzare la lista dei dispositivi assegnati alle zone e le relative informazioni (Biblioteca, Indirizzo, ID, Stanze). NOTA - Un dispositivo non può essere assegnato a più zone. Assegnando un dispositivo ad una nuova area...
-
Page 12: Priorità Scene
ARCTAB - ARCPILOT PRO 4.3 PRIORITÀ SCENE Le funzioni Multi-zona del software permettono di prendere il controllo individuale o di gruppi di dispo- sitivi. Nel caso si voglia controllare un dispositivo in 2 aree allo stesso tempo si può far riferimento a due diverse configurazioni di priorità: LTP Page Priority e Alphabetic Page Priority. -
Page 13: Creazione Di Scene
ARCTAB - ARCPILOT PRO - 5 - CREAZIONE DI SCENE Una scena è composta da una sequenza temporale “Timelines” sulla quale vengono inseriti gli effetti de- siderati. Prima di creare una scena è necessario selezionare una zona: • Selezionare una zona dalla finestra “Areas”. -
Page 14: Modalità Proiettori
ARCTAB - ARCPILOT PRO 5.2 MODALITÀ PROIETTORI È fondamentale configurare le posizioni dei dispositivi al fine di visualizzarli correttamente. Per modificare la posizione di un dispositivo, è sufficiente selezionarlo e trascinarlo nella posizione desi- derata all’interno della griglia. Selezionare le icone poste sulla barra degli strumenti della finestra “Gruppi” per disporre rapidamente i dispositivi in una forma (disposizione a linea, a cerchio, a rettangolo oppure a tabella). -
Page 15: Selezione Dei Dispositivi
ARCTAB - ARCPILOT PRO 5.3 SELEZIONE DEI DISPOSITIVI Ogni dispositivo è rappresentato da un piccolo quadratino. La selezione può essere effettuata con il mou- se o premendo il tasto CTRL della tastiera per una selezione multipla. Inoltre, sulla barra degli strumenti sono disponibili diverse opzioni di selezione (Select all, Unselect all, Invert selection e Half selection). -
Page 16: Costruzione Di Scene
ARCTAB - ARCPILOT PRO 5.5 COSTRUZIONE DI SCENE Una scena è realizzata mediante una sequenza temporale (Timelines). Vi è una linea per ogni singolo di- spositivo selezionato o per un gruppo di dispositivi. 5.6 APPLICARE UN EFFETTO ALLA TIMELINES È possibile aggiungere un effetto alla Timelines semplicemente trascinandolo sopra; può essere applicato ad un singolo dispositivo oppure ad un gruppo di dispositivi. -
Page 17: Gli Effetti
ARCTAB - ARCPILOT PRO - 6 - GLI EFFETTI Far riferimento alla seguente lista di effetti da applicare alla Timelines: Effetti validi per la modalità “Proiettori” e “Rects”. • “STATIC” - consente di assegnare un livello DMX costante per i dispositivi selezionati (esempio: colore statico). -
Page 18: Static Level
ARCTAB - ARCPILOT PRO 6.1 STATIC LEVEL Questo effetto consente di impostare un livello static al dispositivo selezionato. Dopo aver assegnato l’ef- fetto si aprirà una finestra di dialogo per settare un colore in tre modalità: • “Color picker” • “Preset colors” (Red, Green e Blue) • “Manual selection”... -
Page 19: Gradient
ARCTAB - ARCPILOT PRO 6.2 GRADIENT Questo effetto consente di creare una dissolvenza tra i valori DMX (Colors and Position). Nel caso di una sfumatura di colore è possibile aggiungere altri punti. È necessario fare un doppio click sulla zona di sfumatura per aggiungere un nuovo colore selezionandolo dalla ruota colori. -
Page 20: Curve
ARCTAB - ARCPILOT PRO 6.3 CURVE Questo effetto consente di avere un maggior controllo sui singoli canali ed è molto utile con i dispositici a LED. Selezionare il canale su cui si desidera intervenire (Red, Green e Blue) e dopo selezionare una forma d’onda (Sinus, Square, Triangle). -
Page 21: Color Mixing
ARCTAB - ARCPILOT PRO 6.4 COLOR MIXING Color mixing è l’effetto di miscelazione più semplice per creare molteplici combinazioni di colori. La fi- nestra di opzioni permette di variare la velocità, le dimensioni e il tempo di durata dell’effetto. Inoltre, è... - Page 22 ARCTAB - ARCPILOT PRO Si possono modificare i punti creati trascinando sulla griglia X/Y oppure utilizzando i cursori sul lato destro della finestra di dialogo. Per aggiungere o rimuovere un punto, è necessario selezionare il relativo strumento (“Aggiungere” o “Can- cellare”) nella barra degli strumenti.
-
Page 23: Matrix
ARCTAB - ARCPILOT PRO 6.6 MATRIX L’effetto Matrix può essere applicato solo usando la modalità “Rects” dalla finestra Gruppi. Questo effetto non può essere applicato alla modalità “Proiettori”. Dopo aver selezionato e trascinato l’effetto Matrix sulla Timelines, si aprirà una finestra di dialogo in modo da poter configurare il tipo di effetto (quadrato, cerchio, linea ecc.). -
Page 24: Gif
ARCTAB - ARCPILOT PRO 6.8 GIF Un file Gif animato può essere applicato solo usando la modalità “Rects” dalla finestra Gruppi. Questo effetto non può essere applicato alla modalità “Proiettori”. Dopo aver selezionato e trascinato l’effetto Gif sulla Timelines, si aprirà una finestra di dialogo in modo da selezionare un file Gif che può... -
Page 25: Text
ARCTAB - ARCPILOT PRO 6.10 TEXT Questo effetto può essere applicato solo usando la modalità “Rects” dalla finestra Gruppi. Questo effetto non può essere applicato alla modalità “Proiettori”. Dopo aver selezionato e trascinato l’effetto Testo sulla Timelines, si aprirà una finestra di dialogo in modo da inserire il testo desiderato. -
Page 26: Color Manager
ARCTAB - ARCPILOT PRO 6.11 COLOR MANAGER Color Manager consente di creare un effetto personalizzato; disegnare nella matrice mediante lo stru- mento “Pencil” dopo aver selezionato il colore dalla ruota colori. Si possono utilizzare gli strumenti come riempimento, linea, quadrato, cerchio oltre che importare immagini. -
Page 27: Opzioni Rgbw
ARCTAB - ARCPILOT PRO • Cliccare sul punto dove è visualizzato, nella figura, il numero 1. • Selezionare il colore che si desidera mascherare (nell’esempio riportato di seguito il colore di sfondo è blu) • Regolare al tolleranza (numero 2) • Modificare l’opacità... -
Page 28: Riproduzione Scene Nella Modalità Live
ARCTAB - ARCPILOT PRO - 7 - RIPRODUZIONE SCENE NELLA MODALITÀ LIVE Selezionando la paletta Live si accede alla schermata ( vedi figura) che consente la riproduzione delle scene. Selezionare la scena che si desidera riprodurre. NOTA - Per la visualizzazione in 3D dei vostri dispositivi premere sulla relativa icona. -
Page 29: Calendario
ARCTAB - ARCPILOT PRO - 8 - CALENDARIO Il software ARCPILOT PRO consente di mandare in esecuzione le scene dopo aver impostato l’orario e la data semplicemente trascinando le scene sul calendario. Di seguito è riportato un esempio di riproduzio- ne della Scena1 alle ore 10:30 in data 30 agosto. -
Page 30: Scrittura Memoria Stand Alone
• Selezionare la zona nel pannello “Areas”. • Selezionare la scena dal pannello “Scenes” e trascinarla sull’ARCTAB come mostrato in figura. NOTA - Per copiare tutte le scene in una pagina cliccare sull’ARCTAB con il tasto destro del mouse e sele- zionare “Assign all scenes”. - Page 32 All rights reserved by Music & Lights S.r.l. No part of this instruction manual may be. Reproduced in any form or by any means for any commercial use. In order to improve the quality of products, Music&Lights S.r.l. reserves the right to modify the characteristics stated in this instruction manual at any time and without prior notice.
- Page 33 ARCTAB - ARCPILOT PRO TABLE OF CONTENTS Safety General instructions 5. 4 The rects mode Warnings and installation precautions 5. 5 Scenes construction General information 5. 6 Adding an effect to the timelines 1 Introduction 6 The effects 1. 1 Description 6.
-
Page 34: General Instructions
ARCTAB - ARCPILOT PRO WARNING! Before carrying out any operations with the unit, carefully read this instruction manual and keep it with cure for future reference. It contains important information about the installation, usage and maintenance of the unit. SAFETY General instruction • The products referred to in this manual conform to the European Community Directives and are there-... -
Page 35: Introduction
- 1 - INTRODUCTION 1.1 DESCRIPTION ARCTAB is a touch-sensitive DMX interface with stand-alone operation conceived for easy control of light- ing systems based on LED source or equipped with RGB colour mixing system. The touch surface can be fully programmed through PC with scenes editor, zone addressing, timer/calen- dar/clock adjustment for stand-alone operation. -
Page 36: Operating Elements And Connections
ARCTAB - ARCPILOT PRO 1.3 OPERATING ELEMENTS AND CONNECTIONS RS232TX GND DMX RS232RX DMX1- PORT 7 DMX1+ PORT 6 DMX2- PORT 5 DMX2+ PORT 4 RELAY PORT 3 3.3V PORT 2 IR RX PORT 1 PORT 0 Front 9 10... -
Page 37: Installation
- 2 - INSTALLATION 2.1 MOUNTING The ARCTAB controller can be installed in any standard electrical backbox. If you use a double size box, you can insert the power supply inside. • Mount the back side of the interface on the wall with 2 or more screws. -
Page 38: Connections
• 256 MB of video memory 3.2 SOFTWARE INSTALLATION The ARCTAB interface has to be connected to the computer through USB and requires the installation of its drivers. The software installation program copies the USB drivers on the system. Once the software is installed, connect the interface to the computer and Windows will launch the installation wizard. -
Page 39: Creating A New Show
ARCTAB - ARCPILOT PRO - 4 - CREATING A NEW SHOW Once the software is stared, you will need to save your show. The files are saved with the .arc extension. • Click on the left-side icon of the software title bar to open the main software menu and select “Save” to open the “Save as”... -
Page 40: The Areas Patch
ARCTAB - ARCPILOT PRO 4.2 THE AREAS PATCH You can setup several areas (zones). Areas are very important for a multi-room installation in order to be able to play a different scene for each zone. All fixtures are assigned to the “Global area” by default, this zone can play a sequence for all fixtures and cannot be removed. - Page 41 ARCTAB - ARCPILOT PRO This window shows a list of all DMX devices. To assign a DMX device to a zone, you must select the cor- responding checkbox on the right side of the list. There is a column for each zone and you can check their name by moving your mouse on the column header as show below.
-
Page 42: Scene Priorities
• Save and close the program ARCPILOTPRO. • Run the file “Tools.exe” in the folder of the software after you have verified that the interface ARCTAB is connected to PC. • Select “Parameters” and change the configuration as shown in the figure. -
Page 43: Creating Your Scenes
ARCTAB - ARCPILOT PRO - 5 - CREATING YOUR SCENES A scene is made with the timelines but the first thing to do is to select the fixtures you want to use from the “Groups” window: • Select a zone from “Areas” windows. -
Page 44: The Fixtures Mode
ARCTAB - ARCPILOT PRO 5.2 THE FIXTURES MODE It is important to setup the positions of your fixtures in order to visualize them correctly. It is often easier to build your sequences if you have an idea of your fixtures actual positions. -
Page 45: Selecting The Fixtures
ARCTAB - ARCPILOT PRO 5.3 SELECTING THE FIXTURES Every fixture is represented by a little square. The selection is made with the mouse. You can use the “Ctrl” key for a multiselection or the various option from the toolbar (select ALL, HALF, INVERT...). -
Page 46: Scenes Construction
ARCTAB - ARCPILOT PRO 5.5 SCENES CONSTRUCTION A scene is built with a timeline. There is a line for every single fixture selected or for a group of fixtures 5.6 ADDING AN EFFECT TO THE TIMELINES An effect can be added to the timeline with a simple drag&drop. You can read the next chapter for a description of the available effects. -
Page 47: The Effects
ARCTAB - ARCPILOT PRO - 6 - THE EFFECTS Here is a brief description of available effects: Effects available for “Fixtures mode” and “Rects mode”. • “STATIC” - enables to assign a constant DMX level to the selected fixtures (a static color for example) • “GRADIENT”... -
Page 48: Static Level
ARCTAB - ARCPILOT PRO 6.1 STATIC LEVEL This effect enables you to setup a static level for the selected fixture. Once the effect is assigned to the timeline the following window is opened (if the effect is assigned to a color channel). 3 modes are available to setup a color: • “Color picker”... -
Page 49: Gradient
ARCTAB - ARCPILOT PRO 6.2 GRADIENT This effect allows you to create a fade between DMX values (color, positions...). In the case of a color gradi- ent, it is possible to add more points. You must double click on the gradient zone to add a new step. Then, you can select it and change the color or its position within the gradient. -
Page 50: Curve
ARCTAB - ARCPILOT PRO 6.3 CURVE This tool allows you to have more control over the individual channels of your fixtures and is extremely useful with LEDs. The first thing to do is to select the channel you want to work with (Red, Green...) and then select a waveform from the list (Sinus, Square...). -
Page 51: Color Mixing
ARCTAB - ARCPILOT PRO 6.4 COLOR MIXING The colour mixing tool is the easiest way to create complex colour effects. Firstly, select an effect from the drop down menu and then modify the different options. You can vary the size, speed and duration of the effect as well as changing the colours used by clicking the pallet icon. - Page 52 ARCTAB - ARCPILOT PRO You can modify the created points by dragging on the X/Y area or by using the faders on the right-side of the window. It is also possible to add or remove a points. To do this, you must select the appropriate tool from the toolbar “Add”...
-
Page 53: Matrix
ARCTAB - ARCPILOT PRO 6.6 MATRIX It is important to know that matrix effects can only be used with Rects. It is not possible to drag this kind of effect onto a regular fixture selection. Read the “Rects mode” chapter to see how to use Rects. -
Page 54: Gif
ARCTAB - ARCPILOT PRO 6.8 GIF An animated GIF file can be displayed on the matrix. It is important to know that matrix effects can only be used with Rects. It is not possible to drag this kind of effect onto a regular fixtures selection. Read the “Rects mode”... -
Page 55: Text
ARCTAB - ARCPILOT PRO 6.10 TEXT It is important to know that matrix effects can only be used with Rects. It is not possible to drag this kind of effect onto a regular fixtures selection. After you select and drag text on the effect Timelines, will open a dialog box for you to type the desired text. -
Page 56: Color Manager
ARCTAB - ARCPILOT PRO 6.11 COLOR MANAGER Perhaps you have used all of the effects and combined them in every way possible, but you are still look- ing for something different, perhaps you want to create your own effect from scratch. The color manager allows you to do precisely this. -
Page 57: Rgbw Options
ARCTAB - ARCPILOT PRO • Click here(1) to enable masking • Select the color you wish to mask (in the example below it is the text background color, blue) • Adjust the tolerance here(2) • The opacity of the layer can also be changed. -
Page 58: Playing Your Scenes In Live Mode
ARCTAB - ARCPILOT PRO - 7 - PLAYING YOUR SCENES IN LIVE MODE The LIVE tab allows you to test your scenes. NOTA - For the 3D visualization of your device, press the icon (3D View). -
Page 59: Calendar
ARCTAB - ARCPILOT PRO - 8 - CALENDAR ARCPILOT PRO software contain an internal clock and calendar. This allows you to trigger your scenes by date and time. Simply drag your scenes onto the calendar. The example below will trigger scene 1 at 10.30 am on the 30 th August. -
Page 60: Writing The Stand Alone Memory
Adding your programming to the ARCTAB interface is as simple as dragging and dropping. Select the area you wish to use. Drag the scene from the scenes panel and onto a ARCTAB scene or one of the ARCTAB memory blocks. - Page 61 Place Stamp Here Affrancare Spett.le Music&Lights S.r.l. Via Appia Km 136.200 04020 Itri (LT) Italy "...
- Page 64 Music & Lights S.r.l. entertainment technologies Via Appia km 136,200 - 04020 Itri (LT) ITALY ISO 9001:2008 tel. +39 0771 72190 fax +39 0771 721955 Certified Company www.musiclights.it info@musiclights.it...
Need help?
Do you have a question about the ARCTAB and is the answer not in the manual?
Questions and answers