Advertisement
Quick Links
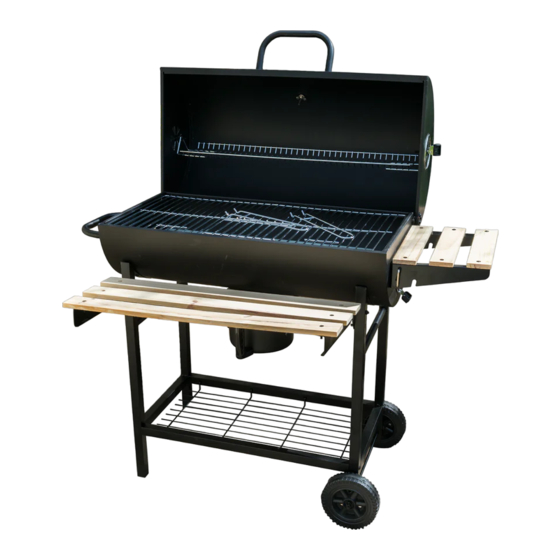
POC124
Classic Barrel BBQ
User Instructions - Please keep for future reference
User Instructions - Please keep for future reference
IMPORTANT – Carefully remove any packaging before use, but retain the safety instructions.
These instructions form part of the product.
Please take note of all of the safety warnings listed in these instructions.
Please read these instructions in their entirety and retain them for future reference.
These instructions should be stored with the product.
This product is for domestic use ONLY and should not be used commercially or for contract purposes.
Safety Caution:
1. DO NOT use spirit or petrol for lighting or re-lighting!
2. Always stand your appliance outdoors and on level ground away from trees and wooden fencing.
3. DO NOT light the re with petrol, para n, methylated spirit, lighter fuel or alcohol. Use a specially
formulated appliance lighting uid, paste or re lighters.
4. DO NOT attempt to light the re if lighting uid has been spilt over clothing.
5. DO NOT try to re-light the re with lighting uid as the charcoal may still be hot and cause a are up.
6. Keep children and pets at a safe distance from the appliance.
7. DO NOT attempt to move the appliance once it has been lit.
8. During use, always use protective gloves when touching any part of the appliance.
9. Make sure that the appliance has completely cooled before removing the ash.
10. Flare-ups can occur if hot fat drips onto the burning charcoal. Keep a water sprayer handy to
extinguish the ame.
11. Always ensure the unit is fully extinguished and completely cool before applying any covers or
storing away. Remember coal can remain hot for sometime and could re-light under certain conditions
unless fully damped down and/or extinguished.
12. To prolong the life of the metal parts, do not leave the barbecue outside and unprotected from the
weather. Ideally it should be stored in a garage or garden shed when not in use.
13. NEVER use water to extinguish the charcoal.
Imported by:
KCT Direct
Glebe Farm, Old London Road
Copdock
Ipswich, Suffolk
IP8 3JN
United Kingdom
ArtVer#2
Advertisement

Summary of Contents for KCT Classic POC124
- Page 1 POC124 Classic Barrel BBQ ArtVer#2 User Instructions - Please keep for future reference Imported by: KCT Direct Glebe Farm, Old London Road Copdock Ipswich, Suffolk IP8 3JN United Kingdom User Instructions - Please keep for future reference IMPORTANT – Carefully remove any packaging before use, but retain the safety instructions.
- Page 2 Care and safe use guidelines FIRST USE OF YOUR BBQ 1. Before first use and after cleaning, apply a light coat of vegetable oil or vegetable cooking spray to the surface of the cooking grills. This simple process will help reduce interior rusting. 2.
-
Page 3: Parts List
ARTS LIST 2× B 1× C 4× 1× E 1× 1× H 3× I1 1× 1× J 3× K1 1× 1× L1 1× L2 1× - 3 -... - Page 4 1× N1 1× N2 1× 1× P 2× Q 2× 1× S 2× T 1× 2× 4× 4× 4× Screw M6 × 45 Screw M6 × 35 Screw M6 × 20 2× 16× 12× Half-threaded screw M6 × 20 Screw M6 × 12 Screw M5 ×...
- Page 5 2× 6× 6× Screw M6 × 15 Nut M8 Screw M5 × 10 18× 4× 30× Nut M5 Nut M4 Nut M6 18× 24× 2× Washer M6 Washer M5 Washer M8 - 5 -...
- Page 6 SSEMBLY Note: Do not tighten the screws until fully assembled. Attach the bottom shelf (R) to the metal tubes (Q). *4PCS Attach the assembled bottom shelf to the short leg frame (L2) and long leg frame (L1) using the M6 × 45 screws (X1). - 6 -...
- Page 7 *2PCS *2PCS (Y1). 6PCS 6PCS *6PCS 6PCS *2PCS *2PCS Attach the cooking barrel (D) to the leg assembly using the M6 × 12 screws (X5), the M6 washers (Z2) and the M6 nuts (Y2). - 7 -...
- Page 8 - 8 -...
- Page 9 8PCS 10PCS 7PCS *6PCS 2PCS *8PCS 2PCS *5PCS *2PCS Attach the air vents (C) to both sides of the cooking barrel using the M6 × 12 screws (X5), the M6 washers (Z2) and the M6 nuts (Y2). washers (Z2) and the M6 nuts (Y2). Attach the handle (A) to the right side of the cooking barrel using the M6 ×...
- Page 10 *4PCS wire support (W) and the M4 nuts (Y4). *12PCS *12PCS *12PCS M5 ×15 screws (X6), the M5 washers (Z1) and the M5 nuts (Y3). M5 ×15 screws (X6), the M5 washers (Z1) and the M5 nuts (Y3). - 10 -...
- Page 11 *2PCS *4PCS *2PCS *2PCS *6PCS *6PCS *6PCS Attach the air vents (C) to both sides of the lid (B) using the M6 x 35 screws (X2), the M6 washers (X7), the M5 washers (Z1) and the M5 nuts (Y3). Attach the thermometer (T) to the lid. Attach the handle (A) to the lid using the M6 x 20 screws (X3) and the M6 washers (Z2).
- Page 12 - 12 -...
Need help?
Do you have a question about the Classic POC124 and is the answer not in the manual?
Questions and answers