
Subscribe to Our Youtube Channel
Related Manuals for Nutri Ninja QB3000C


Summary of Contents for Nutri Ninja QB3000C
- Page 1 QB3000C OWNER’S GUIDE MANUEL DU PROPRIÉTAIRE 2-in-1 / 2-en-1 www.ninjakitchen.com...
- Page 2 FOLLOWING: 1 To protect against electric shock, DO NOT READ ALL INSTRUCTIONS BEFORE USING immerse cord, plug or any part of the main YOUR NUTRI NINJA 2-in-1. ™ unit in water or any other liquids. 2 Close supervision is necessary when any POLARIZED PLUG appliance is used by or near children.
- Page 3 Do not use outdoors. appliance. 28 The maximum rating is based on the 16 oz 16 When making dough in the processor bowl, Nutri Ninja cup. This drives the greatest ™ DO NOT operate the Power Pod continuously power.
- Page 4 CONSIGNES DE SÉCURITÉ IMPORTANTES Pour usage domestique seulement AVERTISSEMENT : LORS DE L’USAGE D’UN APPAREIL ÉLECTRIQUE, DES MESURES DE SÉCURITÉ POUR RÉDUIRE LE RISQUE D’INCENDIE, ÉLÉMENTAIRES DEVRAIENT TOUJOURS D’ÉLECTROCUTION ET DE BLESSURES : ÊTRE RESPECTÉES, Y COMPRIS LES 1 Pour éviter les risques d’électrocution, MESURES SUIVANTES : ÉVITEZ d’immerger l’appareil, son cordon, LISEZ TOUTES LES INSTRUCTIONS AVANT...
- Page 5 28 La puissance maximale correspond à 16 Lors de la préparation de pâte dans le l’utilisation du gobelet Nutri Ninja bol du robot culinaire, NE FAITES PAS 500 ml, qui requiert la plus grande FONCTIONNER le bloc-moteur pendant plus puissance.
- Page 6 Capacité du bol du robot culinaire : 1,2 L (5 tasses, 40 oz) Capacité du gobelet à portion individuelle : 500 mL (2 tasses, 16 oz) Euro-Pro, Ninja, Sip & Seal et Nutri Ninja sont des marques de commerce d’Euro-Pro Operating LLC. 1-877-646-5288...
-
Page 7: Table Of Contents
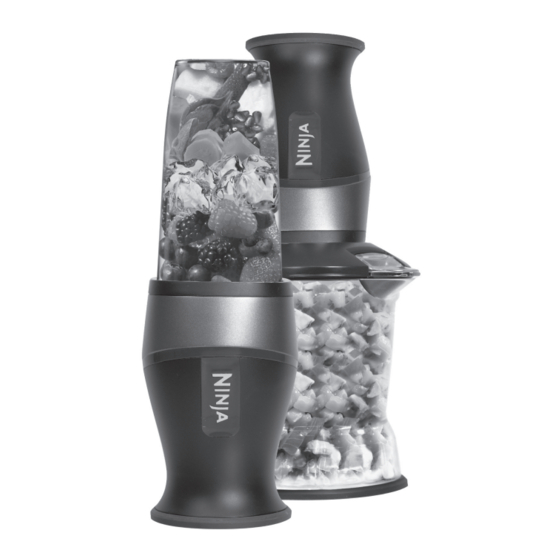
2 en 1. Utilisation du gobelet Nutri Ninja 2 en 1 ............. 23 Assemblage du bol du robot culinaire Nutri Ninja 2 en 1 ........24 Utilisation du jeu de quatre lames ..............24 Utilisation des lames de pétrissage simple et double ........... 25 Utilisation du bol hachoir à... - Page 8 Interchangeable “2-in-1” Power Pod that flips for different meal-making functions. • 1.2 L (40 oz.) All-in-One Bowl for food processing, mixing, chopping and blending. • Single Serve Blending in 500 ml (16 oz.) Nutri Ninja Cups ™ • BPA Free Nutri Ninja Cups, Food Processor Bowl, Blender Pitcher, Bowl-in-Bowl Chopper, Storage Lids ™...
-
Page 9: Getting To Know Your Nutri Ninja
Getting To Know Your Nutri Ninja 2-in-1 ™ Optional Accessories a Power Pod Optional Accessories b 1.2 L (40 oz.) Processor Bowl k 500 ml (16 oz.) Bowl-in-Bowl Chopper c Geared Processor Lid l Storage Lid (Bowl-in-Bowl Chopper) d 4 Blade... -
Page 10: Using The Nutri Ninja ™ 2-In-1
Use caution when washing the blade assemblies as the blades are very sharp. Rinse and dry thoroughly. The blender pitcher, food processor bowl, Nutri Ninja ™ cups, Sip & Seal lids, storage lid and blades, are all ™... -
Page 11: Using The Nutri Ninja ™ 2-In-1 Cup
(Fig. 1) to contact customer service: 1-877-646-5288. Turn the Nutri Ninja cup upside down and place it ™ onto the Power Pod. Press down on the Nutri Ninja ™ cup to pulse or blend. (Fig. 2, Fig. 3) www.ninjakitchen.com... -
Page 12: Assembling The Nutri Ninja
CAUTION: Blades are removable. If pouring with the Once processing is completed and the blades have lid removed, always remove the blade assembly first. stopped spinning, remove the Nutri Ninja 2-in-1 Power ™ If using pour spout, make sure the lid is secure on the Pod and the Geared Lid. -
Page 13: Using The Single And Double Dough Blades
2-in-1 Food Processor Bowl on a ™ Once processing is completed and the blades have clean, dry, level surface. stopped spinning, remove the Nutri Ninja 2-in-1 Power ™ Pod and the Geared Lid. Remove the Dough Blade and Place the Dough Blade over the spindle pin inside the Food Processor Bowl. -
Page 14: Using The Nutri Ninja ™ 2-In-1 Bowl-In-Bowl Chopper
Using the Nutri Ninja 2-in-1 Bowl-In-Bowl Chopper ™ (may not be included) Make sure to align the chopper tab with the processor bowl pour spout or the chopper will not activate. Fig. 13 Fig. 14 Fig. 15 Fig. 16 For best results, use short “PULSES” by pushing down on the button in short, 1 second bursts until desired consistency is achieved. -
Page 15: Using The Nutri Ninja ™ 2-In-1 Blender Pitcher
Using the Nutri Ninja 2-in-1 Blender Pitcher ™ (may not be included) WARNING: DO NOT try to assemble or operate the Power Pod, Geared Lid and blades together outside of the containers. CAUTION: If using the pour spout, make sure your thumb is firmly pressed down on the thumb tab of the lid to secure the lid. - Page 16 Using the Nutri Ninja 2-in-1 Blender Pitcher - con ™ (may not be included) Fig. 19 Fig. 20 For best results, use short “PULSES” by pushing down on the button in short, 1 second bursts until desired consistency is achieved.
-
Page 17: Cleaning And Maintenance
Salt & Pepper Non-Stick Spray Directions: 1. Place the meat into the 500 ml (16 oz.) Nutri Ninja Cup. ™ 2. Hold down and blend continuously for 15 seconds. Form into one single patty and season with salt and pepper. -
Page 18: Troubleshooting Guide
Troubleshooting Guide PROBLEMS POSSIBLE REASONS & SOLUTIONS • Make sure the Power Pod is securely placed on Geared Lid. • Make sure the Geared Lid is securely on container. • Check that the plug is securely inserted into the electrical outlet. •... -
Page 19: Warranty & Registration
ONE (1) YEAR LIMITED WARRANTY EURO-PRO Operating LLC warrants this product to be free from material defects and workmanship for a period of one (1) year from the date of purchase when utilized for normal household use, subject to the following conditions, exclusions and exceptions. - Page 20 • Gobelets à portion individuelle Nutri Ninja de 500 ml. • Récipient mélangeur, gobelets, bol du robot culinaire, bol hachoir à emboîter, couvercles de rangement Nutri Ninja et couvercles étanches à rabat Sip & Seal sans bisphénol A (BPA). •...
-
Page 21: Familiarisez-Vous Avec Votre Nutri Ninja
Couvercle de rangement pour 1,2 L / 1,6 L h Gobelet Nutri Ninja (x 2) i Jeu de lames Nutri Ninja j Couvercles étanches à rabat Sip & Seal (x 2) REMARQUE :Les lames des gobelets et des récipients ne sont pas interchangeables. -
Page 22: Mode D'emploi De L'appareil Nutri Ninja
Mode d’emploi de l’appareil Nutri Ninja 2 en 1 MISE EN GARDE : Si vous transvidez un mélange par VEUILLEZ GARDER À L’ESPRIT CES le bec verseur, DIRECTIVES DE SÉCURITÉ IMPORTANTES assurez-vous LORSQUE VOUS UTILISEZ L’APPAREIL : que vous tenez fermement l’onglet... -
Page 23: Utilisation Du Gobelet Nutri Ninja
Ajoutez les ingrédients dans le gobelet Nutri Ninja sens contraire des aiguilles d’une montre. REMARQUE : Veillez à ne pas trop remplir le gobelet! Mettez le couvercle à... -
Page 24: Assemblage Du Bol Du Robot Culinaire Nutri Ninja
Assemblage du bol du robot culinaire Nutri Ninja 2 en 1 WARNING: NE TENTEZ PAS d’assembler ou de mettre en marche le bloc-moteur, le couvercle avec engrenages et les lames hors des récipients. MISE EN GARDE : Si vous transvidez un mélange par le bec verseur, assurez-vous que vous tenez fermement l’onglet du couvercle avec votre pouce afin de maintenir le... -
Page 25: Utilisation Des Lames De Pétrissage Simple Et Double
(Fig. 11, Fig. 12) IMPORTANT: Ne faites pas fonctionner l’appareil à vide. Une fois le mélange terminé et les lames immobilisées, Déposez le bol du robot culinaire Nutri Ninja 2 en 1 enlevez le bloc-moteur Nutri Ninja 2 en 1 et le couvercle sur une surface propre, sèche et de niveau. -
Page 26: Utilisation Du Bol Hachoir À Emboîter Nutri Ninja
Utilisation du bol hachoir à emboîter Nutri Ninja 2 en 1 (compris ou non) Assurez-vous d’aligner l’onglet du bol hachoir avec le bec verseur du bol de robot culinaire; autrement, le bol hachoir ne fonctionnera pas. Fig. 13 Fig. 14 Fig. -
Page 27: Utilisation Du Récipient Mélangeur Nutri Ninja
Utilisation du récipient mélangeur Nutri Ninja 2 en 1 (compris ou non) WARNING: NE TENTEZ PAS d’assembler ou de mettre en marche le bloc-moteur, le couvercle avec engrenages et les lames hors des récipients. MISE EN GARDE : Si vous transvidez un mélange par le bec verseur, assurez-vous que vous tenez fermement l’onglet du couvercle avec votre pouce afin de maintenir le... - Page 28 Utilisation du récipient mélangeur Nutri Ninja 2 en 1 – suite (compris ou non) Fig. 19 Fig. 20 Pour de meilleurs résultats, utilisez de brèves « IMPULSIONS » en appuyant brièvement (pendant une seconde) à plusieurs reprises sur le bouton jusqu’à l’obtention de la consistance désirée.
-
Page 29: Nettoyage Et Entretien
Sel et poivre Aérosol de cuisson antiadhésif Instructions : 1. Mettez le bifteck dans le gobelet Nutri Ninja de 500 ml. 2. Appuyez sur le gobelet et maintenez-le enfoncé pendant 15 secondes consécutives. Préparez une seule galette et assaisonnez-la avec le sel et le poivre. -
Page 30: Guide De Dépannage
Lorsque les lames s’immobilisent, enlevez le bloc-moteur et le couvercle à engrenages. Retirez une quantité d’aliments. mélangeur ou du bol de robot culinaire Nutri Ninja • N’utilisez pas de la glace qui est fondue ou qui est restée hors du congélateur. -
Page 31: Garantie Et Enregistrement
GARANTIE LIMITÉE D’UN AN EURO-PRO Operating LLC garantit ce produit contre toute défectuosité de matériel ou de main-d’œuvre pour une période d’un (1) an à compter de la date d’achat, dans le cadre d’une utilisation domestique normale, en vertu des conditions, exclusions et exceptions suivantes. - Page 32 1-877-646-5288 www.ninjakitchen.com Copyright / Droit d’Auteur © Euro-Pro Operating LLC 2014 Euro-Pro, Nutri Ninja, Sip & Seal and Ninja are trademarks of Euro-Pro Operating LLC. Euro-Pro, Nutri Ninja, Sip & Seal et Ninja sont des marques de commerce d’Euro-Pro Operating LLC.
Need help?
Do you have a question about the QB3000C and is the answer not in the manual?
Questions and answers