
Related Manuals for TypeS BT57131


Summary of Contents for TypeS BT57131
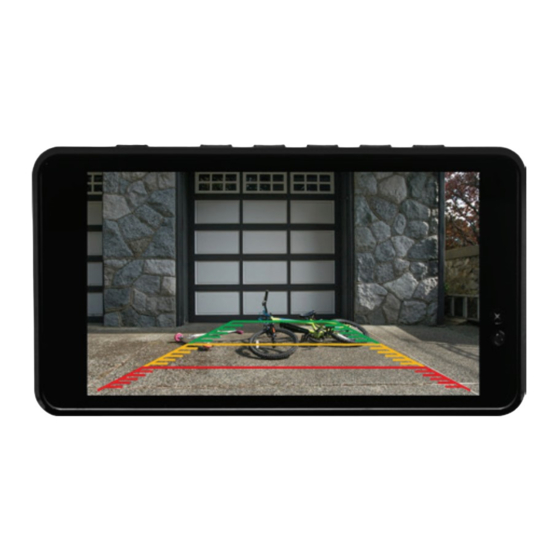
- Page 1 HD QUICK-CONNECT WIRELESS BACKUP CAM With 5” Hand Wave Activated Monitor ITM. / ART. 296743 WP ITM. BT57131 Care & Use Instructions Important, retain for future reference: Read carefully...
-
Page 2: Table Of Contents
TABLE OF CONTENTS 1. Introduction ....................................1 2. Package Contents ...................................2 3. Product Specifications ................................3 4. Product Dimension ................................3 5. Installation Guide ..................................4 6. Settings and Operation ..............................15 7. Safety Information ................................21 8. Maintenance & Warranty ..............................24... -
Page 3: Introduction
Please read all of the installation instructions carefully before installing the product. Improper installation will void manufacturer’s warranty. The installation instructions do not apply to all types of vehicles, and are written as guidelines to assist in installing the system. -
Page 4: Package Contents
QIG-57131UK_V1 Product code / Code de produit / C—digo del producto : BT57131 12. 8 x Spacer (Optional) Register this product within 30 days of purchase to receive 1 FREE YEAR of additional warranty coverage (beyond the standard one year warranty), along with special product offers and announcements. -
Page 5: Product Specifications
3. PRODUCT SPECIFICATIONS 1. Frequency: 2.4GHz 2. Operating Voltage: Monitor - DC 12V/24V, Backup Cam - DC 5V 3. Operating Temperature: -10ºC~50ºC (14ºF~122ºF) 4. Camera Water Resistance: IP65 Rating 5. Battery Capacity: 3350mAh 6. Maximum Signal Range: 10 Meters/33 Feet (without interference or obstruction) 4. -
Page 6: Installation Guide
5. INSTALLATION GUIDE DASH MONITOR INSTALLATION 1. Place Magnetic Windshield Mount on the windshield and adjust to your desired position. 2. Attach the Dash Monitor on to the Magnetic Windshield Mount. 3. Remove the Dash Monitor protective overlay. 4. To power the Dash Monitor: Take the 12V/24V Power Adapter and plug adapter into the right side of the Dash Monitor. - Page 7 HD QUICK-CONNECT WIRELESS BACKUP CAM INSTALLATION OPTION A - UK/EU LICENSE PLATE WITH SCREWS: Peel off 1. Peel off the adhesive tape backings from the Backup Camera and mount the license plate on the Backup Camera. 2. Align the holes on the license plate to the holes of the rear bumper and tighten the screws.
- Page 8 3. Insert spacers when tightening the screws in order to level the space between the license plate and the rear bumper. Spacer OPTION A - DONE...
- Page 9 OPTION B - UK/EU LICENSE PLATE WITH ADHESIVE MOUNTING TAPES: Peel off 1. Peel off the adhesive tape backings from the Backup Camera and mount the license plate on the Backup Camera. 2. Attach 4 double sided mounting tapes (4.5mm thickness) to the back of the Backup Camera, and 4 double sided mounting tapes (6mm thickness) to the back of the...
- Page 10 OPTION C - UK/EU LICENSE PLATE WITH LICENSE PLATE FRAME: 1. Open the license plate frame and remove the license plate. 2. Unscrew and remove the license plate frame from the rear bumper.
- Page 11 3. Put the license plate back into the license plate frame. Peel off 4. Peel off the adhesive tape backings from the Backup Camera and mount the license plate frame on the Backup Camera.
- Page 12 5. Attach 4 double sided mounting 6 m m tapes (4.5mm thickness) to the 4 . 5 m m back of the Backup Camera, and 6 m m 6 double sided mounting tapes 4 . 5 m m 6 m m (6mm thickness) to the back of the 6 m m 4 .
- Page 13 OPTION D - UK/EU LICENSE PLATE WITH LIMITED SPACE AT THE TOP OF LICENSE PLATE: 1. Unscrew and remove the Solar Panel Mounting Plate and Backup Camera Mounting Plate. 2. Position the Backup Camera below the Solar Panel. Use the provided Join Metal Plate Join Metal Plate to attach them together.
- Page 14 3. Attach the Solar Panel Mounting Plate to the back and reinstall the 4 screws to the back of the Solar Panel. NOTE: Make sure you only attach the Solar Panel Mounting Plate NOT the Backup Camera Mounting Plate. 4. Peel off the adhesive tape backings from the Backup Camera and mount the license plate on the Backup Camera.
- Page 15 6 m m 6 m m 6 m m 6 m m 4 . 5 m m 6 m m 4 . 5 m m 6 m m 5. Attach double sided mounting tapes to the back of the license LICENSE PLATE plate according to the 2 figures on the left.
- Page 16 OPTION D WITH LICENSE PLATE - DONE OPTION D WITH LICENSE PLATE FRAME - DONE...
-
Page 17: Settings And Operation
6. SETTINGS AND OPERATION Power Menu Parking Aid Line / Enter Down Wake-up Button POWER ON/OFF • The Dash Color Monitor will automatically turn ON when it is connected to a power source. • Hold the Power button to turn ON/OFF the unit, if necessary. •... - Page 18 PAIRING The HD Quick-Connect Wireless Backup Cam included is already paired with the Monitor. If you can not see the Camera image, pair the Camera with the following steps: Power on the HD Quick-Connect Wireless Backup Cam To enter Pairing Mode, press and hold the Power Button under the camera for 5 seconds, or until the LED flashes continuously.
- Page 19 ROTATE CAMERA Press “MENU” Go to “Rotate Camera” by pressing “– “ Press “Parking Aid Line” to enter Press “+” or “-” to rotate screen direction Press “Parking Aid Line” to confirm and exit TO ADJUST BRIGHTNESS Press “MENU” Go to “Brightness” by pressing “– “ Press “Parking Aid Line”...
- Page 20 TO ADJUST CONTRAST Press “MENU” Go to “Contrast” by pressing “– “ Press “Parking Aid Line” to enter Press “+ “ or “– “ to adjust the contrast level Press “Parking Aid Line” to confirm and exit OPERATION TIME The Monitor’s parking view operation time will start to count down when you wake up the license plate camera.
- Page 21 MOTION DETECTION Motion detection range can help you adjust the detection distance between you and the monitor when you drive. You can also disable the function without disturbing you. Press “MENU” Go to “Motion Detection” by pressing “– “ Press “Parking Aid Line” to enter Press “+ “...
- Page 22 DISABLING / ENABLING STARTUP HELP The Startup Help message will appear by default each time you plug in your Monitor. To Disable or Enable this message, press and hold 3 seconds to either disable or enable the opening screen startup message. BACKUP CAM POWER / LED INDICATORS Power / Mode Status LED / Indicators...
-
Page 23: Safety Information
IMPORTANT SAFETY INSTRUCTIONS 1. SAVE THESE INSTRUCTIONS– This manual contains important safety and operating instructions of 12V Car charger for Model BT57131. 2. Before using the product, read all instructions and cautionary markings. 3. Do not expose car charger to rain, moisture, or snow. - Page 24 • Never depend on the HD Quick-Connect Wireless Backup Cam entirely when backing up. The image on the screen is different from actual conditions. Objects viewed in the Dash Monitor differ from actual distance because a wide-angle lens is used. Objects in the Dash Monitor will appear visually opposite than when viewed in the rear view and outside mirrors.
- Page 25 cover when cleaning dirt or snow from the cover. • The HD Quick-Connect Wireless Backup Cam has a water resistant construction. Do not detach, disassemble or modify it. This may cause incorrect operation. HD Quick-Connect Wireless Backup Cam is waterproof. •...
-
Page 26: Maintenance & Warranty
children are in the yard, driveway or parking lot playing near parked cars. • Roll down your window so you will be able to hear what is happening outside your vehicle. • Owners of SUVs, trucks, and vans need to take extra care to avoid hitting or running over a child. •... - Page 27 1. All repairs must be performed by Type S. 2. All warranty claims must be accompanied by a copy of the sales receipt or bill of sale. 3. The equipment must not have been altered or damaged through negligence, accident, improper operation, or failure to follow the product instructions for installation, use, or care.
- Page 28 ALL IMPLIED WARRANTIES, INCLUDING ANY IMPLIED WARRANTY OF MERCHANTABILITY OR FITNESS FOR A PARTICULAR PURPOSE. Type S and/or its affiliates do not guarantee or promise that the user of HD Quick-Connect Wireless Backup Cam will not be in an accident or otherwise not collide with an object and/ or person.
- Page 29 Solar Powered HD Quick-Connect Wireless Backup Cam With 5” Hand Wave Activated Monitor BT57131 Responsible Party: Type S 2975 Red Hill Ave., Ste. 100, Costa Mesa, CA 92626 Tel: 866-294-9244 This product fulfills the European Directives 2014/30/EU and 2011/65/EU This device should be disposed through your local electronic product recycling system –...
- Page 32 A Horizon Brands Company 2975 Red Hill Ave., Ste. 100, Costa Mesa, CA 92626 1.866.294.9244 | info@typesauto.com ©2019 Type S. All rights reserved. www.typesauto.com ML-57131UK_V1...
Need help?
Do you have a question about the BT57131 and is the answer not in the manual?
Questions and answers