Table of Contents
Advertisement
Quick Links
Advertisement
Table of Contents

Related Manuals for GOelectronic GOHD4K

Summary of Contents for GOelectronic GOHD4K
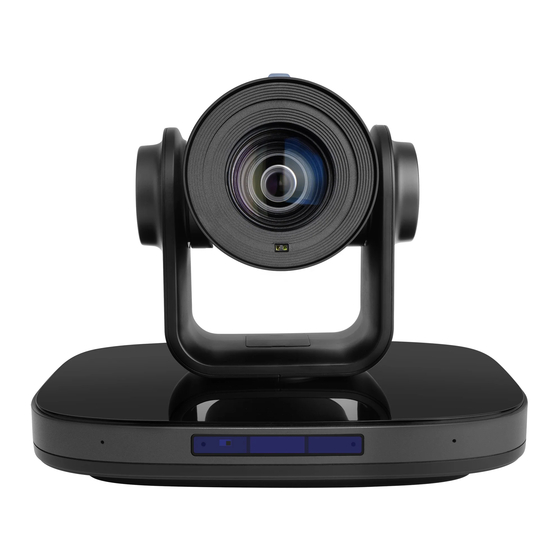
- Page 1 GOHD4K 4K 3G-SDI/HDMI/IP/USB PTZ Camera with 20x Zoom User Manual...
-
Page 2: Packing List
NOTE FEATURES Electric Safety Installation and operation must be in 4K Ultra HD accordance with national and local With a new generation Sony 1/1.8- electric and safety standards. Do not use inch, maximum 8.42 million pixels, any power supply other than the one high-quality UHD CMOS sensor, 4K originally supplied with this camera. -
Page 3: Product Specifications
Image Freeze Support PRODUCT Number of Preset SPECIFICATIONS Preset Accuracy 0.1° USB Features Camera Windows 7/8/10, HDMI: 4KP25, 4KP30, Operate System Mac OS X, Linux, Android 4KP50, 4KP60, 4KP59.94, Color System / YUY2 / MJPEG / H.264 / 4KP29.97, 1080P25, Compression H.265 1080P30, 1080P50,... - Page 4 use only 1 x RS232 IN: 8pin Min DIN, Max Distance: 30m, Protocol: VISCA / Pelco-D / Pelco-P HDMI Interface 1 x HDMI: Version 2.0 1 x RJ45: 10/100/1000M LAN(PoE+) Adaptive Ethernet Port. Interface It supports PoE+ USB Interface 1 x USB: Type-C 1 x 3G-SDI: BNC type, 3G-SDI Interface 800mVp-p, 75Ω.
-
Page 5: Quick Start
QUICK START 1) Verify that all connections are correct before powering on the camera. 2) Power the camera on via the switch on the rear of the unit. The power indicator on the front panel of the camera will illuminate. 3) After the camera is powered on, the pan-tilt mechanism will rotate the camera head to maximum positions, and then stop in the forward-facing position when initialization is complete. -
Page 6: Remote Control
2) 0-9 REMOTE Press numeric buttons 0-9 to set CONTROL and call preset positions. 3) * 4) PRESET To set a preset position press [PRESET] + a numeric button [0]- 5) HOME Press to return camera to home position. When accessing the camera’s on- screen menu, press to enter a sub-menu or confirm a selection. -
Page 7: Camera Osd Menu
(though freeze feature 12) AUTO TRACKING Buttons continues). To disable manual [F1] No function freeze press [#]+[*]+[F4]. [F2] No function “Unfreeze” will display in left [F3] Press to start AI Intelligent upper corner and disappear after Tracking. five seconds. [F4] Press to stop AI Intelligent Tracking. - Page 8 (Only available in Auto, AAE, and 7.2 EXPOSURE Bright modes) Move the cursor to the “Exposure” Meter: option and press the [HOME] button Options: Average, Center, Smart, Top to enter the Exposure page, as shown Iris: Camera Iris value in the figure below. Options: F1.8, F2.0, F2.4, F2.8, F3.4, F4.0, F4.8, F5.6, F6.8, F8.0, F9.6, F11.0, Close...
- Page 9 RG Tuning: Red Gain tuning Options: On, Off Options: -10 to +10 B&W-Mode: Black & White Mode (Only available in Auto mode) Options: On, Off BG Tuning: Blue Gain tuning Style: Options: -10 to +10 Options: Default, Norm, Bright, PC (Only available in Auto mode) Saturation: 7.5 P/T/Z...
- Page 10 Call Preset Speed: Preset pan/tilt Options: 4KP25, 4KP29.97, 4KP30, speed 4KP50, 4KP59.94, 4KP60, 1080P30, Options: 1 to 24 1080P25, 1080P50, 1080P60, Pre Zoom Speed: Preset zoom speed 1080P59.94, 1080P29.97, 1080I50, Options: 0 to 7 1080I60, 1080I59.94, 720P60, 720P59.94, 720P50 7.6 NOISE REDUCTION Auto Scan: Move the cursor to the “Noise Options: On, Off...
-
Page 11: Network Function
protocols) at the network interface will light P_P_Address: PELCO-P address up green within 5 seconds and Options: 0 to 31 the data indicator will flash (Only available in Auto, PELCO-P orange, indicating that protocols) physical connection Net Mode: camera has been completed. Options: Serial, Parallel Baudrate: 8.3 NETWORK CONNECTION... - Page 12 restart. Change IP Address: Step 1: Search the IP address of camera. Step 2: Select the camera IP you want to change. Step 3: Select the config dialog of upgrade applets. Step 4: Change the IP address, netmask and gateway, then click “Set”.
- Page 13 IE browser does not support H5. You will need to install the VLC plug-in. Visit website (http://www.videolan.org/vlc), 8.5.2 Setup Camera Dynamic DNS download and install the 32-bit media Set domain name to camera, setup player. Once installed, open the the parameter, then dynamic DNS can media player to view the camera access camera.
- Page 14 All pages include two menu bars: Real Time Monitoring (for displaying video image) Parameter Setup (function buttons) A. Video Monitoring Window Video viewing window must be the same as video resolution; the bigger the resolution is, the bigger the playing area is. Double click the viewing window to show full-screen.
- Page 15 2) Zoom menu within the IP interface. Zoom In and Zoom Out buttons C. Language Selection allow for a wide or close-up shot. 3) Focus Focus In and Focus Out buttons allow for fine manual focus adjustment if the camera has Select either “Chinese”, “English”...
- Page 16 5) Resolution 8.6.3 Image Settings First stream supports: 3840x2160, 1920x1080, 1280x720, 1024x576, 720x480, 720x408, 640x480, 640x360. Second stream supports: 720x480, 720x408, 640x480, 640x360, 480x320, 320x240. The higher the resolution, the clearer the image and the more network bandwidth used. 6) Bit Rate Adjust the maximum bit rate of the network video.
- Page 17 1) Audio Switch 8.6.6 Network Settings Enable Disable audio embedding 2) Audio Type Select audio type: AAC, G711A 3) Sample Rate Select sample rate: 44.1K, 48K 4) Bit Rate Select bit rate: 96K, 128K 5) Input Type LINE IN 6) Input Vol Select volume of audio 7) ADTS Options Enable / Disable ADTS...
- Page 18 of the camera. The default IP Enable / Disable ONVIF protocol address is 192.168.100.88. You control and ONVIF authorization. cannot change the Mac address. 7) Multicast Settings Enable / Disable the Multicast 2) Port Settings protocol. A. HTTP Port Adjust the Multicast address. This port is used for HTTP- (Default: 224.1.2.3) CGI control and for the web...
- Page 19 The correspondence between the camera RS232 INTERFACE and the Mini DIN pin: Camera Mini DIN 1.DTR 1.DTR 2.DSR 2.DSR 3.TXD 3.TXD 4.GND 4.GND 5.RXD 5.RXD 6.GND 6.GND 7.IR OUT 7.NC 8.NC 8.NC SERIAL Function COMMUNICATION CONTROL RS232 Communication Control The camera can be controlled via RS32.
-
Page 20: Troubleshooting
supported your MAINTENANCE hardware/software. TROUBLESHOOTING Image is shaky or vibrating 1. Check that the camera is mounted securely CAMERA MAINTENANCE horizontal, level surface. If camera will not be used for an 2. Check the building and any extended period of time, power supporting furniture down the camera via the switch... - Page 21 may not be set to the same IR address. Try each of the four camera select buttons on the remote. Serial communication does not control the camera 1. Verify that the RS-232/RS-485 cable is connected correctly and is using the proper pinout. 2.
- Page 22 PO Box 1864 Lake Oswego, OR 97035 customerservice@goelectronic.com 21 | G O H D 4 K M A N U A L...
Need help?
Do you have a question about the GOHD4K and is the answer not in the manual?
Questions and answers