Table of Contents
Advertisement
Available languages
Available languages
Quick Links
Advertisement
Table of Contents

Summary of Contents for SiCEP EV-D12W
- Page 1 EV-D12W Quick Start Guide www.sicep.it 22874.0...
- Page 2 Welcome Thank you for choosing SICEP. We are devoted to providing you easy smart home products. If you have problems using the product, please contact our service team before returning your product.
-
Page 3: Package Content
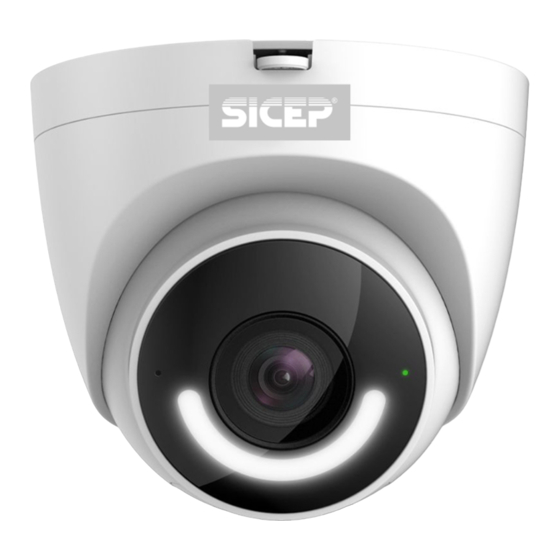
Package content Camera ×1 Mounting Plate ×1 Positioning Map ×1 Waterproof Connector ×1 Power Adapter ×1 Screw Package ×1 Quick Start Guide ×1 Camera introduction Build-in Mic LED Indicator Spotlight Lens... - Page 4 Micro SD Card Slot Reset Button Max. 256Gb Built-in Speaker Note: Press and hold the reset button for 10 s to reset the camera. Double-press the reset button to enable the camera hotspot. The pattern of the LED indicator is included in the following table. LED Indicator Status Device Status Powered o /LED turned o...
- Page 5 My Sicep Setup Setup WIFI Name Password Next Done...
-
Page 6: Ceiling Mounting
Ceiling Mounting Mounting Surface Positioning Map Expansion Bolt Mounting Plate Self-tapping Screw Camera Adjusting Angle: Wall Mount:... -
Page 7: Troubleshooting
Troubleshooting Problem Solution • Make sure that the network cable is connected well, and the NVR or switch The camera cannot work supports POE power supply. When the indicator light on the NVR or switch normally or start ashes, it means that the camera is powered up. •... - Page 8 EV-D12W Kurzanleitung www.sicep.it...
- Page 9 Willkommen Vielen Dank, dass Sie sich für SICEP entschieden haben. Wir sind bestrebt, einfachere Produkte für das intelligente Heim anzubieten. Wenn Sie Probleme bei der Verwendung des Produkts haben, wenden Sie sich bitte an unser Serviceteam.
- Page 10 Packungsinhalt Kamera×1 Montageschablone ×1 Montageschablone ×1 Wasserdichter Anschluss ×1 Netzteil ×1 Schraubenbeutel ×1 Kurzanleitung ×1 Einführung in die Kamera Integriertes LED-Anzeige Mikrofon Scheinwerfer Objektiv...
- Page 11 MicroSD-Kartensteckplatz Rücksetztaste Max. 256Gb Integrierter Lautsprecher Hinweis: Halten Sie die Rücksetz-/Kopplungstaste 10 Sekunden lang gedrückt, um die Kamera zurückzusetzen. Doppelklick Sie die Reset-Taste, um den Kamera-Hotspot zu aktivieren. The pattern of the LED indicator is included in the following table. LED Status Device Status Abgeschaltet/LED Ausgeschaltet...
- Page 12 My Sicep Setup Setup WIFI Name Password Next Done...
- Page 13 Deckenmontage Montage-Ober äche Montageschablone Dübel Montageplatte Selbstschneidende Schraube Kamera Einstellen des Blickwinkels: Wandmontage:...
-
Page 14: Fehlerbehebung
Fehlerbehebung Problem Lösungen Die Kamera funktioniert oder • Stellen Sie sicher, dass das Netzwerkkabel richtig angeschlossen ist und der startet nicht ordnungsgemäß NVR oder Switch Stromversorgung per POE unterstützt. • Das Infrarotlicht wird zum Objektiv re ektiert, sodass die Wirkung nicht gut Die IR-Wirkung ist nicht gut ist. -
Page 15: Guía De Inicio Rápido
EV-D12W Guía de inicio rápido www.sicep.it... - Page 16 Bienvenido Gracias por elegir SICEP Nuestra misión es proporcionar productos fáciles de usar para un hogar inteligente. Si tiene problemas usando el producto, por favor diríjase a nuestro equipo de atención al cliente antes de devolver su producto.
-
Page 17: Contenido Del Paquete
Contenido del paquete Plantilla de Conector a prueba Cámara ×1 Placa de montaje ×1 posicionamiento ×1 de agua ×1 Alimentador ×1 Juego de tornillos ×1 Guía de inicio rápido ×1 Introducción a la cámara Micrófono Indicador LED incorporado Foco Lente... - Page 18 Ranura de la tarjeta microSD Botón de reinicio Màx. 256Gb Altavoz integrado Nota: Mantenga pulsado el botón de reinicio/emparejamiento durante 10 segundos para reiniciar la cámara. Pulse dos veces el botón de reset para activar el hotspot de la cámara. The pattern of the LED indicator is included in the following table.
- Page 19 My Sicep Setup Setup WIFI Name Password Next Done...
-
Page 20: Montaje En El Techo
Montaje en el techo Super cie de montaje Plantilla de posicionamiento Taco de expansión Placa de montaje Tornillo autorroscante Cámara Ángulo de ajuste: Montaje mural:... -
Page 21: Solución De Problemas
Solución de problemas Problema Solución La cámara no funciona con • Asegúrese de que el cable de red esté bien conectado y que el NVR o el normalidad o no se inicia interruptor acepten la alimentación POE. • L luz infrarroja se re eja en la lente, por lo que el efecto no es bueno. Ajuste El efecto IR no es bueno el ángulo de la lente para evitar oclusiones alrededor de la lente. -
Page 22: Guide De Démarrage Rapide
EV-D12W Guide de démarrage rapide www.sicep.it... - Page 23 Bienvenue Merci d’avoir choisi SICEP. Nous nous consacrons à fournir des produits pour la maison intelligente plus faciles à utiliser. Si vous rencontrez des di cultés lors de l’utilisation du produit, veuillez contacter notre équipe technique avant de renvoyer votre produit.
-
Page 24: Contenu De L'emballage
Contenu de l’emballage Caméra ×1 Plaque de montage ×1 Patron d’installation ×1 Connecteur étanche ×1 Adaptateur Guide de démarrage Jeu de vis ×1 d’alimentation ×1 rapide ×1 Introduction à la caméra Microphone Indicateur intégré lumineux Lampe Objectif... - Page 25 Emplacement de la Bouton de réinitialisation carte microSD Max. 256 Go Haut-parleur intégré Remarque: Appuyez et maintenez la touche de réinitialisation/couplage pendant 10 secondes pour réinitialiser la caméra. Appuyez deux fois sur le bouton de réinitialisation pour activer le point d'accès de la caméra. The pattern of the LED indicator is included in the following table.
- Page 26 My Sicep Setup Setup WIFI Name Password Next Done...
-
Page 27: Montage Au Plafond
Montage au plafond Super cie de montaje Patron d’installation Cheville à expansion Plaque de montage autotaraudeuse Camera Réglage de l’angle: Montage mural:... -
Page 28: Dépannage
Dépannage Problème Solution La caméra ne peut ni • Véri ez que le câble réseau est bien connecté et que le NVR ou le démarrer ni fonctionner commutateur prend en charge l’alimentation PoE. normalement L’e et IR n’est pas de •... -
Page 29: Guida Rapida
EV-D12W Guida Rapida www.sicep.it... - Page 30 Benvenuti Grazie per aver scelto SICEP. Il nostro obiettivo è quello di fornire prodotti per la domotica più facili da utilizzare. In caso di problemi durante l’utilizzo del prodotto, si prega di contattare il nostro team di assistenza prima di restituire il prodotto.
-
Page 31: Contenuto Della Confezione
Contenuto della confezione Dima di Telecamera ×1 Piastra di montaggio ×1 Waterdichte Connector ×1 posizionamento ×1 Alimentatore ×1 Confezione di viti ×1 Guida introduttiva ×1 Introduzione alla telecamera Microfono Indicatore LED integrato Ri ettore Obiettivo... - Page 32 Slot per scheda Micro SD Tasto di ripristino Max 256 Gb Altoparlante integrato Nota: Tenere premuto per 10 secondi il pulsante Reimposta/Associa per reimpostare la telecamera. Premere due volte il bottone di reset per abilitare l'hotspot della telecamera. The pattern of the LED indicator is included in the following table. Stato LED Stato dispositivo Spento/LED spento...
- Page 33 My Sicep Setup Setup WIFI Name Password Next Done...
- Page 34 Montaggio a so tto Montaggio a parete Dima di posizionamento Bullone di espansione Piastra di montaggio Vite auto lettante Telecamera Regolazione dell'angolazione: Montaggio a parete:...
-
Page 35: Risoluzione Dei Problemi
Risoluzione dei problemi Problema Soluzione La telecamera non funziona • Accertarsi che il cavo di rete sia collegato in modo corretto e che l’NVR o lo o non si avvia normalmente switch supportino l’alimentazione POE. • La luce a infrarossi si ri ette sull’obiettivo e il risultato non è buono. L’e etto IR non è... - Page 36 EV-D12W Snelstartgids www.sicep.it...
- Page 37 Welkom Bedankt dat u voor SICEP heeft gekozen. Onze toewijding is om u eenvoudige Smart Home producten te bieden. Als u problemen ervaart met het gebruik van uw product, neem dan eerst contact op met onze service team.
-
Page 38: Inhoud Verpakking
Inhoud verpakking Camera ×1 Montageplaat ×1 Montageoverzicht ×1 Connettore impermeabile ×1 Voedingsadapter ×1 Schroevenset ×1 Snel startgids ×1 Introductie camera Geïntegreerde Led-indicator microfoon Spot Lens... - Page 39 Sleuf voor micro-SD-kaart Reset-Knop Max. 256Gb Ingebouwde luidspreker Opmerking: Druk de reset-/koppelknop 10 seconden in om de camera te resetten. Druk de resetknop 2x achter elkaar om de cameras hotspot te activeren. The pattern of the LED indicator is included in the following table. Ledstatus Apparaatstatus Uitgeschakeld/led uit...
- Page 40 My Sicep Setup Setup WIFI Name Password Next Done...
- Page 41 Plafondbevestiging Montageoppervlak Kaart installatiepositie Expansiebout Montageplaat Zelftappende schroef Camera De hoek aanpassen: Wandmontage:...
- Page 42 Probleemoplossing Probleem Oplossing De camera kan niet normaal • Zorg dat de netwerkkabel correct is aangesloten en dat de NVR of switch de functioneren of opstarten POE-voeding ondersteunt. Het infraroode ect is • Het infraroodlicht wordt weerkaatst op de lens, waardoor het e ect niet goed niet goed is.
-
Page 43: Guia Rápido
EV-D12W Guia rápido www.sicep.it... - Page 44 Bem-vindo Obrigado por escolher a SICEP. Estamos empenhados em fornecer produtos inteligentes e simpli cados para o lar. Se tiver problemas ao utilizar o produto, contacte a nossa equipa de assistência antes de devolver o produto.
-
Page 45: Conteúdo Da Embalagem
Conteúdo da embalagem Mapa de Conector Câmara ×1 Placa de montagem ×1 posicionamento ×1 impermeável ×1 Adaptador Pacote de parafusos ×1 Snel startgids ×1 de energia ×1 Apresentação da câmara Microfone Indicador LED incorporado Foco Objetiva... - Page 46 Ranhura para cartão micro SD Botão "Repor" Màx 256Gb Caixa de som embutida Nota: Prima sem soltar o botão Reset/Pair durante 10 segundos para repor a câmara. Pressione duas vezes o botão de rede nição para ativar o ponto de acesso da câmera. The pattern of the LED indicator is included in the following table.
- Page 47 My Sicep Setup Setup WIFI Name Password Next Done...
- Page 48 Montagem no teto Superfície de montagem Mapa de posicionamento Parafuso de expansão Placa de montagem Parafuso autoperfurante Câmara Ajustar o ângulo: Montagem em parede:...
- Page 49 Solução de problema Problema Solução A câmara não funciona • Certi que-se de que o cabo de rede está bem ligado, e se o NVR ou comutador normalmente ou não inicia suporta a alimentação tipo POE. O efeito de IV não é •...
- Page 50 Sicep S.r.l. Via Calabria, 14 www.sicep.it 50052 Certaldo (FI) - ITALY sicep@sicep.it...
Need help?
Do you have a question about the EV-D12W and is the answer not in the manual?
Questions and answers