
Subscribe to Our Youtube Channel
Related Manuals for Douglas Battery LEGACY DL Series


Summary of Contents for Douglas Battery LEGACY DL Series
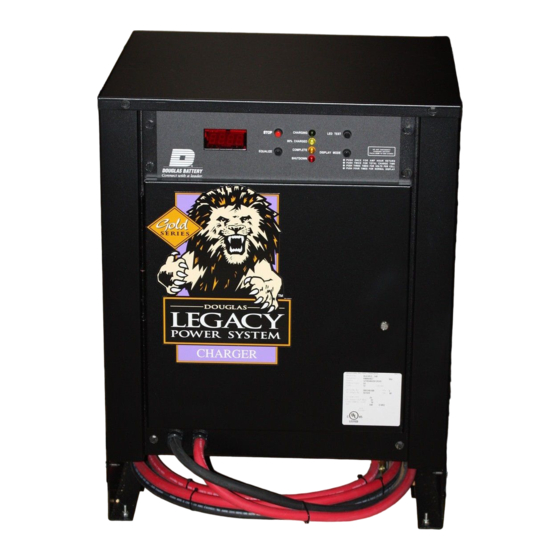
- Page 1 LEGACY and LEGACY GOLD DL/DLG SERIES Ferroresonant Industrial Battery Charger Installation and Operating Instructions DOUGLAS BATTERY MANUFACTURING COMPANY 500 BATTERY DRIVE WINSTON-SALEM, NORTH CAROLINA 27107 FM1219 REV F, 1/07...
-
Page 2: Table Of Contents
TABLE OF CONTENTS PAGE SECTION SAFETY INSTRUCTIONS SECTION RECEIPT AND INSPECTION OF THE CHARGER SECTION DESCRIPTION OF OPERATION SECTION CONTROL FEATURES SECTION INSTALLATION SECTION OPERATING PROCEDURE SECTION CHARGER CABINETS SECTION MAINTENANCE (Input Voltage Changeover) SECTION TROUBLESHOOTING GUIDE SECTION SCHEMATIC DIAGRAMS... - Page 3 IMPORTANT SAFETY INSTRUCTIONS INSTRUCTIONS IMPORTANTES CONCERNANT LA SECURITE ********************************************************************* SAVE THESE INSTRUCTIONS. THIS MANUAL CONTAINS IMPORTANT SAFETY AND OPERATING INSTRUCTIONS. CONSERVER CES INSTRUCTIONS. CE MANUEL CONTIENT DES INSTRUCTIONS IMPORTANTES CONCERNANT LA SECURITE ET LE FONCTIONNEMENT. ********************************************************************* WORKING IN THE VICINITY OF A LEAD-ACID BATTERY IS DANGEROUS. BATTERIES GENERATE EXPLOSIVE GASSES DURING NORMAL BATTERY OPERATION.
-
Page 4: Description Of Operation
SECTION 2 RECEIPT AND INSPECTION Upon receipt of the Battery Charger the information on the shipping carton should be checked against your order. Any discrepancies should be reported to the nearest authorized representative. Whenever possible, move the charger to the installation site before uncrating. - Page 5 4.6) Automatic 12-hour "REFRESH" charge adds a top off charge to a fully charged battery. The charger will start a “refresh” charge 12 hours after a normal charge complete has been reached, assuming that the battery was not disconnected during that time. The charger will automatically start charging the battery and will charge until dv/dt-di/dt is reached.
- Page 6 4.13) LED Indicators 1. “CHARGING” - charger is charging the battery 2. “80%” - the battery voltage is greater than 2.37 vpc. 3. “CHARGE COMPLETE” - the charge cycle has been terminated normally. -If flashing (1/2 second on every 4 sec.), the charger is set to equalize at the end of the charge cycle.
-
Page 7: Installation
SECTION 5 INSTALLATION 5.1) PHYSICAL LOCATION: Charging areas should be clean and dry. The temperature of the charging room should be between 32°F (0°C) and 77°F (25°C), with occasional and brief periods of ambient temperature as high as 104°F (40°C). Combustible materials, open flames and smoking should not be permitted near or in the charging area. -
Page 8: Operating Procedure
5.4) OUTPUT POWER CONNECTION: The charger is normally furnished with an output charge plug or receptacle. Verify that the connectors on both the battery and the charger are correct. Verify that when connected, the positive polarity (red) of the charger is connected to the positive terminal of the battery. - Page 9 6.2.3) Locate the DELAY START thumbwheel switch behind the front panel at the bottom of the control board. Adjust the DELAY START thumbwheel switch until the NUMBER INDICATOR on the switch yields the number of delay hours desired. 6.2.4) Close and secure the cabinet door. 6.2.5) Apply AC power to the LEGACY AND LEGACY GOLD SERIES charger.
- Page 10 6.4.1) CHARGE COMPLETED TERMINATION occurs when a battery reaches full charge. The LEGACY AND LEGACY GOLD control monitors the battery charge characteristics. The control utilizes di/dt current compensation to obtain an accurate battery voltage charging slope, dv/dt measurement. Once the control has verified that the battery charge slope has reached the predetermined value for full charge, the charge is terminated automatically.
- Page 11 6.7) THREE-HOUR EQUALIZE CYCLE: 6.7.1) A 3-hour AUTOMATIC EQUALIZATION cycle will occur every 5 charging cycle when this feature is enabled. A cycle is counted only if 1 hour or more time is required to reach 80% charged from charge start. To enable, set DIP Sw 5 to OFF (DLG) or remove W1 (DL).
-
Page 12: Charger Cabinets
SECTION 7 CHARGER CABINETS SINGLE PHASE THREE PHASE... -
Page 13: Maintenance (Input Voltage Changeover)
SECTION 8 MAINTENANCE ******************************** IMPORTANT ******************************* BEFORE PERFORMING ANY MAINTENANCE ON THE CHARGER: A) If a battery is being charged, terminate the charge by pressing the STOP button. B) Disconnect the battery from the charger. C) Remove AC power from the charger. D) Lock and tag unit out of service. - Page 14 NOTE: THREE PHASE UNITS WILL CONTAIN EITHER TWO OR THREE TRANSFORMERS. BE SURE TO MATCH THE CORRECT SCHEMATIC WITH THE TRANSFORMER CONFIGURATION OF YOUR PARTICULAR UNIT. 8.2.2) VOLTAGE CHANGEOVER INSTRUCTIONS: Manually terminate the charging battery by pressing the STOP button and disconnect battery from charger, if charger was in charge mode.
- Page 15 FIGURE 8A AC VOLTAGE SELECTOR BLOCKS 120 / 240 VAC SINGLE PHASE MODELS ONLY ************************************************************************ FIGURE 8B AC VOLTAGE SELECTOR BLOCKS 208/240/480 VAC SINGLE PHASE AND 3 TRANSFORMER THREE PHASE MODELS ONLY NOTE: FOR 3 PHASE ALL THREE BLOCKS MUST BE SET IDENTICALLY ************************************************************************ FIGURE 8C AC VOLTAGE SELECTOR BLOCKS...
- Page 16 FIGURE 8D AC VOLTAGE SELECTOR BLOCKS 220/380/440 VAC SINGLE PHASE AND 3 TRANSFORMER THREE PHASE MODELS ONLY NOTE: FOR 3 PHASE ALL THREE BLOCKS MUST BE SET IDENTICALLY ********************************************************************** FIGURE 8E AC VOLTAGE SELECTOR BLOCKS 240/415 VAC SINGLE PHASE MODELS ONLY ************************************************************************ FIGURE 8F AC VOLTAGE SELECTOR BLOCKS...
- Page 17 FIGURE 8G AC VOLTAGE SELECTOR BLOCKS 208/240/480 VAC THREE PHASE 2 TRANSFORMER MODELS ONLY ************************************************************************ FIGURE 8H AC VOLTAGE SELECTOR BLOCKS 220/380/440 VAC THREE PHASE 2 TRANSFORMER MODELS ONLY *********************************************************************** FIGURE 8I AC VOLTAGE SELECTOR BLOCKS 240/415 VAC THREE PHASE 2 TRANSFORMER MODELS ONLY...
- Page 18 FIGURE 8J VOLTAGE SELECTION ON PRIMARY SIDE OF CONTROL TRANSFORMER **NOTE: OTHER MODELS ARE SIMILAR IN CONFIGURATION 8.2.3) CHARGING CURRENT START & FINISH RATE ADJUSTMENT: ******************************* WARNING ********************************* HIGH VOLTAGES EXIST WITHIN THE CHARGER, WHICH CAN CAUSE SEVERE INJURY OR DEATH.
-
Page 19: Troubleshooting Guide
Verify the proper connection of each Ferroresonant Transformer to its respective Capacitor. Each Ferroresonant Transformer should be tapped the same for proper operation. Close and secure the charger cabinet. Connect the AC input line to the AC source. FIGURE 8K FERRORESONANT TRANSFORMER CAPACITOR WINDING SECTION 9 TROUBLESHOOTING GUIDE... - Page 20 Measure the Control Transformer secondary voltage across terminals 5&7. The AC voltage should be approximately (18 to 20) volts rms. If no voltage is measured, then the Control Transformer is defective and should be replaced. If the measured voltage is extremely high or low, verify that the AC line input is connected to the proper terminals of the Control Transformer.
Need help?
Do you have a question about the LEGACY DL Series and is the answer not in the manual?
Questions and answers