Table of Contents
Advertisement
Quick Links
Advertisement
Table of Contents

Summary of Contents for Alloy Home MH4
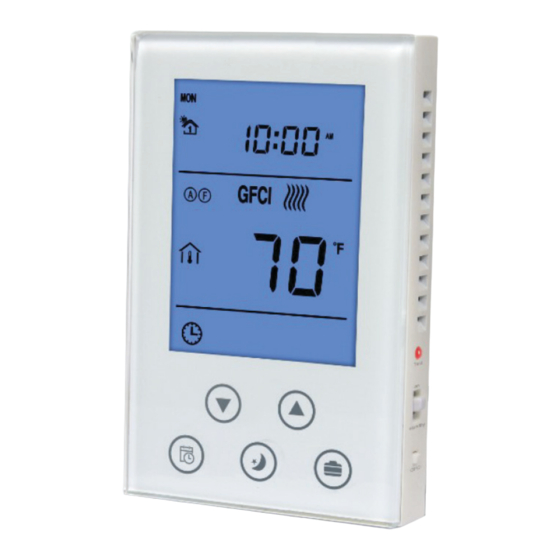
- Page 1 Electrical Heating Thermostat...
-
Page 2: Specification
Electrical Heating Thermostat SPECIFICATION • Power supply: AC120V/AC240V, 60Hz • Max output: 1800W at 120AC ; 3600W at 240AC • Self-consumption: <2W • Temp. format: ºC /ºF ; Time format: 12h / 24h • Z-Wave frequency: 908.42MHz, 941.42MHz or other customized frequency •... -
Page 3: Installation And Wiring
INSTALLATION & WIRING Location: Indoor installation recommended, approximately 4.5’ to 5’ above the floor so as to accuratley asses the average room temperature. It should be away from direct sunlight, any cover or any heat source to avoid an inaccurate reading for temperature control. CAUTION: Cut off power supply at circuit breaker or fuse before installation to avoid fire, shock or death! Step 1: Separate the device with a flat-head screwdriver into two parts: the display panel and the bottom case. - Page 4 Note: Setback (terminals 3 & 4): the input terminal controlled by remote; one terminal con- nects to the internal power source with a 10K resistor, the other terminal connects to the internal ground wire. Relout (terminals 5 & 6): the output terminal controlled by remote; inside circuit is a OC output, it can drive a relay that below 24V directly.
-
Page 5: Operation
OPERATION On/Off Operation • ON: When it displays OFF, slide up the ON/OFF button to turn it on. Local time, the corresponding temperature, working mode and output status will be displayed on the screen. • OFF: In normal working interface, slide down the ON/OFF button to turn it off. It will display OFF on the screen and all outputs will be closed. - Page 6 or delay for 10s without any operation to save all the values and return to the normal working interface automatically. During setting, press button at any time, which will return to the normal working interface and the values will be saved. Working Mode Setting •...
- Page 7 Check the Temperature Press buttons simultaneously. The displayed temperature will be switched between the room temp and floor temp Keypad Lock Press buttons simultaneously to lock the keypad. The lock icon displays on the screen. While the keypad is locked, you cannot make any changes. Press buttons simultaneously to unlock the keypad.
- Page 8 screen. When the detected indoor temperature ≥ the set temperature, heating turns off and the icon disappears. • Room Temperature Control, Floor High Temperature Limit Mode If the icon displays on the screen, it indicates the system is in Room Temperature Control, Floor High Temperature Limit Mode.
- Page 9 Configuration of User Parameters (Hidden Menu) In the shutdown interface, press simultaneously to enter into the param- eters menu. Then, if applicable, input password 1234 using “Up” and “Down” buttons. Press to switch, then press the “Confirm” button to enter into the setting interface: Parameter Default Range...
-
Page 10: Troubleshooting
Parameter Default Range Note Floor Protection Temp 5°C (9°F) 0.5~10°C Backlash Value (01~18°F) Remote Control Mode 16.5°C 5~37°C Temp Setting (62°F) (41~99°F) Factory Reset 0~99 Set to 55 then press S3 to confirm Factory Reset Heating Temp 0-99 Increasing Speed Celsius/Fahrenheit OC/OF OC: Celsius... - Page 11 Problem Solution Heat occurs at wrong time Check the current time and schedule are properly set at AM or Error EEE Check floor sensor resistance. Change if out of range FCC Warning (Part 15.21) (USA only) Changes or modifications not expressly approved by the party responsible for compli- ance could void the user’s authority to operate the equipment.
- Page 12 Home 1 YEAR LIMITED WARRANTY We warrant this product to be free from defects in material and workman- ship under normal and proper use for one year from purchase date of the original purchaser. We will, at its option, either repair or replace any part of its products that prove defective by reason of improper workmanship or materials.
Need help?
Do you have a question about the Home MH4 and is the answer not in the manual?
Questions and answers