Advertisement
Quick Links
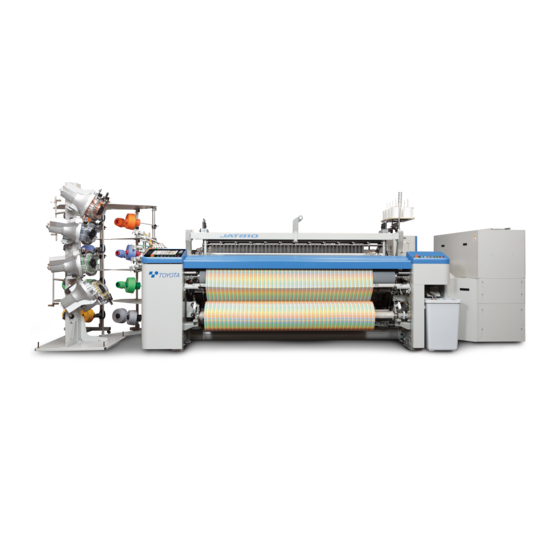
TOYOTA AIR JET WEAVING MACHINE
Thank you for purchasing the JAT810 Air Jet Weaving Machine.
This installation guide describes the work required for your weaving machines from their delivery through installation,
including necessary preparations before starting production.
Make preparations according to the time schedule as instructed in this guide so that you can have everything ready when
our service personnel arrive. This will eliminate wasted time and efforts. If preparations are not completed, our service
personnel will have to leave and come back again at a later date.
If you have any questions concerning the installation, please contact us at the following locations:
HEAD
OFFICE:
Notice: Specifications, operating instructions, and dimensions in this manual are subject to change for improvements
without prior notice.
TOYOTA shall take no responsibility for loss, damage, expense or claims for bodily injury or property damage arising
from incorrect usage which is not in accordance with the instructions given in this manual.
Please also understand that we will not be held responsible for the result of operating this machine.
Model JAT810
Profile Reed System
INSTALLATION GUIDE
TOYOTA INDUSTRIES CORPORATION
TEXTILE MACHINERY DIVISION
1, Toyodacho 2-chome, Kariya-shi, Aichi, 448-8671 JAPAN
PHONE: +81 566 27 5316
FACSIMILE: +81 566 27 5301
(FIRST EDITION)
Advertisement

Related Manuals for Toyota JAT810


Summary of Contents for Toyota JAT810
- Page 1 Notice: Specifications, operating instructions, and dimensions in this manual are subject to change for improvements without prior notice. TOYOTA shall take no responsibility for loss, damage, expense or claims for bodily injury or property damage arising from incorrect usage which is not in accordance with the instructions given in this manual.
- Page 2 This manual uses the following symbols: , ATTENTION. symbol is used in this manual, alerting you to a situation that might cause serious injury or death to the worker if he or she does not follow the instructions in this manual necessary to avoid any dangers in the machinery.
- Page 3 Contents OUTLINE OF INSTALLATION WORK ㌀ ㌀ ㌀ ㌀ ㌀ ㌀ ㌀ ㌀ ㌀ ㌀ ㌀ ㌀ ㌀ ㌀ ㌀ ㌀ ㌀ ㌀ ㌀ ㌀ ㌀ ㌀ ㌀ ㌀ ㌀ ㌀ ㌀ ㌀ ㌀ ㌀ ㌀ ㌀ ㌀ ㌀ ㌀ ㌀ ㌀ ㌀ ㌀ ㌀ ㌀ ㌀ ㌀ ㌀ ㌀ ㌀ ㌀ ㌀ ㌀ ㌀ ㌀ ㌀ ㌀ ㌀ ㌀ ㌀ ㌀ ㌀ ㌀ ㌀ ㌀ ㌀ ㌀ ㌀ ㌀ ㌀ ㌀ ㌀ ㌀ ㌀ ㌀ ㌀ ㌀ ㌀ ㌀ ㌀ ㌀ ㌀ ㌀ ㌀ ㌀ ㌀ ㌀ ㌀ ㌀ ㌀ ㌀ ㌀ ㌀ ㌀ ㌀ ㌀ ㌀ ㌀ ㌀ ㌀ ㌀ ㌀ S.
- Page 4 ㌀ ㌀ ㌀ ㌀ ㌀ ㌀ ㌀ ㌀ ㌀ ㌀ ㌀ ㌀ ㌀ ㌀ ㌀ ㌀ ㌀ ㌀ ㌀ ㌀ ㌀ ㌀ ㌀ ㌀ ㌀ ㌀ ㌀ ㌀ ㌀ ㌀ ㌀ ㌀ ㌀ ㌀ ㌀ ㌀ ㌀ ㌀ ㌀ ㌀ ㌀ ㌀ ㌀ ㌀ ㌀ ㌀ ㌀ ㌀ ㌀ ㌀ ㌀ ㌀ ㌀ ㌀ ㌀ ㌀ ㌀ ㌀ ㌀ ㌀ ㌀ ㌀ ㌀ ㌀ ㌀ ㌀ ㌀ ㌀ ㌀ ㌀ ㌀ ㌀ ㌀ ㌀ ㌀ ㌀ ㌀ [3] TMS Scanner (TOYOTA MONITORING SYSTEM SCANNER) ㌀...
- Page 5 OUTLINE OF INSTALLATION WORK OUTLINE OF INSTALLATION WORK Items marked with a box □ are jobs which you should do. Use the list given below as a check list. 1. Preparations for Introducing the Machine Complete the following preparations: □ Building construction and floor work (Irregularity in the floor levelness: 5 mm or less, Surface irregularities of the floor where the legs of the machine are to be positioned: 1 mm or less) □...
- Page 6 Any incorrect usage could possibly result in a serious bodily injury, in the worst case it could cause death, and/or substantial property damage. TOYOTA has done everything possible to assure optimum safety. However, it cannot be completed without your understanding and efforts.
- Page 7 S. SAFETY [1.1] Rules for Installation Work 1 Before Installation Check the safety rules and the workmanship standards for the plant. Make sure that all personnel involved know the nature of the job and the installation procedure, and agree as to the best way to get them done.
- Page 8 S. SAFETY 2 During Installation General points for installation work (1) Always wear a helmet whenever installation is being carried out at the same time as other jobs, such as construction and piping. (2) Always wear gloves whenever there is the possibility of injuring hands or fingers.
- Page 9 S. SAFETY Transport Before bringing in machinery, always prepare well-maintained carriers. Carriers Q'ty Specifications Forklift 3.5 t (or wrecker) (Reed space:150-190 cm) Hand lift 3.0 t or more Small jack 1.5 t or more Wooden block Approx. 90×150×60 mm (2) Never lift the machine or load any higher than 200 mm above the floor during transport.
- Page 10 S. SAFETY Unpacking and cleaning (1) Parts are coated with rust-preventive oil. Take necessary action so they will not slip when carrying them. (2) When washing parts, use waterproof paper to prevent the floor from becoming stained. (3) Use Nippon Oil Corporation's New-sol Deluxe or equivalent cleaning fluid.
- Page 11 S. SAFETY [1.2] Rules for Safe Operation 1 General Rules Absolute precautions (1) Never allow non-qualified workers to carry out connection or disconnection of the primary power lines. (2) Never try live-wire operation when changing the wiring on the machine. (3) Never start the machine without communicating your intention to co-workers or without confirm- ing their answer to your signal.
- Page 12 S. SAFETY 2 Precautions for Weaving Starting (1) Make sure that there is no one beside or behind the machine. (2) When two or more workers are to handle a job, they must always communicate through words or gestures before starting the job. (3) Before pressing any switches on the machine, be sure to identify them to prevent mistakes.
- Page 13 2.If the signal indicator 1 flashes (in case of standard setting), warning lamp 2 lights and warning iron 3 is displayed: It means that the Toyota Automatic Pick Operator (TAPO) is in operation. The machine is temporarily on halt and will restart running, so never reach out towards the movable parts or the working area while these indications are on.
- Page 14 S. SAFETY [1.3] Rules for Maintenance 1 Before Maintenance Work Checking the work procedure Check the work procedure with co-workers in advance. Be sure to inform the operators that the machine is to be stopped, and always put up the maintenance notice (specified by the plant) on the power switches. Checking the jigs and tools Select and inspect the jigs and tools for the job purpose.
- Page 15 S. SAFETY 2 Precautions for Maintenance Personnel If you stop the machine for maintenance, be sure to put up the warning notice saying "DON'T TURN THE SWITCH ON". Never put tools or any items on top of the machine whether it is in operation or on halt. Otherwise, they may fall into the machine, causing parts damage or even bodily injury.
- Page 16 S. SAFETY 3 During Maintenance Work For safety, be sure to turn off the machine before starting maintenance work. At the same time, be sure to put up the maintenance notice (specified by the plant) on the switches. Basic maintenance procedure (1) Stop the machine by pressing the STOP switch.
- Page 17 S. SAFETY [1.4] Rules for Operating or Checking the Electrical Devices Even after the main switch (main circuit breaker CB1) on the control box is turned off, the groupcontrol inverter power is fed to the terminal board (TB3) and the primary side of the magnet switch (MSI).
- Page 18 1. PREPARATIONS FOR INTRODUCING THE MACHINE 1. PREPARATIONS FOR INTRODUCING THE MACHINE [1] Building (1) Make sure that the building has been completed enough to protect the machines and related facilities from rain and wind. (2) Make sure that the width and height of the carrying- in entrance are enough to carry in the machines laid on a forklift horizontally.
- Page 19 1. PREPARATIONS FOR INTRODUCING THE MACHINE Crank Shedding Motion (CS, CM) Nominal Reed H (mm) D (mm) W(mm) Space (cm) φ800F φ930F φ1000F φ800F φ930F φ1000F R/S 150 3007 1712 1842 1912 1700 1727 1822 3407 1712 1842 1912 1700 1727 1822 4307...
-
Page 20: Foundation Work
1. PREPARATIONS FOR INTRODUCING THE MACHINE [2] Foundation Work There are three types of installation methods for theweaving machines: ・Gluing installation ・Bolting installation ・On-the-floor installation The bolting installation method may be divided into either straight-bolting or L-bolting installation. This manual describes the straight-bolting installation method. - Page 21 Required piping Air pipes (Other related piping, e.g., water piping) ATTENTION Conduits for network cabling is necessary in order to adopt the FACT (TOYOTA FACTORY MANAGEMENT SYSTEM). Take it into consideration from the plant designing stage by referring to Appendix 4-2.
- Page 22 1. PREPARATIONS FOR INTRODUCING THE MACHINE [2.3] Floor Surface Conditions (1) Any irregularity ((A) shown at left) in the floor levelness should be 5 mm or less for the gluing installation and bolting installation. It should be 3 mm or less for the on-the-floor installation. (2) Surface irregularities (B) of the floor where the legs of the machine are to be positioned should be 1 mm or less.
- Page 23 1. PREPARATIONS FOR INTRODUCING THE MACHINE [2.4] Preparing Glue or Quick-hardening Cement ■ For the gluing installation method IMPORTANT If you are responsible for the preparation of the glue, prepare it before the start of installation work. ■ For the straight-bolting installation method IMPORTANT If you are responsible for the preparation of the quick-hardening cement and straight bolts, prepare them before the start of installation work, as well as preparing M16 nuts and 6-class...
- Page 24 1. PREPARATIONS FOR INTRODUCING THE MACHINE (1) Properties (according to the manufacturer's manual) Tensile & shear strength(Adhesive strength test for metals) ・Conditions Surface treatment: Clean with lacquer thinner after polishing with #320 sandpaper Hardening time: 7 days at 20°C ・Test method: In accordance with JIS K6850 Adhesive strength Metals Rupture...
- Page 25 1. PREPARATIONS FOR INTRODUCING THE MACHINE ■ Quick-hardening cement for the bolting installation method Product name: Konishi E200 Manufacturer: Konishi Co., Ltd. http://www.bond.co.jp/ ・Osaka Head Office 2-1-2 Hiranomachi Chuo-ku, Osaka (Sawanotsuru Bld.) 541-0046 Address: Tel: +81 6 6228 2961 ・Tokyo Head Office 2-3 Kanda Nishikicho Chiyoda-ku, Tokyo 101-0054 Address: Tel: +81 3 5259 5737...
- Page 26 1. PREPARATIONS FOR INTRODUCING THE MACHINE [2.5] Marking on the Floor (1) According to your floor plan specifying the layout and spaces between machines, mark one reference line lengthwise and one crosswise. (2) According to the machine dimension drawing, mark a front line, a rear line, and side lines for the machine's feet parallel to the reference lines marked in step (1).
- Page 27 1. PREPARATIONS FOR INTRODUCING THE MACHINE 2.Prepare quick-hardening cement. 3.Moisten the inside of the holes with water. 4.While bleeding air, pour quick-hardening cement into each of the holes and put an anchor bolt into it so that the distance from the top of the anchor bolt to the floor comes to "...
- Page 28 1. PREPARATIONS FOR INTRODUCING THE MACHINE EXAMPLE: Floor Plan for Negative Cam Shedding (For details, refer to the submitted drawings.) Dimensions L2 table L2 3020 3220 3420 3620 Dimensions L3, L4 table See other tables for other specifications of weft insertion motions. Middle frame position - 190 Dimension A...
- Page 29 1. PREPARATIONS FOR INTRODUCING THE MACHINE EXAMPLE: Floor Plan for Crank Shedding (For details, refer to the submitted drawings.) Dimensions L2 table L2 2597 2797 2997 3197 3397 3597 Dimensions L3, L4 table See other tables for other specifications of weft insertion motions. Middle frame position - 250 Dimension A...
- Page 30 1. PREPARATIONS FOR INTRODUCING THE MACHINE EXAMPLE: Floor Plan for Electronic Shedding Motion (For details, refer to the submitted drawings.) Dimensions L2 table (ES spec.) L2 3064 3264 3464 3664 3864 4164 Dimensions L3, L4 table See other tables for other specifications of weft insertion motions. Hole position of control box wires Specifications Dimension B...
- Page 31 1. PREPARATIONS FOR INTRODUCING THE MACHINE EXAMPLE: Floor Plan for Positive Cam Shedding Motion (For details, refer to the submitted drawings.) Dimensions L2 table (Stäubli 1781 as an example) L2 3315 3515 3715 3915 4215 4865 Dimensions L3, L4 table See other tables for other specifications of weft insertion motions.
- Page 32 1. PREPARATIONS FOR INTRODUCING THE MACHINE EXAMPLE: Floor Plan for Positive Dobby Shedding (For details, refer to the submitted drawings.) Dimensions L2 table (Stäubli 3220/3260 as an example) L2 3502 3702 3902 4102 Dimensions L3, L4 table See other tables for other specifications of weft insertion motions. Middle frame position - 190 Dimension A...
- Page 33 1. PREPARATIONS FOR INTRODUCING THE MACHINE EXAMPLE: Difference from Cheese Stands and Weft Insertion Motions (For details, refer to the submitted drawings.) Dimensions L3 differ from the specifications of the weft insertion motions. Tandem Balloon 6C type, 2C type 4C type 6C type 8C type nozzles...
- Page 34 1. PREPARATIONS FOR INTRODUCING THE MACHINE [3] Wiring (for looms other than towel weaving machine) [3.1] In-plant Electric Facilities The in-plant electric facilities shall be set up as specified below to make the most of the loom performances while maintaining safety. For details, consult with electric specialists or electric companies.
- Page 35 1. PREPARATIONS FOR INTRODUCING THE MACHINE 7 When wiring the loom power cable to the loom, it is recommended to lay them at least 200 mm away from each other to prevent noise generation. If the inverter power line is connected to the loom using a cable consisting of three power wires and the grounding wire, do not connect the grounding wire of the inverter cable to that of the loom.
- Page 36 1. PREPARATIONS FOR INTRODUCING THE MACHINE [3.2] Circuit Breakers Group inverter 2 is not installed in case of individual inverter specification. The group inverter, group inverter breaker and related wiring shown here, therefore, are unnecessary. 1 Capacity of non-fuse circuit breaker (A) for group inverter Provide one non-fuse circuit breaker (A) on the inlet side for each group inverter.
- Page 37 1. PREPARATIONS FOR INTRODUCING THE MACHINE 2 Capacity of non-fuse breaker (B) for loom (1) The non-fuse circuit breaker for loom is required to be installed on the switchboard for disconnecting the power for loom maintenance, inspection or troubleshooting. (2) It is recommended to provide one non-fuse circuit breaker for each weaving machine. (3) Frequent tripping will occur if the capacity is insufficient.
- Page 38 1. PREPARATIONS FOR INTRODUCING THE MACHINE [3.3] Cable Capacity The cable capacity shall be determined according to the motor rated current with the supply voltage fluctuation and voltage drop. Please consult with the person in charge of electricity or electric specialists. 1 Supply voltage fluctuation and line voltage drop (1) The voltage received by the loom drops due to supply voltage fluctuation and the voltage drop at deltastarting by the cable resistance.
- Page 39 1. PREPARATIONS FOR INTRODUCING THE MACHINE 2 Current in each loom operation state NOTE: The loom with an electronic shedding motion requires the additional current besides the above current to operate the electronic shedding motor. The additionally required current can be roughly calculated by the formula below: χ...
- Page 40 1. PREPARATIONS FOR INTRODUCING THE MACHINE 4 Cable selection Select the cable according to steps [1], [2] and [3]. (1) Obtain the current flowing in cable ① between the circuit breaker on the switchboard and the group inverter. Select the cable according to the value obtained by the equation below. ...
- Page 41 1. PREPARATIONS FOR INTRODUCING THE MACHINE [3.4] Cable Capacity Calculation Examples (reference examples) The available cable sizes and characteristics vary with the territory and country and with the cabling method. The cable capacity calculation examples described below should be used as reference examples. For cables ①...
- Page 42 1. PREPARATIONS FOR INTRODUCING THE MACHINE 2 Selection of cable ② between inverter and loom (Unit: mm Distance Power supply Motor capacity voltage 10 m 20 m 30 m 40 m 50 m 60 m 70 m 80 m 90 m 100 m 200V 220V...
- Page 43 1. PREPARATIONS FOR INTRODUCING THE MACHINE (Unit: mm Distance Power supply Motor capacity voltage 10 m 20 m 30 m 40 m 50 m 60 m 70 m 80 m 90 m 100 m 440V ・These values are calculated on assumption of the supply voltage fluctuation as 5% and voltage drop by cable as 9%.
- Page 44 1. PREPARATIONS FOR INTRODUCING THE MACHINE 3 Selection of cable ③ between circuit breaker on switchboard and loom (Unit: mm Distance Power supply Motor capacity voltage 10 m 20 m 30 m 40 m 50 m 60 m 70 m 80 m 90 m 100 m...
- Page 45 1. PREPARATIONS FOR INTRODUCING THE MACHINE (Unit: mm Distance Power supply Motor capacity voltage 10 m 20 m 30 m 40 m 50 m 60 m 70 m 80 m 90 m 100 m 440V ・These values are calculated on assumption of the supply voltage fluctuation as 5% and voltage drop by cable as 5%.
- Page 46 1. PREPARATIONS FOR INTRODUCING THE MACHINE 4 Selection of cable ③ between circuit breaker on switchboard and electronic shedding loom Main motor capacity: 2.6kW (Unit: mm Distance Power supply Electronic voltage shedding spec 200V 220V 350V 380V 400V 415V 440V ・These values are calculated on assumption of the supply voltage fluctuation as 5% and voltage drop by cable as 5%.
- Page 47 1. PREPARATIONS FOR INTRODUCING THE MACHINE [3.5] Group Inverter 1 Determination of installing location To minimize the voltage drop, select a location to minimize the distance between the inverter and loom. (See page 41 for the capacity of the cable between the inverter and loom.) 2 Major specifications, dimensions and weight of inverter...
- Page 48 1. PREPARATIONS FOR INTRODUCING THE MACHINE 3 Wiring method between inverter and loom ・ Bus type wiring is generally adopted for wiring between the inverter and looms. Please consult with the electric specialist for the wiring work. ・ When the number of looms is small, each loom may be connected using one cable to the inverter. Up to six looms, however, can be connected to each inverter, however, since three pairs of three output terminals (TB) are provided and two cables can be connected to each pair.
- Page 49 1. PREPARATIONS FOR INTRODUCING THE MACHINE [3T] Wiring (for towel weaving machine) NOTE: For the wiring of the looms other than the towel weaving machine with separate inverter, refer to page 34. [3T.1] In-plant Electric Facilities The in-plant electric facilities shall be set up as specified below to make the most of the loom performances while maintaining safety.
- Page 50 1. PREPARATIONS FOR INTRODUCING THE MACHINE 5 Cable size selection Inferior quality of the fabric or frequent occurrence of the weft error may be caused at the time of starting unless a cable of the appropriate capacity is selected. This is because the rush current at starting the loom is very large. Select a cable of appropriate capacity so that the electric current can flow for consecutive operation and so that it retains the voltage drop by rush current within 5%.
- Page 51 1. PREPARATIONS FOR INTRODUCING THE MACHINE 1 Capacity of non-fuse breaker (A) for loom (1) The non-fuse circuit breaker for loom is required to be installed on the switchboard for disconnecting the power for loom maintenance, inspection or troubleshooting. (2) It is recommended to provide one non-fuse circuit breaker for each loom. (3) Frequent tripping will occur if the capacity is insufficient.
- Page 52 1. PREPARATIONS FOR INTRODUCING THE MACHINE [3T.3] Cable Capacity Select a cable of appropriate capacity that retains the voltage drop within 5% in consideration of the current for each loom operation state and the cable resistance caused by the distance. 1 Current in the loom operation state (Excluding the jacguard) Non-electronic shedding spec.
- Page 53 1. PREPARATIONS FOR INTRODUCING THE MACHINE 3 Current in the loom operating condition Electronic shedding spec. Motor rated current: In Power supply voltage Motor 200V 220V 350V 380V 400V 415V 440V 460V 480V 2.6kW For the electronic shedding spec., the electronic shedding current is added in addition to above. The added current can be roughly calculated by the formula below: χ...
- Page 54 1. PREPARATIONS FOR INTRODUCING THE MACHINE [3T.4] Cable Capacity Calculation Examples (reference examples) The available cable sizes and characteristics vary with the territory and country and with the cabling method. The cable capacity described below should be regarded as reference examples. * These sample calculations are made on the assumption of the voltage drop by cable ①...
- Page 55 1. PREPARATIONS FOR INTRODUCING THE MACHINE 2 Cable size on cable ① between the switchboard breaker and the loom Electronic shedding spec. Main motor capacity 2.6 kw (Unit: mm Wiring distance Power supply Electronic shed- voltage ding spec. 200V 220V 350V 380V 400V...
-
Page 56: Air Compressor
1. PREPARATIONS FOR INTRODUCING THE MACHINE [4] Air Compressor [4.1] Compressed-air Requirements for Air Jet Weaving Machines and Precautions for Piping Compressed air to be used for weft insertion should satisfy the following requirements in order to prevent weft miss and ensure fabric quality: ・... - Page 57 1. PREPARATIONS FOR INTRODUCING THE MACHINE [4.2] Choice of Air Compressor Type and the Number of Compressors It is recommended that you use a screw or turbo compressor for air jet weaving machines which features small pressure fluctuation, weak vibration, soft noise, high compression efficiency and low discharge temperature. (See the comparison table below.) Type Screw compressor...
- Page 58 1. PREPARATIONS FOR INTRODUCING THE MACHINE 2 Calculating the capacity and the number of air compressors required ....② Qc× Nc Where : Compressor load factor This should be 0.85 or less for reciprocating compressors and 0.90 or less for screw or turbo compressors.
- Page 59 1. PREPARATIONS FOR INTRODUCING THE MACHINE 3 Calculating the approximate power consumption of compressor (1) For oil-free reciprocating compressors, oil-free screw compressors, and turbo compressors W = W1 × n × [a + b (1 – a)] (2) For oil injection screw compressors W = W1 ×...
- Page 60 1. PREPARATIONS FOR INTRODUCING THE MACHINE Manufacturer Lubricated type Unlubricated type - TX, TRA, TRE, and TRX types Atlas GA type ZR type Kobe Steel HM type ALE type Hitachi S and M types DSP and SDS types Mitsui Seiki Z and ZV types ZUV type Contact of compressor manufacturer...
- Page 61 1. PREPARATIONS FOR INTRODUCING THE MACHINE [4.3] Layout Examples of Air Compressors and Related Equipment 1 Turbo type oil-free compressor The filter is unnecessary for most oil-free compressors. However, consider the necessity of the filter depending on the environment of installation. 2 Packaged oil-free screw (dry screw) compressor 3 Packaged oil injection screw compressor 4 Oil-free reciprocating compressor...
- Page 62 1. PREPARATIONS FOR INTRODUCING THE MACHINE [4.4] Piping 1 Compressor room (1) Always mount a bypass at the filter position. This allows you to change the filter element without stopping the compressor. (2) When using an oil injection compressor "OSP type", mount differential pressure gauges before and after the oil removing filter for early detection of a clogged filter.
- Page 63 1. PREPARATIONS FOR INTRODUCING THE MACHINE (2) Determine the pipe diameter according to the airflow rate. Criteria for determining the main pipe diameter ・240 m /H ....21/2 B (65A) or over ・480 m /H ....3B (80A) or over ・12,000 m /H ..5B (125A) or over Nominal diameter OD (mm)
-
Page 64: Other Equipment
1. PREPARATIONS FOR INTRODUCING THE MACHINE [5] Other Equipment [5.1] Temperature Control and Air Conditioning To maintain the optimum operating condition of the weaving machine, it is important to keep the weaving room at a constant temperature and humidity. It is recommended that the weaving room be conditioned as listed below. The optimum temperature and humidity will vary depending upon yarn type and sizing. - Page 65 1. PREPARATIONS FOR INTRODUCING THE MACHINE [5.4] Separate Take-up Motion Connect the power supply to the separate take-up motion as shown below. Since this is a typical example, however, it is not always applicable to all separate take-up motions. 1 Power supply to separate take-up motion When operating the separate take-up motion using the plant power supply, it may be connected to the secondary side of the no-fuse circuit breaker (NF1) in the loom control box, but limit the power consumption by the separate take-up motion to within 500 W.
- Page 66 1. PREPARATIONS FOR INTRODUCING THE MACHINE 3 Loom stop signal from separate take-up motion To stop the loom by an instruction from the separate take-up motion, provide a relay contact (normally open) at the separate take-up motion, and connect it to pin Nos. 92 and E of CN36 (see below for pin assignment) of the loom I/O-1 board.
-
Page 67: Installation Work
2. INSTALLATION WORK 2. INSTALLATION WORK [1] Preparations for Installation [1.1] Arrangement of Workers Arrange the workers for installation by referring to the table given below. This table is an example for installing 50 weaving machines, starting on April 1 and setting-up four machines a day. * Worker's skill level : Has experience with similar machines and can be relied on to a certain extent. - Page 68 2. INSTALLATION WORK [1.3] Preparation of Piping Prepare pipes and related parts listed below. Name Quantity Specifications Inside Dia.: φ20, Pressure-withstanding strength: 1.18 Vinyl (rubber) hose Approx. 1 m/machine MPa (12 kg/cm ) or more Hose band 1/machine Hose nipple 1/machine For φ20, PT 1/2 Stop valve*...
- Page 69 2. INSTALLATION WORK [2] Installation Work Before starting the carrying-in and installation of weaving machines, be sure to read Chapter S. SAFETY and observe the instructions given there. [2.1] Positioning of the Weaving Machine Before carrying the weaving machine into the weaving room, it is recommended that you remove the wooden frame (located at the bottom of the weaving machine) outside the weaving room.
- Page 70 2. INSTALLATION WORK [2.3] Installation 1 Levelling the weaving machine ATTENTION When a weaving machine exposed to cold outdoor atmosphere is brought into a warm indoor location, all ・When two or more workers are to handle machine parts will be covered with condensed water a job, they must always communicate droplets.
- Page 71 2. INSTALLATION WORK If the machine is not level, make it level with packings. Listed below are packings available for weaving machines. Type Thickness Application Correct loom leveling using a Steel 1, 2, or combination of three packing packing 3.2 mm types (in thickness).
- Page 72 Installation with anchor bolts As shown below, install the cheese stand base to the floor with anchor bolts according to your floor plan. Mounting the cheese stand Refer to the "JAT810 INSTRUCTION MANUAL", Chapter 5, Section 5.1.
- Page 73 Using a cart will make this job easier. Positioning the EDP stand Refer to JAT810 INSTRUCTION MANUAL, Chapter 5 Picking Motion. Wiring and piping between the main unit and EDP stand As shown in the left figure, the EDP inverter circuit board is installed in the EDP stand.
- Page 74 2. INSTALLATION WORK (3) Optical fiber cable Connect the optical fiber cable with the optical fiber connector that is on the EDP inverter circuit board. ATTENTION Take care not to bend the optical fiber cable at sharp angles because it is easily affected by bending stress.
- Page 75 2. INSTALLATION WORK 4 Control box support (1) Attach the support to the control box stay so that the door can be opened/closed smoothly. The components of the support differ depending on the frame foot/no frame foot as shown below.
- Page 76 2. INSTALLATION WORK (2) Method of adjustment 1.Loosen nut A at the mounting area on the back of the control box [Fig. 1]. 2.Loosen nut 4, and turn the jack bolt 4 until the upper surface of the main unit and the upper surface of the door are nearly aligned [Figs.
- Page 77 2. INSTALLATION WORK [2.4] Wiring and Piping to Weaving Machines 1 Wiring Before starting the job below, make sure that the main switch on the workshop switchboard is turned OFF and then put up the "DON'T TURN THE SWITCH ON" notice tag on the main switch.
- Page 78 2. INSTALLATION WORK —— Reference —— Air Piping Work to the Weaving Machine IMPORTANT Shown below are air pipes and related parts required before the start of the trial run. Parts A to E below are to be prepared by you for air piping. ③...
- Page 79 3. PREPARATIONS FOR WEAVING START-UP 3. PREPARATIONS FOR WEAVING START-UP [1] Warp-related Preparations In the preparations described in this section, the following accessories should be prepared by either your company or Toyoda depending upon the specifications. Be sure to check which is responsible for those preparations. If you are responsible, prepare them before the weaving start-up.
- Page 80 3. PREPARATIONS FOR WEAVING START-UP 1 Mounting a single beam [At the warp beam gear side] Determine distance L1 according to warp beam flange diameter 2a and warp beam diameter 1b by referring to the table below. (Reference) Yarn Beam Holder:T5 type Warp beam Warp beam L1 (mm)
- Page 81 3. PREPARATIONS FOR WEAVING START-UP (4) Set warp beam gear 4 onto warp beam 1 and turn gear 4 so that eight bolt holes provided in gear 4 become aligned with those in beam 1, and the three bolt holes in gear 4 come close to those in flange 2.
- Page 82 NOTE: At the RH side of the let-off motion, install the RH beam in the same manner as for the LH beam. 1960 2240 DW : Drawing-in width 2310 LO : Genuine Toyota standard twin beam dimensions 2410 2560 Unit: mm Dimension A~ R/S336 : 510-(R/S-DW)/2 R/S340 ~...
- Page 83 3. PREPARATIONS FOR WEAVING START-UP 3 Mounting a grand beam of towel loom (1) [Installation on the yarn beam gear side] Mark the yarn beam 1 85 mm from side “a” with a felt-tipped pen, etc. (2) Screw in a yarn beam flange 2 from direction A. Set the inside of the flange to the marked position.
- Page 84 3. PREPARATIONS FOR WEAVING START-UP (5) [Flange installation on the side of the counter- yarn beam gear] Mark the yarn beam 1 at a point the reed drawing width of L mm to the right of the marking made in (1). NOTE: A minimum effective drawing width to each nominal reed width is a nominal reed width minus 70 cm.
- Page 85 3. PREPARATIONS FOR WEAVING START-UP Not using a flange ring (setting a left flange to the left side) (1) Make a mark on the position to fix a flange with a felt pen or something similar. (2) Screw-in yarn beam flange 2 from the direction of "A"...
- Page 86 3. PREPARATIONS FOR WEAVING START-UP Mounting a flange opposite to the yarn beam gear side (5) Make a mark on "Drawing-in width – (2 × Selvage textural width) + 0 to 10 mm" = L mm from the right side on the mark made in step (1). NOTE: The minimum effective drawing-in width relative to each drawing-in width is -70 cm.
- Page 87 3. PREPARATIONS FOR WEAVING START-UP 5 Winding warp onto a warp beam : Warp beam gear : Warp beam flange : Warp letting-off direction : Warp taking-up direction in sizing ATTENTION Be careful with the warp taking-up direction when sizing. 6 Preparing warp yarn When preparing warp yarn, be sure to observe the following: (1) Procure warp yarn and complete warp preparatory processes according to the schedule without any delay.
- Page 88 3. PREPARATIONS FOR WEAVING START-UP [1.2] Preparing the Droppers IMPORTANT Check whether you are responsible for the preparation of the droppers. If you are responsible, prepare them before the start-up of weaving. –– Reference –– Choosing the Droppers The following data comes from the ISO and Groz-Beckert catalogues. (1) Dropper types Type Closed type...
- Page 89 3. PREPARATIONS FOR WEAVING START-UP [1.3] Preparing the Healds IMPORTANT Check whether you are responsible for the preparation of the healds. If you are responsible, prepare them before the start-up of weaving. –– Reference –– Steel Heald Specifications (1) Flat steel heald (reinforced type) Flat steel heald Overall length Max.
- Page 90 3. PREPARATIONS FOR WEAVING START-UP (2) J-type riderless, flat steel heald (Uster auto drawing-in type) Max. Riderless, flat heald Overall length Yarn number count density Optimum yarn count Remarks Cross section English number Silk deni- Mail size End-loop spacing (L mm) Simplex Duplex size count...
- Page 91 3. PREPARATIONS FOR WEAVING START-UP (3) C-type riderless, steel heald Riderless, flat heald Overall length Max. density Yarn number count Optimum yarn count Cross section English number Mail size End-loop spacing (L mm) Simplex Duplex Silk denier size count Metric count Tex count Cotton Wool Linen (11") (12")
- Page 92 ・ Abrasion of the reed caused by long-term use may generate a warp break or fluff of the yarn. Confirm there is no abrasion before use. 1 Drawing-in width Refer to 4.1 JAT810 Technical Information for the nominal reed spaces and effective drawing-in widths.
- Page 93 3. PREPARATIONS FOR WEAVING START-UP 2 Drawing-in procedure Draw in warp from the left end of the reed (from the main nozzle side) regardless of the drawing-in width. Drawing-in from the 2nd dent As shown at left, start drawing at the 2nd dent from the left. The 1st dent should be reserved for the following purposes: ・When you use additional yarn, draw addition-...
- Page 94 3. PREPARATIONS FOR WEAVING START-UP [1.5] Preparations for Selvage Construction 1 For Full-leno Selvage Device This device binds two leno yarns with every weft yarn at each side of the fabric to produce a firm selvage construction which will not become loose if weft yarns are cut.
- Page 95 3. PREPARATIONS FOR WEAVING START-UP (3) How to draw in leno yarn through the reed ・At the left side of the machine Draw in leno yarns ○ through the same dent through which the leftmost ground yarns △ are drawn. If selvages are not well tightened , you may draw in leno yarns through an empty dent adjacent to the one through which the leftmost...
- Page 96 (3) How to draw in leno yarn through the reed Draw in leno yarns through the reed in the same manner as for the full-leno selvage device. NOTE: For details, refer to the JAT810 INSTRUCTION MANUAL, Chapter 8, Section 8.2.
- Page 97 3. PREPARATIONS FOR WEAVING START-UP 3 For warp-addition device This device generally feeds two additional warps into selvages in order to get cleaner warp separation at the left end of fabrics (at the weft insertion side), thereby improving selvage firmness. (1) Additional yarn (which you should pro- cure) ・Yarn specifications:...
- Page 98 3. PREPARATIONS FOR WEAVING START-UP (2) How to draw in additional yarn through the reed – At the left side of the machine Thread two additional yarns ● and leno yarns ○ through an empty dent adjacent to the one through which the leftmost ground yarns △...
- Page 99 3. PREPARATIONS FOR WEAVING START-UP [1.6] Preparations for Waste Selvage Device This device binds weft jetted up to the outside of the right edge of the woven fabric with several yarns fed from the waste-selvage cheeses (in the stand-equipped type) or with several warps (in the non-stand type) in order to apply tension to the weft, for an ideal selvage construction.
- Page 100 3. PREPARATIONS FOR WEAVING START-UP (2) How to draw in waste-selvage yarn through the reed You may draw in waste-selvage yarn in either of the following ways: (A) : Standard Draw in waste-selvage yarn so that the leftmost waste-selvage yarn is 1-3 mm ("b" shown at left) away from the right edge of weft feeler WF1.
- Page 101 3. PREPARATIONS FOR WEAVING START-UP 2 For non-stand type (which has no waste-selvage bobbin stand) This non-stand type uses ground warps of yarn number count 7's to 40's. (1) Number of waste-selvage yarns: 12 yarns as standard If a waste-selvage yarn break occurs frequently, use 16 yarns;...
- Page 102 3. PREPARATIONS FOR WEAVING START-UP [2] Weft-related Preparations (Mainly Spun Yarn) [2.1] Preparing Weft Yarn and Cheeses Air jet weaving machines whose weft insertion speed exceeds 1500 m per minute (Reed space: 190 cm, machine speed: 790 rpm) require not only high-quality weft yarn but also high-quality weft cones (cheeses). This is because the smooth release of weft from cheeses becomes more important as the machine speed increases.
- Page 103 3. PREPARATIONS FOR WEAVING START-UP [3] Lubricants, Cleaning Oil, and Sealant [3.1] Lubricants 1 Lubricant Symbols and the Corresponding Products Commercially Available Type of lubricants Grease Symbol Manufacturer ・Mobil 600W Cylinder ・Mobilgear 600XP150 Mobil Vacuoline528 (VG150) ・Mobil 600W Super Mobilux EP2 Mobilux EP0 ・SHC629 Cylinder Oil...
- Page 104 3. PREPARATIONS FOR WEAVING START-UP 2 Lubricants Required Before Trial Run For negative tappet cam shedding motion Lubricant type Symbol Lubricating points Quantity per machine RH cutter and full-leno selvage device A little Tappet cam box (spun cam specification) 9ℓ LH &...
- Page 105 3. PREPARATIONS FOR WEAVING START-UP for 1781*e32D, 1781*e32F, 1691*e32D, 1692*e32D, 1691*e22N, 1692*e22N for 1671*e22D, 1681*e22D For crank shedding motion (single-harmonic, multi-link) Prepare the same type of oil and grease as that of the positive cam shedding motion specified in [3.2] above. For electronic dobby For the lubricant type and quantity to be applied to the dobby, refer to the manufacture's manual.
- Page 106 *1. Not required for the customers that selected half-leno selvage motion. *2. The tucker housings (for the customers that selected the tuck-in device) are not lubricated when the machine leaves Toyota. Apply oil before the trial run. 3 Lubricants Required After Production Weaving Prepare oil and grease by referring to the quantity listed below.
- Page 107 3. PREPARATIONS FOR WEAVING START-UP 4 Lubricating Tools Oil drainer (Commercially available) NOTE: For the manufacturer names, refer to Chapter 4, Section 4.2. Oil drainer attachment (Product No. 743) Grease gun (Product No. 769-1) Oiler (Product No. 695) Oiler (Commercially available) Oiler (Commercially available) Brush (Commercially available) NOTES:...
- Page 108 3. PREPARATIONS FOR WEAVING START-UP [3.2] Cleaning Oil and Sealant 1 Cleaning Oil Required When Unpacking When the machine leaves Toyoda, the back roller, easing roller, and breast beams are coated with rust- preventive oil. To wipe off the oil easily, use the cleaning oil specified below. Recommended cleaning oil: NIPPON OIL CORPORATION New-sol Deluxe or its equivalent Never use trichloroethylene-base cleaning fluid.
- Page 109 4. APPENDIX 4. APPENDIX [1] JAT810 Technical Information [1.1] Nominal Reed Space and Effective Drawing-in Width 1 Nominal reed space 140, 150, 170, 190, 210, 230, 250, 280, 300, 336, 340, 360, 390 cm 2 Effective drawing-in width Nominal reed...
- Page 110 4. APPENDIX Nominal reed Max. effective drawing-in Shedding type Heald frame type Selvage type space (cm) width (mm) 140 ~ 336 Negative Cam Riderless Full-leno selvage (M) ( ~ R/S230) Half-leno selvage Full-leno selvage (E) Tucked-in selvage Rod Change Full-leno selvage (M) (Flat Heald) Half-leno selvage Full-leno selvage (E)
- Page 111 4. APPENDIX Nominal reed Max. effective drawing-in Shedding type Heald frame type Selvage type space (cm) width (mm) 340 ~ 390 Positive Dobby Riderless Full-leno selvage (M) Half-leno selvage Full-leno selvage (E) Tucked-in selvage Rod Change Full-leno selvage (M) (Flat Heald) Half-leno selvage Full-leno selvage (E) Tucked-in selvage...
- Page 112 4. APPENDIX [1.2] Machine Weight (excluding EDP) Shedding type Negative tappet Positive cam Single-harmonic Electronic Electronic Reed space cam shedding shedding motion shedding dobby (DE) shedding R/S (cm) motion (TN) (TP) motion (CS) 2750 2750 2850 2850 2950 2950 TN +450 3050 3050 TN –250...
- Page 113 4. APPENDIX [1.3] Yarn Number Count of Warp Spun yarn Ne5-100’s Filament yarn 7-1000d Glass fiber 42-1340 dtex Wool yarn Nm 14-64 [1.4] Picking Density Take-up drive Specifications Picking density Standard 24-300 yarns/inch Electric take-up Coarse density 9-100 yarns/inch Mechanical take-up Glass fiber 9-100 yarns/inch [1.5] Warp Tension Setting Range...
- Page 114 4. APPENDIX [1.6] Possible Weaving Range (Yarn density vs. Yarn number count) The graph below shows the possible weaving range for spun yarn.
- Page 115 4. APPENDIX [1.7] Fabric Examples Fabrics Yarn type ① Poolin (208) PC45×PC45 ×1210 136×72 ② Calico C40×C40 ×1840 78.9×63.5 ③ Poolin (168) PC45×PC45 ×1687 110×76 ④ Imitation poplin PC45.4×PC45.4 ×1650 121.92×63.5 CM40×CM40 ⑤ Down-proof ×1775 120×110 Spun C7×C6 ⑥ Denim (14.5 oz) ×1666 65×48 ⑦...
-
Page 116: Network Application
4. APPENDIX [2] Network application You can use our network applications (optional) specified below by connecting the Toyota Air Jet Loom with the network. ・TMS (TOYOTA Monitoring System) ・FACT (TOYOTA Factory Management System) [2.1] Scope of your work ・ Designation of options Since the network board and software CD-ROM are necessary, please inform Toyota of these network options when determining the machine specifications. - Page 117 ・Straight connection is necessary. Note: Installation work materials such as metal conduits and power cables are also required. If you have any problem with 1) to 5) for TMS introduction, please consult with the Service or Sales Department of Toyota Industries Corporation.
- Page 118 4. APPENDIX [2.2] Network Connection Concept For networking in a plant, connect the network boards (optional) in respective loom control panels using switching hubs. ・ Key Points for Wiring Design ・Maximum number of looms to be connected to a network should be about 200 units. If more than 200 units need to be connected, separate the network using a router.
- Page 119 4. APPENDIX ・ Terminology ・Switching hub A concentrator for accommodating network cables with a switching function. The switching function refers to a function for reading the MAC address for the destination terminal in the data frame and sending the data only to the port where the destination terminal is connected. ・MAC address Hardware address to be set up for identifying the device to be connected in the network.
- Page 120 4. APPENDIX [2.3] Network Design Network design is made for the following purposes: ・To determine the laying routes of network cables and the power line. ・To determine the lengths and quantities of necessary materials. ・To determine the locations for installation of the computer, switching hubs and the router. The network is designed according to the following steps: (1) Preparing the plant layout (2) Dividing the looms into groups as required...
- Page 121 4. APPENDIX (2) Dividing looms into groups as required • To network over 200 looms, divide the looms into groups, each consisting of within 200 looms. ・If the row of looms is long, the network cable length may exceed 100 m. (The network cable must not be extended beyond 100 m.) Grouping of looms may make the wiring route study easier.
- Page 122 4. APPENDIX (3) Determining the locations of the computer, router and switching hubs ・The computer, switching hubs, and the router as network components are precision electronic devices. They should be installed in places that can be protected from fluffs and condensation or housed in metal boxes. ・The power supply (100 VAC or 200 VAC) for the network devices is necessary.
- Page 123 4. APPENDIX ・Relaying switching hubs are necessary for connecting looms to the network. First determine their positions. Note: The computer is a precision electronic device. Select a location where it can be protected from fluffs and condensation. If it is to be installed inside the plant, house it in a metal box for protection. ・Determine the places for installing switching hubs for loom connection.
- Page 124 4. APPENDIX (4) Checking the network wiring routes ・Be sure that the planned network devices can be connected without any problem. ・Be sure that there is no obstacle in the route to make wiring impossible. ・Be sure that the network cable length does not exceed 100 m in any place. Since actual wiring requires leading-in from under the floor into the loom and switching hub box, provide a sufficient margin in length calculation.
- Page 125 4. APPENDIX ・If there is no problem with the network wiring route, enter all routes in the plant layout drawing to complete the "network connection diagram". Network connection diagram example Note: Always connect each loom and switching hub, or between switching hubs using one independent cable in the form of star connection.
- Page 126 4. APPENDIX ・Network devices require the power supply. Add the power cable route, where new power line installation work is necessary, to the plant layout drawing to make the "network device power cabling diagram". Network device power cabling diagram example ・Submit the network connection diagram and network device power cabling diagram to the person or company in charge of installation when requesting the design and installation of actual piping.
- Page 127 4. APPENDIX (5) Network Equipment Selection and Ordering ・Select and order equipment and materials based on the network connection diagram. Network connection diagram example ・The necessary equipment and materials for the above figure as an example are as follows: A: Computer 1 set B:...
- Page 128 4. APPENDIX [2.4] Piping Work ・ The piping work for network wiring is described also in 4.2.2 Key Points for Design. Install exclusive metal conduits for noise prevention. (See the figure below.) (*) Since the rising length from the trunk line metal conduit to the loom varies with the actual piping method, provide sufficient margin (about 4 to 5 m) when calculating the cable length beforehand.
- Page 129 4. APPENDIX ・ Make a metal box as shown below to fix each switching hub in it. ・ The switching hub should be made removable for easy maintenance. ・ Provide a household power outlet and a grounding connection port in the box. ・...
- Page 130 4. APPENDIX [2.5] Wiring Sample Diagram...
- Page 131 4. APPENDIX [2.6] Network Cable Connector Installation Method (What must be prepared) ・Network cable (*) ・Connectors (*) ・Nippers ・Special network cable crimping tool Note: The network cable is available in single core type and multiple core (stranded core) type. Prepare connectors that match the purchased cable type.
- Page 132 4. APPENDIX (2) Arrange the core conductors as illustrated below. (3) Cut the core conductors with nippers for neat arrangement.
- Page 133 4. APPENDIX (4) With the metal terminals of the connector facing upward, insert the arranged conductors into the connector. (5) After checking if the inserted connectors are in the specified order, crimp them using the special crimping tool.
- Page 134 4. APPENDIX [2.7] Network Cable Connection to the Machine Connect the network cable on the loom side to the daughter board (network interface card) on the control board in the control box.
- Page 135 4. APPENDIX [2.8] Connection with Customer's Network (1) Introduction For connection with the customer's network, install a router to separate the loom TMS network from the customer's network. If directly connected, the data on the customer's network side may flow into the loom TMS network side to overload loom task processing, possibly causing temporary failure in loom network communication.
- Page 136 4. APPENDIX (3) Rough description of connection method The explanation here is for connecting the two following networks using a router: Since the router setting method varies with the machine model, only rough explanation is given here. 1.Router installation The router with two or more network ports can be assigned with an IP address and a sub-net mask at each port.
- Page 137 4. APPENDIX 2.Computer setting The computer can basically communicate only with the computer belonging to the same network. For communication with a computer in a different network, it is necessary to send the data to the router once, from which it is to be sent to the computer in the different network. This router is called the default gateway.
- Page 138 4. APPENDIX 3.Loom setting Loom setting should also be changed as the computer setting. In case of simple setting, the sub-net mask and default gateway cannot be changed. In the case of above setting; Sub-net mask: 255.255.255.0 Default gateway: 172.17.1.254 are internally set.
- Page 139 The dedicated computer (TMS scanner PC) collects and stores the data of all looms by serial communication from LTB4. The TMS can collect data from the TMS scanner PC, and summarize the operation data of the JAT810 / 710 and the TMS scanner PC into the same report and graph.
- Page 140 ・ Up to 800 looms can be connected to one TMS scanner PC. If the number of looms exceeds 800, two TMS scanner PCs (mater and sub) are necessary. The maximum total number of JAT810 / 710 looms connected to the TMS and other looms connected to the TMS scanner PC(s) is 1,000.
- Page 141 ○ ● Export to CSV file ○ ○ (2) Stop causes that can be collected from the looms other than JAT810 / 710 are as follows: Table 1. Stop Causes Collectable by TMS Scanner Stop cause JAT810 / 710 TMS scanner (JAT610, etc.) Warp miss (upper) ○...
- Page 142 4. APPENDIX (3) TMS Scanner PC Configuration ・ The TMS scanner PC is exclusively for the TMS scanner. ・ The TMS scanner PC consists of the PC itself, uninterrupted power supply (UPS), display, and keyboard. ATTENTION ・Do not install the TMS and other software on the TMC scanner PC. Otherwise, normal operation may fail. ・Because of this reason, a separate computer for TMS installation is necessary.
- Page 143 4. APPENDIX [3.3] Connection between Looms and Data Collection Boards (LTB4) To introduce the TMS scanner, it is necessary to connect looms to LTB4 boards. Check if the looms to be monitored allow connection with the LTB4 boards. 1 Communication Method between LTB4 Boards and Computer The data collection board (LTB4) collects the loom parallel monitor signals such as the production pulse, stop signal and stop cause signal.
- Page 144 4. APPENDIX 2 Conditions for Connecting LTB4 to The Loom To connect LTB4 to each loom, the following power voltage and signals must be supplied from the loom: ・ Necessary power voltage ・12 VDC (LTB4 board drive voltage) Voltage: +11.5 to +12.5 Current consumption: Within 0.5 A ・...
- Page 145 6 Management of Looms Connected to TMS Scanner Summarize JAT810 / 710 looms connected to the TMS directly and other looms (JAT610/600, LW600 and looms of other makes) connected to the TMS via the TMS scanner in a table as shown below.
- Page 146 ・ If the loom positions are not shown in the layout drawing, indicate them in the drawing. Each loom may be abbreviated as a rectangle but with correct length and in correct position. ・ In case different models like JAT810 / 710 and JAT610 are mixed, distinguish the models in different colors.
- Page 147 4. APPENDIX 3 Study The Cabling Routes and Cable Lengths on The Layout Drawing Pay attention to the following points in the study. 4 Cautions for TMS Scanner Communication ・ The upstream and downstream cables form a loop in TMS scanner communication. Star connection using a hub as in the Ethernet is not adopted.
- Page 148 ・ It is also possible to use two TMS scanner PCs (master and sub) for easier cable routing. ・ The total of JAT810 / 710 looms connected directly to the TMS and other looms like JAT610 connected via TMS scanner PCs must not exceed 1,000.
- Page 149 4. APPENDIX ・ Underground conduit installation ・ Overhead conduit installation...
- Page 150 ・ Aside from the scanner PC sent in [ 3 ], a computer installed with TMS is necessary. (This is unnecessary if the TMS for JAT810 / 710 has already been operating.) ・ To prepare it anew, the following recommended conditions must be satisfied: Machine compatible with preinstalled model PCAT allowing full running of "Microsoft Windows 7, 8.1...
Need help?
Do you have a question about the JAT810 and is the answer not in the manual?
Questions and answers