Table of Contents
Advertisement
Quick Links
Advertisement
Table of Contents

Summary of Contents for aleen Music Tel-240
- Page 1 Installation Operation Manual...
- Page 3 MusicTel 240 Installation and Operation Manual Version 3.0 Release 2 June 2002...
- Page 4 In the event that the product proves to be defective in workmanship or materials within a period of one year from date of shipment, Aleen Technologies shall repair or replace the product at its discretion. Transportation will be the responsibility of the dealer/distributor.
-
Page 5: Table Of Contents
TABLE OF CONTENTS INTRODUCTION ................. 1-1 DESCRIPTION ..................2-1 Physical Description ................2-1 2.1.1 Front Panel....................2-2 Unpacking....................2-3 2.2.1 Inserting the Memory Module ..............2-4 2.2.2 Physical Installation.................2-5 INSTALLATION AND OPERATION..........3-1 Recording on a Music Channel..............3-2 Erasing the Content of the Music Channels..........3-4 3.2.1 Erasing the Contents of a Single Channel..........3-4 3.2.2... -
Page 7: Introduction
INTRODUCTION The MusicTel-240 is a digital music on hold player. It is built with absolutely no mechanically-moving parts. The MusicTel-240 allows 9 minutes of stored music, in a non-volatile, replaceable memory module. Recording is performed by connecting the MusicTel-240 to an external audio device. Figure 1-1. - Page 8 Introduction The MusicTel-240 has the following features: • Four music channels. • Automatic time allocation – 9 minutes of music on a single channel. • Replaceable memory card . • High audio quality. • Zero gap recording – silence is not recorded. •...
-
Page 9: Description
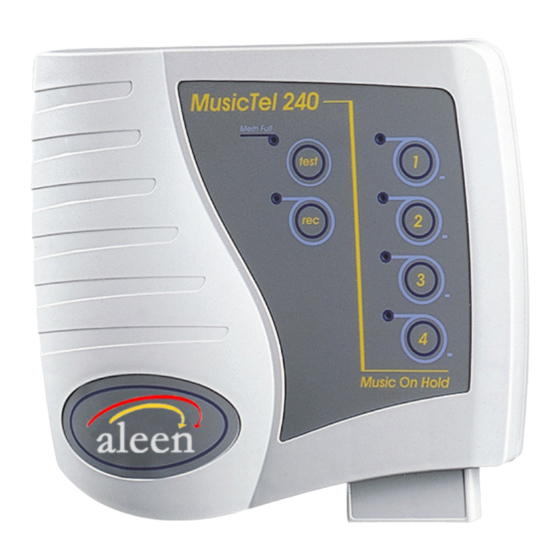
DESCRIPTION Physical Description The functional components of the MusicTel-240 are located on its front panel. The LEDs and buttons are located on the top panel. The MusicTel-240 incorporates four music channel status LEDs and configuration keys, a “ ” button, and a “ ”... -
Page 10: Front Panel
Description The four music channels LEDs on the top panel indicate that a corresponding music channel is included in the play list. For example: if music channels 2 and 4 are set to be on the play list, then LEDs “2” and “4” are lit. The “Mem Full”... -
Page 11: Unpacking
Description Unpacking The MusicTel-240 installation package should contain the following items: • MusicTel-240 unit. • DC power supply. • Flash memory module. • Standard RJ-11 audio cable. • Recording cable. • Installation and operating manual. • Wall mounting installation screws, and a drill template. If any of these components are damaged or missing, please contact your local ITS dealer. -
Page 12: Inserting The Memory Module
Description 2.2.1 Inserting the Memory Module The flash memory module is inserted into the designated compartment, located on the front panel of the MusicTel-240. * NOTE: “9 min. Release 3” should be written on the memory card. To insert the memory module: 1. -
Page 13: Physical Installation
Description 2.2.2 Physical Installation The MusicTel-240 is delivered with pre-recorded music. New music can be recorded before installing the MusicTel-240 on the wall, and before connecting it to the PBX. To install the MusicTel-240: 1. Use a drill and the wall plugs to place the two screws, and mount the MusicTel-240 close to the PBX 2. -
Page 14: Installation And Operation
INSTALLATION AND OPERATION This section describes the operating features of the MusicTel-240. The following operating features are available and described: • Recording a music channel. • Erasing the contents of the music channels. • Listening to the contents of a music channel. •... -
Page 15: Recording On A Music Channel
Installation and Operation Recording on a Music Channel To record music on the MusicTel-240, a special recording cable is used (provided). Recording new music can only be performed on an empty channel, provided the memory is not full. Erasing instructions are given in section 3.2 of this manual. - Page 16 Installation and Operation 5. Press the “Play” button on the audio device. The MusicTel-240 starts recording, and the music is heard via its internal speaker. 6. Stop the recording by pressing the “ “ button again. The “rec” LED turns OFF.
-
Page 17: Erasing The Content Of The Music Channels
Installation and Operation Erasing the Content of the Music Channels Two erasing types are available: 1. Erasing the contents of a single channel. 2. Erasing the contents of all music channels. These options are described below. Note: All Erase operations require the connection of the Recording Cable to the MusicTel-240. -
Page 18: Erasing The Contents Of All Music Channels
Installation and Operation 3.2.2 Erasing the Contents of All Music Channels 1. Connect the recording cable (provided) to the MusicTel-240. A flashing channel LED indicates that the channel is not recorded, while a constantly lit channel LED indicates that the channel is recorded. test 2. -
Page 19: Listening To The Content Of A Music Channel
Installation and Operation Listening to the Content of a Music Channel Note: It is recommended to disconnect the recording cable while performing the test. To test the recorded music channel content: 1. Select the music channel by pressing the respective button. Make sure that the respective LED is lit. -
Page 20: Configuring The Music Playlist
Installation and Operation Configuring the Music Playlist To configure the music playlist: 1. Disconnect the recording cable from the MusicTel-240. 2. Select the music channels to be added to the playlist by pressing their respective button 3. Make sure that the respective LEDs of the selected music channels are lit 4.
Need help?
Do you have a question about the Music Tel-240 and is the answer not in the manual?
Questions and answers