Table of Contents
Advertisement
Quick Links
Advertisement
Table of Contents

Related Manuals for Aspen C108

Summary of Contents for Aspen C108
- Page 1 C108 OWNERS MANUAL...
- Page 2 SECTION TOPIC PAGE SECTION 1 Specifications 4 – 6 Service Points SECTION 2 Aspen Warranty Boat US Membership SECTION 3 Getting Started 10 - 12 Batteries & Chargers 13 – 16 AC / DC Panels 17 - 19 Tank Gauges...
-
Page 3: Vessel Specifications
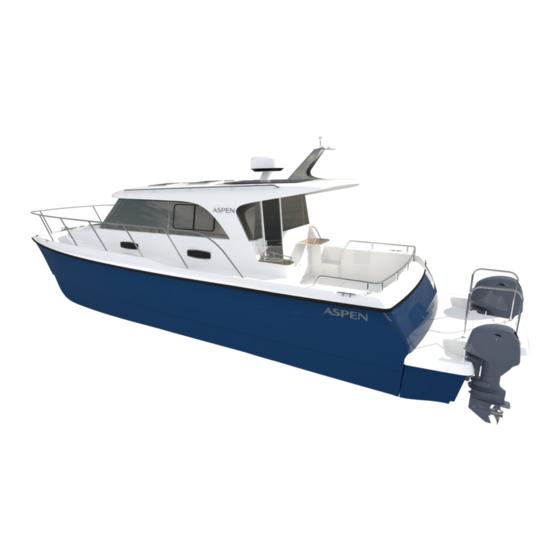
VESSEL SPECIFICATIONS VESSEL NAME: HULL IDENTIFICATION NUMBER: MANUFACTURER: Aspen MODEL: C108 LENGTH OVERALL: 37’-8” LENGTH AT WATER LINE: 35’ BEAM: 10’8” DRAFT: 31” | 22” Trimmed DISPLACEMENT: 9,700lbs HULL MATERIAL: Fiberglass BOTTOM PAINT: SeaHawk Biocop ENGINE Yamaha F200XB –Yamaha F115... -
Page 4: Capacity Specifications
CAPACITY SPECIFICATIONS Unit Capacity Material Holding Tank Gallons Polypropylene Starboard Water Tank Gallons Polypropylene Port Water Tank Gallons Polypropylene Port Fuel Tank #1 Gallons Aluminum Port Fuel Tank #2 Gallons Aluminum STBD Fuel Tank #3 Gallons Aluminum Yamaha Lube Engine Oil – 200hp 4.76 Quarts 4M FC W... -
Page 5: Engine Specifications
ENGINE SPECIFICATIONS (Reference only – check your engine owners manual) ENGINE MANUFACTURER: YAMAHA 200 & 115 MODEL NUMBER: F200 MODEL NUMBER: F115 SERIAL NUMBER: SERIAL NUMBER: FUEL TYPE: Gas FUEL TYPE: Gas ALTERNATOR AMPERAGE: 50 ALTERNATOR AMPERAGE: 35 PROPELLER DIAMETER: 14.5” PROPELLER DIAMETER: 13.125”... - Page 6 SERVICE POINTS & PARTS (Reference only – check your engine owners manual) OIL CHANGE Yamaha Lube (115hp) 4M FC-W 3.9 qts Yamaha Lube (200hp) 4M FC-W 4.76 qts Oil Filter (115hp) 5GH-13440-70-00 Oil Filter (200hp) 69J-13440-03-00 GEAR OIL CHANGE 115hp Yamaha Marine Gearcase Lube SAE 90 API GL-4 .70 qt 1.036 qt...
-
Page 9: Getting Started
There is a 6-gallon hot water tank – 110V located in the starboard lazarette. SAFETY EQUIPMENT (Option) Aspen boats are typically equipped with 8 life jackets: two under the helm seat (suspender inflating type), 4 in the starboard aft cockpit storage compartment, and two under the master bed. - Page 10 GETTING STARTED CONTINUED SHORE POWER Boat comes equipped with a 30-amp service cord. Note: It’s best not to exceed a 25-amp draw or plug damage may occur. Be sure to twist lock to cord in place for complete connection at the pedestal.
- Page 11 PAINTING PROCEDURE The typical yard will make a major mess of bottom painting an Aspen, as they do not care about how smooth the final finish is. Their goal is gobs of paint fast, no finesse, paint spurs are OK.
-
Page 12: Battery Switches
BATTERY SWITCHES The C108 has five main battery switches: 1 EMERGENCY PARALLEL Starboard cockpit 2 ENGINE ON/OFF Starboard cockpit 3 HOUSE ON/OFF Starboard ¼ berth 4 BOW THRUSTER Starboard ¼ berth 5 STERN THRUSTER Starboard ¼ berth 6 INVERTER (under bed) Starboard ¼... -
Page 13: Battery Locations
BATTERY LOCATIONS HOUSE BATTERIES (Standard) Golf Cart 6Volt Deep cycle, AGM lead acid, in series for 12V house supply. (under bed cushion) Start Aft house ENGINE START BATTERY LEAD ACID G27 Note: on Generator boats we double up the start batteries and locate in aft starboard hull for weight and balance issues. -
Page 14: House Battery
HOUSE BATTERY Inverter Room The first cushion in the starboard stateroom is removable. Under is a removable access plate. This space has 2 golf cart house battery's (AGM) style, the optional 2000-watt charger (100 amp-12v/2000-watt 110V) inverter as well as a Master Volt duel out put 20-amp charger for the house and start battery bank. - Page 15 INVERTERS & CHARGERS (Magnum & MasterVolt) Under Starboard ¼ Berth The 25 Amp 3 channel House MasterVolt automatic charger is wired to come on when the boat’s shore power is connected and the A/C breakers at the dash are in the ON position. The chargers are four-stage, smart units that charge aggressively when the battery is low and then ramp down as it charges.
- Page 16 AC / DC PANELS The AC and DC panels are both Blue Sea Systems premium panels. DC Panel: The DC panel is fed from the House AC Panel: This panel is fed from the 30- batteries. It includes both voltage (pressure) amp shore power connection.
- Page 17 DC PANEL LAYOUT PUMPS PANEL: The pump panel controls the bilge pumps and shower sump pump. Most of these are automatic, but these switches allow you to manually turn on each of the six pumps for each water-tight compartment. Except for Pumps Systems the freshwater switch, these switches are...
- Page 18 SHORE POWER DISCONNECT 1) SWITCH OFF BREAKER NOTE: When reattaching the cord, you MUST twist to lock and 2) UNPLUG CORD get a complete connection * NOTE: NEVER LEAVE A HOT OR LOOSE CORD ON DOCK, IT COULD SHOCK SWIMMERS IF IT FALLS IN THE WATER.
- Page 19 TANK GAUGES & SOLAR PANEL CONTROLS TO READ TANK LEVEL: Left Gauge = Left Water Tank Center Gauge = Waste Tank Right Gauge = Right Water Tank SOLAR PANEL CHARGE CONTROLLER The Solar Boost 3000 is a premium charge controller that helps capture all the sun’s peak mid-day energy.
- Page 20 FUSE PANELS BEHIND DASH FUSE HOLERS (BLUE SEAS): GM AUTO BLADE FUSE-TYPE (FULL SIZE) There are 4 fuse blocks behind the dash (Blue Seas USA). The center fuse block is (Hot Float) This block always has power to run automatic bilge pumps and supply power to devices like the Carbon Monoxide sensor and computer memories.
- Page 21 Whole Boat GFI (EFI): This device behind the dash is similar to a GFI outlet that protects against electrical shock. If you find after plugging in and turning on all breakers you still don’t have power, then check this unit. If its tripped and power is restored by pushing the button your good to go.
- Page 22 Behind the Dash Starboard • This area has the stereo, VHF, AC and 400- watt inverter. Note the inverter will make a beeping noise when on and the battery voltage drops (sometimes while thruster- ing) turn it off when not in use (see yellow arrow).
- Page 23 BILGE PUMP DIAGRAM Drain Tube with plug Drain Tube with plug Starboard #1 Port #1 Port #2 Starboard Shower Starboard #2 (Inboard only) Port #3 Starboard #3 Port #4 Starboard #4 On auto Motor pod on float only auto float only...
- Page 24 EQUIPMENT SYSTEMS Before getting under-way, there are key things to do and check: 1. Check all safety equipment, bilges, machinery spaces, and service points. 2. Turn on battery switches in the cockpit. Check voltage on the House & Engine Start batteries & make sure you have adequate voltage on all systems.
- Page 25 EQUIPMENT SYSTEMS: THRUSTER, RADIO & WIPERS Thruster: These side power units are very handy while docking. Caution: Be certain no one is in the water near the boat when the thruster IS on. The thruster works like a vacuum, sucking from a large area. To use, ensure battery switches are on, then press both ON buttons simultaneously.
- Page 26 EQUIPMENT SYSTEMS: ENGINE & SAFETY GEAR Starting Engine: Once batteries are on you can start the engines. The key switches are Engine Computer: The engine computer is mounted port switch, port engine, very useful as it allows you to view engine starboard switch, starboard engine.
- Page 27 EQUIPMENT SYSTEMS: GARMIN CHART PLOTTER To start the chart plotter, locate the power button at the bottom right of the unit. Press and hold the power button for three seconds. The unit will start in approximately ten seconds. 1) Press “Charts” 2) Press “Navigation Charts”...
-
Page 28: Air Conditioning Unit
AIR CONDITIONING UNIT (Option) The unit is located under the sink. Quick-start Operations Checklist: 1) Ensure seawater-intake ball valve is open. 2) Make sure the control is powered off. 3) Turn on the air conditioner circuit breaker. If the seawater pump has its own circuit breaker, turn that on also. - Page 29 When the anchor the anchor locker. Be sure to secure rode has been purchased from Aspen, it the anchor with a bungee or line while includes depth markers every 30ft to aid in underway.
- Page 30 ANCHOR DETAILS WINDLESS WITH CLEAT AND ROLLER LINE AFTER STACKING - DETANGLE (Be sure to add bungee or snubber to secure) WINDLASS WRENCH ANCHOR DEPTH MARKERS Use wrench to tighten/loosen clutch, capstan. Note: The wrench is key to adjusting how much force the windlass pulls in with.
- Page 31 TILT HELM & CURTAINS The Tilt Helm lever is located The hydraulic fluid (Teliflex) fills at under the steering wheel. the top under rubber cover. Running attitude, 16 Kts, tabs down. Master Curtains snap in. Each is Labeled Port/Starboard with arrow showing forward.
- Page 32 SHOWER CURTAIN & SPRAYER First, set water to preferred temperature. The sink wand lifts to hanger near the door. The curtain from shelf behind door is snapped into the ceiling buttons. Dry door and shower floor when done. Door can be left open or closed while showering. The automatic sump pump under the head evacuates the water.
- Page 33 FUEL SYSTEM: FILTERS & PRIMING The C108 fuel system includes three filters and a two electric switching valves at the dash that control a spool valves near the filters (starboard forward hatch). In normal operation, the switches will be in the main position. (never operate both engines in the AUX position at the same time you may starve the engines of fuel and damage them.
- Page 34 RAW WATER BALL VALVE There is one raw water valve on the boat located starboard forward lazarette open the starboard hatch forward inboard you will see the thru hull valve. The one valve has two ¾” hoses coming off of it. One hose feeds the seawater washdown pump and the other feeds the seawater to the toilet.
- Page 35 MOTOR POD DRAIN VALVES Port & Starboard motor pods are equipped with one way drain plugs. Starboard drain plug is located directly on the transom center line. Port drain has a hose running forward of the waste tank and a valve at the end directly above the bilge pump.
- Page 36 LAZARETTE EQUIPMENT 6 Gallon SS Hot Water heater SS is located in the starboard lazarette. It runs on 120 V while at dock. Note it draws 1800 watts so you will not be able to run Pressure Water Pump & Strainer The large additional loads while the water C107 has two water tanks (24 gallons heater is on.
-
Page 37: Water System Diagram
WATER SYSTEM DIAGRAM 24-gallon water tank Pump x 2 Sink Sink Hot water Sink 26 gallon heater water tank HOLDING TANK DIAGRAM 30 gallon holding tank Head... - Page 38 LPG TANK STORAGE & OPERATION Propane tank is in the Port Cockpit storage To use, make sure hose connection is tight, locker. Note: Locker is plumbed with a hose open valve, gauge will show approx. 90 Psi. If you hear a hissing or smell gas turn valve to a through hull overboard so a gas leak off ,check connections w/ soap 50/50 water would not inter the boat.
- Page 39 LPG CONTROL DETECTION SYSTEM The propane sniffer control unit is just fwd of the sink. This unit's power may be switched with the black switch just below it. The sniffer is very sensitive and false alarms can be disconcerting. When its off, the solenoid valve at the tank is closed.
-
Page 40: Lpg System
LPG SYSTEM STOVE & IGNITOR Ignitor battery is located in the drawer underneath the galley sink LPG TANK Located in port cockpit storage locker... -
Page 41: Teak Care
TEAK CARE Note: Teak surfaces exposed to the sun for extended periods will bleach to a lighter color. Its best when the boats not in use to close the shades or cover the teak with a light-colored towel or similar. Another option is to use automotive style twist and pop shades. - Page 42 ZINC REPLACEMENT: THRUSTER MFG PART #: SM31180A STARBOARD - BOW STARBOARD - STERN...
- Page 43 TRAILER INFO Aspens Trailer is built by Float On Trailers in Vero Beach Florida. It is a 10,000-12,000-pound capacity aluminum trailer. The minimum tow truck size is ¾ Ton. When the ball weight is set to 6-7% of the towed weight (600-800 pounds) she tows like a dream. Includes a solid winch stand assembly with stair for access while loading.
- Page 44 FOLDING THE MAST FOR TRAILERING While folding, be careful not to lean on the solar panel glass. Rest the support tube carefully on the SS mast, tip in to cockpit, then lift forward to corner for towing. NOTE: It is best to close the door before placing support. 1.
-
Page 45: Lifting Strap Location
LIFTING STRAP LOCATION Note: If the spreader bars are less than 11ft., you will need 24” carpeted 2x6’s just under the gunwales to spread the compression load from the straps and reduce damage to the gunwale rubber. Arrows show location of the The forward Sling goes just lifting straps. - Page 46 BOAT HAULING PROCEDURE SLINGING THE BOAT Pre-loading this strap down 12-18” will lift the boat level. It is very important that you DO NOT LIFT ON SAND BAR. Strap needed to be on Keel.
- Page 47 ZODIAC LAUNCH 1. Un-clip SS support rods 2. Store Rods on transom clip 3. Tip Tender in, leave clipped to boat while mounting motor. 5. Support Engine on swim step, 4. Un-buckle engine step into tender and swing engine from aft compartment to tender and secure.
- Page 48 EXTRA DETAILS Kayak with ratchet straps and Electrical junction box is foam pad. Be sure to remove behind enclosure. Kayak while towing. Tender Snubber Ling: used for medium range towing to take wind buffeting out. For long hauls it is best to deflate the tender.
- Page 49 OUTFITTING YOUR BOAT...
- Page 50 OUTFITTING YOUR BOAT...
- Page 51 OUTFITTING YOUR BOAT...
- Page 52 OUTFITTING YOUR BOAT...
- Page 53 OUTFITTING YOUR BOAT...
- Page 54 OUTFITTING YOUR BOAT...
- Page 55 OUTFITTING YOUR BOAT...
- Page 56 BOAT CLEANING PRODUCTS MAGUIRE’S MARINE BOAT SOAP WITH WAX KEEPS THE BOAT WAX INTACT. GREAT FOR GEL-COAT.
- Page 57 BOAT CLEANING PRODUCTS T-9 BOESHIELD: 303 AEROSPACE This is wonderful for your engine rooms PROTECTANT: metal parts, all of them, bronze, SS This material is for plastic clamps, motor metal parts, battery that’s out in the sun, I.E. Vinyl connections, bonding system seats, Zodiac boats, recoat connections and kicker motor.
- Page 58 OPEN HULL MIDSHIP STERN...
- Page 59 OPEN HULL PORT BOW Optional Garmin Electronics/ Port Compartment Access Hatch Drain Plug Under Bed Access Hatch / Bilge Pump Windless Anchor Optional Breaker Garmin Auto (Located in Bottom Pilot Compass of Hanging Locker)
- Page 60 WATERPROOF PLUGS...
-
Page 61: Troubleshooting
TROUBLESHOOTING This list is developed from common customer questions. ELECTRICAL • I here beeping but can’t figure out from where? There are about 10 devices on the boat that can beep a warning. Here is a list of the most common and what to do. •... - Page 62 But you need to fix the problem – shut the engine off, this stops the raw water pump. • Battery Chargers. Your Aspen has two chargers, one 12amp dedicated to the engine start battery and a second 20 amp dedicated to the house battery. On boats with 1,000 or 2,000 watt inverters, they have built-in 80-100 amp chargers for the house battery charging.
- Page 63 TROUBLESHOOTING • Inverters 1000 – 2000 watt. These devices take 12-volt power and step it up to 120Volts and also turn it into a sign wave (AC power). What most people don’t understand is how much energy is in a typical 120-volt outlet and how that compares to 12V power. The formula is: Volts x Amps = Watts.
- Page 64 TROUBLESHOOTING MECHANICAL SYSTEMS • Ships Hydraulic Steering. Aspen uses a Teleflex Sea Star steering system made in Richmond, BC. The unit’s hydraulic reservoir is filled by removing the rubber cover on top, then the black screw cap on top of helm. The boat ships with a clear hose with the fitting to attach to the bottle and the helm (in owner’s manual bag).
- Page 65 TROUBLESHOOTING • Hatches. Easy to use but many owners miss the “open just a crack” option. If you look at the area where the handle latches, there are two tabs that protrude. If you open the hatch ¼ Inch and twist the latch, it locks in that position. This is handy, allowing some ventilation while keeping 90% of the water out except in big down pours.
-
Page 74: Winterizing Your Boat
WINTERIZING YOUR BOAT 1. Drain water tanks, Port & Starboard: Flip on DC breakers, located left side center under glove box. Then push toggle switch for water pump switch (Left = port tank, Right = starboard tank) and open faucets. 2. - Page 75 20-30 minutes until it cools down. To give you a comparative feel for battery loads, the refrigerator on a 32 Aspen on average uses 4 amps, the house lights use 5 amps if all are on, so 530 amps is a lot of power.
- Page 76 TOILET LOGIC: DETAILS & MAGIC Notes from Larry Graf Notes as of November 18, 2016: Marine toilets are mission critical components in cruising but also one of the most problem prone areas for new owners. The goal is reliability and little or no smell while in use or storage.
- Page 77 Coast Guard Inspections The Coast guard inspectors are required to see your Y valve is locked in the (waste in Tank Position). Aspen’s don’t have a Y valve as most boat owners don’t position it correctly and things get plugged in the valve. In our design all the waste always goes into the holding tank, you have no way to pump directly from the head to the ocean.
- Page 81 Anchoring Woes While on our owners cruise this year, I was able to observe several non-Aspen owners anchoring techniques, sometimes with a grin. Seems like a lot of boaters do not get this process and then often blame their equipment when their technique was really the issue.
- Page 82 Anchoring Woes Once I have picked the cove and basic location (if I have not been there before), I switch my Chartplotter sonar to full screen and troll zig zag through the area I am going to anchor in. I look for unexpected anomalies on the bottom IE, big rocks, log dump cables from (my guess) 80 years ago? I also study the thickness of the sonars bottom and its color, if it is a thin line with yellow that often indicates a hard rock bottom, eelgrass and kelp frequently show up on newer plotters as well.
- Page 83 Anchoring Woes The final step is delicate, with the rode out per the depth noted above, I ease the boat astern. Typically, 2 seconds in reverse then glide 3 seconds in neutral - I do this over and over, gently seating the anchor (if needed you can use the thrusters a bit to keep the boat aligned).
- Page 84 Common Anchoring Questions: How tight should my winch clutch be set (knob on side of the windlass)? • I set mine so with the anchor in the roller, when I grab the chain or line 18” in front of the windless and pull straight up hard, I can make is slip, if I pull with nearly everything I’ve got.
-
Page 85: Engine Maintenance Schedule
ENGINE MAINTENANCE SCHEDULE Your Yamaha engine and its equipment are designed for high reliability and long life. The engines are built to withstand the marine environment, but also to have the smallest possible environmental impact. If the engines are serviced regularly according to the schedule, these qualities will be retained and unnecessary malfunctions will be avoided. - Page 86 Initial Every Actions Item 20 hours 100 hours 300 hours 500 hours (3 months) (1 year) (3 years) (5 years) Inspection or Fuel filter (can be ●/○ ●/○ replacement as disassembled) necessary Fuel line (high ● ● Inspection pressure) Inspection or Fuel line (high ○...
- Page 87 Initial Every Actions Item 20 hours 100 hours 300 hours 500 hours (3 months) (1 year) (3 years) (5 years) Inspection or Spark plug ○ ○ replacement as caps/spark plug wires necessary Shift Dampener Inspection or ○ System (SDS) replacement propeller damper Water from the ●/○...
Need help?
Do you have a question about the C108 and is the answer not in the manual?
Questions and answers