Table of Contents
Advertisement
Quick Links
Advertisement
Table of Contents

Summary of Contents for OceanPlay BUG
- Page 2 This instruction manual is not a guide to sailing your craft and it should not be considered suitable for the task of learning to sail a boat. Please read the manual before rigging and sailing your Bug. Before you go sailing: o Check you are wearing suitable clothing and safety equipment for the conditions and time of year.
- Page 3 Important information There are two hatches and one transom drain bung on the Bug, these must all be checked to ensure tightness and correct fitment prior to every time you sail: 1. Under the centre toe strap on the aft face of the centreboard case console.
-
Page 4: Table Of Contents
Bug Rigging Instructions The Bug rigging instructions are a guide to rigging your boat. Contents Glossary Useful Boat Terminology Parts of the Bug/Specification Maintenance and Service Sail Numbers Rigging and Raising the Mast Rigging and Fitting the Boom Vang/Kicker Mainsheet... -
Page 5: Useful Boat Terminology
Painter: Rope exiting through the bow/front of the boat used for leading/towing or tying the boat to a jetty or buoy. 2. Useful Boat Terminology Head of sail Battens Mast Leech of sail Clew of sail Boom Rudder Stern/Transom... -
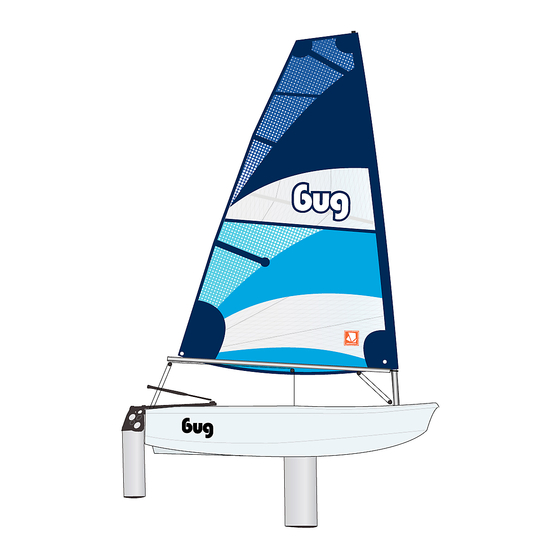
Page 6: Parts Of The Bug/Specification
Tack of sail Centreboard Foot of sail 3. Parts of the Bug/Specification... -
Page 7: Maintenance And Service
Do not leave the rig under tension when not sailing or during storage. • Your Bug should only be used in conjunction with the Bug specific launching trolley. The use of any other launching trolley may damage the hull and invalidate your warranty. -
Page 8: Sail Numbers
5. Sail Numbers 1. Identify the sail number of your Bug by referring to the builder’s serial number plate positioned on the starboard (right hand) side of the rear sub deck inner tank side. Sail Number 001234 2. Cut the required sail numbers from the generic digital 8’s supplied using... - Page 11 3. Apply the sail numbers in a dry, clean and wind free environment using the following guidance: Standard/Training Sail 1. Lay the sail on a flat surface starboard/right hand side up. 2. The numbers on the starboard/right hand side of a sail are always higher than that of the port/left hand side.
- Page 12 Race/Performance Sail 1. Lay the sail on a flat surface starboard/right hand side up. 2. The numbers on the starboard/right hand side of a sail are always higher than that of the port/left hand side. 3. Measure 200mm down, from the second batten pocket of the sail. 4.
-
Page 13: Rigging And Raising The Mast
6. Rigging and Raising the Mast 1. Unwrap the spars and locate the lower end of the upper mast into the upper end of the lower mast. 2. Take care to ensure the reactor finger (comprising part of the upper mast collar) locates securely into the recipient slot in the upper edge of the lower mast. - Page 14 6. Place the bow of the boat facing directly into the wind. 7. Push the mast retainer swing arm in to its “open” position in readiness for mast insertion. 8. Place the lower end of the complete mast assembly into the mast step tube before pushing the mast retainer swing arm back to its “closed”...
-
Page 15: Rigging And Fitting The Boom
7. Rigging and Fitting the Boom 1. Take the outhaul control line and tie a double half hitch stopper knot in one end. 2. Pass the untied end through: a. The starboard/right aft/rear boom end. b. The outhaul clew strap eye. c. - Page 16 Standard/Trainer Bug Rig When using the standard Bug sail the inboard boom end yoke arm should be fitted to the gooseneck mast collar as shown.
- Page 17 Race/Performance Bug Rig When using the Race/Performance Bug sail the inboard boom end yoke arm should be fitted to the gooseneck mast collar as shown. Care should be taken to ensure the mast collar spigot pin locates successfully into the recipient slot in the “mate”...
-
Page 18: Vang/Kicker
Attach the uppermost block to the webbing strap on the lower face of the boom. Rope up the Vang/Kicker purchase system as shown: Standard/Trainer Bug Rig (3:1) Race/Performance Bug Rig (6:1) Note: The additional mid cascade block required is supplied only the with power curve topmast. -
Page 19: Mainsheet
9. Mainsheet 1. Take the mainsheet and tie a bow line loop on to the centre of the mainsheet block located on the lower aft/rear Knot surface of the boom. 2. Pass the remaining loose end downward and through the auto ratchet traveller block. - Page 20 5. Pass the loose end through the webbing sling immediately above the helms cockpit area. Note: This prevents the rope from sagging and getting tangled up around the helmsman during tacks and gybes! Pass the loose end in a clockwise direction through the remaining mainsheet block positioned on the lower...
-
Page 21: Cunningham
Cunningham Standard/Trainer Bug Rig When using the standard Bug sail the cunningham control line should be configured to incorporate usage of the D-ring on the forward edge of the luff tube and the clam cleat on the front face of the lower mast immediately above the gooseneck collar as depicted. - Page 22 (c) Through the tack eye travelling in a port/left to starboard/right direction. (d) Downward and through the plastic fairlead on the underside of the inboard end of the boom travelling in a starboard/right to port/left direction (e) Upward and for the second time, through the tack eye travelling in a port/left to starboard/right direction.
-
Page 23: Rudder
Rudder 1. Take the loose tiller arm and carefully remove the pre-tapped retaining screw from the aft/rear end of the tube. 2. Insert the aft/rear end of the tiller arm tube into the rudder head tiller arm hood travelling in a forward to aft/rearward direction. Line up the tiller arm retaining screw hole with its corresponding recess/hole on the uppermost aft/rear surface of the rudder head tiller arm hood. - Page 24 6. Take the rudder assembly and pass the tiller extension and tiller arm under the mainsheet bridle strop at the aft/stern edge of the boat. 7. Lower the rudder head assembly on to the rudder gudgeons situated on the stern/transom of the boat. 8.
-
Page 25: Mainsail Reefing
Mainsail Reefing Note: This function is only applicable to the Standard Bug Rig. The architecture of the Race/Performance Bug rig does NOT support this function. 1. Unhook the lower Vang/Kicker block from the eye bracket on the aft face of the mast immediately above deck level. -
Page 26: Launching And Basic Safety On The Water
❖ Conform to the sailing rules of the road. ❖ Look out for changing weather conditions. ❖ Never sail beyond your ability or that of your crew. ❖ Understand and be competent in the sailing skills and righting techniques. Enjoy Your Bug Sailing!
Need help?
Do you have a question about the BUG and is the answer not in the manual?
Questions and answers