Advertisement
Advertisement
Table of Contents

Summary of Contents for Safety Xpress OBSL24
- Page 1 OVER CAR BONNET STORAGE LOCKER INSTALLATION MANUAL Contents Product Features & Specifications …………………….Page 2 Parts Drawing……………………………….………...….Page 3 Installation Instructions……………..……………………Page 4-8 Page 1 of 8...
- Page 2 Product Feature & Specification * SKU: OBSL24 * Material: Cold Rolled Steel & Galvanised Sheet * 2 people recommended for installation * Adjustable Feet * 3-point lock for extra security * Dimensions: 2500(A) x (2000-2300)(B) x 1000(C) x(1000-1300)(D)mm * Storage Capacity: 2.5 cubic metres...
- Page 3 Page 3 of 8...
- Page 4 Installation Instructions Step 1 ① Read instructions from start to finish for assembly. ② It is recommended that you measure the height of your vehicle and take into consideration the height of the ceiling before assembling and ensure that it is the right height for your vehicle as it may be difficult to change the height after it is assembled.
- Page 5 Step 2 ① Assemble back beams and legs using M8 nuts provided (parts 09, 10, 06, 12). ② Connect with M8 bolts and nuts for parts 12, 02, 06, 07. Note: For most sedan vehicles, the third hole counting from bottom of feet up will be suitable height. For higher vehicle such as four wheel drives, utes, fourth hole counting from feet up will be suitable height.
- Page 6 Step 3 Stand the front and back assembled frames up, please have 2 people doing this, and put the 2 x side panels on as per drawing , using the M8 nuts provide. (05) Side Panel (05) Side Panel Page 6 of 8...
- Page 7 Step 4 Install top panels (13), back panels (14) and bottom panels (15) as drawing shows below. IMPORTANT: Please use the screws provided in the kit to fix each panel, do not use your own screws. (13) Top Panel (14) Back panel (15) Bottom Panel Page 7 of 8...
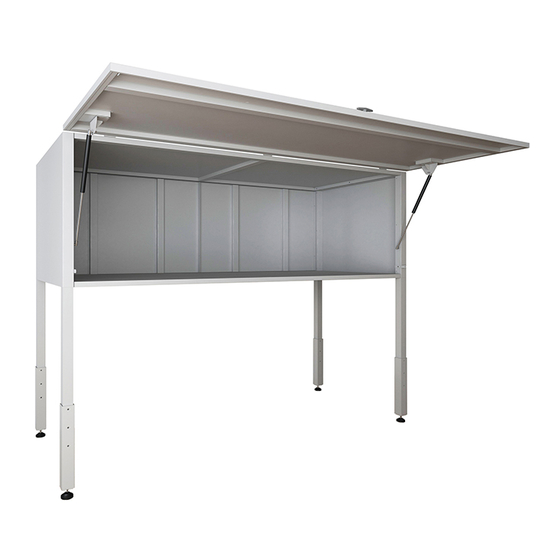
- Page 8 Step 5 Installation of Gas Struts Hold door open and install the gas struts provided as per the diagram below. Please note: Ensure that gas struts are installed onto the same holes on either side. E.g. If you are installing the gas struts in the third hole in the door ensure that it is also in the third hole on the hinge side, otherwise the door will not shut properly resulting in damage to the unit.
Need help?
Do you have a question about the OBSL24 and is the answer not in the manual?
Questions and answers