
Summary of Contents for Elos BIOTOPUS II
- Page 1 BIOTOPUS II A Q U A R I U M C O N T R O L L E R VER 01.05.7 UK ENGLISH A Q U A R I U M A U T O M A T I N G S Y S T E M...
- Page 2 BIOTOPUS II - Operator manual Page 2...
-
Page 3: Precautions And Safety Instructions
BIOTOPUS II - Operator manual PRECAUTIONS AND SAFETY INSTRUCTIONS: a. Before connecting the BIOTOPUS II and its components, fi nd a safe position for them. To reduce the risk of fi re or electric shock, do not expo- se this unit to rain or moisture. Position the MULTIPLUG far away from the aquarium, to avoid water to contaminate it otherwise this unit may be damaged. - Page 4 All other servicing should be referred to qualifi ed service personnel. i. AVOID DANGEROUS OPERATING CONDITIONS Do not operate the Biotopus II with wet hands, if you are standing in water, if the Controller is wet. Page 4...
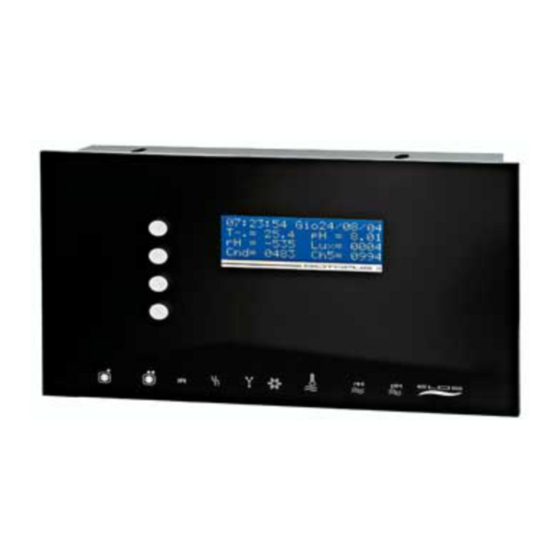
- Page 5 BIOTOPUS II - Operator manual Figure 1.1. Page 5...
- Page 6 BIOTOPUS II - Operator manual Page 6...
- Page 7 BIOTOPUS II - Operator manual What is packed with your BIOTOPUS II: Model “ONLY MONITOR”: •DISPLAY UNIT •Temperature probe •12-16 Volt dc power supply •one mounting hanger •Operator Manual (what you are now reading) •Warranty Registration Card Model “CONTROL”: •DISPLAY UNIT •MULTIPLUG UNIT: 6 plugs...
- Page 8 • Operator Manual (what you are now reading) • Warranty Registration Card What is not packed with your BIOTOPUS II that you will need • PROBES: pH probe (one ore two), redox probe, lux probe (some versions may include a pH probe) •...
- Page 9 Probes supplied by Elos carry a 90-day warranty from date of purchase with the same conditions as the controller and satellite warranty. Elos warrants any repair or replacement of its products for thirty (30) days or for the re- mainder of the original warranty, whichever period is longer.
- Page 10 Elos as to whether the product should be repaired, returned to the buyer without repair or otherwise disposed of. Products left in Elos’s possession lon- ger than thirty (30) days without the buyer’s notice of disposition will be subject to a...
- Page 11 Here is the absolute minimum information you need to get started with your new BIOTOPUS II. After you satisfy your urge to hook it up and turn it on, please read the entire manual; you will learn how to maximize the effectiveness of this fi ne product:...
- Page 12 (ALL VERSIONS): 8. Connect the DC power supply(s) and the MULTIPLUG MAIN SUPPLY cable (where MUL- TIPLUG is available) to the WALL OUTLET. You are now ready to start programming your BIOTOPUS II. 1= MULTIPLUG 1 6= LUX PROBE 2= MULTIPLUG 2...
-
Page 13: Safety Lock
BIOTOPUS II - Operator manual SAFETY LOCK: SAFETY LOCK: To avoid unwanted modifi cation to the parameters, in order to enter the MENU’ you will need to HOLD one of the four button for more than 5 sec. Proceed as following: 1) Press one of the four button to enter the Setup MENU’, the controller will prompt you:... -
Page 14: Clock Setup
You still will want to read through the rest of this manual. It provides valuable operation tips and information that will allow you to use the features to full measure. The fi rst time you’ll connect the BIOTOPUS II to the AC wall outlet, it will automatically takes you to the INITIAL SETUP procedure. - Page 15 BIOTOPUS II - Operator manual Please note: at fi rst installation it is necessary to power the unit for 24 hours in order to charge the internal backup battery. 1st button 2nd button 3rd button CONTINUE 4th button USEFUL HINT: in order to simplify the use, all the menùs have been developed using the “BUTTON <->...
- Page 16 The next step will be to load the Parameter: Your Biotopus II is more than simply an Aquarium Controller it is a 360° automation system that will simplify your life. Thanks to its internal software, the parameters of several bioto- pe are automatically available to you by the means of a key press.
- Page 17 3) press the the fourth bottom from the top and use + or - to choose the area. That’s it. Zone Zone Standard <---> <---> <---> <---> <---> <---> Continue Continue Your Biotopus II have been programmed, it is now the time to connect the devices. Page 17...
-
Page 18: Connected Devices
The pH calibration is done using two different buffer solutions. Standard buffer solution choices are pH 4, and 7. Set up two cups: Elos Calibration Solution pH4 in the fi rst cup, Page 18... - Page 19 BIOTOPUS II - Operator manual Elos Calibration Solution pH7 in the second cup. Rinse the probe in the system water and shake it off. Do not scour the probe(s) with any dry towel! Place the pH probe into the Calibration Solution pH4 and start the calibration.
- Page 20 ERROR NR. #### Any key to continue If you have cleaned the probe twice and you are still having problems, you will need to purchase an Elos replacement probe from the dealer where you purchased the controller . REPLACING A PROBE Replace your pH(s) and ORP probes every 16-18 months for Elos laboratory grade pro- bes, 12 months for standard grade probes, or as needed for accuracy and reliability.
- Page 21 The Redox calibration is done using one buffer solution (to version 109e two solutions was used). Standard buffer solution is 220 mV. Set up a cup with the Elos Calibration Solution 220 mV. Rinse the probe in the system water and shake it off. Do not scour the probe with any dry towel! Place the Redox probe into the Calibration Solution 220 mV and start the calibration.
- Page 22 25 °C (77 °F) following the prompts on the display. The Conductivity calibration is done using one buffer solution (50 mS or 500 µS). Standard buffer solution for marine is 50 mS, for fresh water is 500 µS. Set up a cup with the Elos Calibration Solution.
- Page 23 BIOTOPUS II - Operator manual probe by adjusting the proper screw (in correspondence to the plug) on the top of the interface (black box): use left screw to adjust the probe con- nected to the left plug, right screw to adjust the probe connected to the right plug.
-
Page 24: Connection Of The Devices
Socket 5 Socket 6 LIGHT 1 LIGHT 2 HEATER1 OSMO MULTIPLUG A LIGHT 3 LIGHT 4 MOON L. HEATER 2 DOS. 1 AUX 1 MULTIPLUG B Now is time to enjoy your aquarium: your Biotopus II have been programmed. Page 24... - Page 25 BIOTOPUS II - Operator manual I HAVE MADE A MISTAKE: In case you have made a mistake choosing the Aquarium Type or the connected devi ces/probe(s) you can verify and change what you have done. Keep pressed for several seconds one of the four botton to enter the “EXPERT MODE”.
- Page 26 BIOTOPUS II - Operator manual I WANT TO KNOW MORE: You have chosen to use one of the “presets” of your BIOTOPUS II (a BIOTOPE) but you want to know what this means in term of parameters. Let suppose that you want to know when the lights will switch on and off.
- Page 27 BIOTOPUS II - Operator manual pe”) and, if you choose “Continue” pressing the last button from the top you’ll see the presets of the lights timer: Light 1 = 08:20 = 21:40 <---> Continue pressing “Continue” you’ll scroll all the lights and you’ll also see the actual “noon shift”, a parameter that virtually “move”...
- Page 28 BIOTOPUS II - Operator manual in case you decide to see how the Temperature will be in your aquarium, after “Setup”, instead of “Light” you should have chosen “Temperature”: <---> Clock <---> Lights Temperature <---> <---> Continue and then “Info”: <--->...
- Page 29 BIOTOPUS II - Operator manual these are the maximum and the minimum temperatures that you accept in your aqua- rium (you can change these values in the Expert Menu). In some region of the world, the temperature of the water can be extremely high thus killing all the living organism in the Biotope.
- Page 30 BIOTOPUS II - Operator manual Page 30...
- Page 31 BIOTOPUS II - Operator manual ADAVANCED OPERATION Page 31...
- Page 32 BIOTOPUS II - Operator manual Advanced Setup MANUAL SETUP - I WANT TO CHANGE THE SET POINTS: If you decide that the Biotope pre-sets are not suitable to your need, you can change one or all the SetPoints and all the related parameter to fi t your needs. You can do this performing the following steps: press for fi...
- Page 33 BIOTOPUS II - Operator manual Actual Mode : Biotope <---> <---> Biotope (Lock) Biotope (Lock) <---> <---> Manual (Free) <---> <---> Continue Continue choose “Manual” so that, on the upper row of the Display, the mode changes to Manual Actual Mode : Manual <--->...
- Page 34 BIOTOPUS II - Operator manual Advanced Setup SPECIAL TIMERS : “The four points Timer” Let say that you want to use one of the socket (nr. 3 which is factory set to control the heater) to switch on the Ozonizator for twenty minutes, four (4) times a day.
- Page 35 BIOTOPUS II - Operator manual Clear points ? <---> <---> <---> Continue Choose then “Continue” to proceed to the next menù where you’ll be prompted to defi - ne at what time the FPT will “fi rst switch ON”: 1 on 00:00 <--->...
- Page 36 3). You’ll need to connect the Ozonizator to Socket nr. 3 and then you’ll need to inform your Biotopus II that you want to use this soc- ket not to control the heater (see tab. at page 20) but the Timer.
- Page 37 “Multi Timer” task so that you can control your Ozonizer. Your new BIOTOPUS II is an extremely fl exible controller. You can completely personalize the use of each socket of the MULTIPLUG (excluding socket nr. 6 on MULTIPLUG B dedica- ted to the Level controller), assigning them a different task.
- Page 38 BIOTOPUS II - Operator manual On the display the “Not assigned” message will be shown to tell that no plug have been dedicated to this Task. Press the third button from the top to select “Modify”. Task : Multi Timer...
- Page 39 BIOTOPUS II - Operator manual Press the second or the third button to increase or decrease the number and the letter untill you’ll read “A3” meaning that hte task have been assigned to plug “3” on Multiplug “A” Choose “Continue” and on the display you’ll see the new task allocation to each plug of the Multiplugs.
-
Page 40: Dosing Pump
BIOTOPUS II - Operator manual Advanced Setup DOSING PUMP You have chosen to install the second “MULTIPLUG” and you want to use one of the soc- ket (nr. 5) of your second MULTIPLUG to control a dosing pump (see table 1). - Page 41 BIOTOPUS II - Operator manual D1 Duration sec = 012 <---> <---> <---> Continue Using the “+” or the “-” button, scroll to the desired “Duration” (in seconds) and press “Continue” to confi rm; you’ll be taken to the next screen where you’ll set up the “Inter- val”...
- Page 42 1). It is also possible to assign different task to each of the 6 sockets on each MULTIPLUG and use more than a socket to control the Dosing Pumps. Your BIOTOPUS II is able to control up to six separate Dosing pumps. MULTIPLUG NR.
-
Page 43: Conductivity Probe
Advanced Setup CONDUCTIVITY PROBE Up to fi ve probes can be installed as part of the Biotopus II system. Three of the probes (temperature, pH, ORP) have the same basic installation requirements. The conductivity probe, requires special installation procedures to ensure proper operation and accuracy. - Page 44 Conductivity probe). This can be achieved using the specifi c solution, ELOS CLEAN. Leave the probe inside the solution for about 30 minutes than, with a soft cloth or very fi ne (#600) grit sandpaper lightly polish the platinum electrodes.
- Page 45 BIOTOPUS II - Operator manual ELOS CONDUCTIVITY CELL Note: inside a conduc- tivity cell water must fl ow drop by drop. The Conductivity probe MUST be “electrically Water in Probe separated” from pH/ ORP probes. Tempe- rature probe MUST be...
- Page 46 BIOTOPUS II - Operator manual MISCELLANEOUS Page 46...
- Page 47 Miscellaneous INFO Your BIOTOPUS II provide you with several type of information regarding the history of the parameters, the confi guration of the system and the confi guration of the parameters. Info are, in general, contestual thus meaning that, depending on your position inside a menù, you can get the related info.
- Page 48 BIOTOPUS II - Operator manual press “Continue” and you’ll be taken to the next menù where you can RESET the mini- mum and the maximum, useful to start a new sessiong of MIN/MAX aquisition. “Conti- nue” will then show you the HISTORY of the key parameters (T° and pH) at the fl owing of...
-
Page 49: Sun Rise- Sun Set
In case you own a fl uorescent light with dimmable capability or any light that can be controlled by a low voltage signal (0-10 Volts), your BIOTOPUS II provides you the signal (0-10 volts) to control the dimmer in order to simulate the Sun Rise, Sun Set. - Page 50 BIOTOPUS II - Operator manual Miscellaneous RESET In case you need to restore the factory PRESETS, you can RESET your BIOTOPUS II. Proceed as below: • enter the Expert menù pressing one of the four botton for more than 5 sec.
- Page 51 Miscellaneous FEEDING FUNCTION In case you need to stop your pumps, the BIOTOPUS II provide you a quick way to tem- porary stop the pumps managed by Task nr. 15 and 16 (Water Spin) or Task nr. 36 (Servi- ce). Proceed as below: •...
- Page 52 BIOTOPUS II - Operator manual Miscellaneous LIGHT SHUT-OFF In case the temperature of your aquarium will exceed the Alarm Limit, lights will start to switch off, one by one till the temperature will stop rising. To activate the SHUT-OFF procedure, enter the Temperature Menù and choose, from the...
-
Page 53: Moon Phases
In case you own a fl uorescent moolight with dimmable capability or a low voltage moonlight (0-10 Volts), your BIOTOPUS II provides you the signal (0-10 volts) to control the dimmer in order to simulate the lunar phases. This task (task nr. 5) involves the real simula- tion of moonlight, taking into account the duration as well as the intensity of the light, in accordance to the chosen biotope. - Page 54 BIOTOPUS II - Operator manual Miscellaneous Metric or English UNIT To switch between US and EUROPE unit mode (°Celsius - °Fareneith) proceed as fol- lowing: 1) disconnect the power cable from Display unit 2) press and hold the third button from the top...
- Page 55 BIOTOPUS II - Operator manual Miscellaneous PC - LOGGER To continuosly monitor the STATUS of the parameters of your aquarium on a PC, you should proceed as below: • enter the Expert menù pressing one of the four botton for more than 5 sec.
- Page 56 BIOTOPUS II - Operator manual Miscellaneous Second pH probe In case you are not interested in Monitoring/Controlling the redox Potential, you can in- stead install TWO pH probe(s). You’ll simply need to select the second probe (pH2) during the defi nition of the “Connected Devices” (see page 18) and connect the redox Probe to the Display Unit in place of the second pH probe.
- Page 57 BIOTOPUS II - Operator manual OSMO: <---> <---> <---> Continue choose YES and then Continue. You have now installed the additional fl oating switch. Exit the EXPERT MENU’ and enter the Setup MENU’. Choose “Continue” till the BIOTOPUS will prompt you: <--->...
- Page 58 ALARMS COMMAND You’ll simply need a BIOTOPUS II, one or two MULTIPLUG(s) where the devices will be con- nected and the BIOLINK SMS module. The BIOLINK SMS, enables readings such as pH, °C, mV, µS, to be sent worldwide by SMS(text message) to a mobile telephone or fax machine (depends from local telepho- ne company).
-
Page 59: Installation
BIOTOPUS II - Operator manual INSTALLATION: To install the BIOLINK SMS proceed as below: a) purchase from your mobile network operator a proper SIM card with enough CREDIT and take note of the phone number. This will be the “phone number of your BIOTOPUS II”... - Page 60 <---> Continue Continue You’ll now need to tell to your BIOTOPUS II where to send its messages. Proceed as de- scribed below: e) with a GSM phone send the following SMS to the “phone number of your BIOTOPUS II”: ST+AABBB1234567 where “+AABBB1234567”...
- Page 61 BIOTOPUS II - Operator manual Your BIOTOPUS II will now send you, once a day, a report on the STATUS of your aquarium and, in case of ALARM, an alert. You can also use the following command to change the Set Points or switch ON/OFF your equipment: ALØ...
- Page 62 BIOTOPUS II - Operator manual ST+393359304325 UNLOCK THE SIM CARD CHECK THE Send an SMS to your REMOVE THE SIM FROM USING YOUR USUAL GSM AVAILABILITY OF THE BIOTOPUS II with the YOUR PHONE AND PHONE SERVICE following text: INSTALL IT INSIDE THE BIO-...
- Page 63 Status of the KEY parameters of your aquarium, you need to connect your BIOTOPUS II and BIOLINK-SMS to our RESCUE SYSTEM. A device that keeps your controller constantly active, and sense the MAIN POWER SUPPLY sending you an SMS-ALARM in case of POWER FAILURE.
- Page 64 AQUA PUMP(s) to pin 2(-) (blue) and 3(+) (brown) of the RESCUE UNIT green connector (use a Phillips screwdriver). INSTALLATION: You can now setup your BIOTOPUS II in order to use the RESCUE SYSTEM. Proceed as fol- lowing: • enter EXPERT menù (see page 13-SAFETY LOCK) •...
- Page 65 5) in case the BLACK-OUT persist, after 4 hours and after 12 hours a similar SMS MESSAGE will be sent 6) the BLACK-OUT will be visuallized on the BIOTOPUS II display as well as through a bip. It is possible to TEST the functionality of the system proceeding as described below : •...
- Page 66 BIOTOPUS II - Operator manual <---> Rescue Test <---> <---> <---> Exit Press the fi rst button (Rescue Test) the Biotopus wil prompt you: <---> Are you sure? <---> <---> <---> Exit Choose YES, the Biotopus wil prompt you: Unplug power cable than press Continue <--->...
-
Page 67: External Input
BIOTOPUS II - Operator manual EXTERNAL INPUT The RESCUE SYSTEM permit the connection of two separate ON-OFF switches (sensors) that can be used to sense, for example, a level, the presence of water on the fl oor, the opening of a door etc. etc. These switches must be “NORMALLY CLOSED”. When one of these contact is open, an ALARM SMS will be sent thorugh the BIO-LINK SMS. - Page 68 BIOTOPUS II - Operator manual Page 68...
- Page 69 BIOTOPUS II - Operator manual Table 1 Default task/socket setup Socket 1 Socket 2 Socket 3 Socket 4 Socket 5 Socket 6 LIGHT 1 LIGHT 2 HEATER1 OSMO MULTIPLUG A LIGHT 3 LIGHT 4 MOON L. HEATER 2 DOS. Q...
- Page 70 BIOTOPUS II - Operator manual Table 2 Task list Numero TASK Nome TASK DESCRIZIONE TASK Name TASK Number DESCRIPTION Light 1 Light 2 Light 3 Multi Timer Light 4 Timer A Moon light Timer B Heater 1 Aux 0 Heater 2...
- Page 71 BIOTOPUS II - Operator manual Table 3 Maximum load MULTIPLUG SOCKET NR. TYPE/MAX PWR ALL / 400 WATT ALL / 400 WATT NO HQI / 150 WATT NO HQI / 150 WATT NO HQI / 150 WATT OSMO / 100 WATT...
- Page 72 BIOTOPUS II - Operator manual Page 72...
Need help?
Do you have a question about the BIOTOPUS II and is the answer not in the manual?
Questions and answers