Table of Contents
Advertisement
Quick Links
Advertisement
Table of Contents

Summary of Contents for Sunbank SB-40G
- Page 1 Sunbank Installation Manual SB-40G SB-80G...
- Page 2 4. Put pipe dope on female and male threading then wrap with Teflon tape. The threads on the openings to the Sunbank are such that they require at least 4 wraps of high quality Teflon tape. To prevent leaks you should put pipe dope on the female threads and on the male threads, then wrap Teflon tape over the male threads.
-
Page 3: Table Of Contents
International Plumbing Code, International Mechanical Code, and International Fire Code. Sunbank accepts no responsibility for the misuse or improper installation of this product. This manual is illustrative, not comprehensive. It does not cover personal safety when working on a roof or go into depth regarding structural, plumbing, or electrical code. -
Page 4: Included Parts
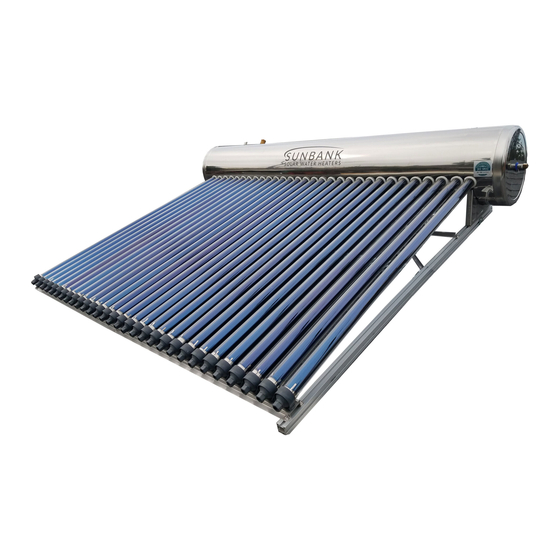
1 – 240V, 2400W heating element (pre-installed, optional to use) Here are photos of some of the components that we talk about in the manual. The thermowell and controller are optional and not included with every Sunbank. T/P Valve Plastic Tailstock... -
Page 5: Not Included Parts
Contact us for a Shopping Cart link to help speed up your purchase of these items. The Sunbank can be installed as a pre-heater with a bypass or as a standalone system. The following parts list is for the basic pre-heater setup: 1 –... -
Page 6: Project Overview
1. Before starting an installation, it is necessary to know where you plan to mount the Sunbank and where you plan to interface with the existing plumbing system. Once this is clearly defined, you can purchase the necessary plumbing supplies. -
Page 7: Plumbing Diagram
4. Plumbing Diagram We are including three plumbing diagrams to help explain how to plumb the Sunbank system. You can also look at our Youtube channel for more details. Youtube.com/sunbanksolar Pre-Heat Diagrams Note: Drain the T/P valve to the gutter to avoid hot water on the roofing material... - Page 8 Stand-alone with Electric Backup Plumbing Diagram Sunbank Installation Manual...
-
Page 9: Bracket Diagram
5. Bracket Diagrams 1) 40G Flush mount for pitched roof 2) 40G Flat roof and ground mount Sunbank Installation Manual... - Page 10 Sunbank Installation Manual...
- Page 11 3) 80G Flush mount for pitched roof 4. 80G Flat roof and ground mount Sunbank Installation Manual...
- Page 12 Sunbank Installation Manual...
-
Page 13: Reinforce Roof
UV exposure. A ¾” cone flashing (middle) is a more robust option. Other options include the Quickflash A/C U-C (right), Quickmount Q-Box, and Soladeck. Flash correctly with M-1, Vulkem, or equivalent structural adhesive. Sunbank Installation Manual... -
Page 14: Roof Attachments
There are many companies that make robust solar roof attachments. Roof attachments are specific to the type of roofing to which you are attaching the Sunbank and all roof attachments should be approved by a structural engineer for the specific installation. For mounting to most composition shingle roofs, we recommend a flashed L foot design like the Quickmount QSME-Lag. -
Page 15: Insulation And Jacketing
Make certain the drain valve is closed. Open the solar isolation valves (V2 and V3) to allow water to fill the Sunbank tank. Close the solar bypass valve (V1) to force cold water into the Sunbank. The Air Vent (or Hy Vent) will allow air to escape and the tank to fill with water. Check the connections and fittings for leaks and repair any if found. -
Page 16: Tube Installation
6. Repeat. 14. Controller Sunbank offers a WiFi Smart Home Controller, as well as a hard wired controller option. Their primary function is to control the backup heating element (if used) as a thermostat, but they do have several other useful features. In order to use the backup heating element, you MUST use a thermostat (controller). -
Page 17: Temp Sensor/Aux Heater
The frequency with which you should change this anode depends on the total dissolved solids (TDS) of your local water supply. If you don’t have a good idea of your local TDS, Sunbank recommends that you check the anode one year after installation and base future checks on the amount of the existing magnesium anode that is left at this point. -
Page 18: Plumbing Labels
17. Plumbing Labels → COLD Line → → HOT from Sunbank → → → If an issue arises, please call your local installer: ____________________________ (phone #) ____________________ Sunbank Installation Manual... -
Page 19: O&M (Painting The Tubes)
18. Operation & Maintenance Once the Sunbank is installed, the tank filled, and the valves turned according to the diagrams above, your Sunbank is operational. Because your system is now pressurized via municipal or well water pressure, the Sunbank delivers hot water by simply opening your hot water faucets. - Page 20 Magnesium anode Every Sunbank comes with a magnesium anode meant to protect the inner tank from corrosion. How fast this sacrificial anode will corrode depends on your local water quality. We recommend that you check the anode one year after installation and base future replacements on how much of the anode remains.
-
Page 21: Warranty
Nor does it include damage from anything outside of Sunbank’s control, such as an act of nature or Force Majeure. Sunbank will replace defective parts at no charge but will not pay for or provide the labor to replace those parts.


Need help?
Do you have a question about the SB-40G and is the answer not in the manual?
Questions and answers